Notifications
The Notifications page holds the account's notification endpoints and notification rules. An endpoint is a destination (an Email recipient list or a Slack channel) together with the FPL action that sends to it. A rule decides which notifications go to which endpoints.
Menu path: Configuration → Notifications · URL path: /v2/configuration/notifications
Task guide: Notifications: deciding what to deliver where.
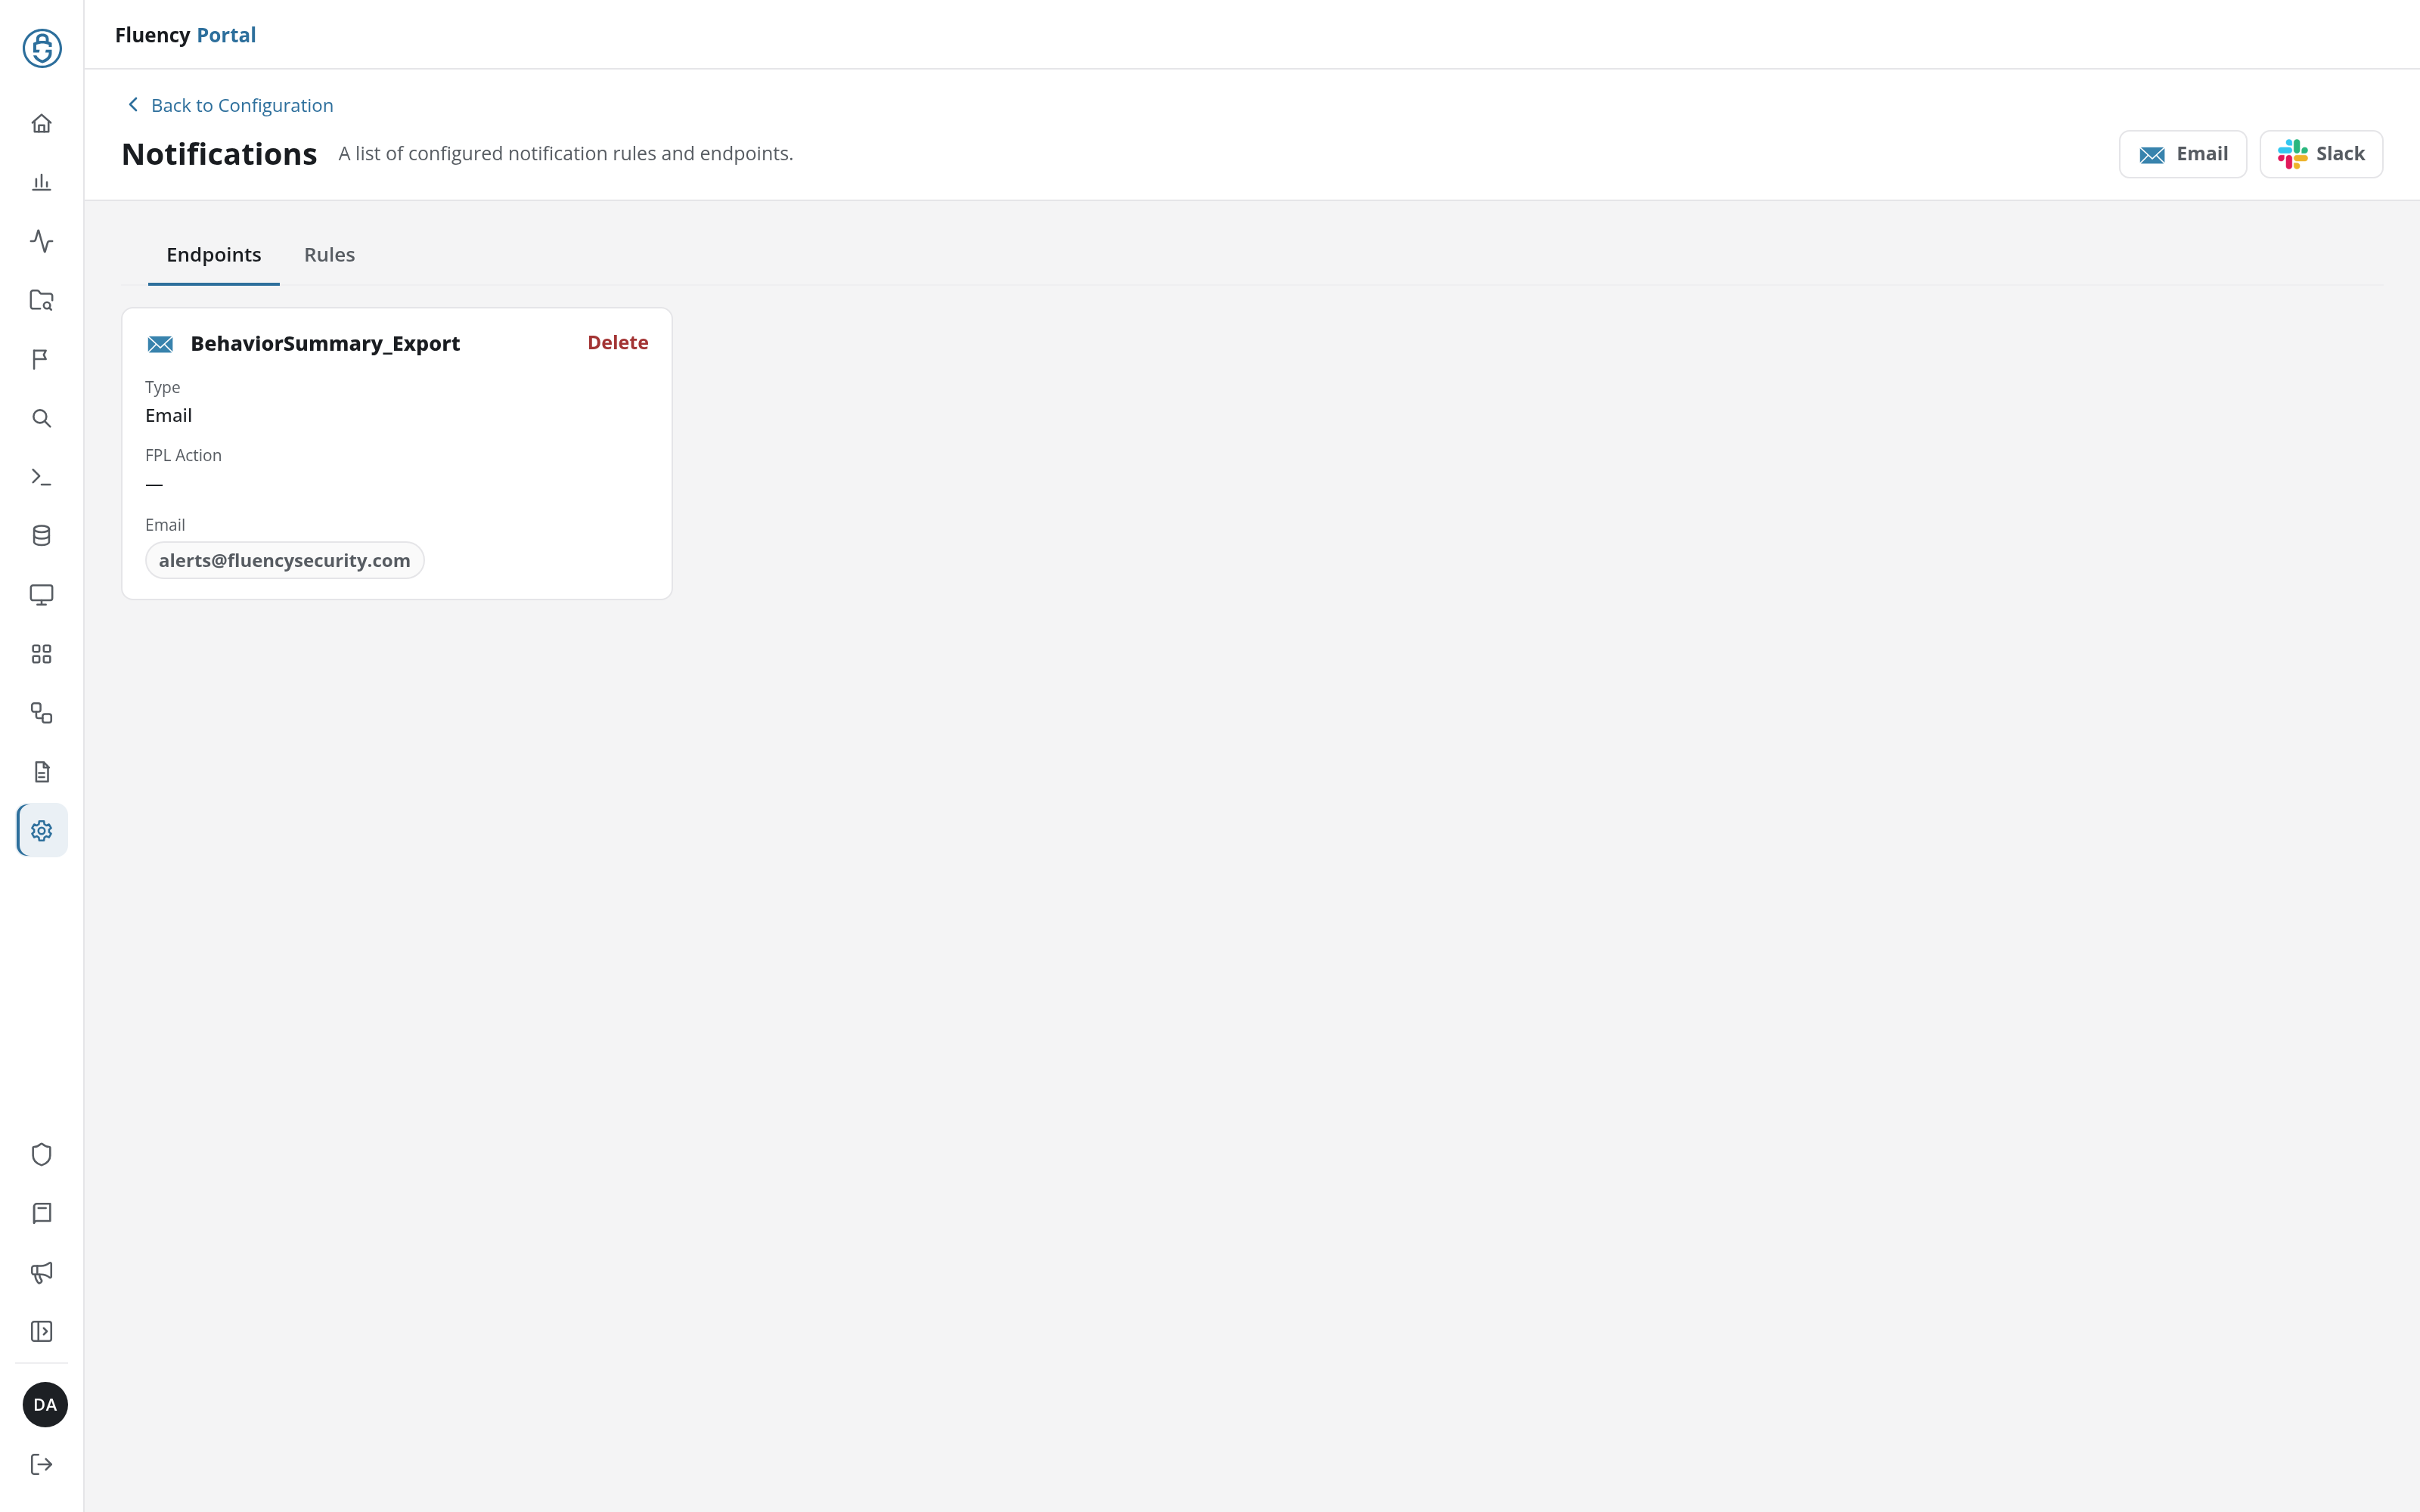
Page Layout
The header has a Back to Configuration link above the title Notifications and the subtitle A list of configured notification rules and endpoints. Below it, two tabs switch the page between its two lists:
- Endpoints (the tab the page opens on): the endpoint cards, with Email and Slack buttons in the header for adding an endpoint of each type.
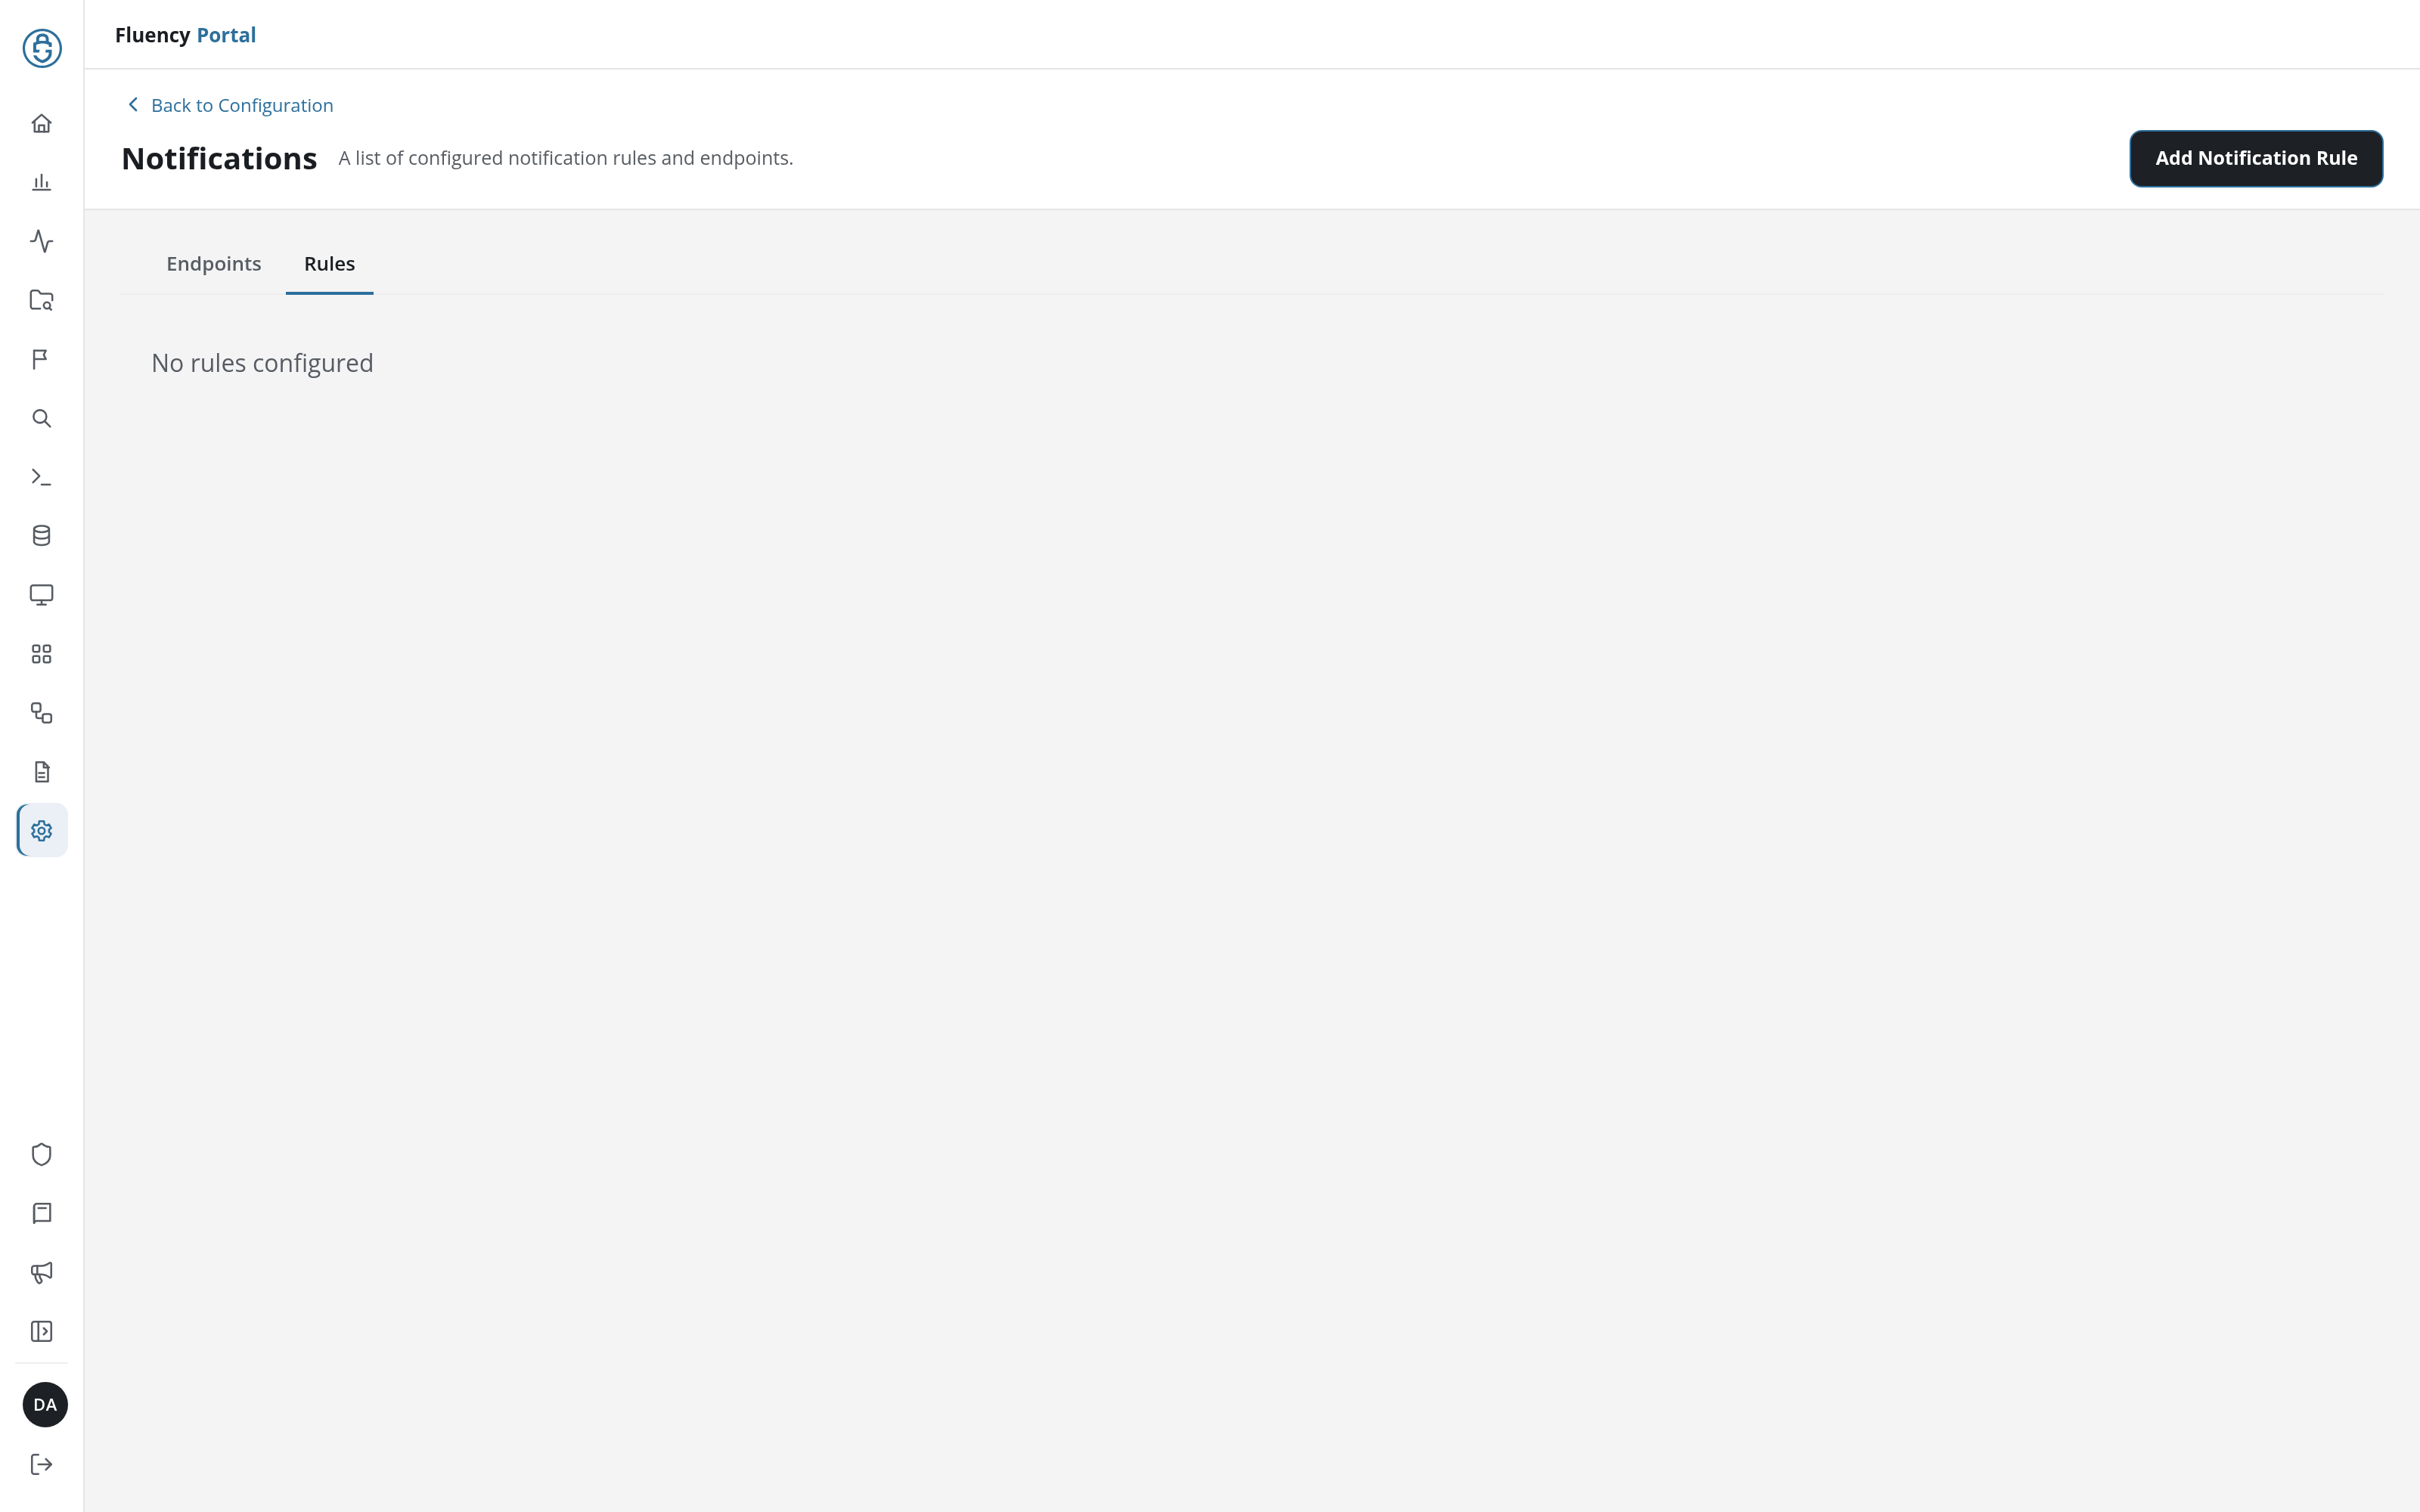
- Rules: the notification rules, with an Add Notification Rule button in the header in place of Email and Slack.
Endpoints
Each endpoint is a card headed by its type's icon and its name, with a red Delete that deletes the endpoint. The card's body lists:
- Type: Email or Slack.
- FPL Action: the FPL action the endpoint sends through, or a dash.
- The delivery details: for an Email endpoint, Email with each recipient address as a tag, and CC with each copy recipient when the endpoint has any.
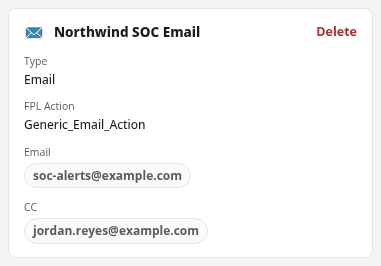
Click a card to edit the endpoint.
Add an Email Endpoint
Click Email in the header to open the Add Notification Endpoint dialog with Type set to Email.
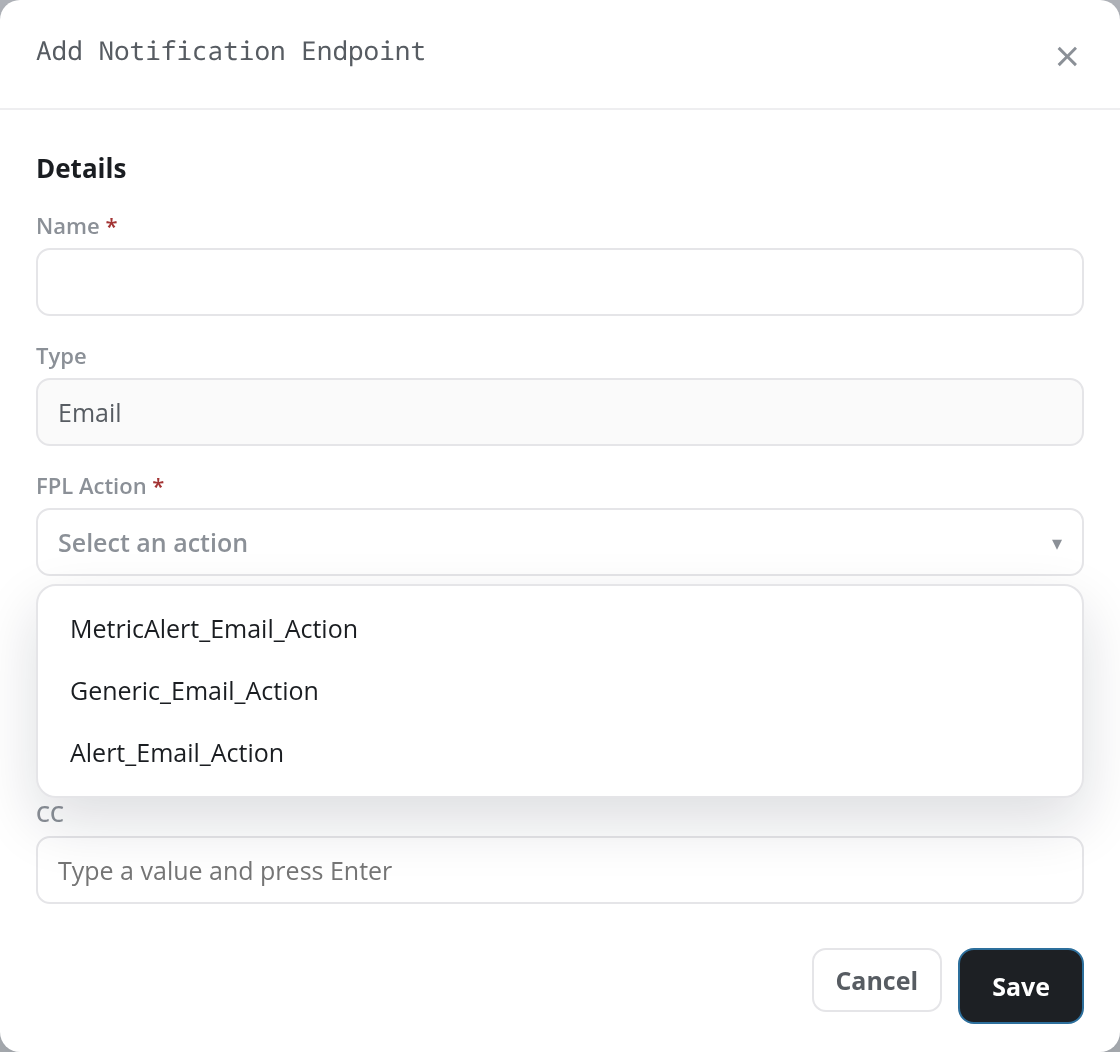
- Details
- Name (required)
- Type: read-only: Email.
- FPL Action (required): the action that sends the email, chosen from a drop-down (placeholder Select an action) of the account's email actions: Alert_Email_Action, Generic_Email_Action, and MetricAlert_Email_Action in the example.
- Email Configurations
- To (required): the recipients. Type an address and press Enter to add it; repeat for each recipient. As you type, the field suggests the email addresses of the account's users. Each recipient becomes a tag, and its × removes it after a confirmation.
- CC: optional further recipients, entered the same way.
Click Save to create the endpoint, or Cancel or × to close the dialog. A required field left empty stops the save with a red message at the foot of the dialog that names every missing field at once, such as Please select an action · Please provide a recipient email. Endpoint names are unique: a name another endpoint already has is refused, and the dialog stays open. A saved endpoint shows the green notice Notification endpoint saved successfully above the tabs, and its card joins the list.
Add a Slack Endpoint
Click Slack in the header to open the same dialog with Type set to Slack.
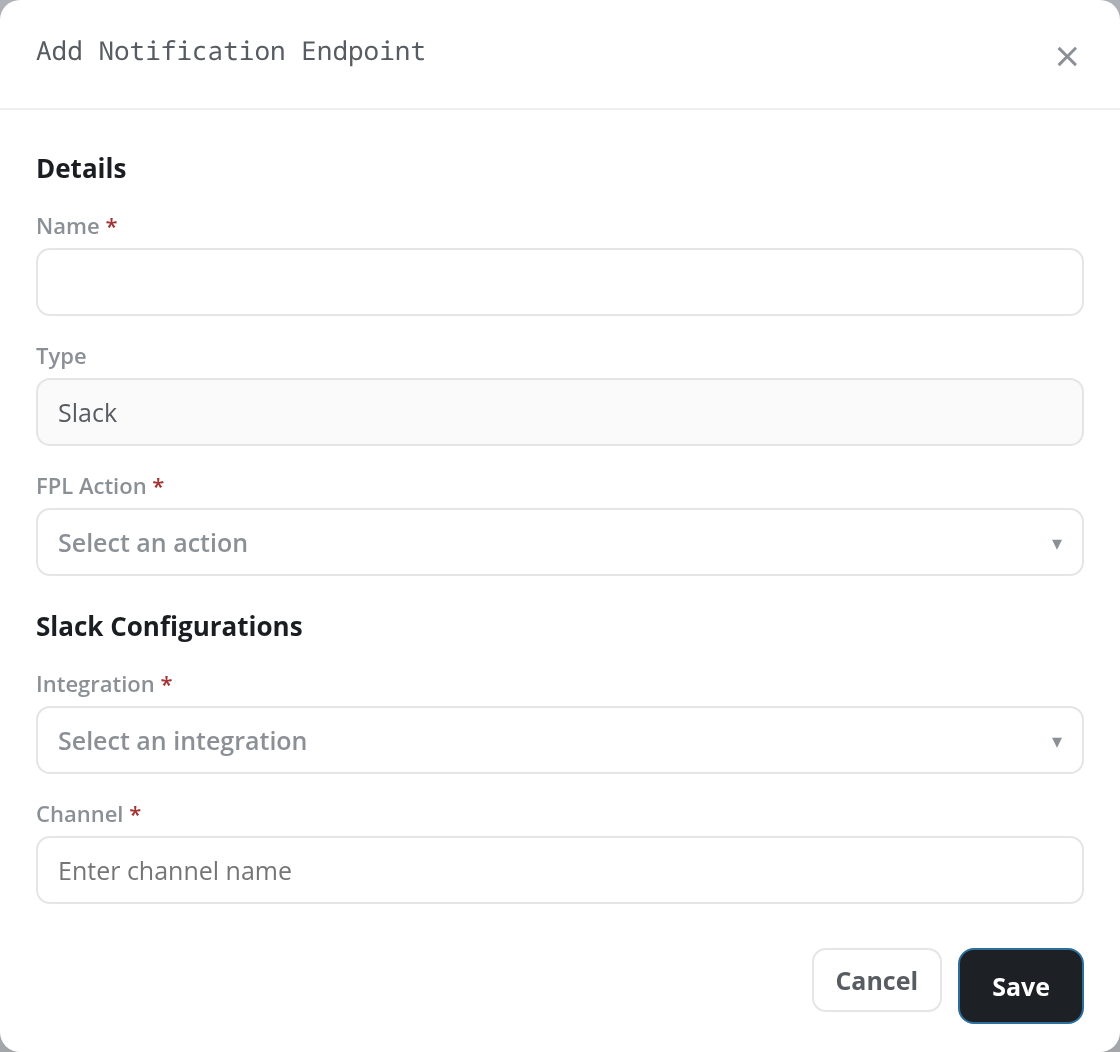
- Details
- Name (required)
- Type: read-only: Slack.
- FPL Action (required): the action that posts the message, from a drop-down of the account's Slack actions. It reads No options when the account has none.
- Slack Configurations
- Integration (required): the Slack integration to post through, from a drop-down of the account's Slack integrations. Its Create New Integration entry starts a new one.
- Channel (required): the channel name to post to.
Click Save to create the endpoint, or Cancel or × to close the dialog.
Edit an Endpoint
Click an endpoint's card to open the Edit Notification Endpoint dialog, filled in with the endpoint's current values. Name and Type are read-only, and FPL Action shows the endpoint's action but is disabled: what the dialog changes is the delivery configuration, for an Email endpoint the To and CC recipients. To cannot be left empty (Please provide a recipient email). Save applies the change with the same Notification endpoint saved successfully notice; Cancel or × discards it.
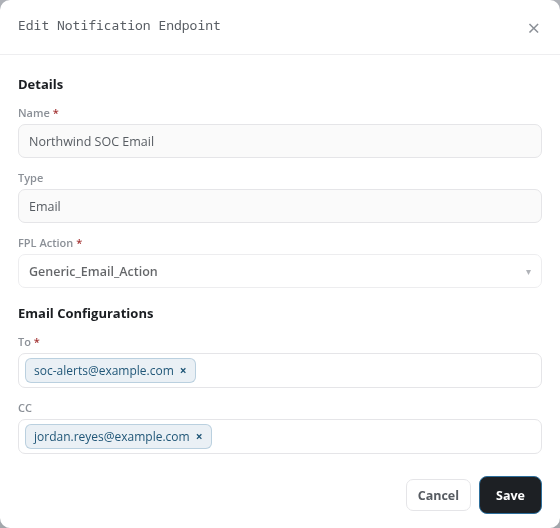
To give an endpoint another name or FPL action, add a new endpoint with the right values, point the rules at it, and delete the old one.
Delete an Endpoint
Click the red Delete in the card's header. A Delete Endpoint confirmation asks Are you sure you want to delete the endpoint <name>?; confirm it to delete the endpoint, which shows the notice Endpoint deleted successfully and removes the card, or cancel to keep it.
Rules
The Rules tab lists the configured notification rules as cards. When there are none it reads No rules configured.
Add Notification Rule
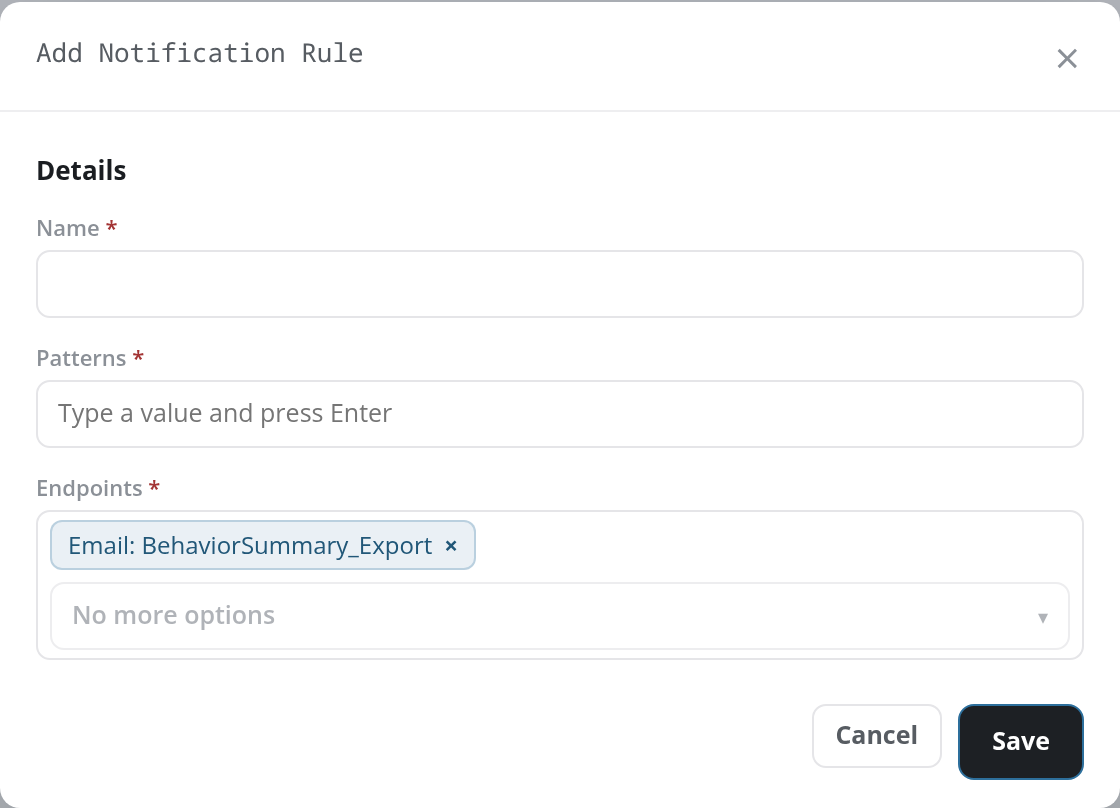
Click Add Notification Rule to open the Add Notification Rule dialog. Its fields sit under a Details heading:
- Name (required)
- Patterns (required): the patterns the rule matches. Type a pattern and press Enter to add it; a rule can have several.
- Endpoints (required): the endpoints matching notifications are sent to. Pick from the drop-down (placeholder Add…), which lists each endpoint as its type and name, such as Email: BehaviorSummary_Export. Each chosen endpoint becomes a tag with an × to remove it, and the drop-down reads No more options once every endpoint is chosen.
Removing a pattern or endpoint tag with its × asks for confirmation first, as on the endpoint dialogs.
Click Save to create the rule, or Cancel or × to close the dialog. A required field left empty stops the save with a red message at the foot of the dialog naming every missing field, such as Name is required · Please provide a pattern · Please select an endpoint. A saved rule shows the notice Notification rule saved successfully and appears as a card.
Rule Cards
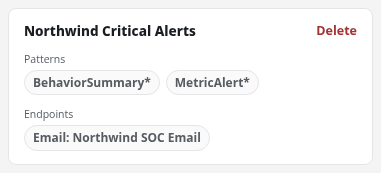
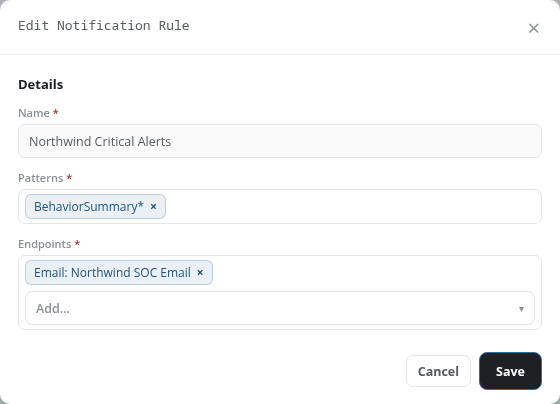
Each rule is a card headed by its name, with a red Delete. The card's body lists the rule's Patterns and its Endpoints, each as tags; an endpoint tag reads as its type and name, such as Email: Northwind SOC Email.
Edit a Rule
Click a rule's card to open the Edit Notification Rule dialog. Name is read-only; Patterns and Endpoints can be changed the same way as when adding the rule. Save applies the change with the notice Notification rule saved successfully; Cancel or × discards it.
Delete a Rule
Click the red Delete on the rule's card. A Delete Rule confirmation asks Are you sure you want to delete the rule <name>?; confirm it to delete the rule, which shows the notice Rule deleted successfully, or cancel to keep it.