Data Lakes
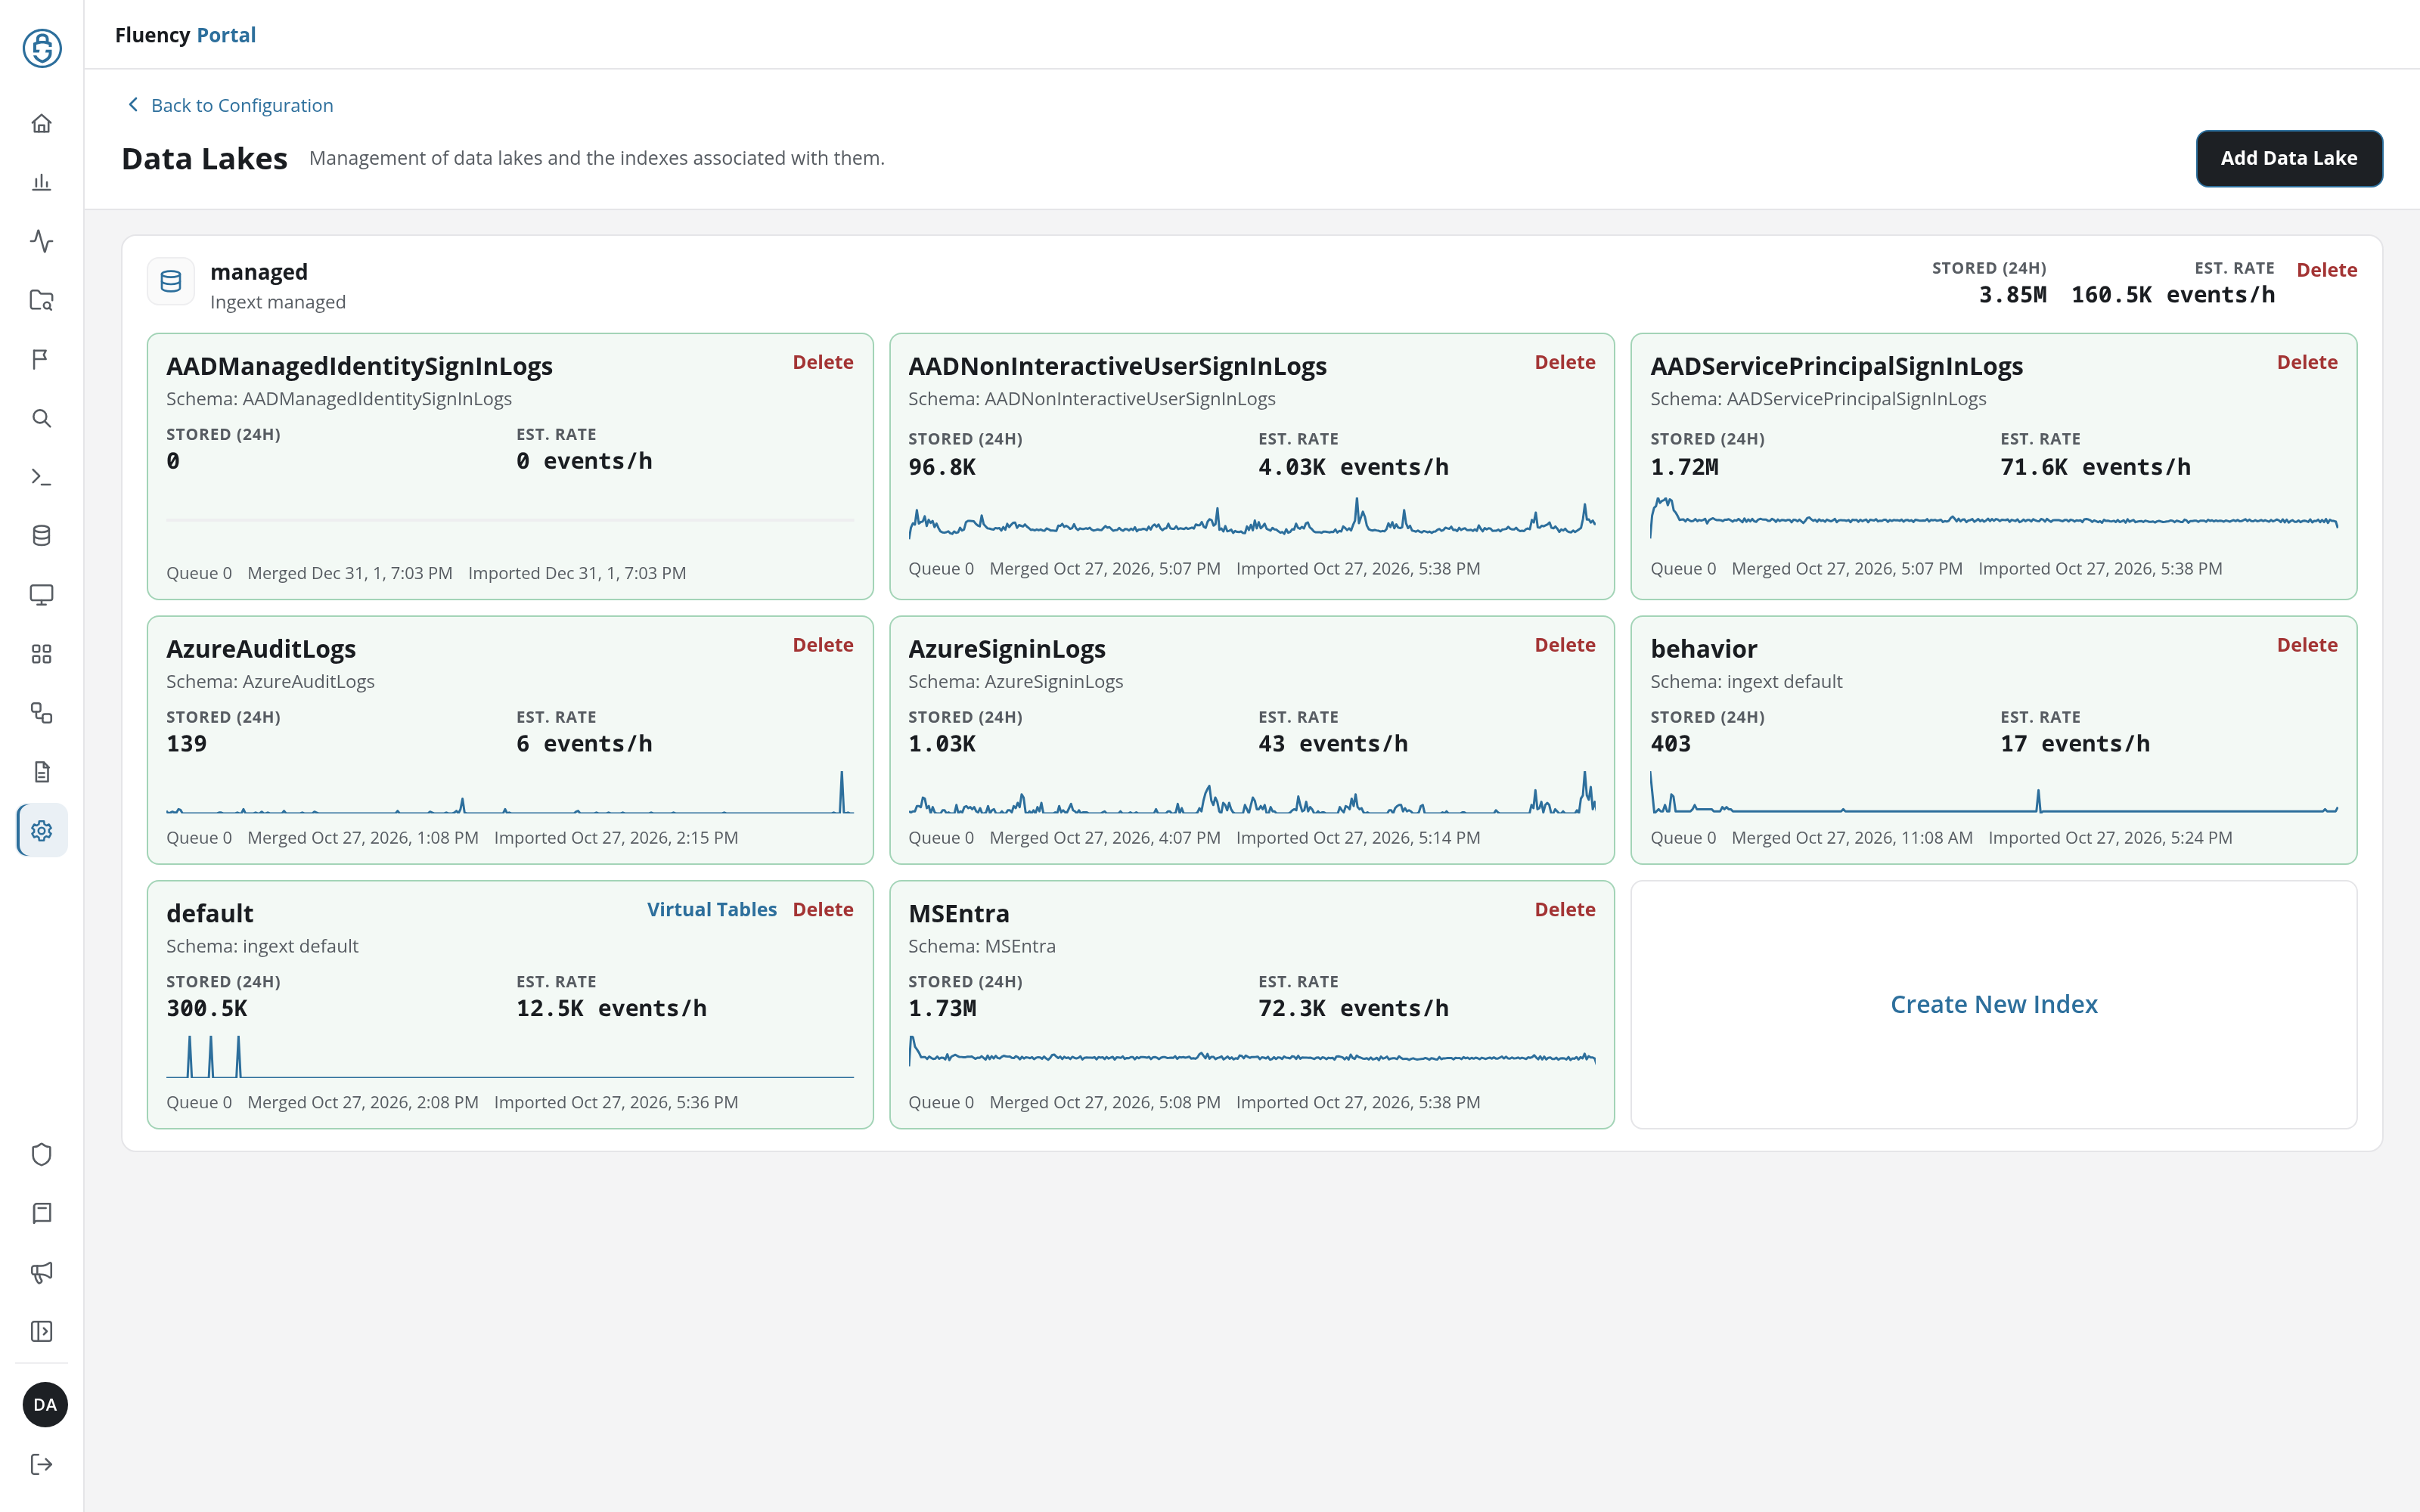
The Data Lakes page shows the account's data lakes and the indexes in each one, with how much each index has stored over the last 24 hours and the rate it is receiving events. From here you can add a data lake, create an index, manage an index's KQL virtual tables, or delete a lake or an index.
Menu path: Configuration → Data Lakes · URL path: /v2/configuration/data-lakes
Task guide: Data Storage: the storage model, retention and residency.
Page Layout
- Header: a Back to Configuration link above the title Data Lakes and the subtitle Management of data lakes and the indexes associated with them, with the Add Data Lake button on the right.
- One panel per data lake: the lake's header row, then a grid of index cards, ending with a Create New Index tile.
Data Lake Panel
The panel's header row identifies the lake and totals its indexes:
- The lake's name (managed in the example) with its storage type beneath it: Ingext managed for platform-managed storage.
- Stored (24H): the number of events the lake's indexes stored in the last 24 hours.
- Est. Rate: the estimated ingest rate, in events per hour.
- Delete, in red: deletes the data lake.
Index Cards
Each card summarizes one index in the lake:
- The index name, with Schema: and the schema the index uses beneath it: a product schema such as
MSEntra, oringext default. - Stored (24H) and Est. Rate: the index's own events stored in the last 24 hours and its estimated rate in events per hour.
- A sparkline of the index's recent ingest volume.
- A footer with Queue (the number of items waiting to be imported), Merged (when the index was last merged), and Imported (when data was last imported into it).
- Delete, in red: deletes the index. It first asks for confirmation (Confirm Delete Index), naming the index and the lake; once the index is deleted, a green notice above the lake panel says so and the card is removed.
An index that has virtual tables available also shows a Virtual Tables link beside Delete (the default index in the example).
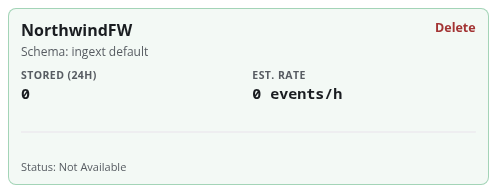
A newly created index shows Status: Not Available in place of the Queue, Merged and Imported footer.
Virtual Tables
Click Virtual Tables on an index card to open the Virtual Tables dialog: View and manage virtual tables.
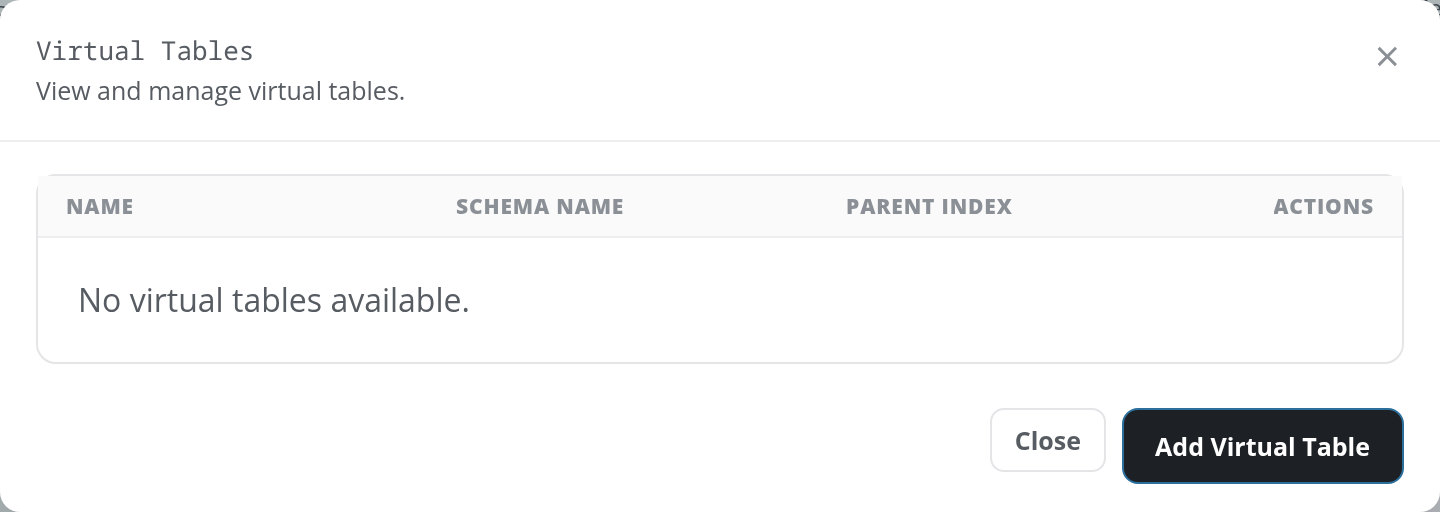
The dialog lists the index's virtual tables with Name, Schema Name, Parent Index, and Actions columns; when there are none it reads No virtual tables available. Add Virtual Table adds one; Close or × closes the dialog.
Add Data Lake
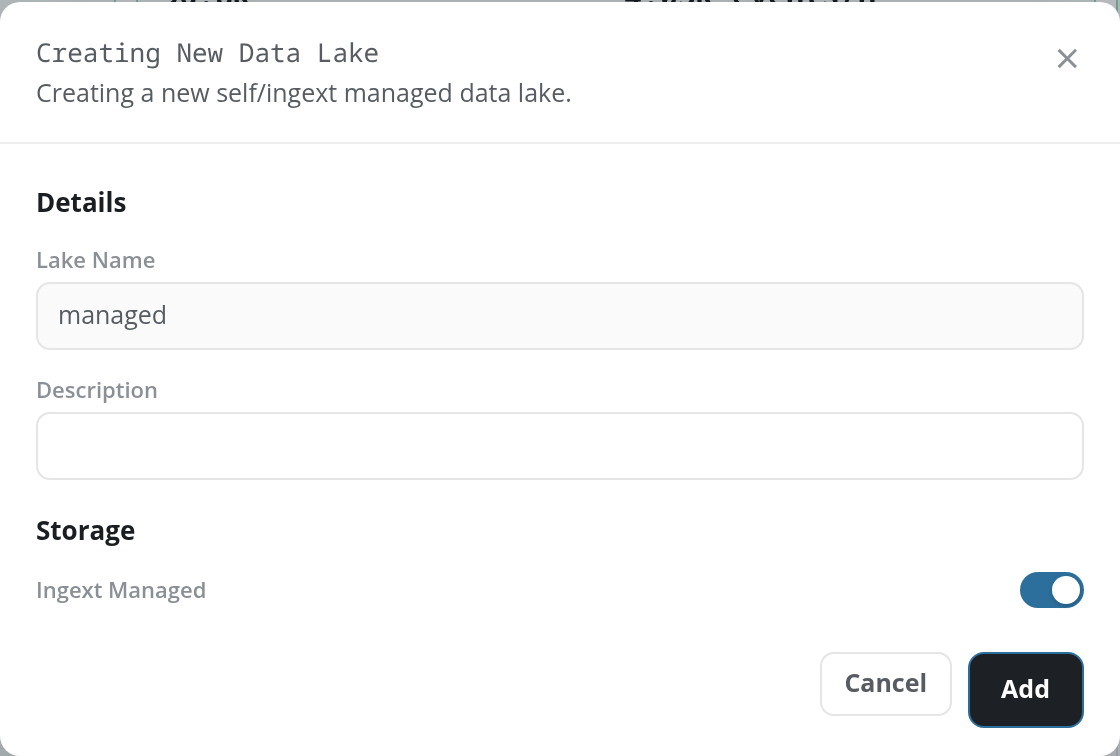
Click Add Data Lake to open the Creating New Data Lake dialog: Creating a new self/ingext managed data lake.
- Details
- Lake Name: while Ingext Managed is on, filled in with managed and read-only.
- Description: optional.
- Storage
- Ingext Managed: a switch, on by default, that keeps the lake in platform-managed storage.
Turning Ingext Managed off makes Lake Name an empty, required field and adds a required Storage Integration drop-down (placeholder Select storage) for choosing where the lake is stored. The drop-down lists the account's storage integrations; it reads No options when there are none.
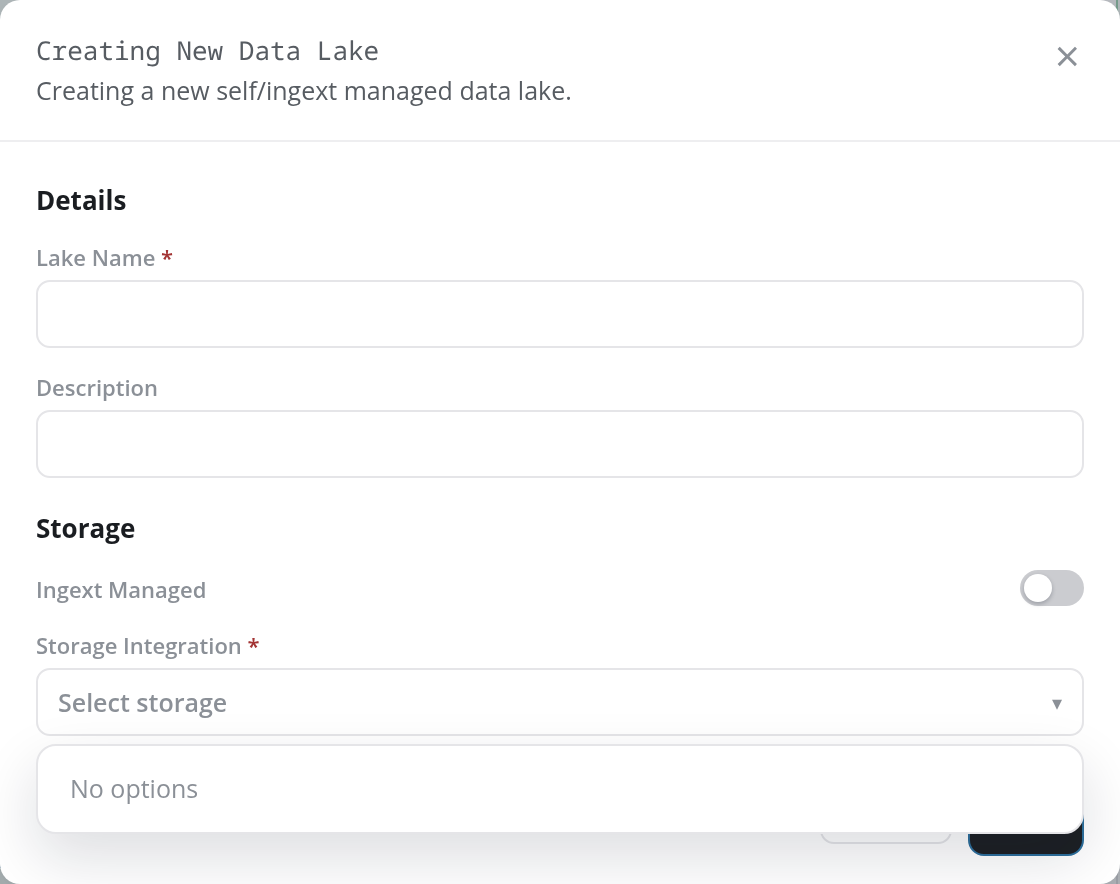
Click Add to create the lake, or Cancel or × to close the dialog without saving.
Create New Index
Click the Create New Index tile at the end of a lake's cards to open the Creating New Index dialog: Creating a new index in the data lake.
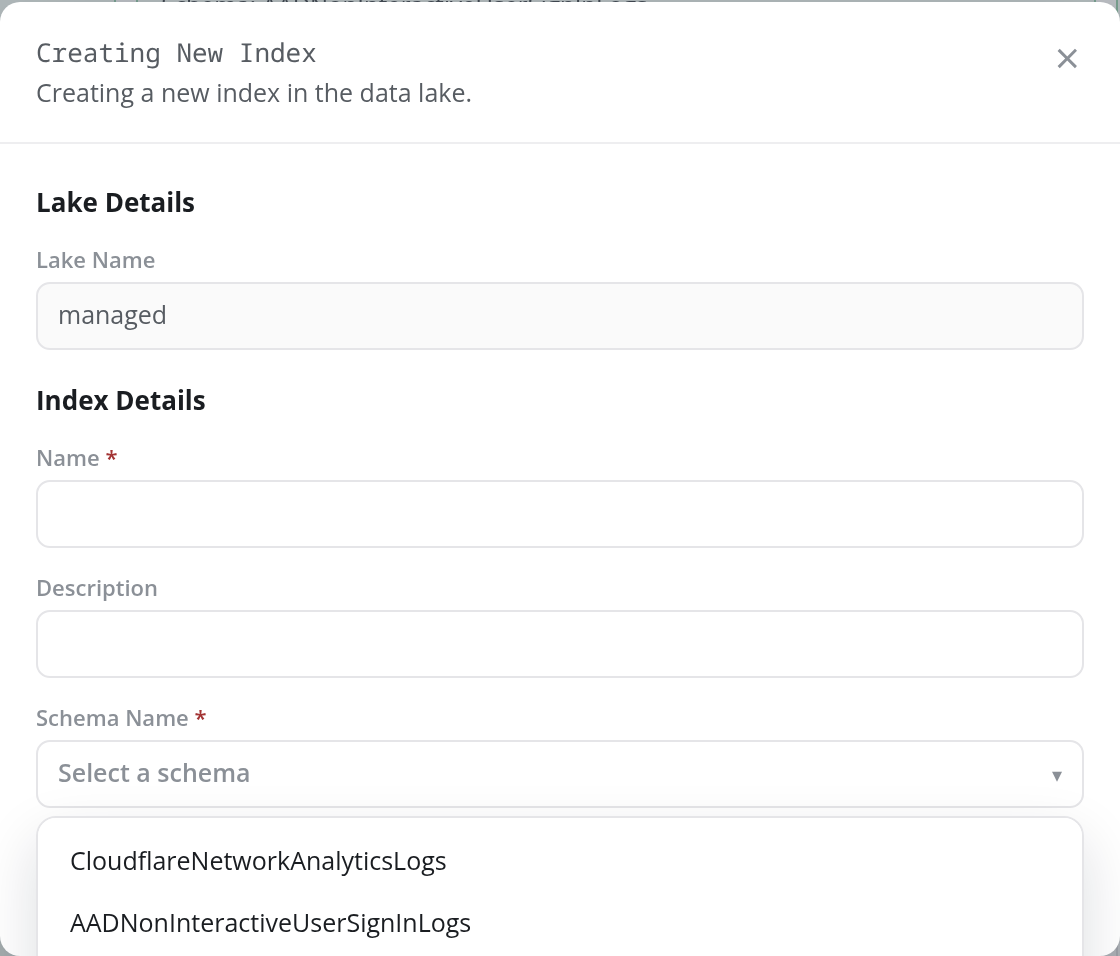
- Lake Details
- Lake Name: read-only: the lake the index is created in.
- Index Details
- Name (required): the new index's name. It must start with a letter and be 3 to 64 characters long, using only letters, digits, underscores and dashes.
- Description: optional.
- Schema Name (required): the schema the index uses, chosen from a drop-down (placeholder Select a schema) of the account's schemas, such as
AbnormalSecurity,AzureSigninLogs,CloudTrail,Okta, oringext default. Schemas are managed on Schemas.
Click Add to create the index, or Cancel or × to close the dialog without saving.
Add checks the form first and shows the first problem it finds in red at the top of the dialog:
| Problem | Message |
|---|---|
| Name empty | Index name is required |
| Name breaks the naming rule | Index name must start with a letter, 3–64 characters, letters, digits, underscore or dash only |
| No Schema Name chosen | Schema name is required |
| The lake already has an index of that name | failed to add datalake index <index> in lake <lake>: index <index> already exists in datalake <lake> |
Add creates the index without asking for confirmation: the dialog closes, a green notice above the lake panel confirms that the index was added to the lake, and the new index's card joins the lake's grid.