Assets
The Assets page (titled Assets Search on screen) lists the assets known to the account: devices registered by hand or discovered from the data they send. From here you can search and filter the asset list, add an asset, open an asset's details, delete an asset, and download the list.
Menu path: Assets · URL path: /v2/assets
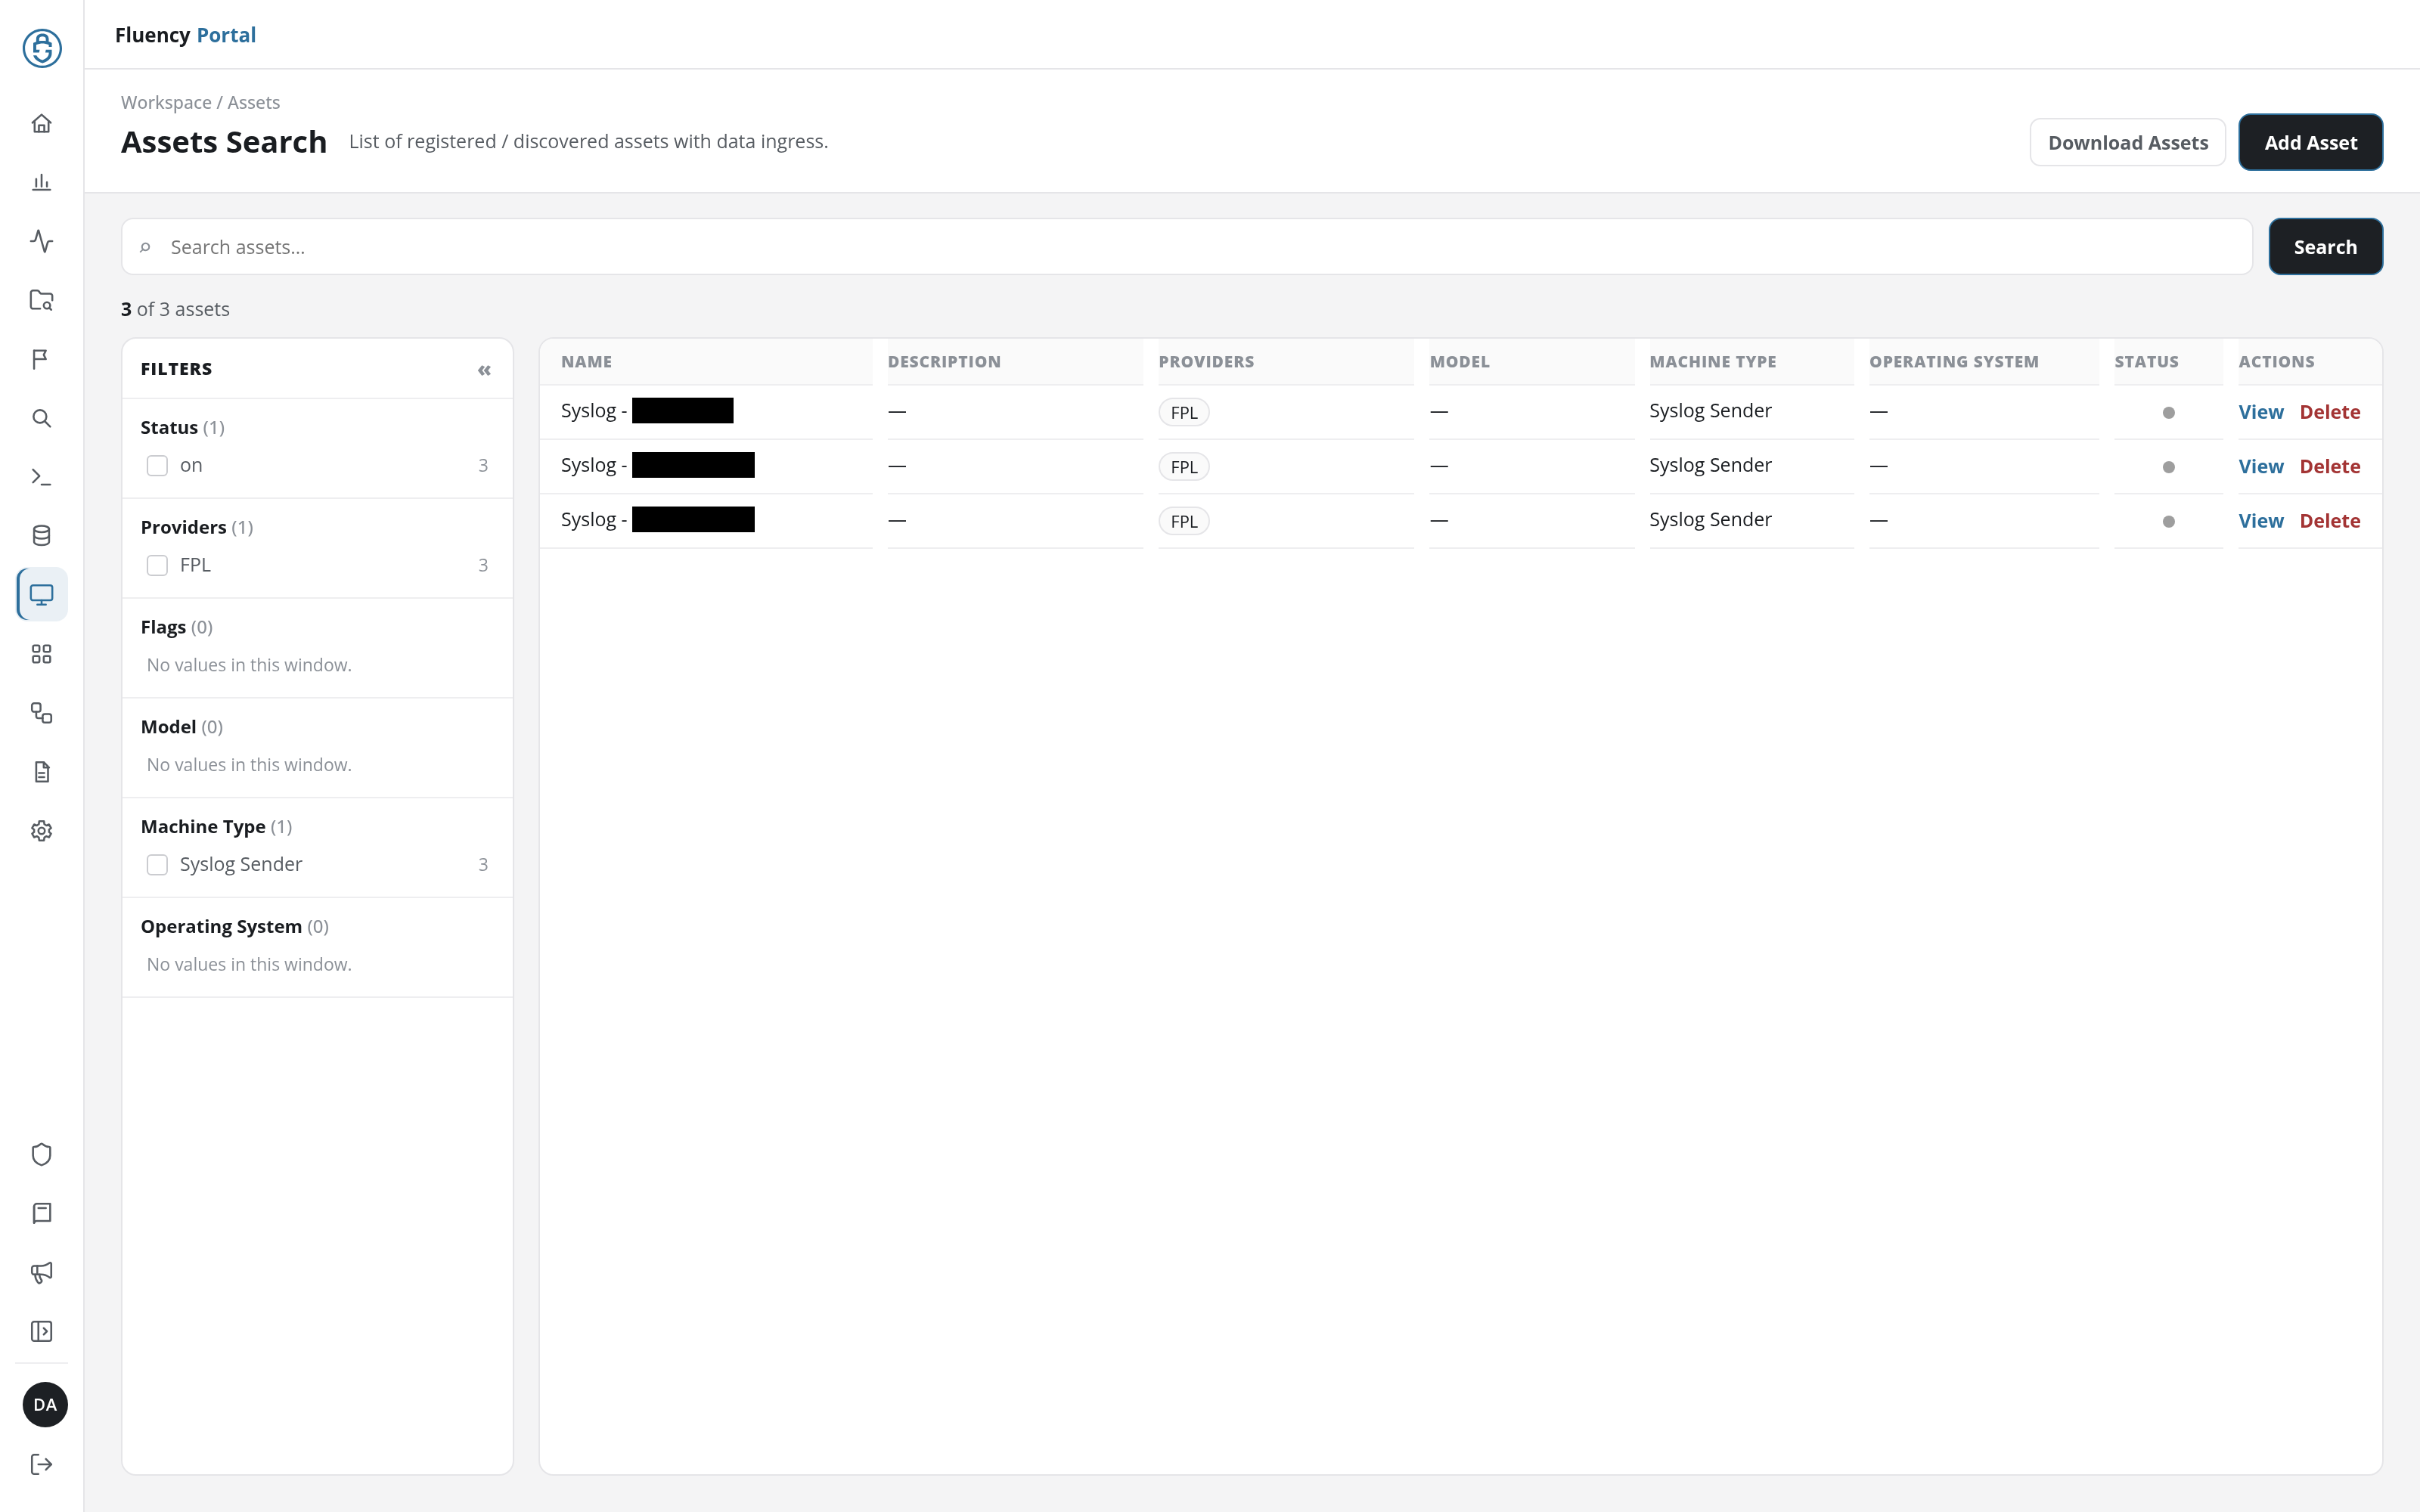
Page Layout
- Header: the breadcrumb Workspace / Assets, the title Assets Search with the subtitle List of registered / discovered assets with data ingress., and the Download Assets and Add Asset buttons on the right.
- Search bar: a full-width Search assets… field and a Search button. Beneath it, a count such as 3 of 3 assets reports the assets that match the current search and filters.
- Filters panel (left): facet groups for narrowing the list.
- Asset table (right): one row per asset.
Header Actions
Download Assets
Download Assets downloads the assets that match the current search and filters as a CSV file, Assets.csv, with the columns name, description, providers, model, machineType, os, and state. The button is unavailable (greyed out) when no assets match.
Add Asset
Click Add Asset to open the Add Asset dialog: Enter the asset information to add to the system.
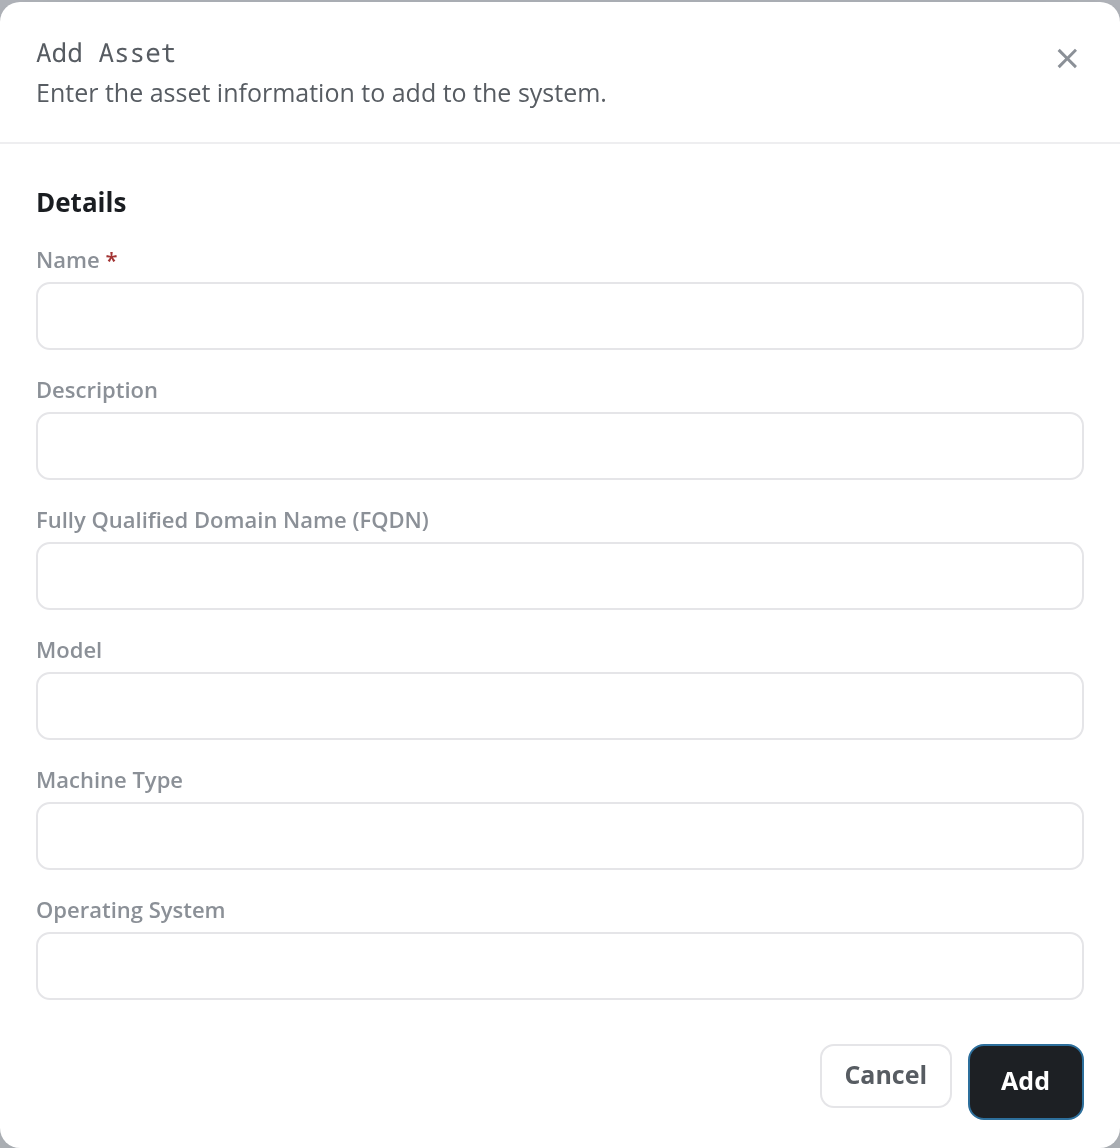
The dialog's Details section has six text fields:
- Name: required.
- Description
- Fully Qualified Domain Name (FQDN)
- Model
- Machine Type
- Operating System
Click Add to add the asset, or Cancel or the × in the upper-right corner to close the dialog without adding it. The notice Asset added successfully. confirms the addition, and an asset added here lists Admin as its provider. Add with an empty Name shows a notice asking for a name, and a name that an existing asset already has is refused with an entry already exists error.
Search
Type in Search assets… and click Search to narrow the table to matching assets. The count beneath the search bar updates to show how many assets match.
Filters Panel
The Filters panel groups the assets by attribute. Each group heading shows, in parentheses, how many distinct values the group has, and each value shows how many assets carry it:
- Status
- Providers: the source that reported the asset, for example FPL.
- Flags
- Model
- Machine Type: for example Syslog Sender.
- Operating System
A group with no values reads No values in this window.
A group lists six values at first; + N more below them lists the rest. Each value cycles through three states as you click it, and each click filters the table at once, without Search:
- Included: the first click ticks the value's checkbox and shows only matching assets. A chip such as Providers: FPL × appears above the panel.
- Excluded: the second click marks the value with a red minus, strikes it through, and hides matching assets. The chip changes to NOT Providers: FPL ×.
- Cleared: the third click removes the filter.
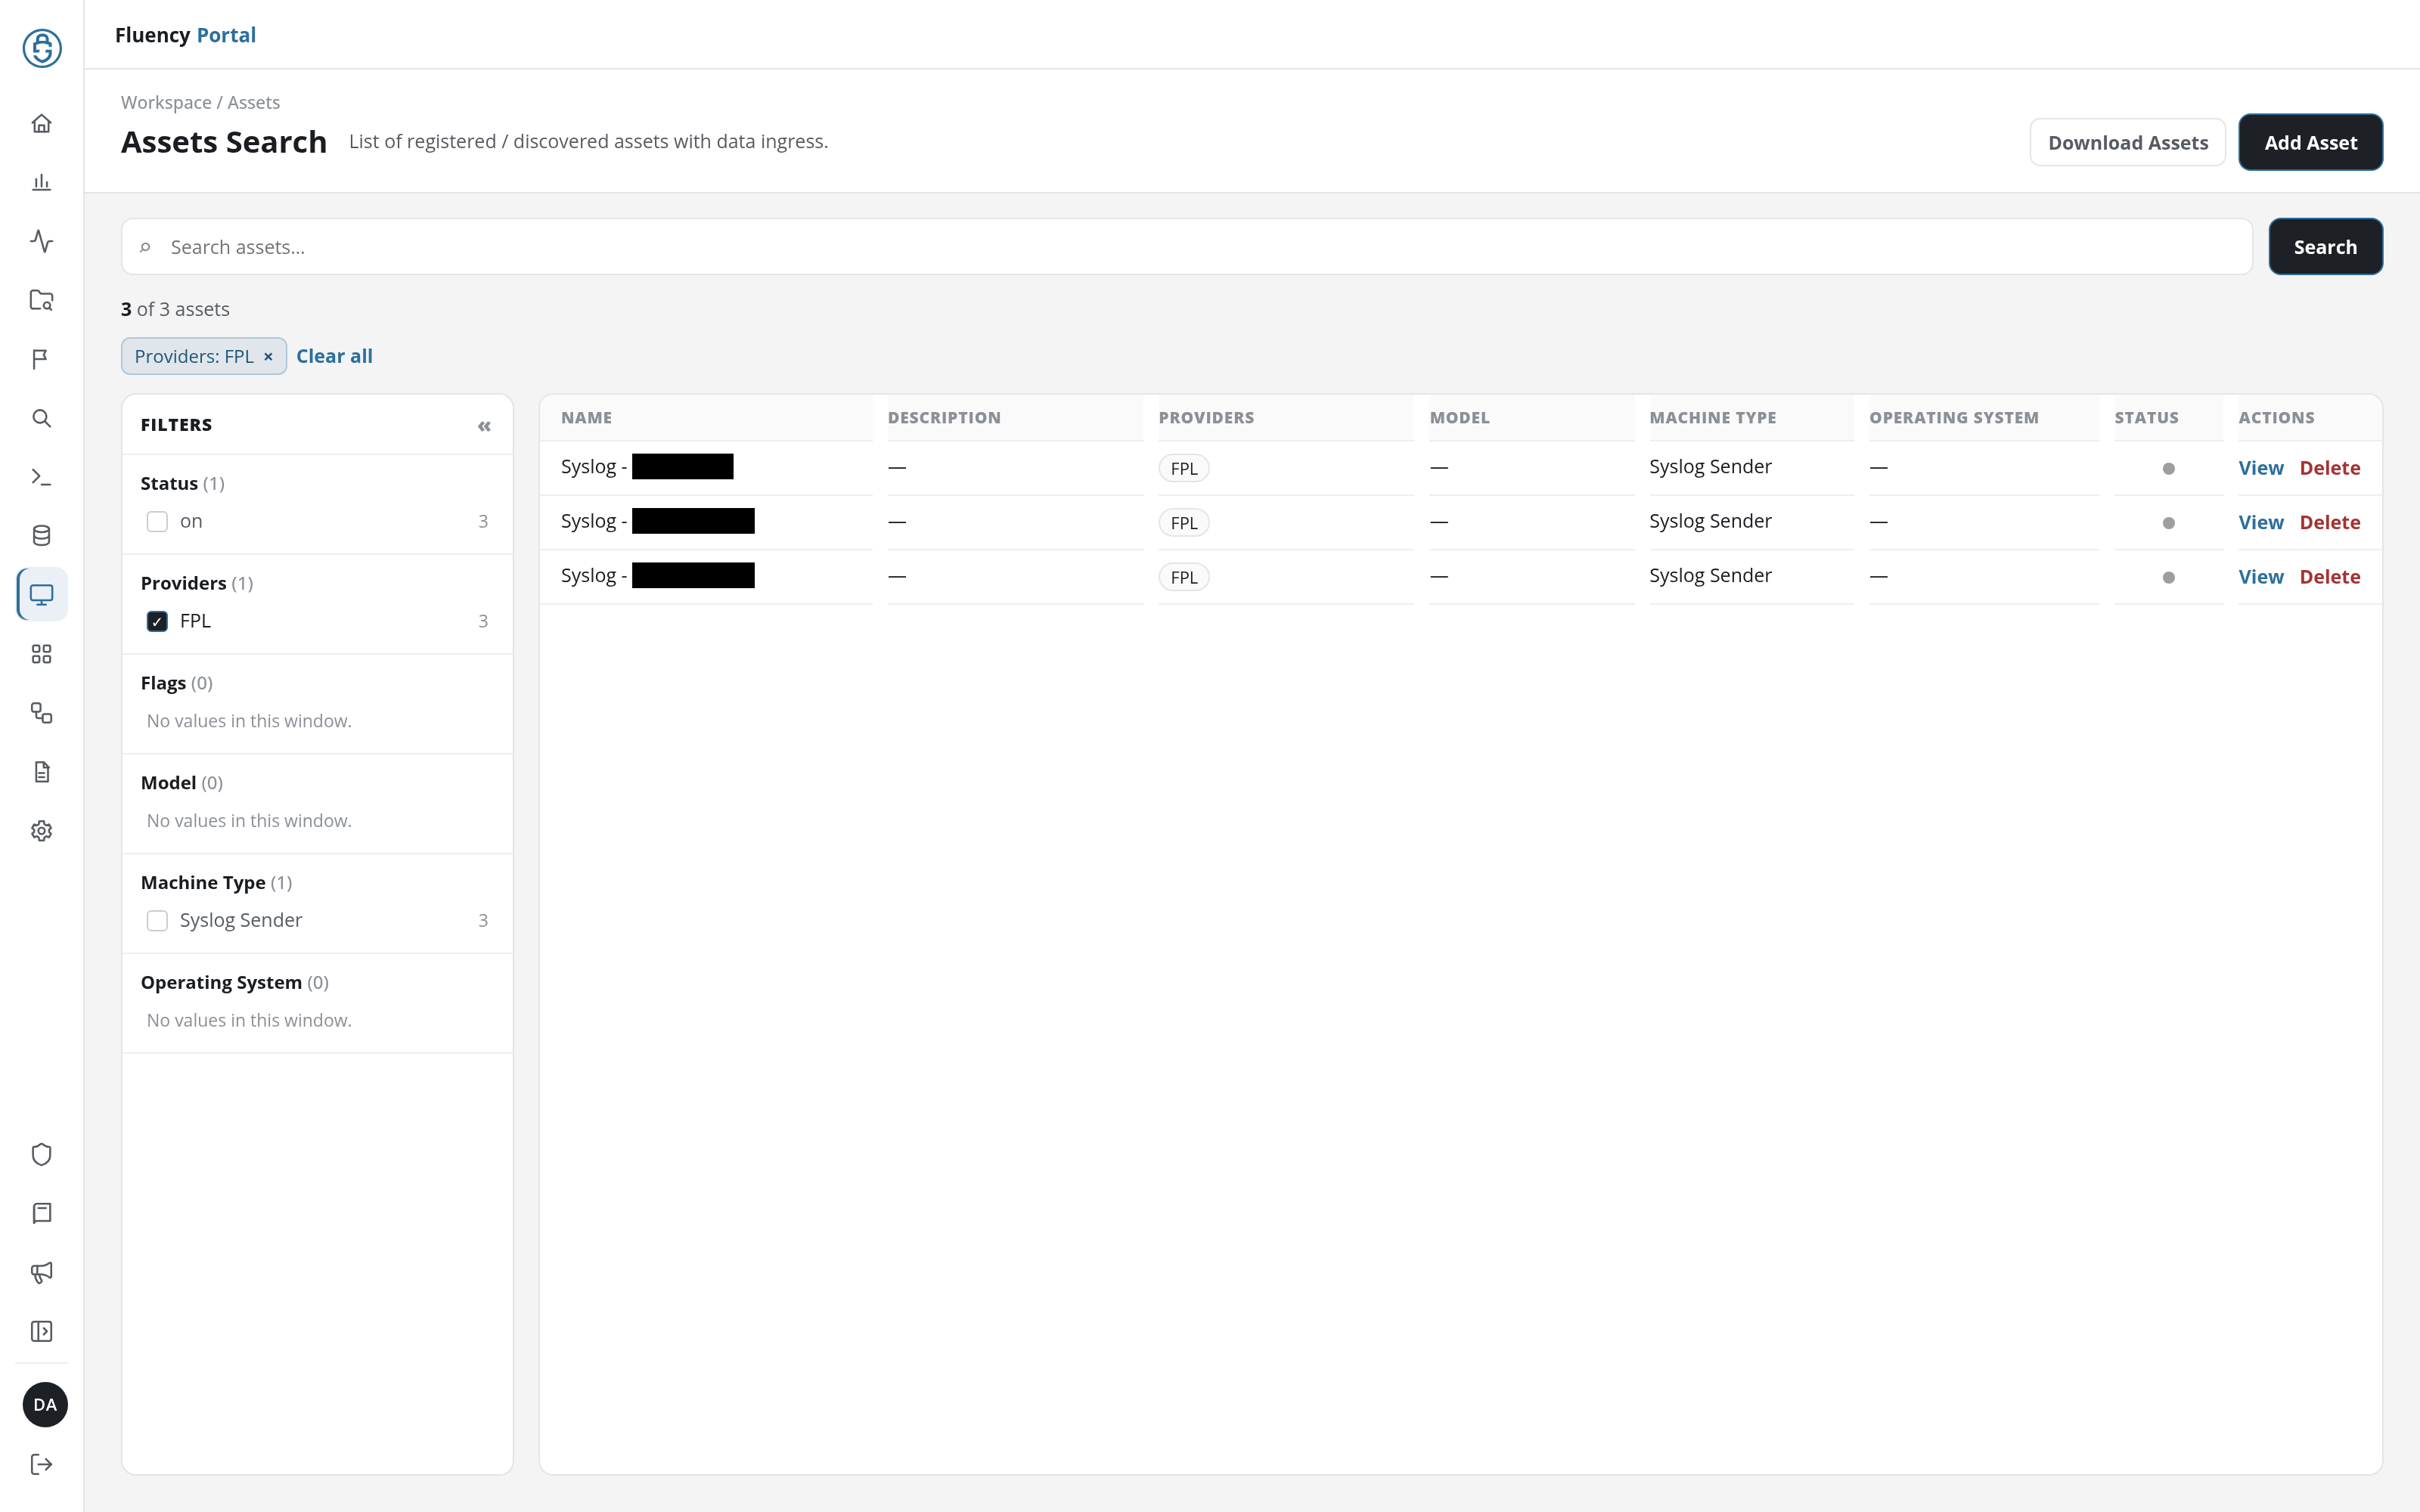
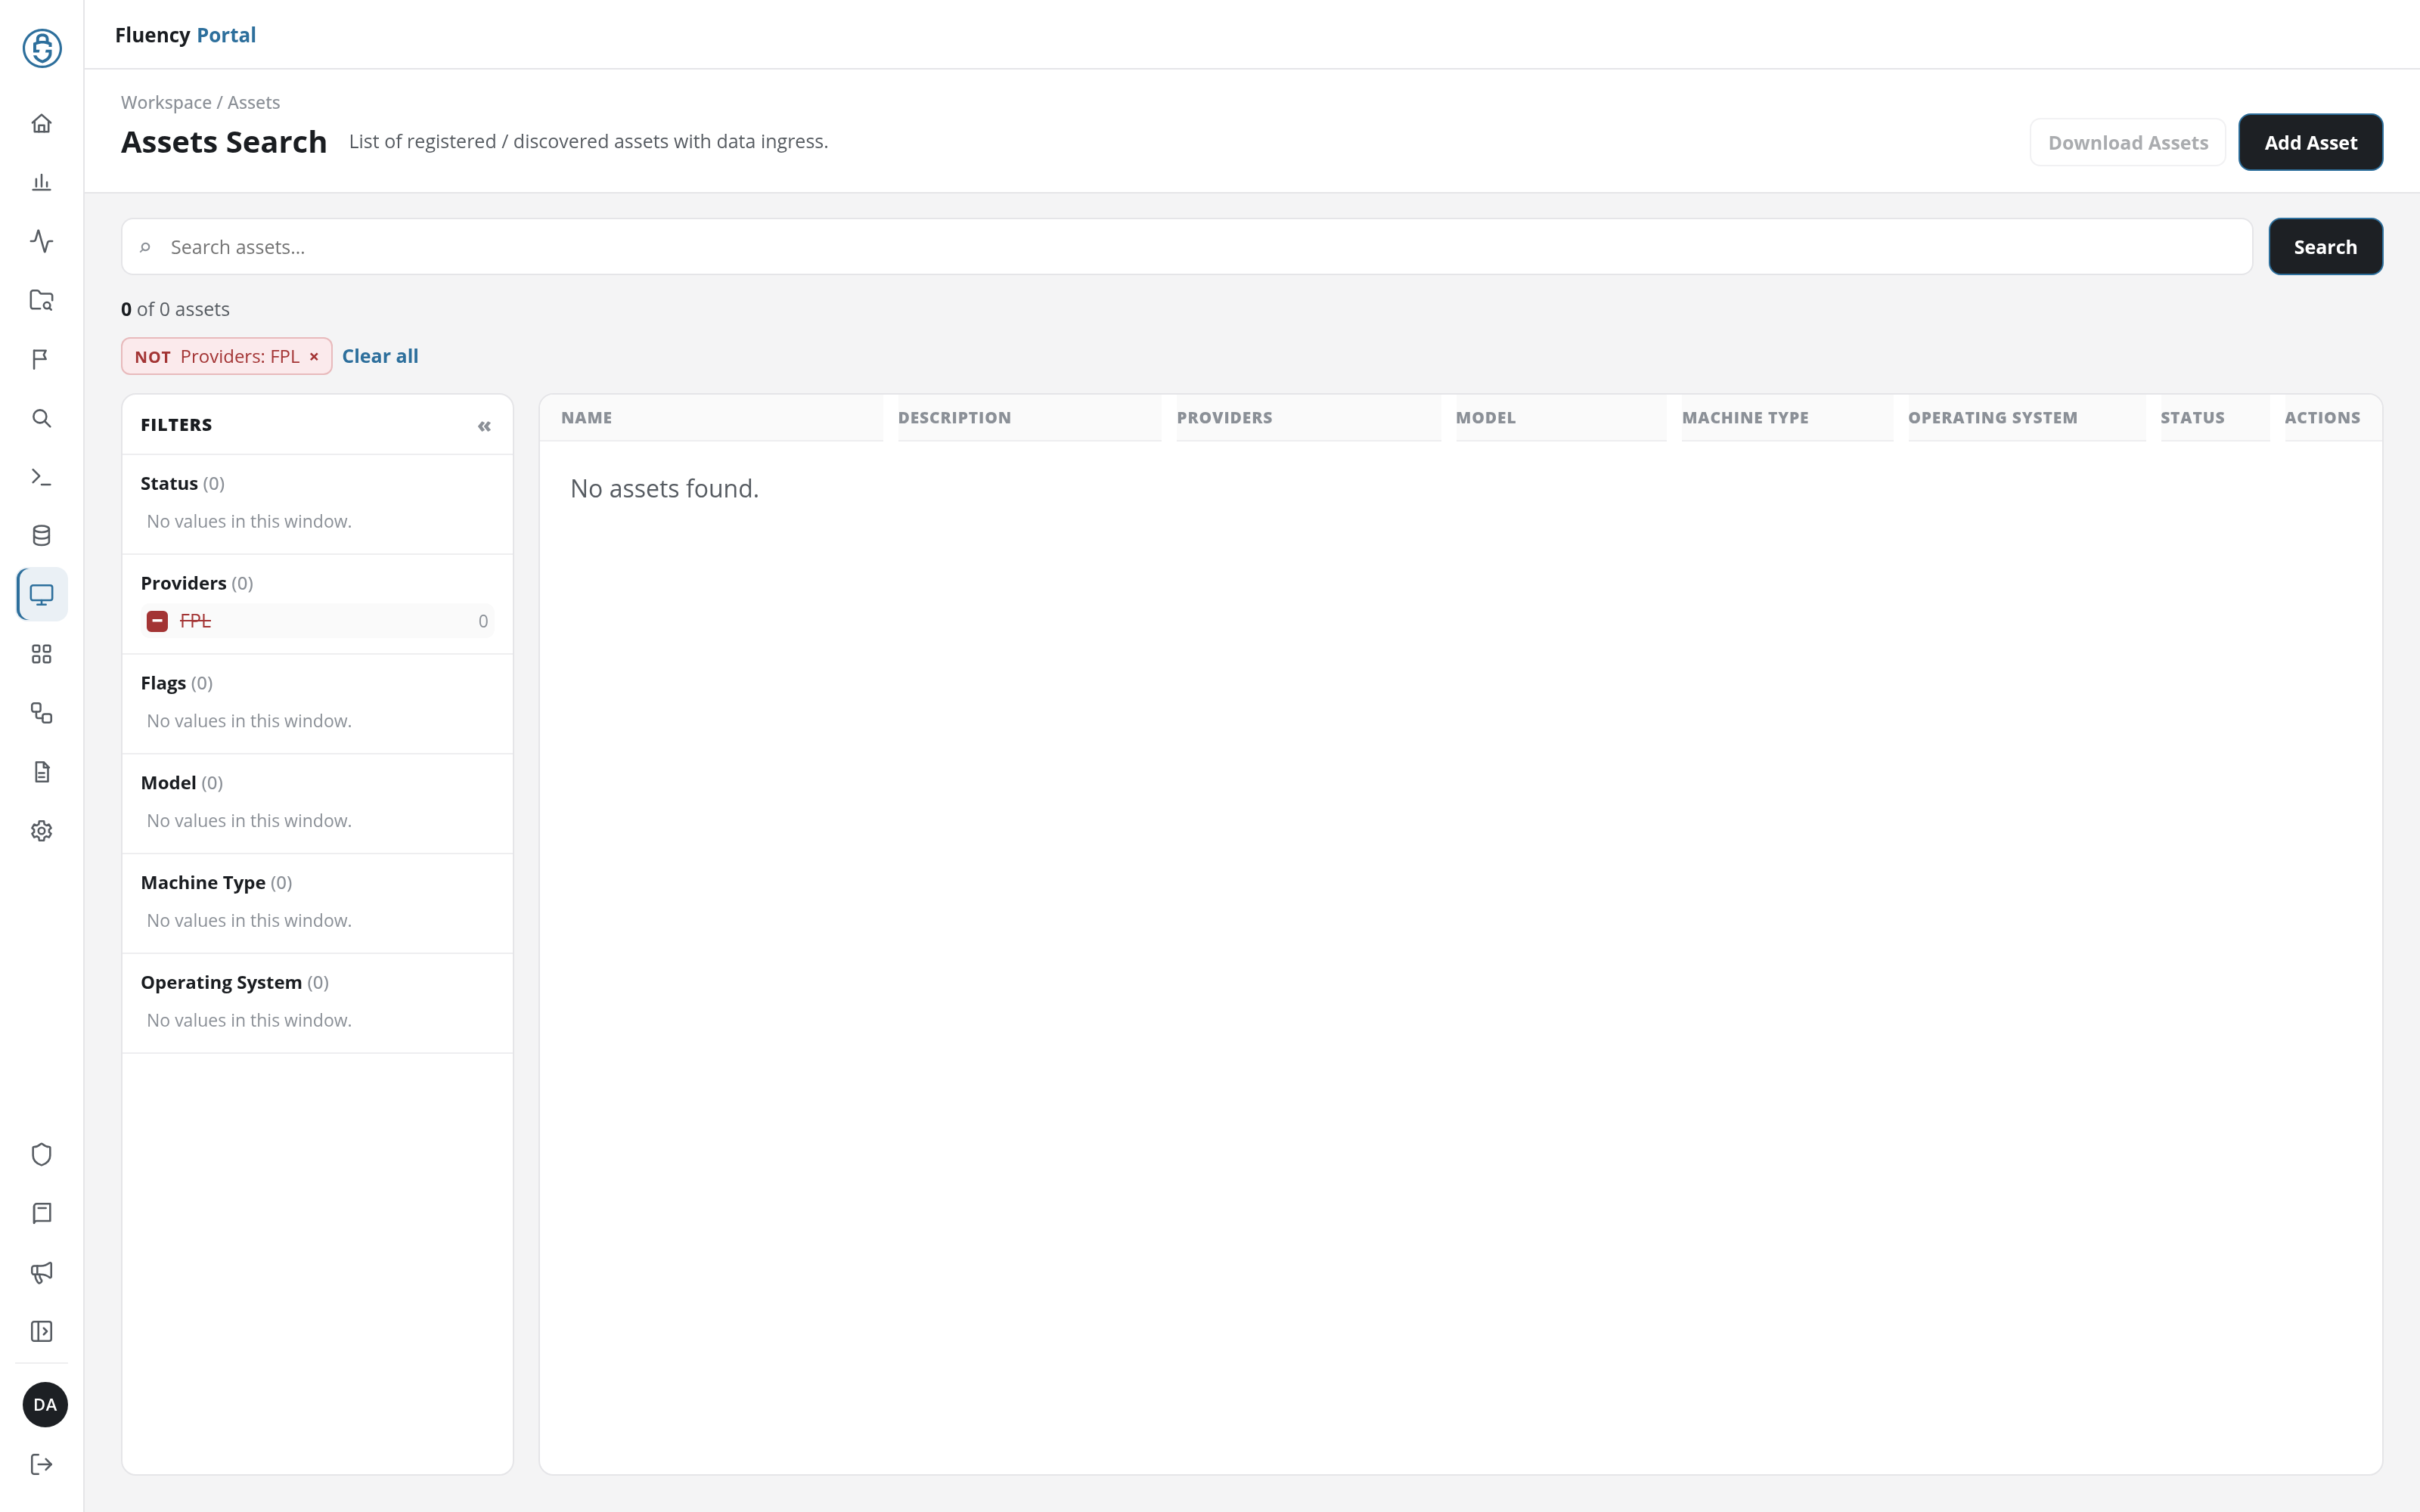
The × on a chip removes that one filter, and Clear all beside the chips removes every filter. When no asset matches, the table shows No assets found.
The « button in the panel's header (Collapse filters) folds the panel down to a narrow » Filters strip, widening the table; click it again to expand the panel.
Asset Table
The table has the columns Name, Description, Providers, Model, Machine Type, Operating System, Status, and Actions. A dash (–) marks an empty field. The Status column shows a status dot, and Actions holds two links per row:
- View: opens the asset's details.
- Delete: deletes the asset after a confirmation, Delete Asset: Are you sure you want to delete asset …?, naming the asset. The notice Asset deleted successfully. confirms the deletion.
Asset Details
View opens a panel titled with the asset's name and the subtitle Asset details and ingress metrics.
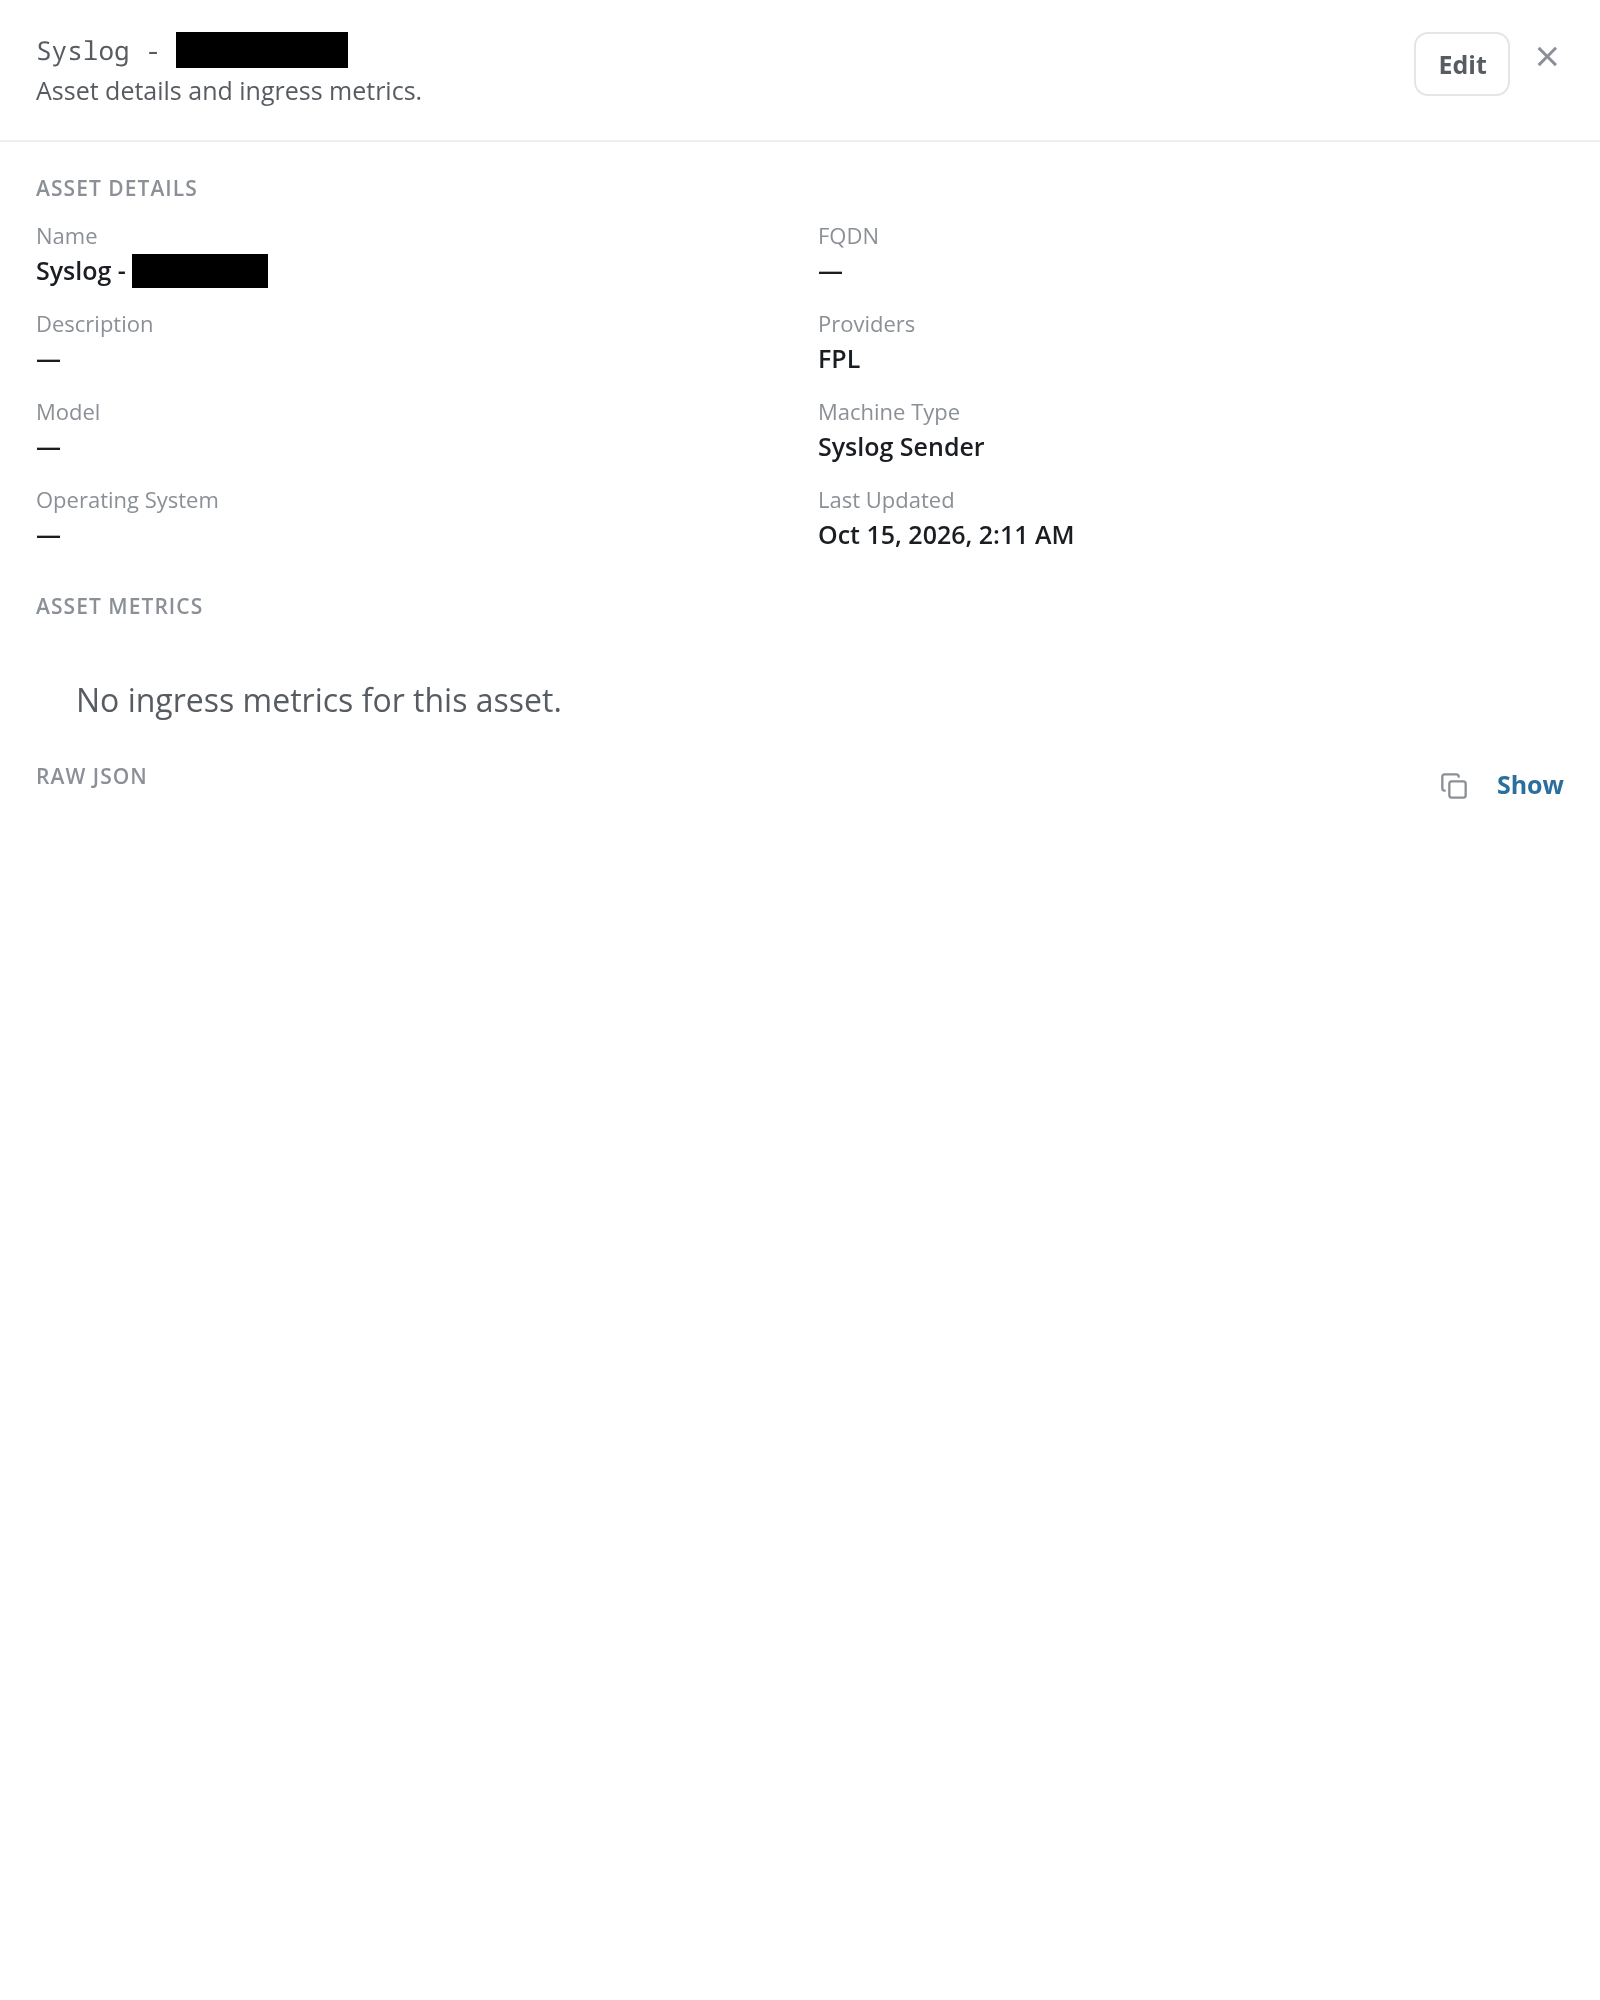
The panel has three sections:
- Asset Details: Name, FQDN, Description, Providers, Model, Machine Type, Operating System, and Last Updated.
- Asset Metrics: the asset's ingress metrics: a Bytes chart of the data received from the asset, over the dated range shown above it in UTC (for example Oct 28, 2026 - Oct 29, 2026 (UTC)). An asset without any reads No ingress metrics for this asset.
- Raw JSON: the asset's stored record. Show displays it, and the copy icon beside it copies it.
Edit in the upper-right corner edits the asset's details; the × closes the panel.
Edit Asset
Edit opens the Edit Asset dialog, with the same Details fields as Add Asset, filled in with the asset's values. Name is read-only; the other five fields can be changed.
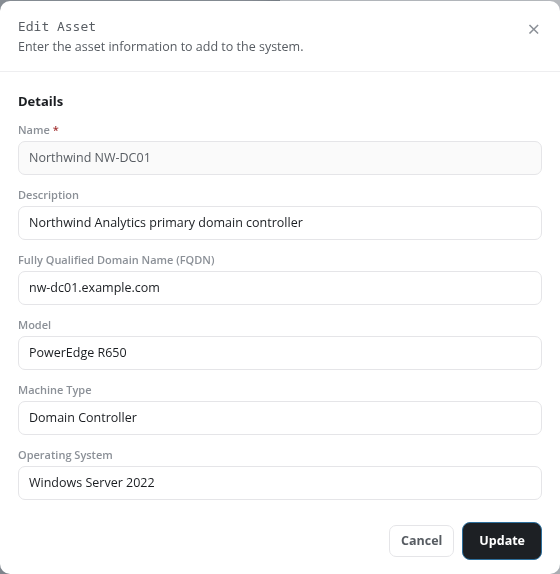
Update saves the changes, with the notice Asset updated successfully., and returns to the details panel showing the new values.