Data Storage
Data lakes in the current interface
Storage is administered on Data Lake → Management (URL path /dataLake/management). The page shows one panel per data lake, with a status card for every index in that lake.
The Management page itself, control by control, is documented in the interface reference at Data Lake → Management, which is canonical for what the screen contains. This page covers the storage model behind it — retention, residency, and where the data physically lives.
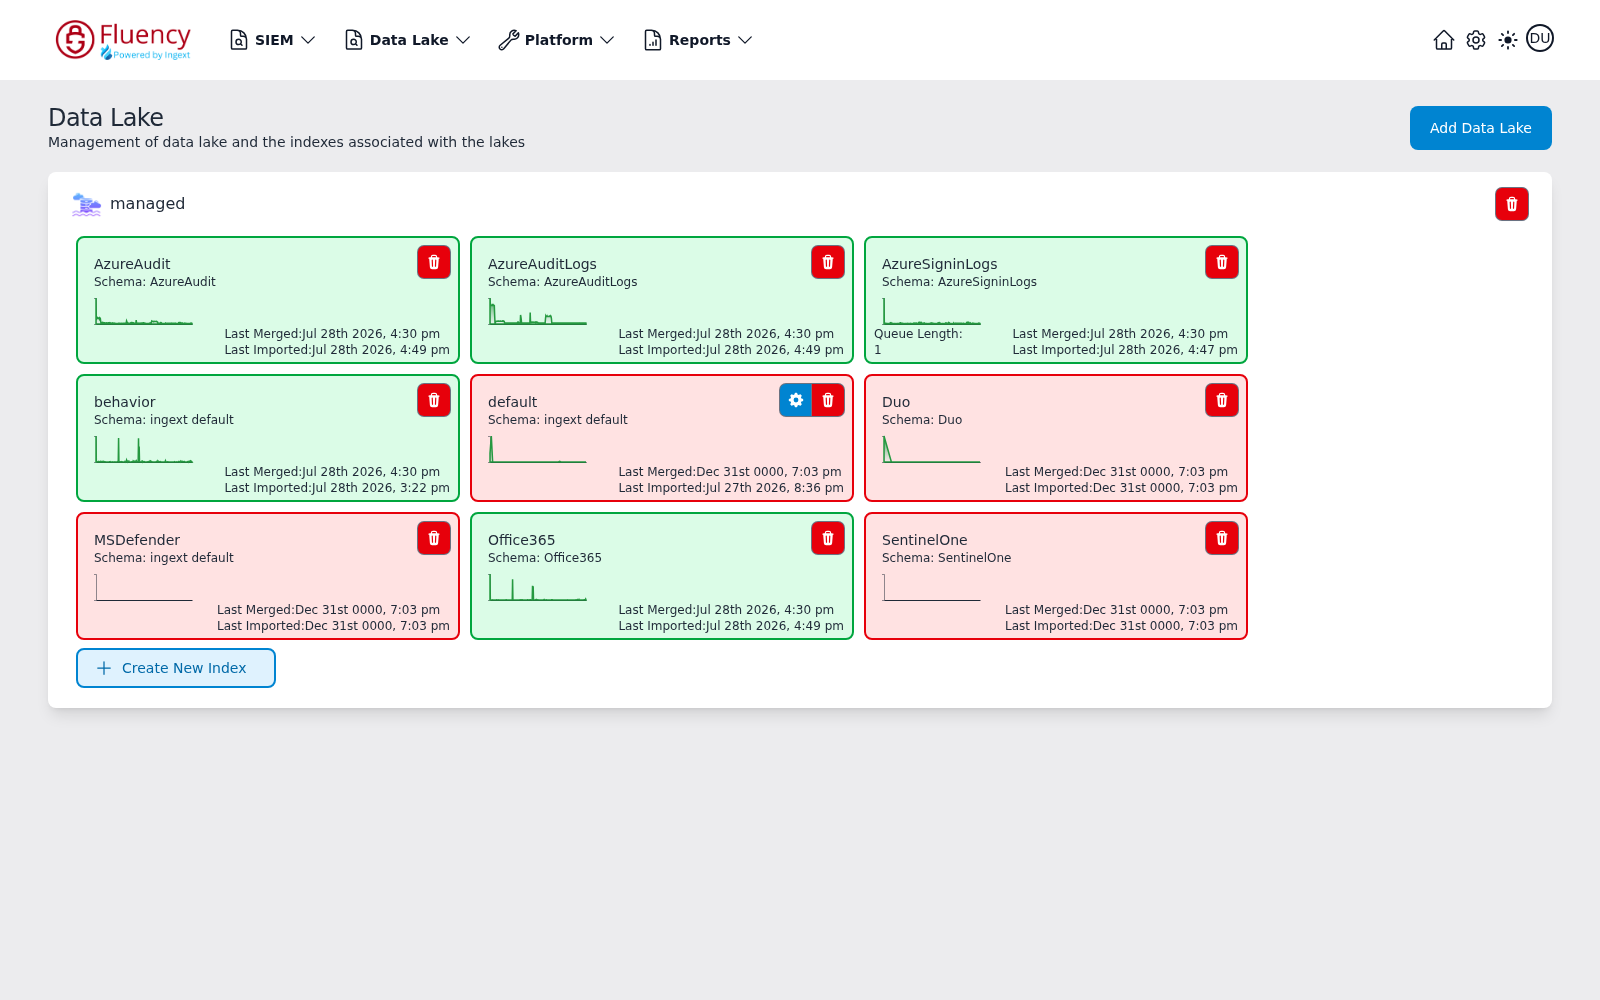
The header carries the page title Data Lake, the subtitle Management of data lake and the indexes associated with the lakes, and an Add Data Lake button on the right. Each lake panel shows the lake name with a trash button at its right edge, a grid of index cards, and a Create New Index button at the bottom.
Each index card summarizes one index: the index name and the schema it uses (Schema: followed by the schema name), an activity sparkline of recent ingest volume, Last Merged and Last Imported timestamps, and a Queue Length counter when events are waiting to be imported. Card color reflects merge state, not import state — a card is green once the index has been merged, and red while its Last Merged value is still the zero-date placeholder Dec 31st 0000. A red card can still carry a real Last Imported timestamp, meaning data has arrived but has not yet been merged into the index, so read the two timestamps rather than the colour. Every card has a red trash button, and a card may also carry a blue gear button that opens the Virtual Tables dialog for that index.
Self-managed or Ingext Managed
Click Add Data Lake to open the Creating New Data Lake dialog, subtitled Creating a new self/ingext managed data lake:
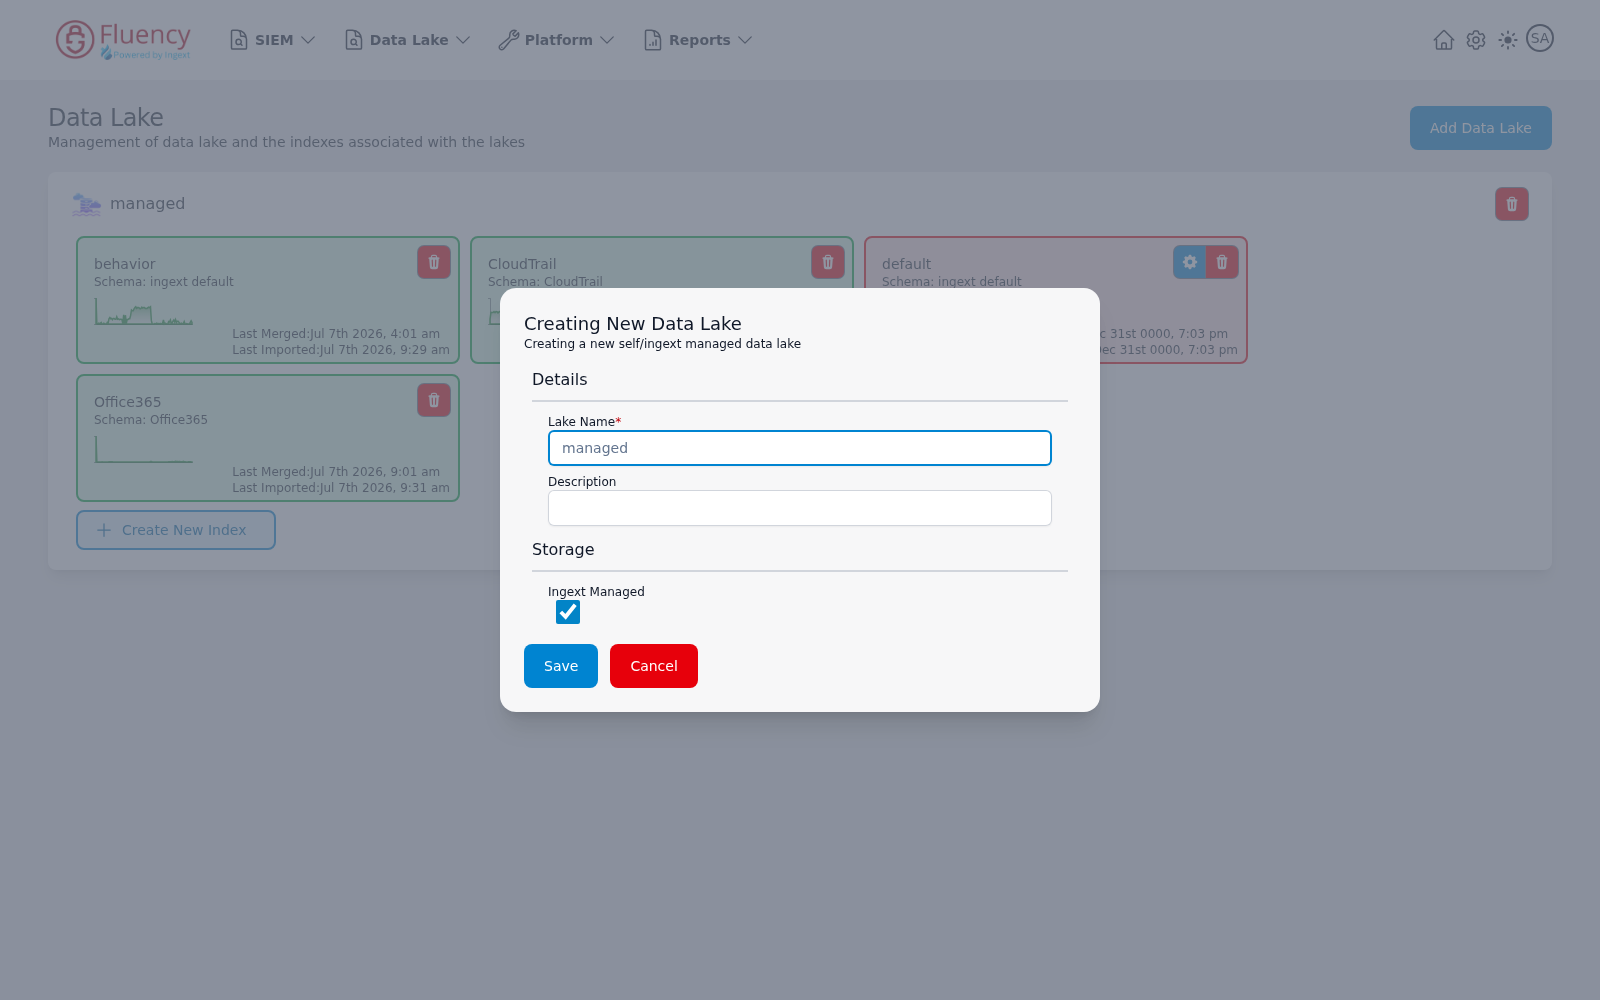
The dialog has two sections:
- Details — Lake Name (required) and an optional Description.
- Storage — an Ingext Managed checkbox that selects platform-managed storage. Leave it unchecked for a self-managed lake.
Click Save to create the lake or Cancel to close without saving.
Deleting a lake or an index
The trash button at the top right of a lake panel opens the Confirm Data Lake Delete dialog, which asks whether you are sure you want to delete the named data lake and warns that all indexes in the data lake will also be lost. Click Yes to delete or No to keep the lake.
An index card's trash button opens the Confirm Delete Index dialog, which asks whether you are sure you want to delete the named index from the named lake. Click Yes to delete the index or No to keep it.
Retention
Data is retained for 365 days and is hot-searchable for the whole of that window. There is no rehydration step and no archive tier to restore from: a query covering the last twelve months reads the same indexes as a query covering the last hour, and the only cost of the longer range is the time it takes to scan it.
That is what makes the task-based search model worth understanding — a year-wide query is a normal thing to run here, not an exceptional one.
Where the data physically lives
The underlying store is AWS S3. Each enterprise account gets its own segmented bucket, so one account's data is never co-located with another's.
Buckets are placed in the AWS Region nearest to where the data originates, which is how the platform addresses residency requirements such as GDPR. A multi-national account gets one bucket per location rather than one bucket overall: an organization with sites in the USA, Germany and South Africa is given three, and data never leaves the region it was collected in.
What crosses regions is metadata, not events. Behaviors and summaries are fed back to the Overview Summary page so an analyst sees the whole estate in one queue; drilling into the underlying records reads them in place, within the region that holds them.