Management
The Management page administers data lakes and the indexes they contain. It shows one panel per lake, with a status card for every index in that lake.
Menu path: Data Lake → Management · URL path: /dataLake/management
Task guide: Data Storage — the storage model, retention and residency.
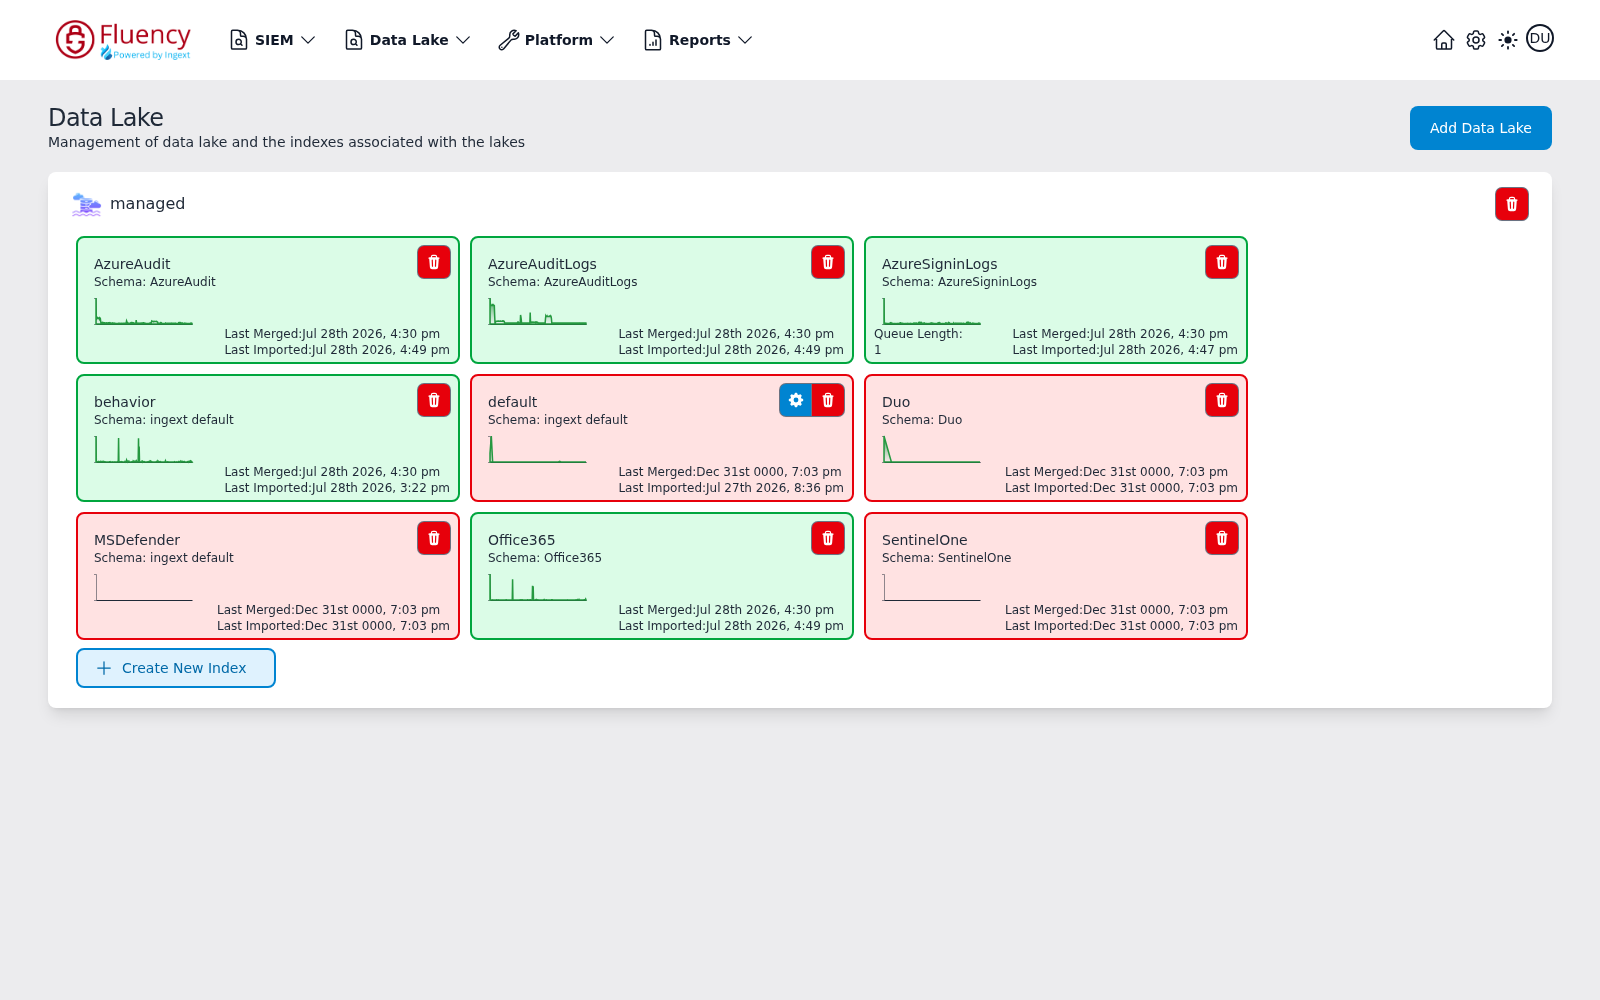
Page Layout
From top to bottom the page contains:
- A header with the page title Data Lake and the subtitle Management of data lake and the indexes associated with the lakes, with the Add Data Lake button on the right.
- One panel per data lake. The panel header shows the lake name (a demo lake is shown here) with a trash button at the panel's right edge.
- Inside the panel, a grid of index cards — one per index in the lake, listed alphabetically.
- A Create New Index button at the bottom of the lake panel.
Header Actions
Add Data Lake
Click Add Data Lake to open the Creating New Data Lake dialog, subtitled Creating a new self/ingext managed data lake:
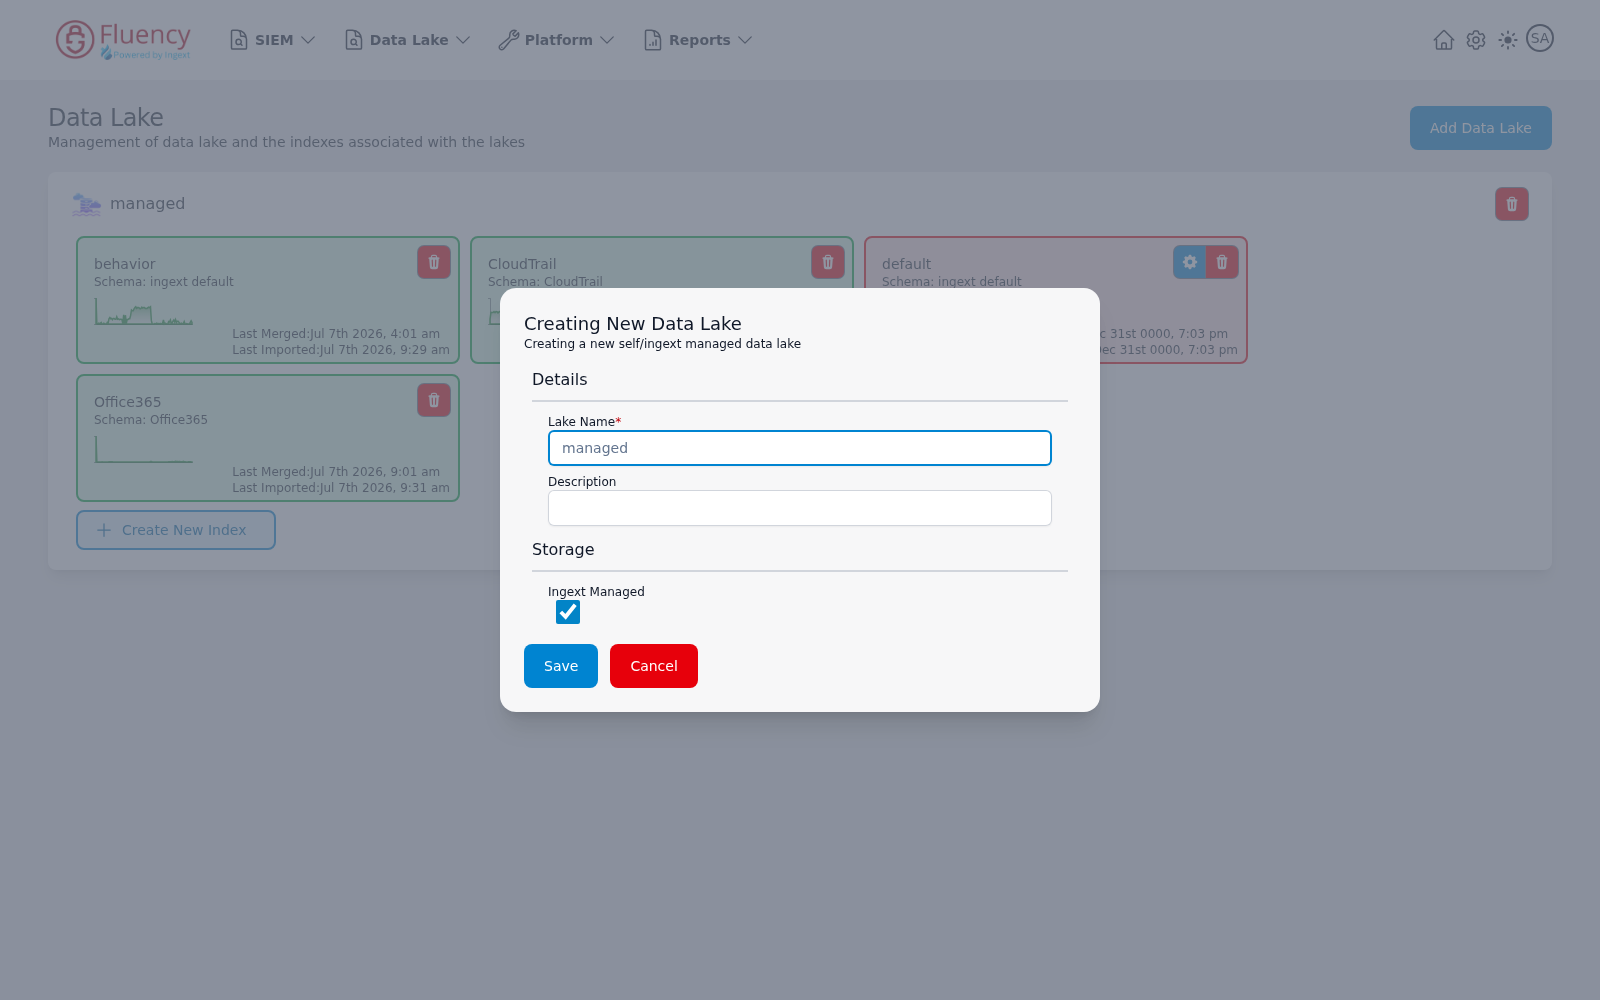
The dialog has two sections:
- Details — Lake Name (required) and an optional Description.
- Storage — an Ingext Managed checkbox (checked in this capture) that selects platform-managed storage.
Click Save to create the lake or Cancel to close without saving.
Data Lake Panel
Each lake panel groups the lake's indexes under the lake name. The trash button at the top right of the panel deletes the entire lake.
Delete a Data Lake
Click the panel's trash button to open the Confirm Data Lake Delete dialog:
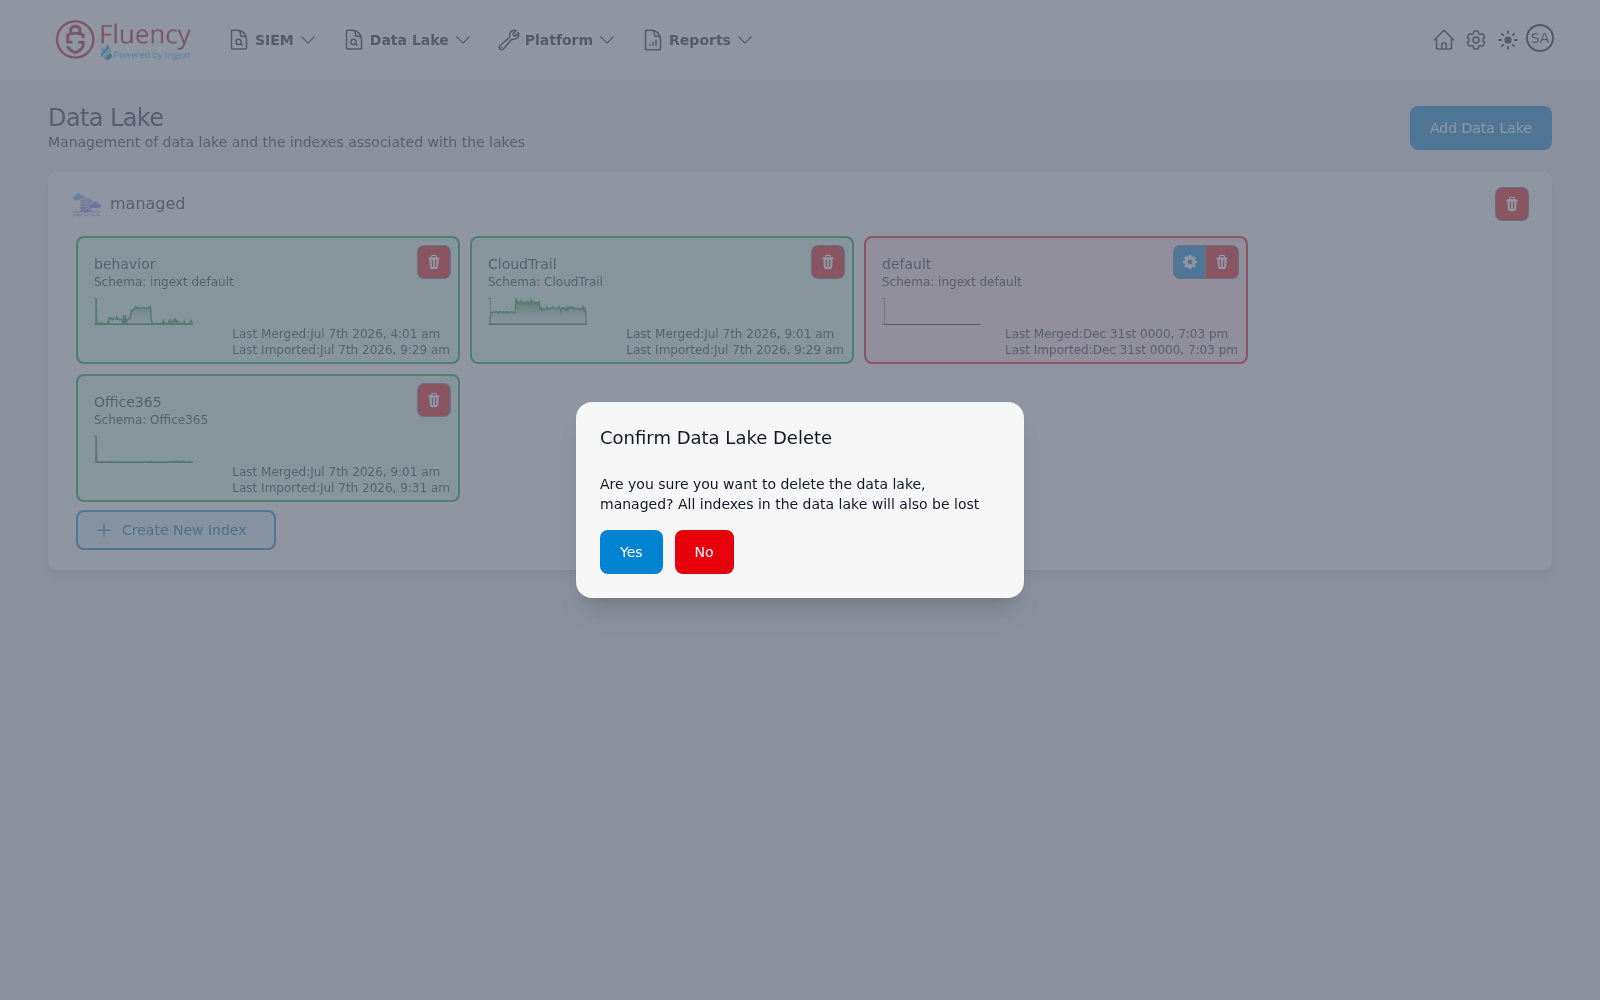
The dialog asks whether you are sure you want to delete the named data lake and warns that all indexes in the data lake will also be lost. Click Yes to delete or No to keep the lake.
Index Cards
Each card summarizes one index in the lake:
- The index name and the schema it uses (Schema: followed by the schema name).
- An activity sparkline of recent ingest volume.
- Last Merged and Last Imported timestamps.
- A Queue Length counter, shown only when events are waiting to be imported (the AzureSigninLogs card in this capture).
Card color reflects index state. A card is green once the index has been merged, and red while its Last Merged value is still the zero-date placeholder Dec 31st 0000 — meaning the index exists but has never been merged. A red card may still show a real Last Imported timestamp, as the default card does here: data has arrived but has not yet been merged into the index.
Every card has a red trash button. A card can also include a blue gear button (shown on the default card in this capture), which manages the index's virtual tables.
Virtual Tables
Click an index card's gear button to open the Virtual Tables dialog, subtitled View and manage virtual tables:
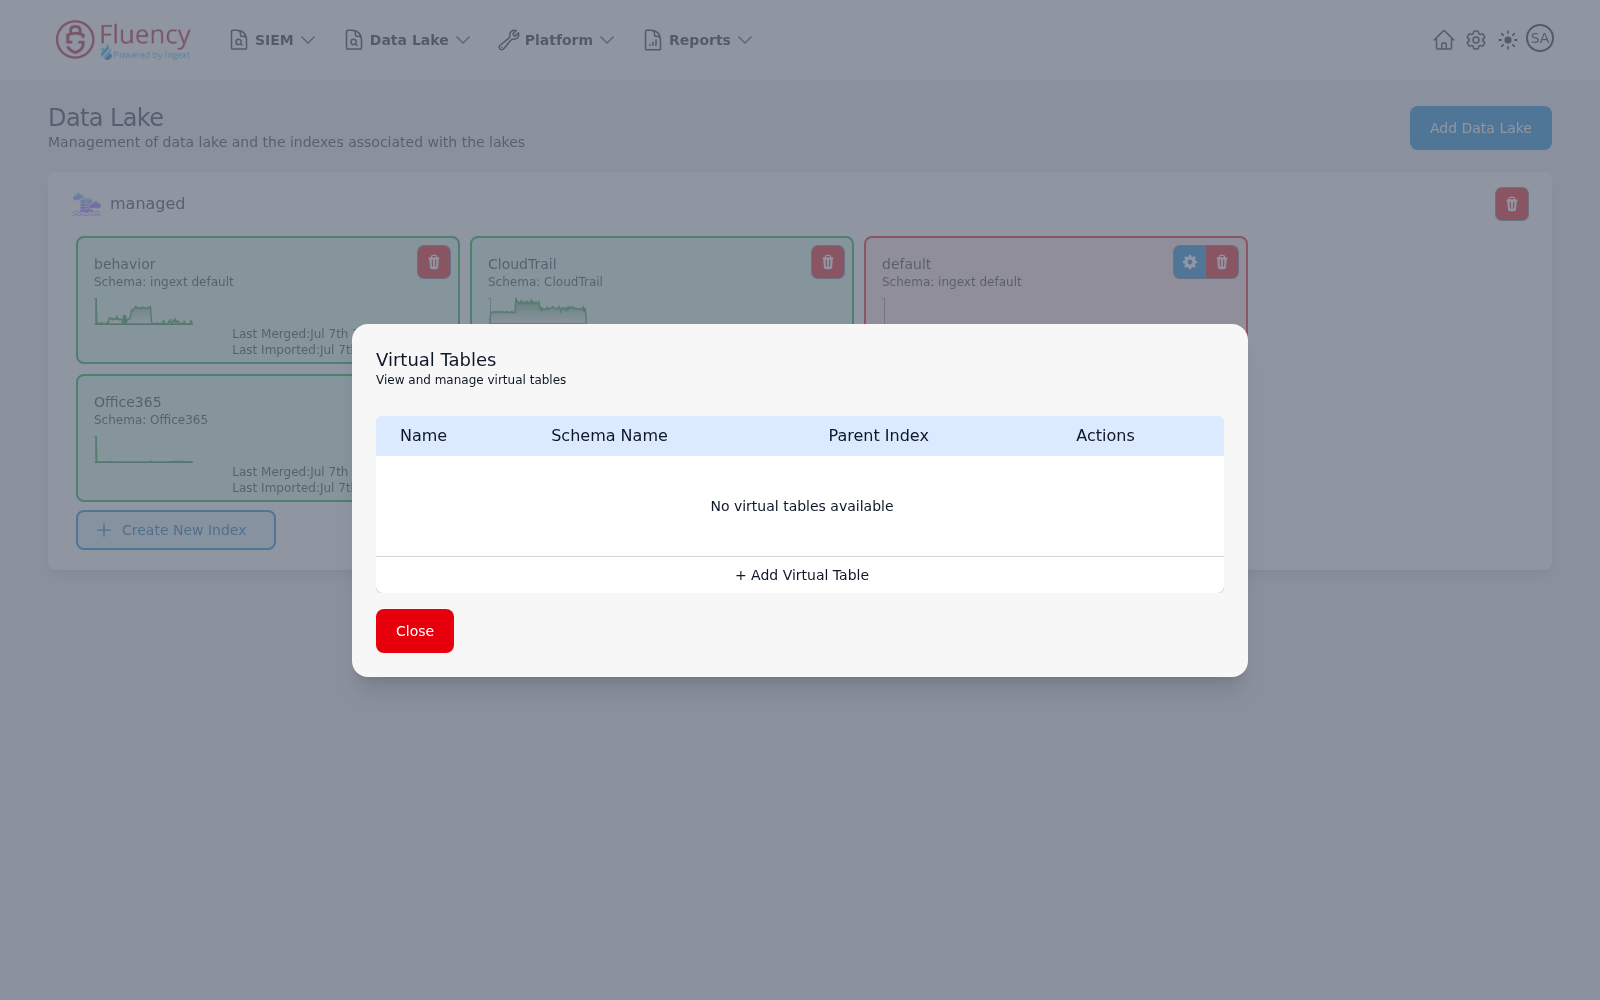
The dialog lists the index's virtual tables in a table with Name, Schema Name, Parent Index, and Actions columns. When none exist, it reads No virtual tables available. Click + Add Virtual Table to define one, or Close to dismiss the dialog.
Delete an Index
Click an index card's trash button to open the Confirm Delete Index dialog:
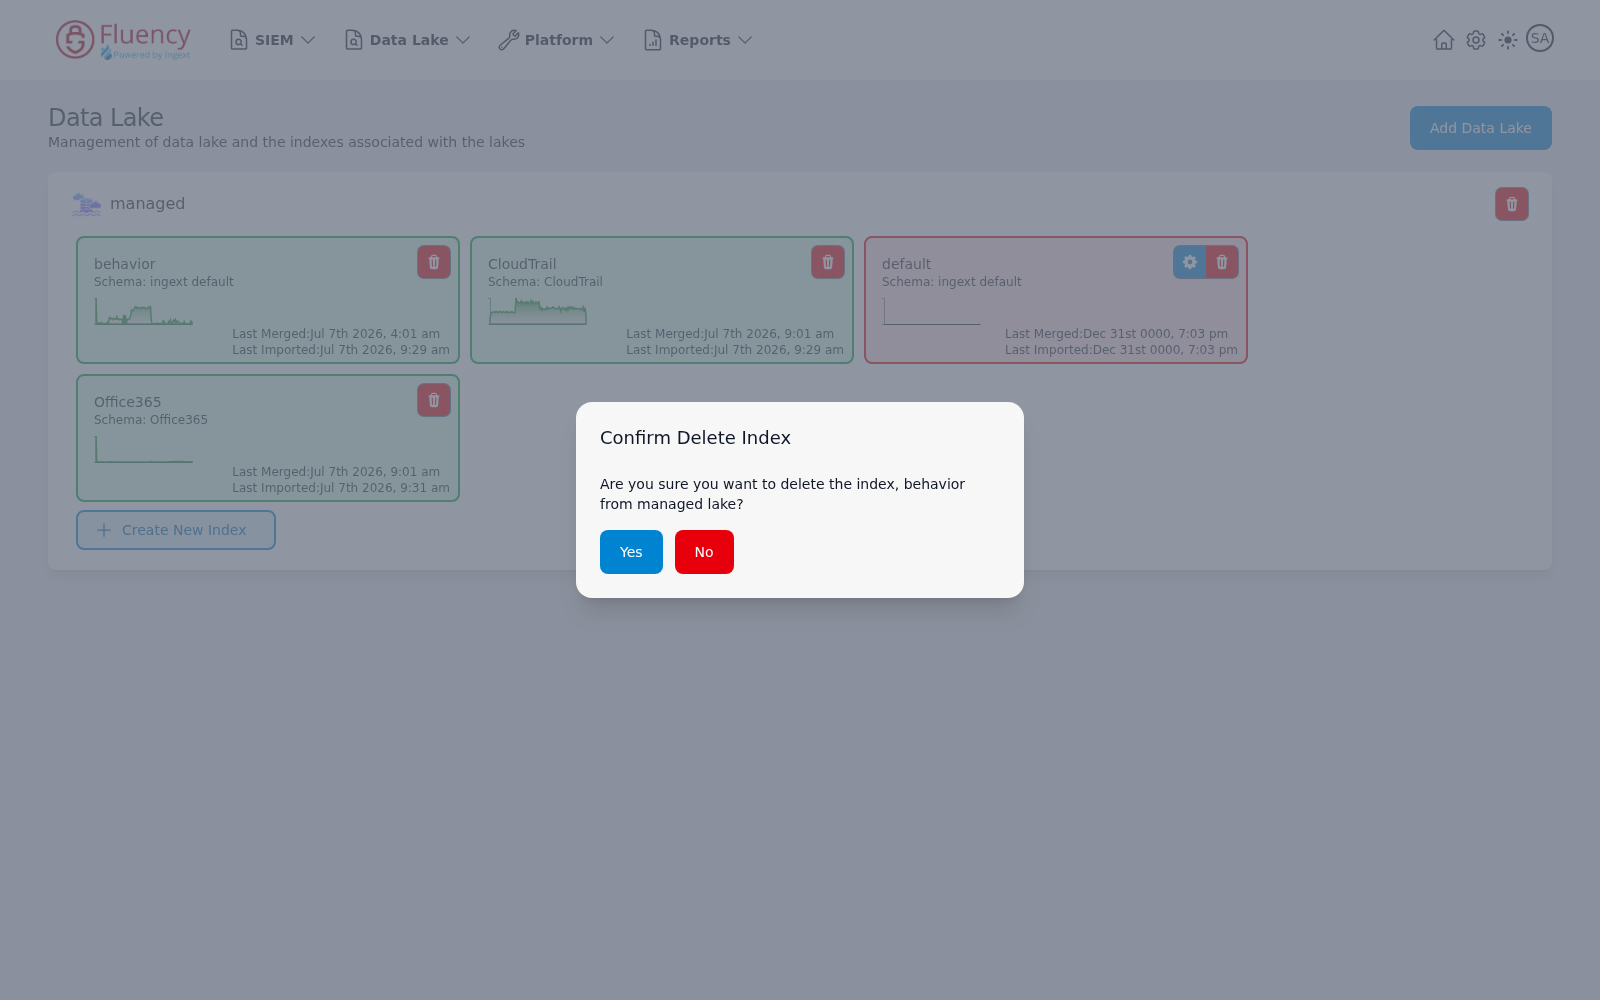
The dialog asks whether you are sure you want to delete the named index from the named lake. Click Yes to delete the index or No to keep it. The same confirmation appears for whichever index card's trash button you click, naming that index.
Create New Index
Click Create New Index at the bottom of the lake panel to add a new index to the data lake.