Entity Tables
The Entity Tables page lists the account's EntityInfo tables: lookup tables of entity values, such as event IDs, reason codes, watchlists, and translations, that enrich events and that behavior rules refer to. From here you can create a table, open one to work with its entries, edit a table's description and fields, and delete a table.
Menu path: Configuration → Entity Tables · URL path: /v2/configuration/entity-tables
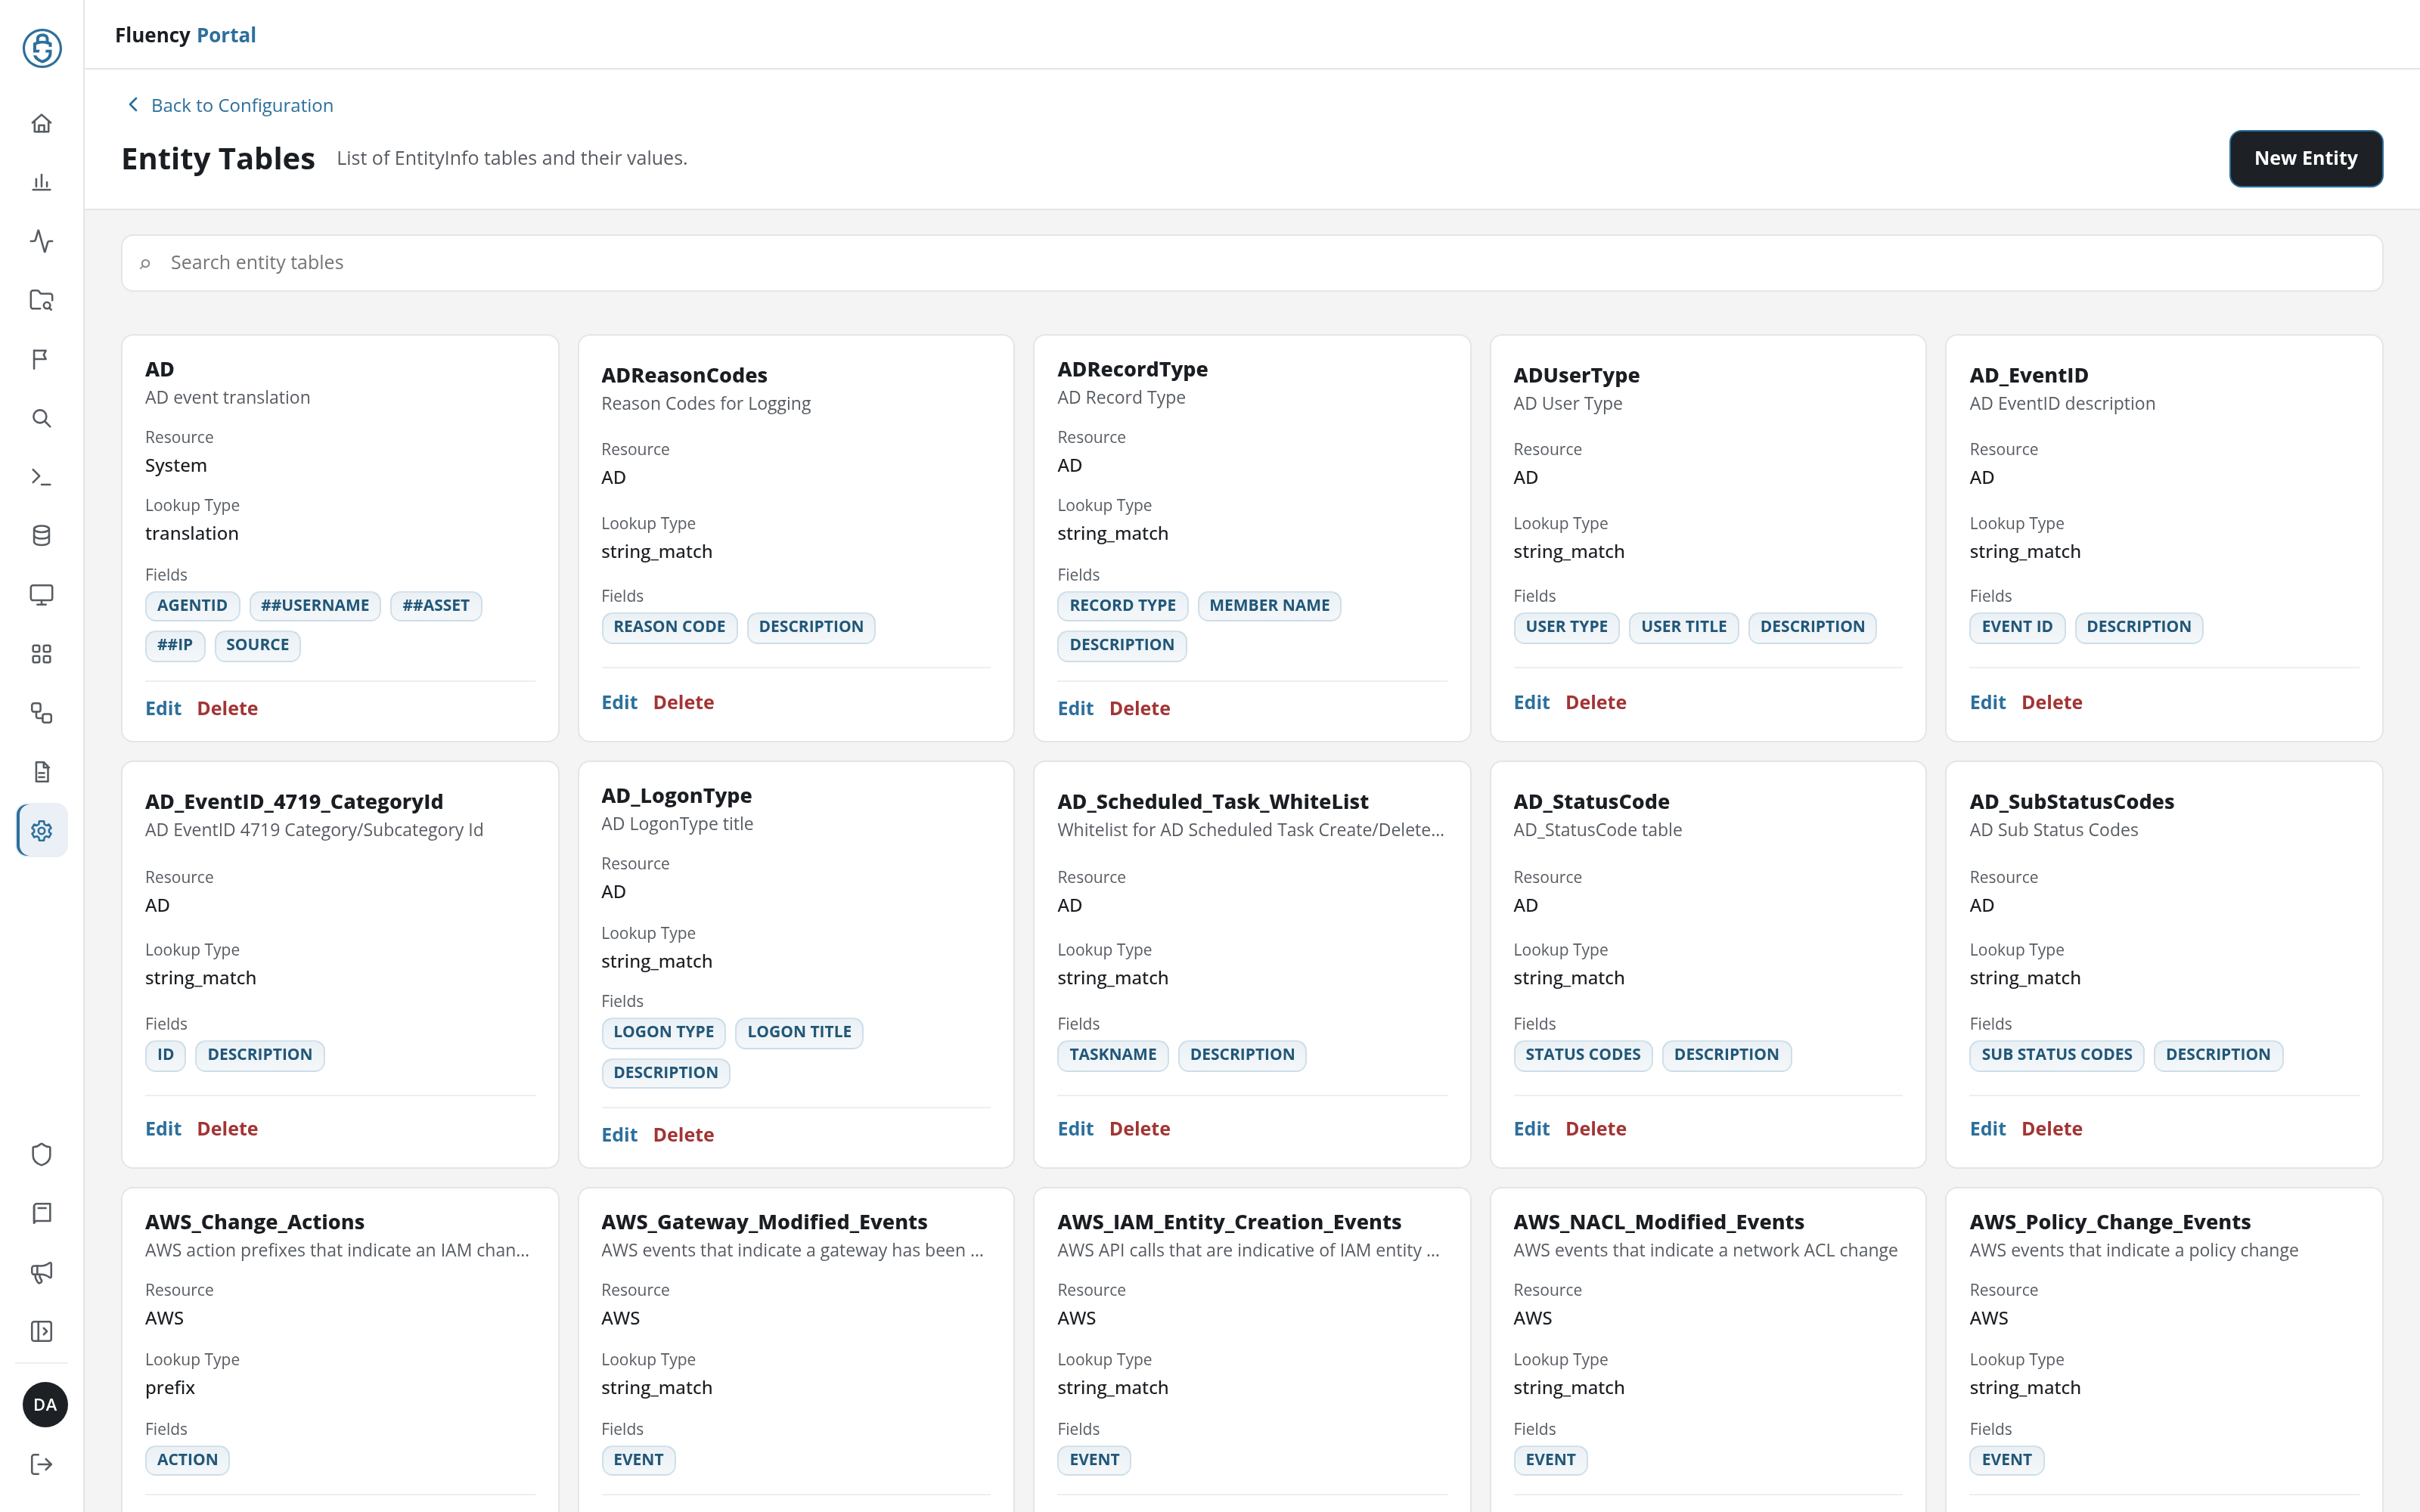
Page Layout
- Header: a Back to Configuration link above the title Entity Tables and the subtitle List of EntityInfo tables and their values., with the New Entity button on the right.
- Search field: Search entity tables, which narrows the cards below to the matching tables; when none match, the page says so in place of the cards.
- Table cards: one card per table, in a grid.
Table Cards
Each card describes one table:
- Name and, beneath it, the table's description (a dash when it has none).
- Resource: the source the table belongs to, for example AD, AWS, or System. A table created with New Entity shows a dash.
- Lookup Type: how values are matched against the table:
string_match,prefix,domain,CIDR, ortranslation. - Fields: the table's columns, as chips (for example REASON CODE and DESCRIPTION, or a translation table's AGENTID, ##USERNAME, ##ASSET, ##IP, and SOURCE).
- Edit and Delete: edit or delete the table.
Open a Table
Click a card to open that table's entries. The URL gains the table's name (?entity=ADReasonCodes, for example), the cards shrink to a single row at the top with the open table outlined, and the header's New Entity button is replaced by Close, which returns to the card grid.
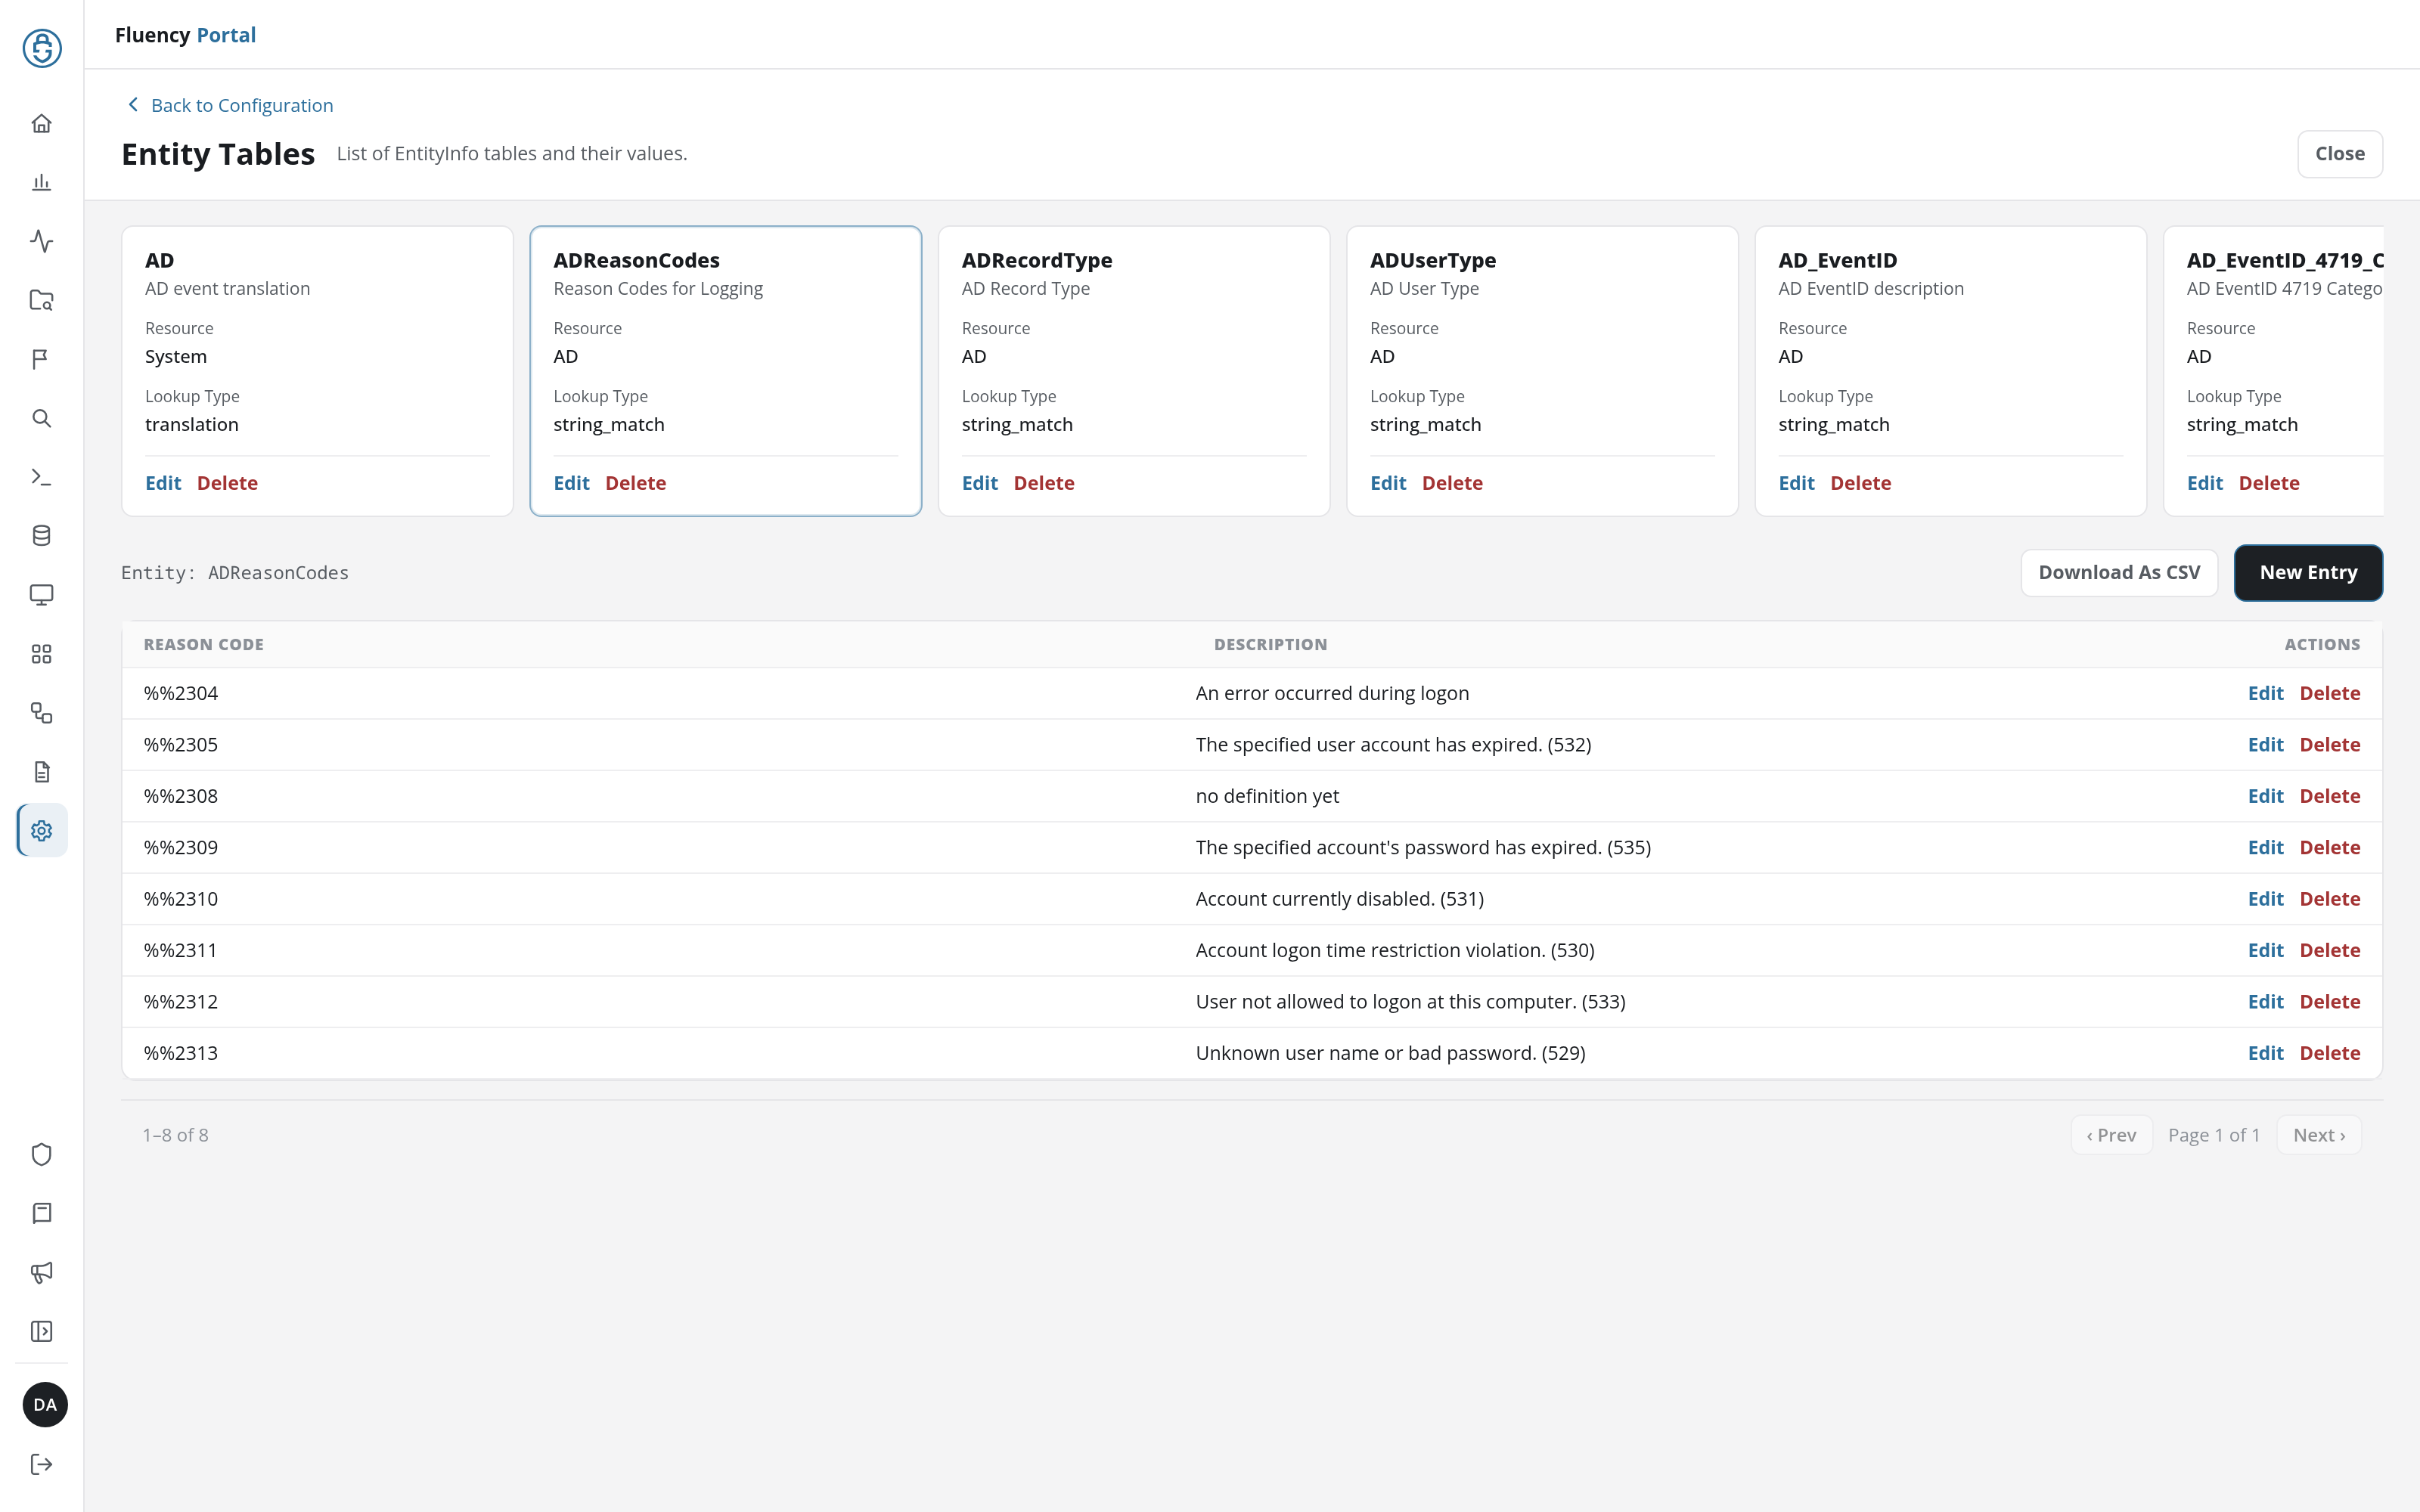
Below the cards:
- Entity: followed by the open table's name, on the left.
- Download As CSV: downloads the table's entries as a CSV file named after the table (
<table>.csv): a header row of the field names, then one row per entry, each value in double quotes. - New Entry: opens the Add Entry dialog.
- The entries table, with one column per field and an ACTIONS column holding Edit and Delete for each entry. A table with no entries reads No entries in this table.
- A footer with the range shown (for example 1–8 of 8), the page number, and ‹ Prev / Next › buttons.
Add Entry
New Entry opens the Add Entry dialog: Enter the entity entry information to add to this entity list. It has one required text field per field of the table; for the translation table pictured, AgentID, ##username, ##asset, ##ip, and Source. The first field is the entry's key: no two entries in a table can share it.
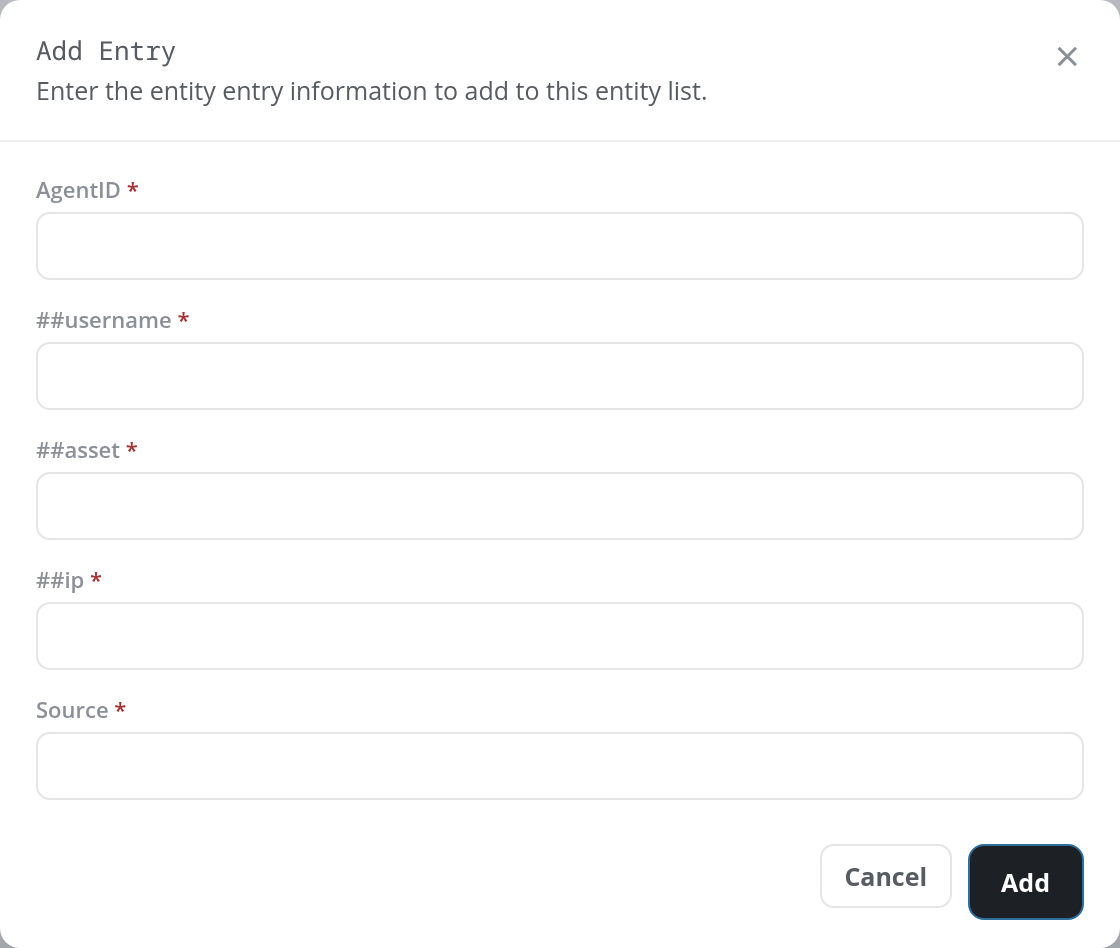
Click Add to add the entry, or Cancel to close the dialog.
- With fields left empty, Add lists every empty one in a single red message at the top of the dialog: <Field> is required, once per empty field, separated by full stops.
- An entry whose first field matches an existing entry's is refused with an error, and the dialog stays open.
- Once the entry is added, the dialog closes, the entry appears in the table, and a green notice reads Entry added successfully to <table>.
Edit an Entry
An entry's Edit opens the Update Entry dialog with the entry's values filled in. The first field (the entry's key, such as Reason Code) is read-only; the other fields can be changed.
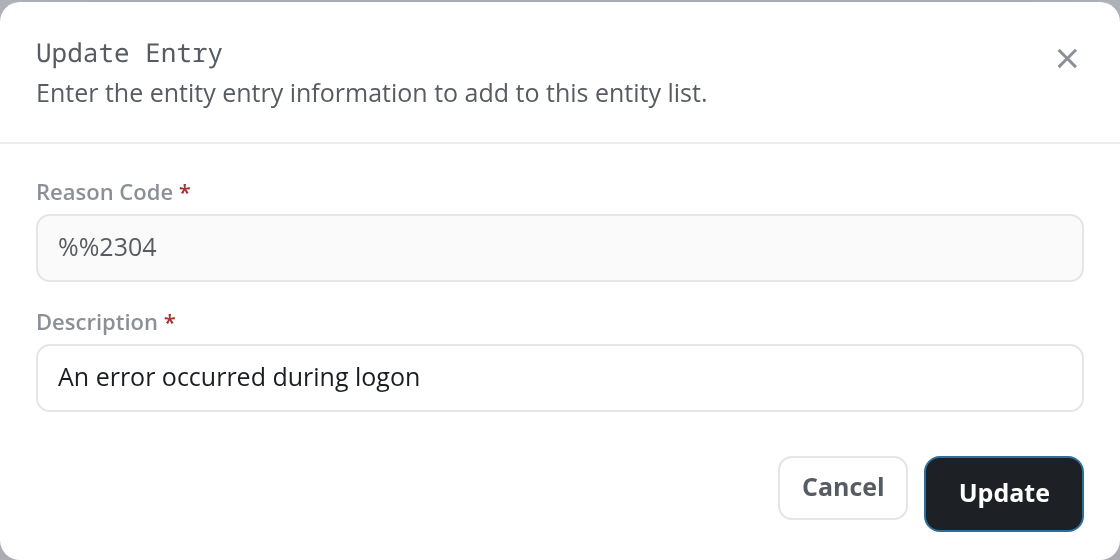
Click Update to save the entry, or Cancel to close without saving. Every field must still be filled in: a field emptied here is reported as <Field> is required. Once the entry is saved, the dialog closes and a green notice confirms the update.
An entry's Delete removes it from the table. It first asks for confirmation (Delete Entry), naming the table; once the entry is removed, a green notice reads Entry deleted successfully from <table>.
New Entity
Click New Entity to open the Add Entity dialog: Enter the Entity information to add to the system.
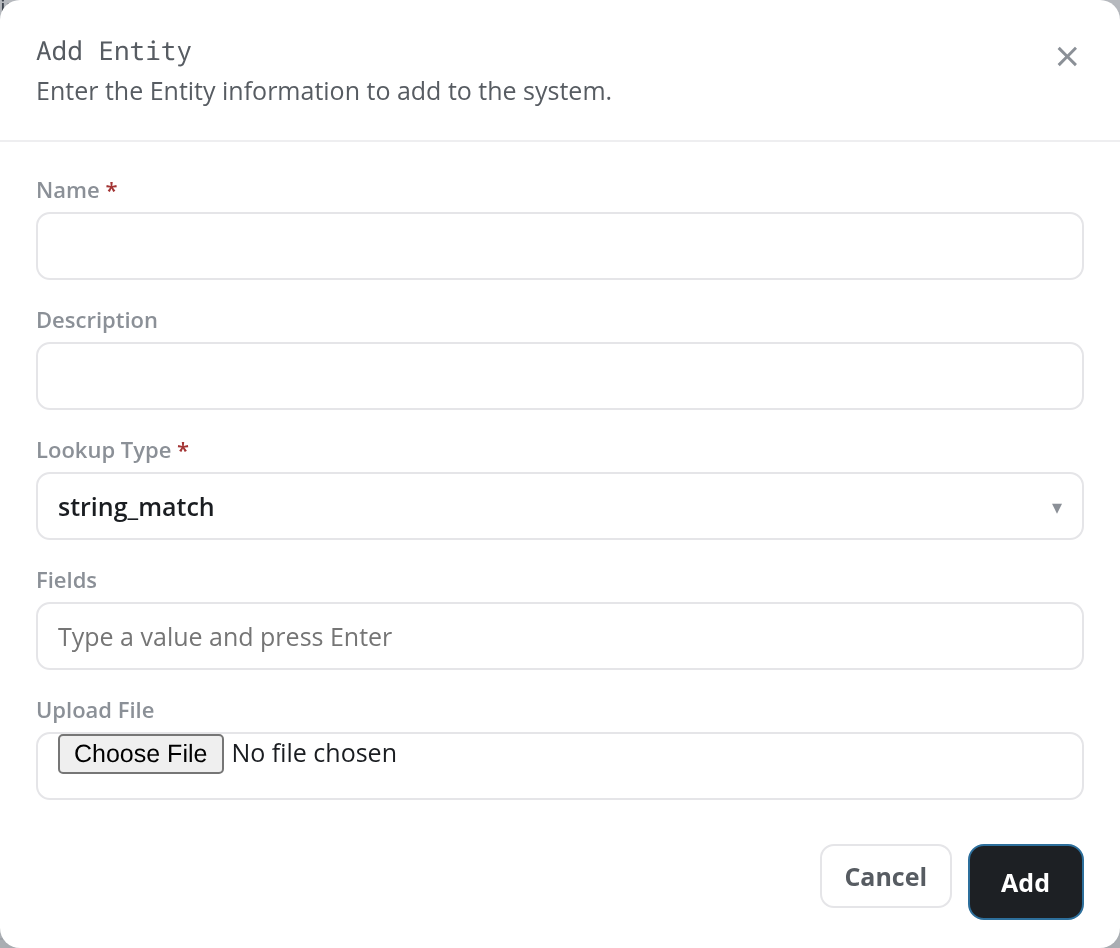
- Name: required (Name is required). The name of an existing table is refused with duplicate entityinfo name.
- Description: optional.
- Lookup Type: required drop-down, preset to
string_match. The options arestring_match,prefix,domain,CIDR, andtranslation. - Fields: the table's columns: type a field name and press Enter to add it as a chip. A chip's × removes it, after a confirmation. The first field is the key of the table's entries. At least one field is required (At least one field is required) unless a file is chosen under Upload File.
- Upload File: a file chooser for a
.csvfile of the table's entries. Choosing a file replaces Fields with a File Preview table of the file: its header row becomes the table's fields, and every other row an entry.
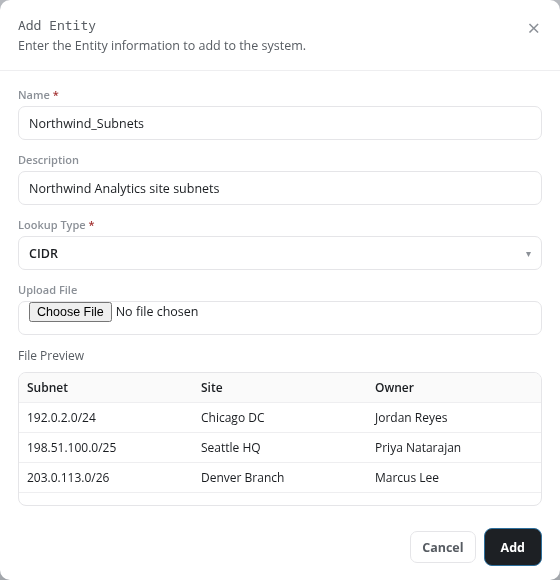
Click Add to create the table, or Cancel to close the dialog. Validation messages appear in red at the top of the dialog, one at a time. Once the table is created, the dialog closes, its card appears in the grid, and a green notice reads Entity table added successfully.
Edit a Table
A card's Edit opens the Update Entity dialog with the table's settings filled in.
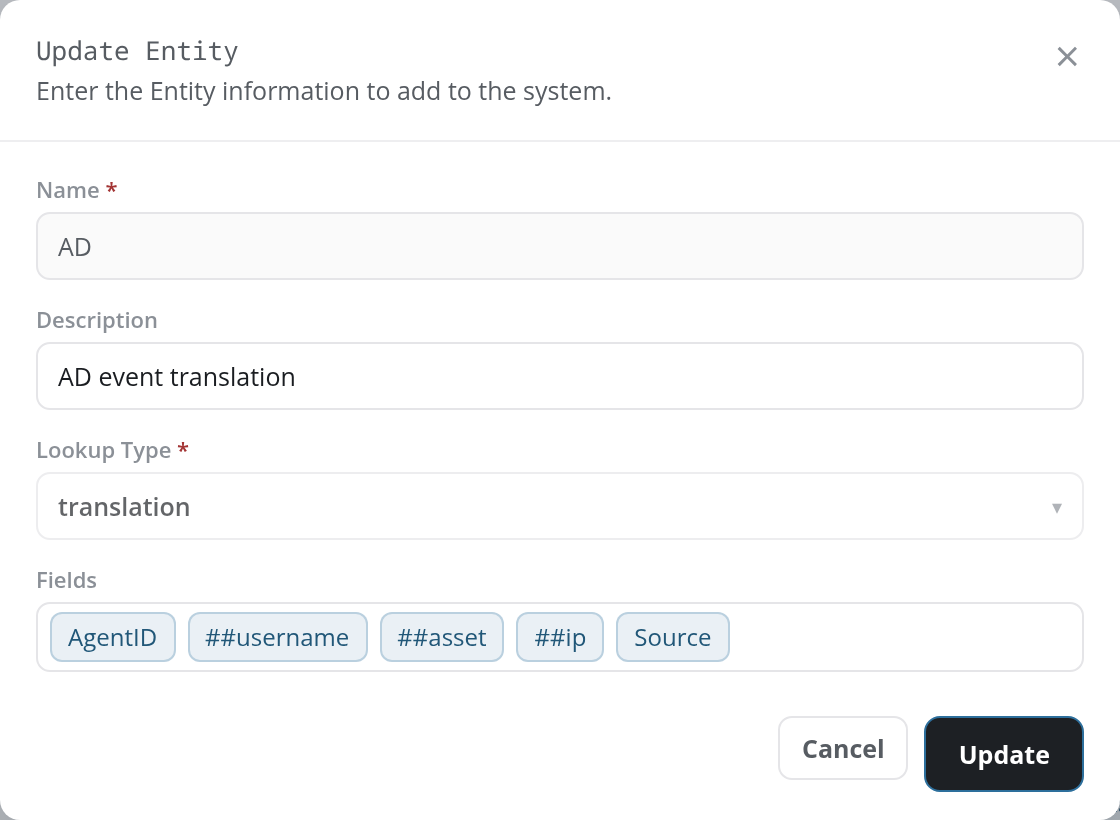
The Name is read-only and the Lookup Type cannot be changed; the Description can be edited, and Fields shows the table's columns as read-only chips, without an ×. There is no Upload File control, so a table's fields and file are set only when it is created; its entries are then changed one at a time, as described under Open a Table. Click Update to save the changes, or Cancel to close without saving. Once the table is saved, the dialog closes and a green notice reads Entity table updated successfully.
Delete a Table
A card's Delete asks for confirmation (Delete Entity Table), naming the table, before it deletes the table. Once the table is deleted, its card leaves the grid and a green notice reads <table> deleted successfully from entity tables.