Notifications
The Platform Notifications page lists the notification endpoints and rules configured for the platform. Endpoints define where notifications are delivered — by Email or to Slack — and each is backed by an FPL action.
Menu path: Platform → Administration → Notifications · URL path: /platform/notifications
Task guide: Notifications — deciding what to deliver where.
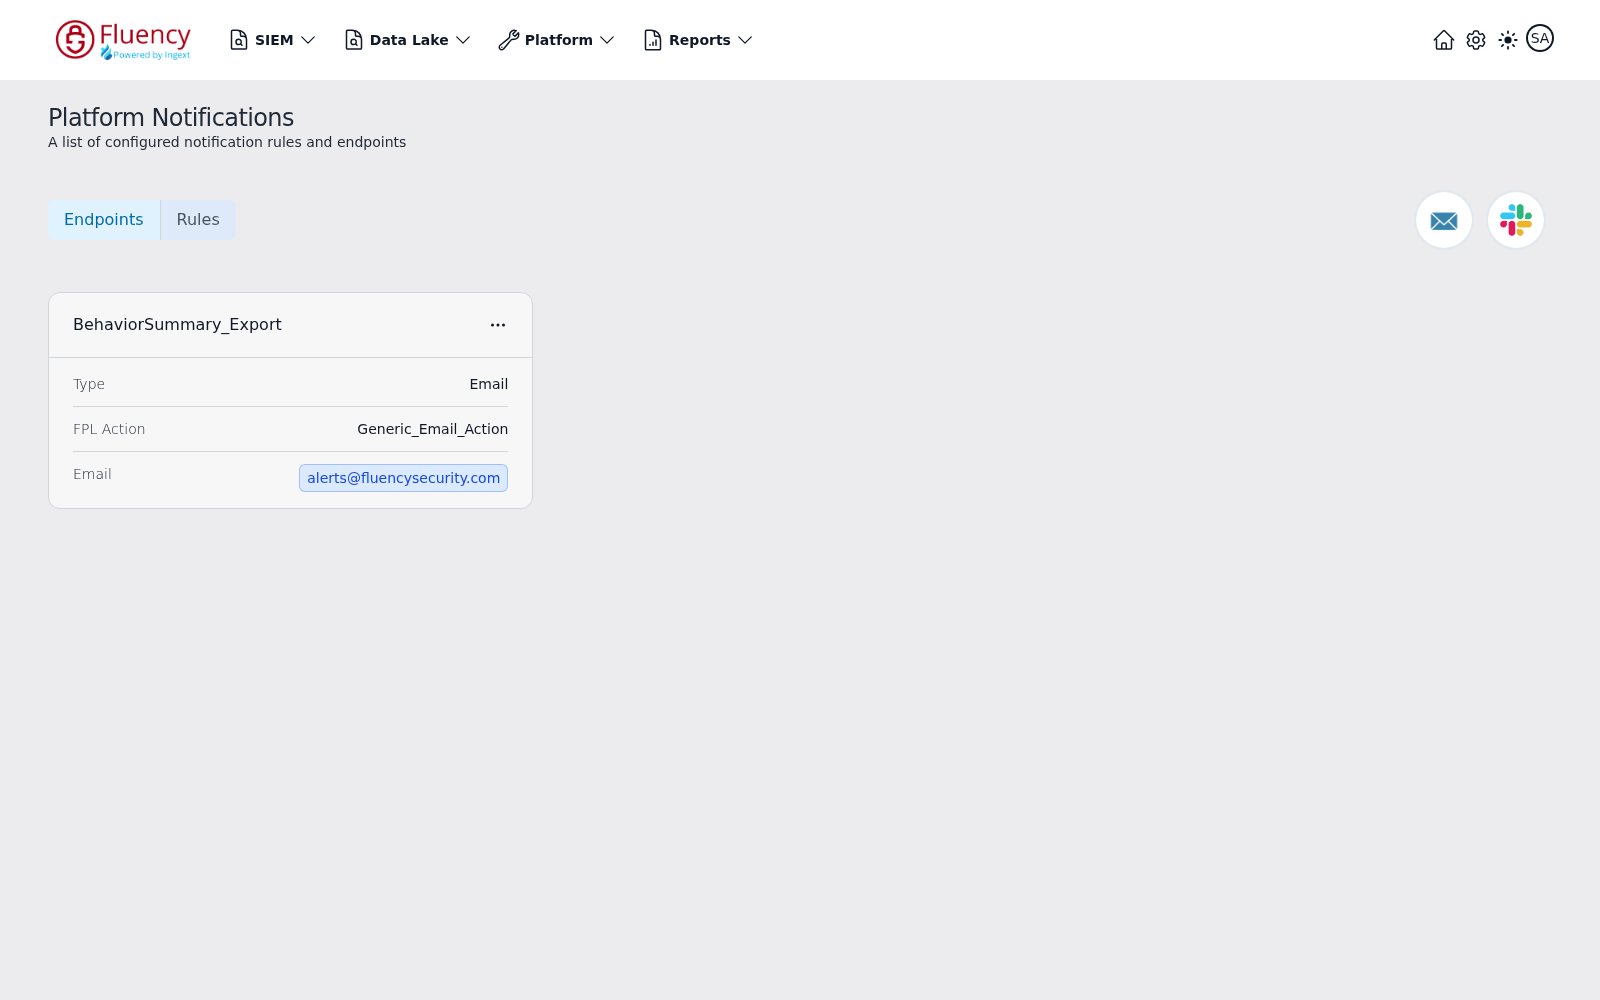
Page Layout
The header shows the title Platform Notifications with the subtitle A list of configured notification rules and endpoints. Below it, an Endpoints / Rules tab selector sits on the left, and two round add-endpoint icon buttons — an envelope icon and a Slack icon — sit on the right. The configured items appear underneath as cards.
Endpoints and Rules Tabs
- Endpoints (shown by default) — lists the configured notification endpoints as cards, with the two add-endpoint icon buttons on the right.
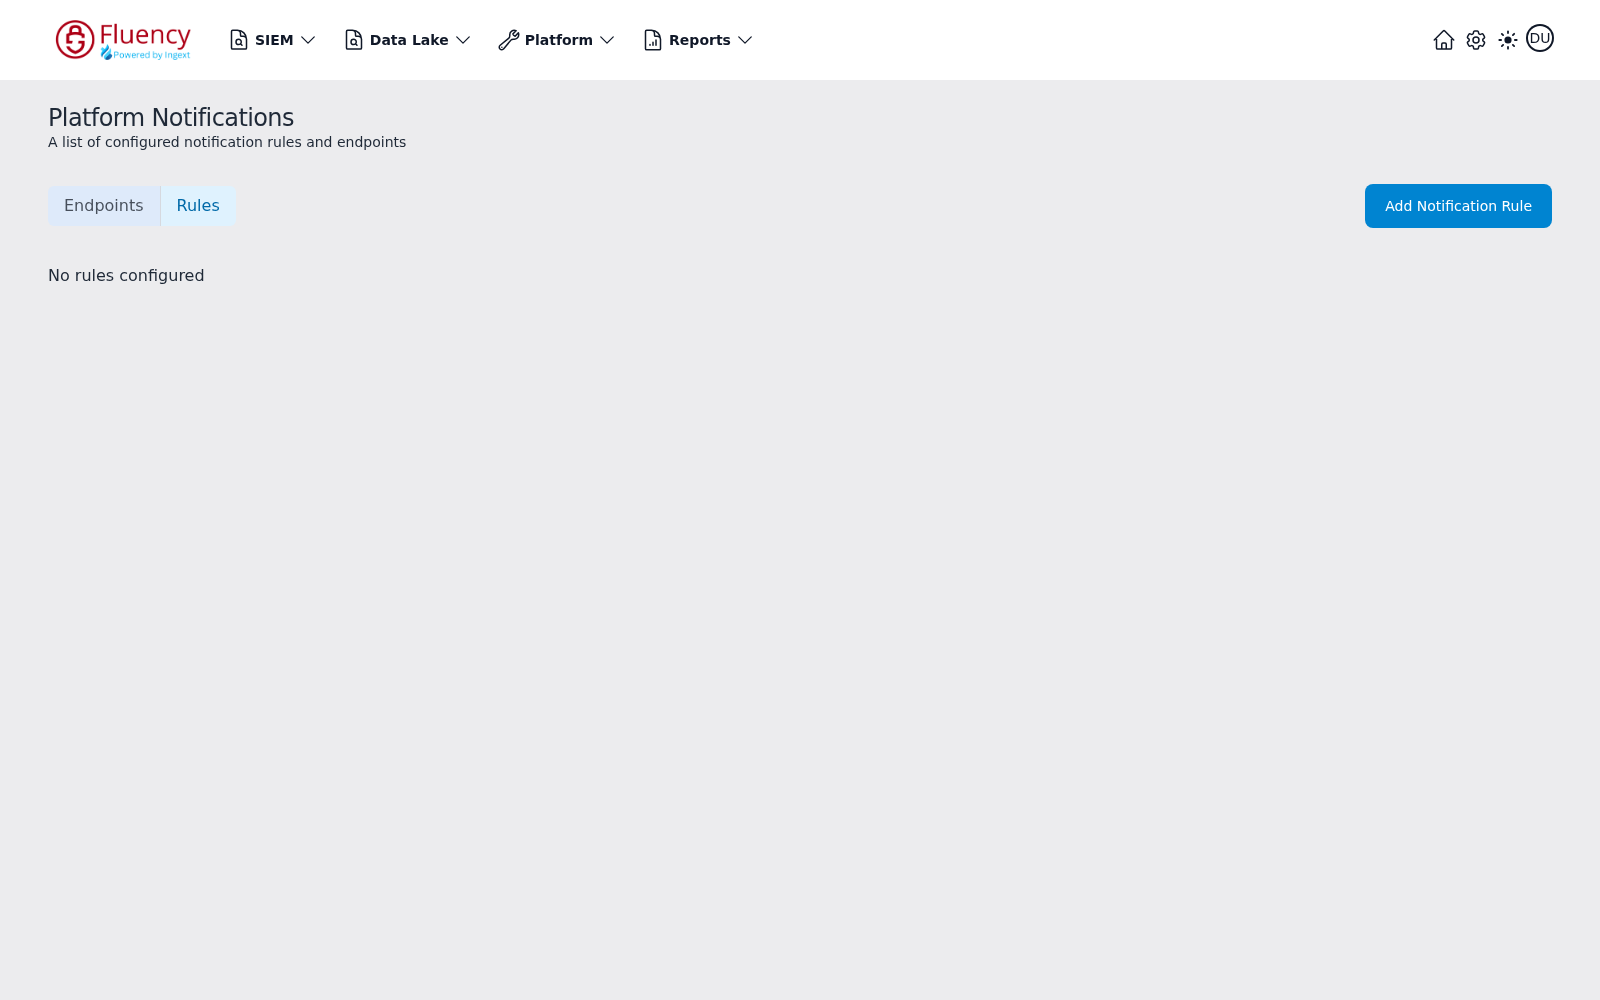
- Rules — switches to the notification rules list and replaces the icon buttons with an Add Notification Rule button. See Notification Rules below.
Add Endpoint Buttons
The two round icon buttons on the right each open the Add Notification Endpoint dialog, preset to a delivery type.
Add an Email Endpoint
Click the envelope icon button to open the Add Notification Endpoint dialog with Type set to Email.
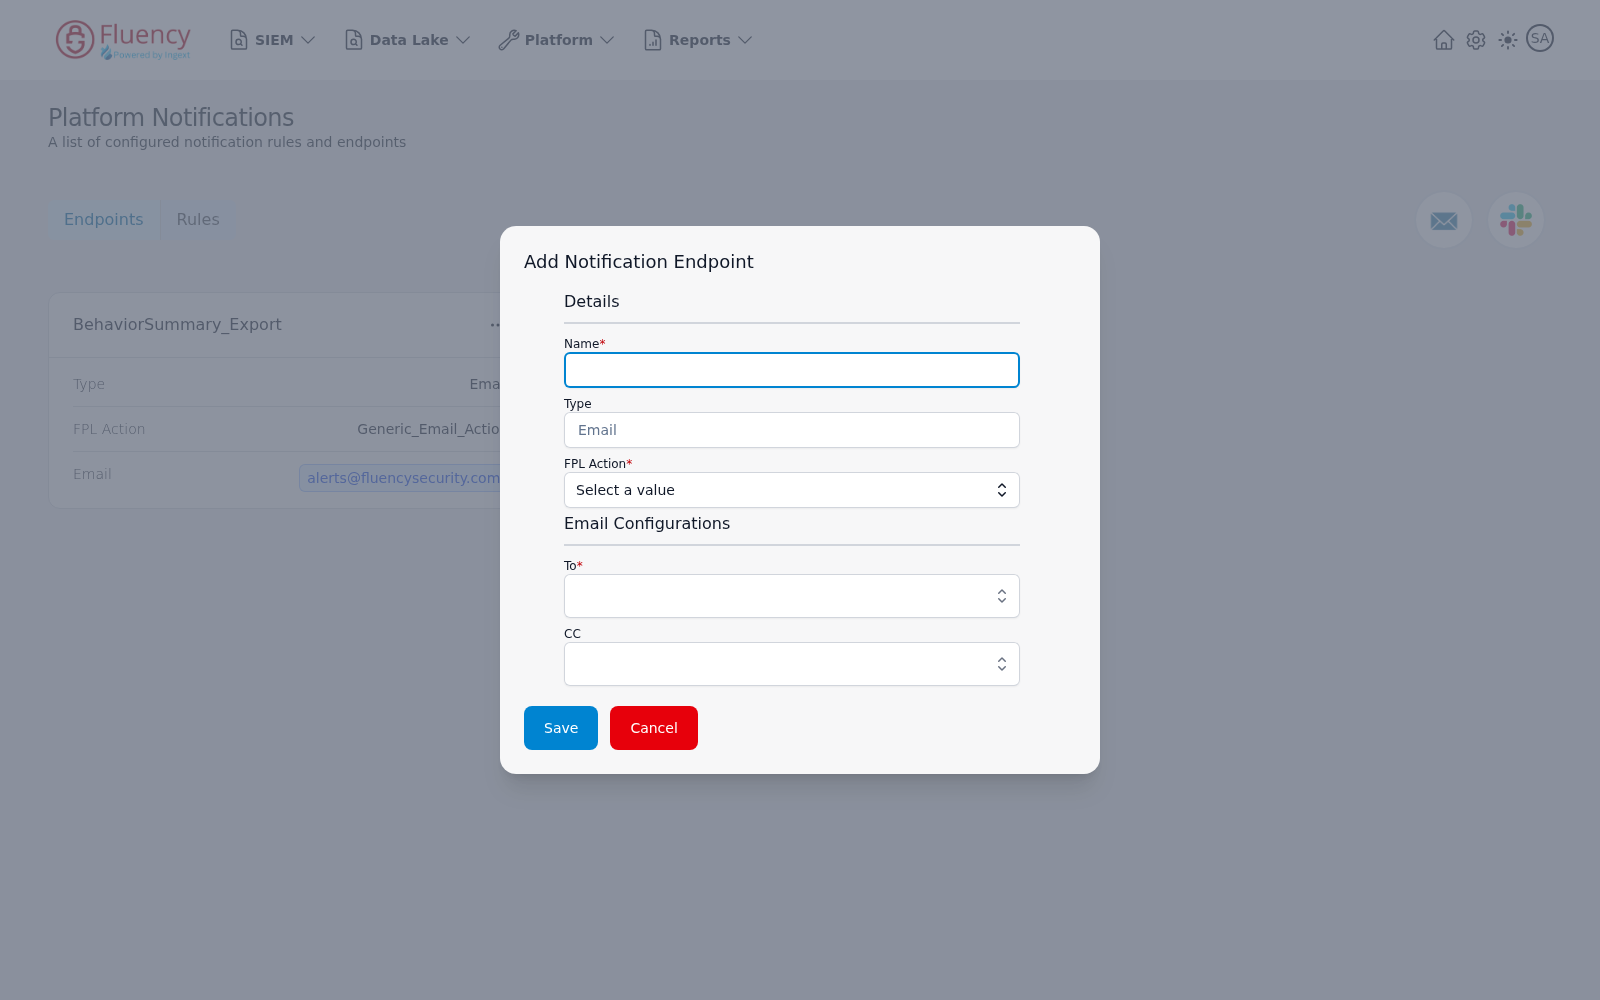
The dialog has two sections:
- Details
- Name (required)
- Type — fixed to Email
- FPL Action (required) — a Select a value drop-down
- Email Configurations
- To (required) — recipient selection field
- CC — additional recipient selection field
Click Save to create the endpoint or Cancel to close the dialog.
Add a Slack Endpoint
Click the Slack icon button to open the same Add Notification Endpoint dialog with Type set to Slack.
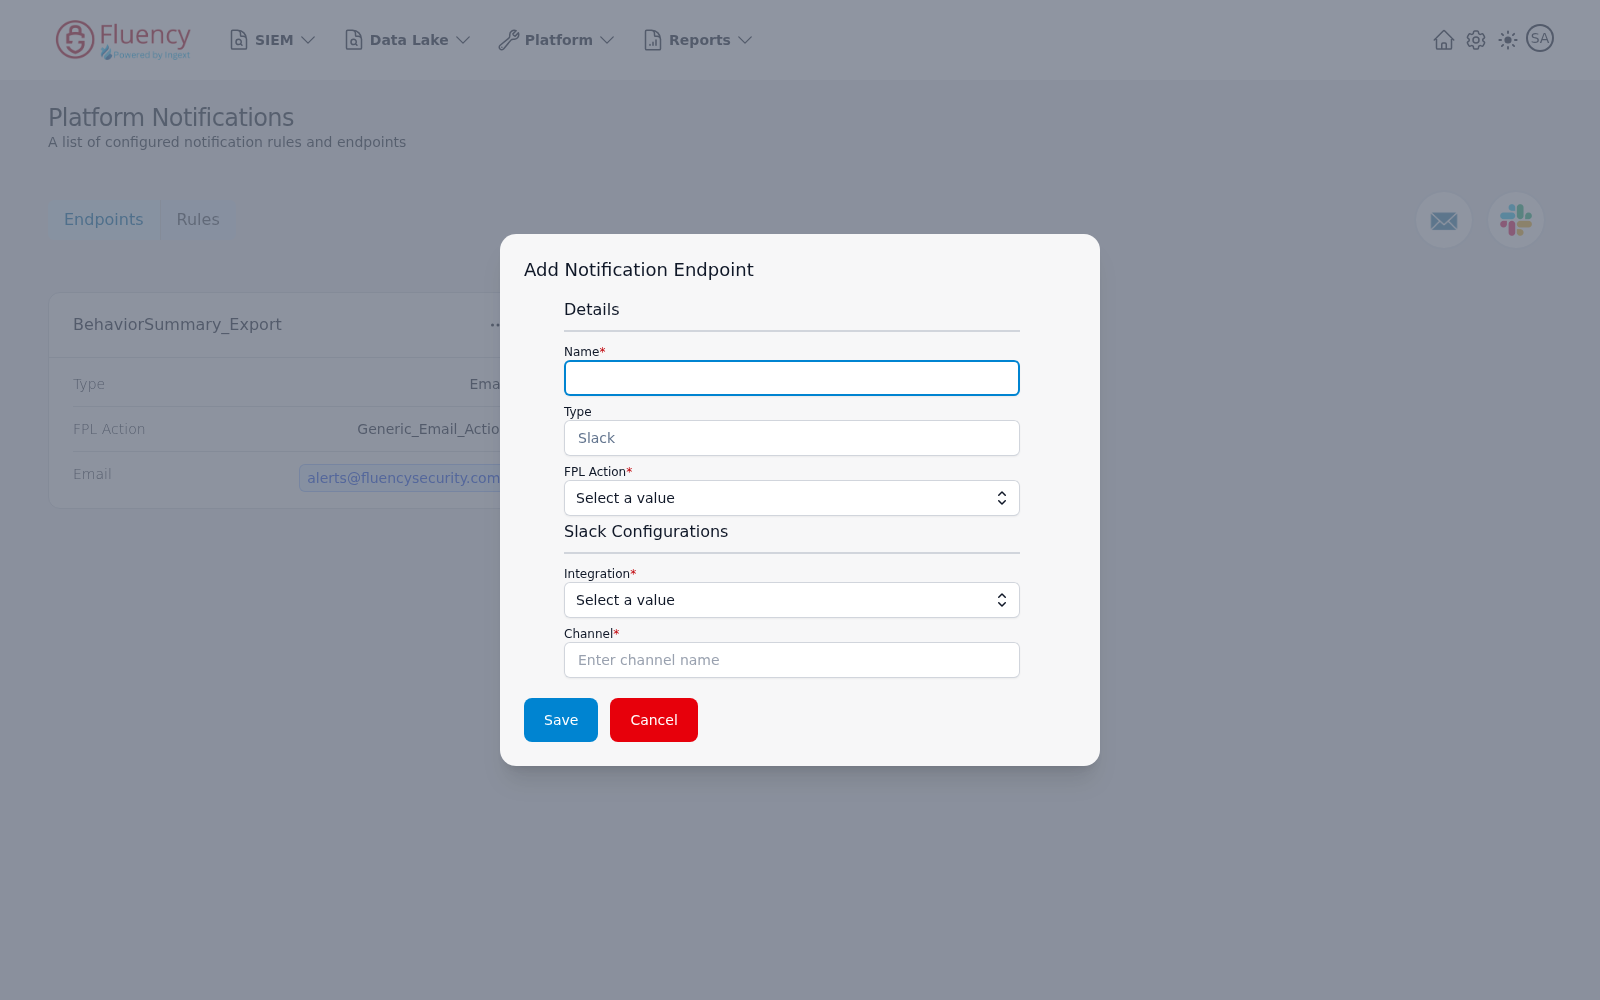
- Details
- Name (required)
- Type — fixed to Slack
- FPL Action (required) — a Select a value drop-down
- Slack Configurations
- Integration (required) — a Select a value drop-down of configured Slack integrations
- Channel (required) — a text field with the placeholder Enter channel name
Click Save to create the endpoint or Cancel to close the dialog.
Endpoint Cards
Each configured endpoint appears as a card. The card header shows the endpoint's name and an options button (...); the body lists the endpoint's properties. For an Email endpoint these are:
- Type — the delivery type, such as Email.
- FPL Action — the FPL action that sends the notification.
- Email — the recipient address, shown as a tag.
Edit an Endpoint
Click a card's body to open the Edit Notification Endpoint dialog, which has the same fields as the add dialog, pre-filled with the endpoint's current values. The Type field is read-only; the name, FPL action, and delivery configuration can be changed.
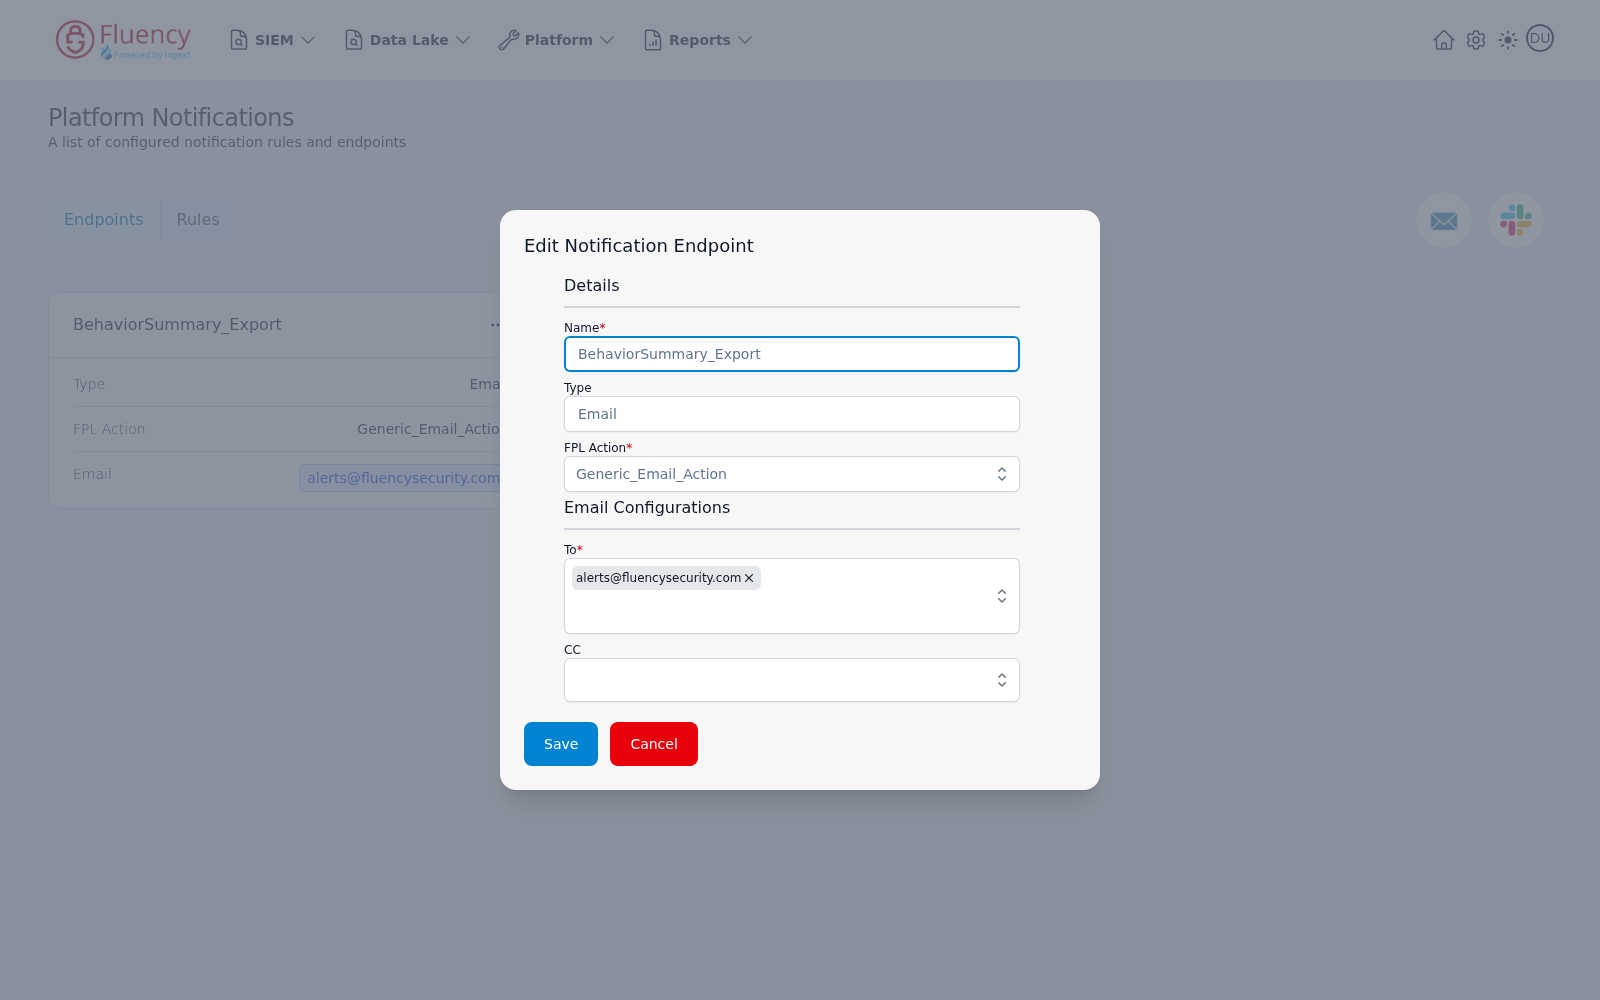
Click Save to apply the changes or Cancel to close the dialog.
Endpoint Options Menu
Click the options button (...) in a card's header to open the endpoint's menu.
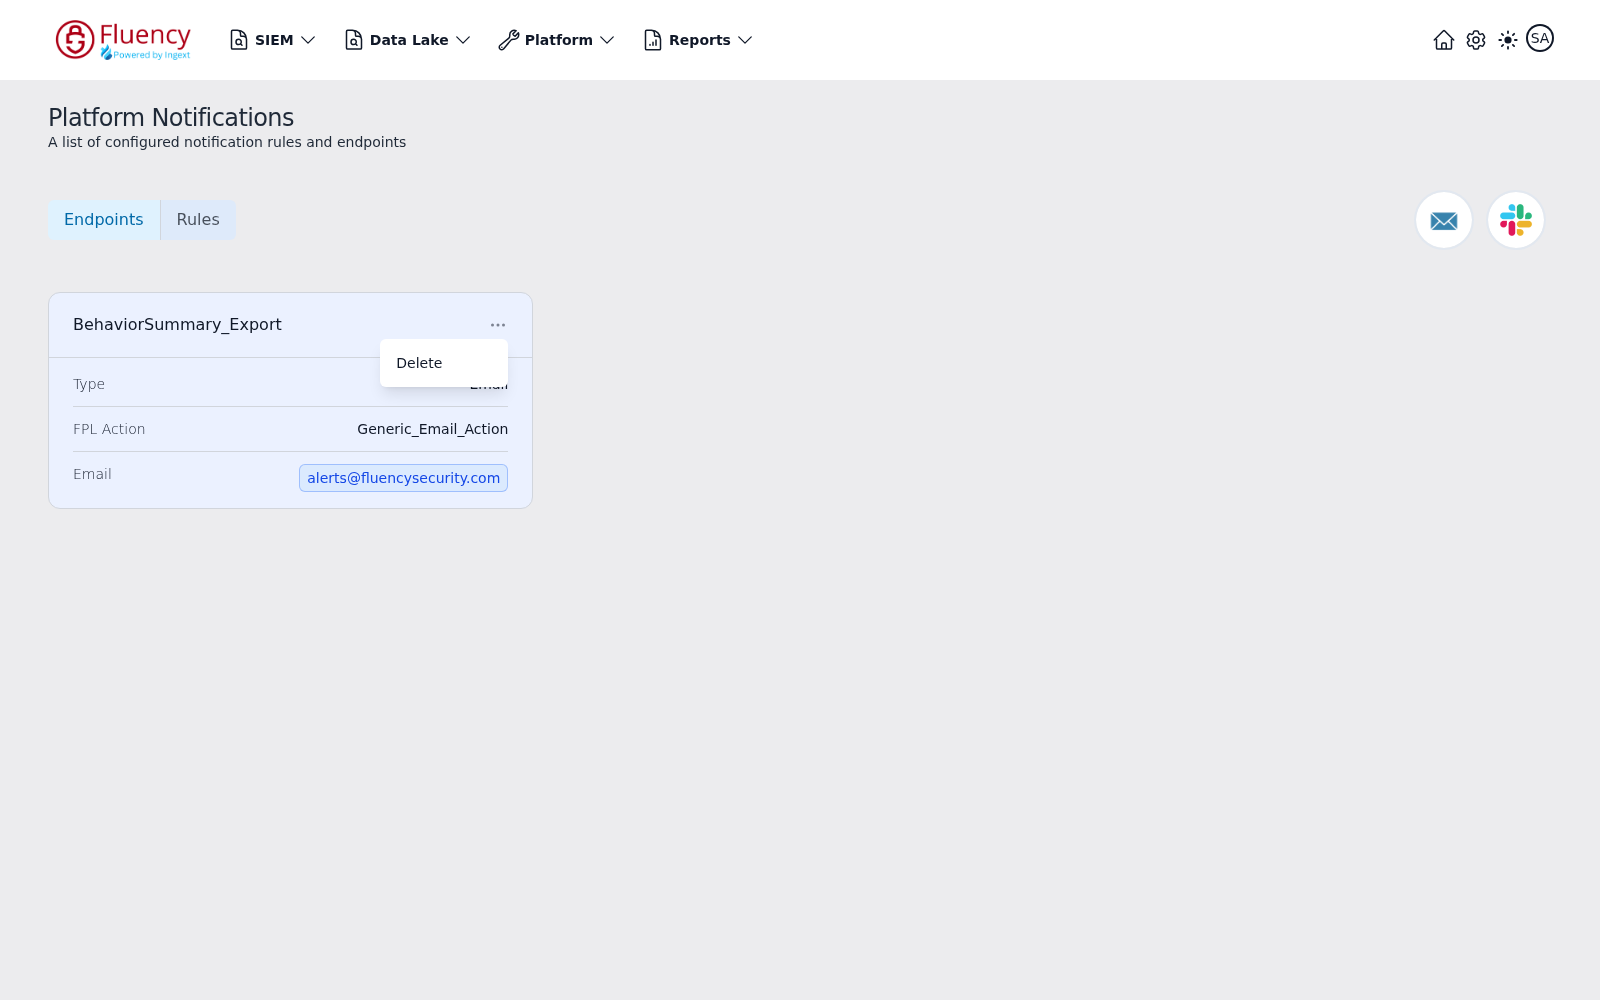
The menu contains a single option:
- Delete — opens a confirmation dialog before removing the endpoint.
Delete Endpoint Confirmation
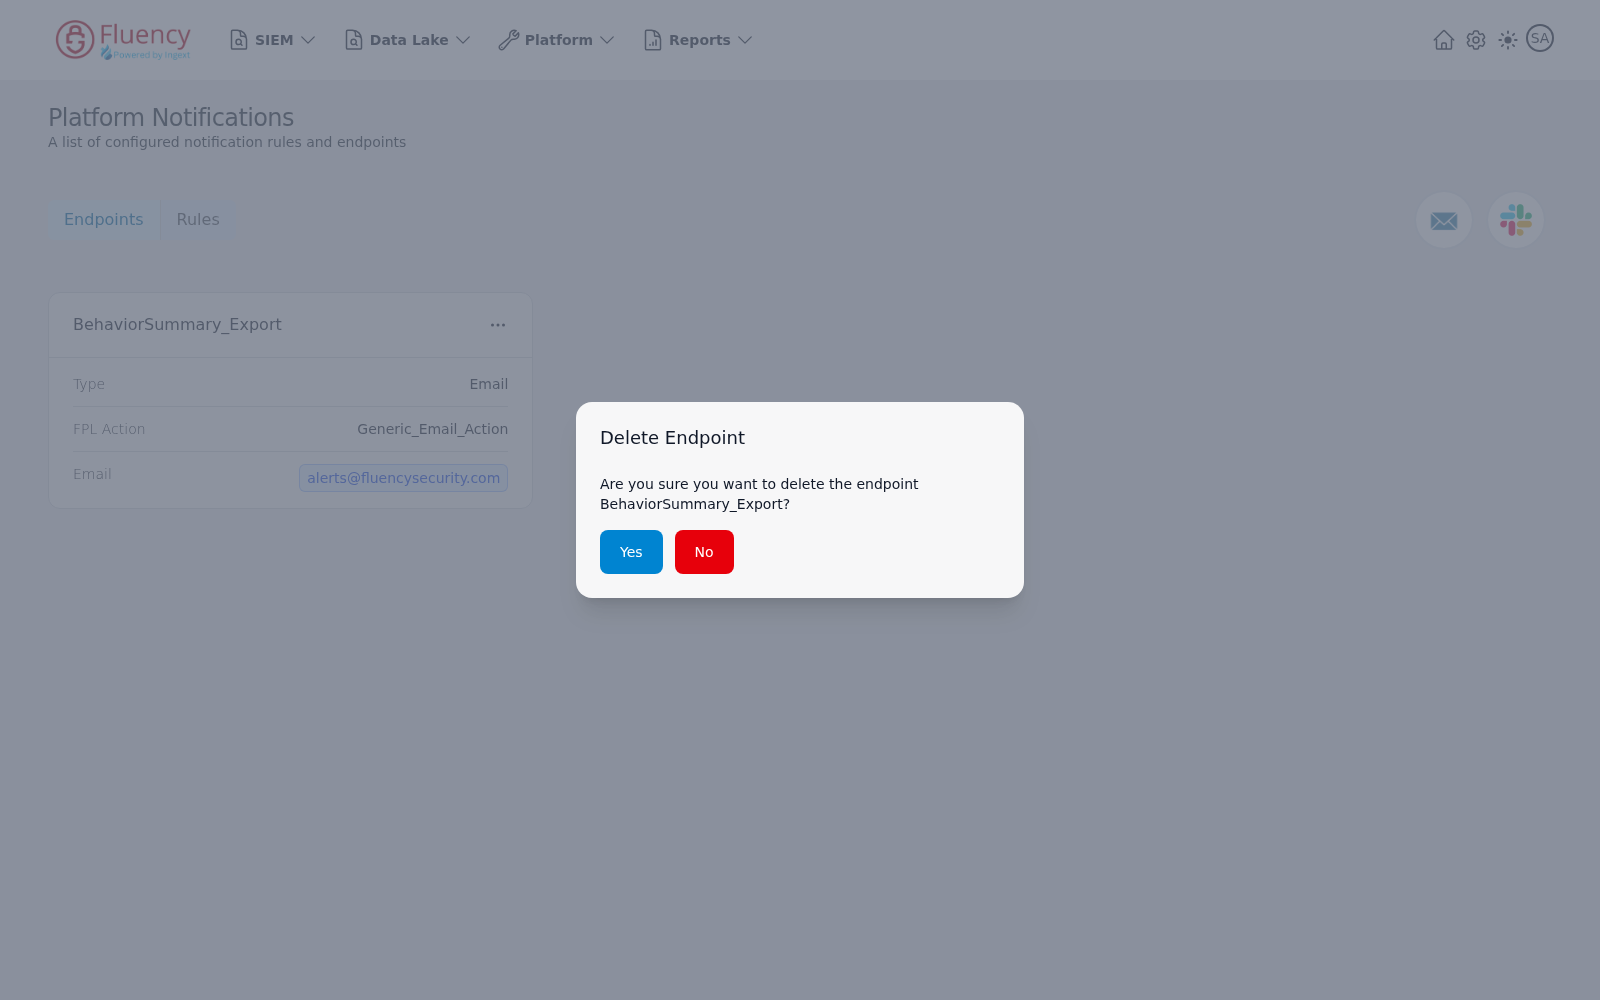
Choosing Delete opens the Delete Endpoint dialog, which asks Are you sure you want to delete the endpoint followed by the endpoint's name. Click the blue Yes button to delete the endpoint or the red No button to keep it.
Notification Rules
Select the Rules tab to manage notification rules. A rule ties one or more endpoints to the patterns that should trigger them. When no rules exist, the tab shows No rules configured with an Add Notification Rule button on the right.
Add a Notification Rule
Click Add Notification Rule to open the Add Notification Rule dialog.
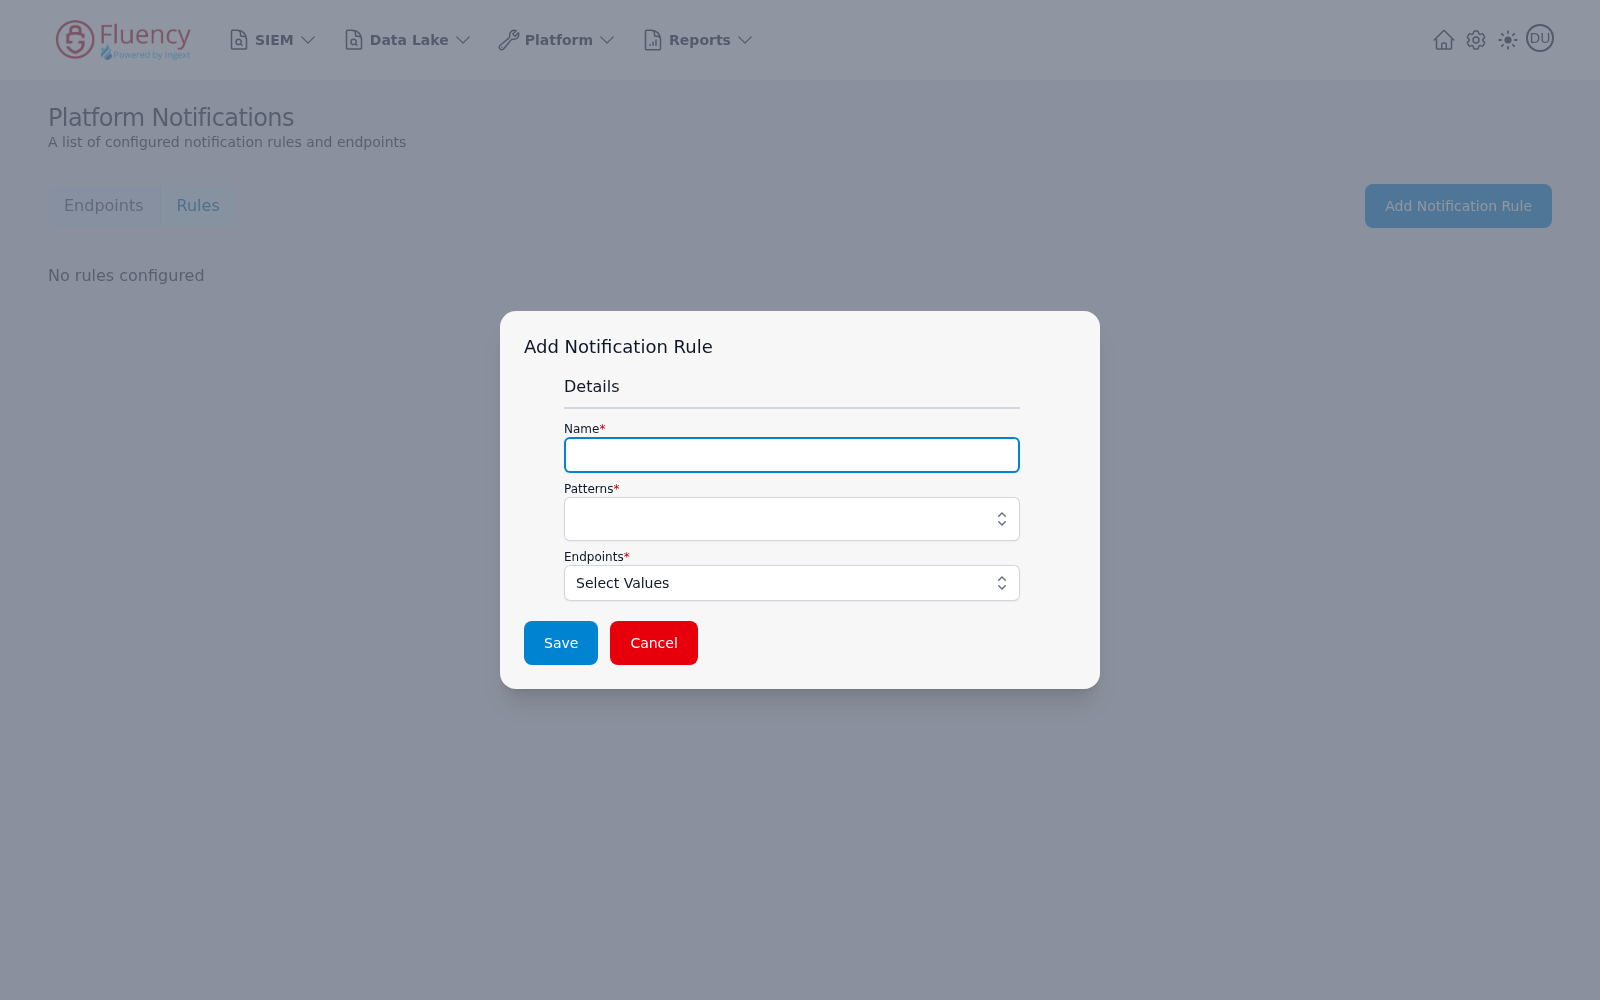
The dialog has a single Details section:
- Name (required) — a name for the rule.
- Patterns (required) — a drop-down of the patterns that trigger the rule.
- Endpoints (required) — a Select Values drop-down for choosing which endpoints the rule delivers to.
Click Save to create the rule or Cancel to close the dialog.