Processors
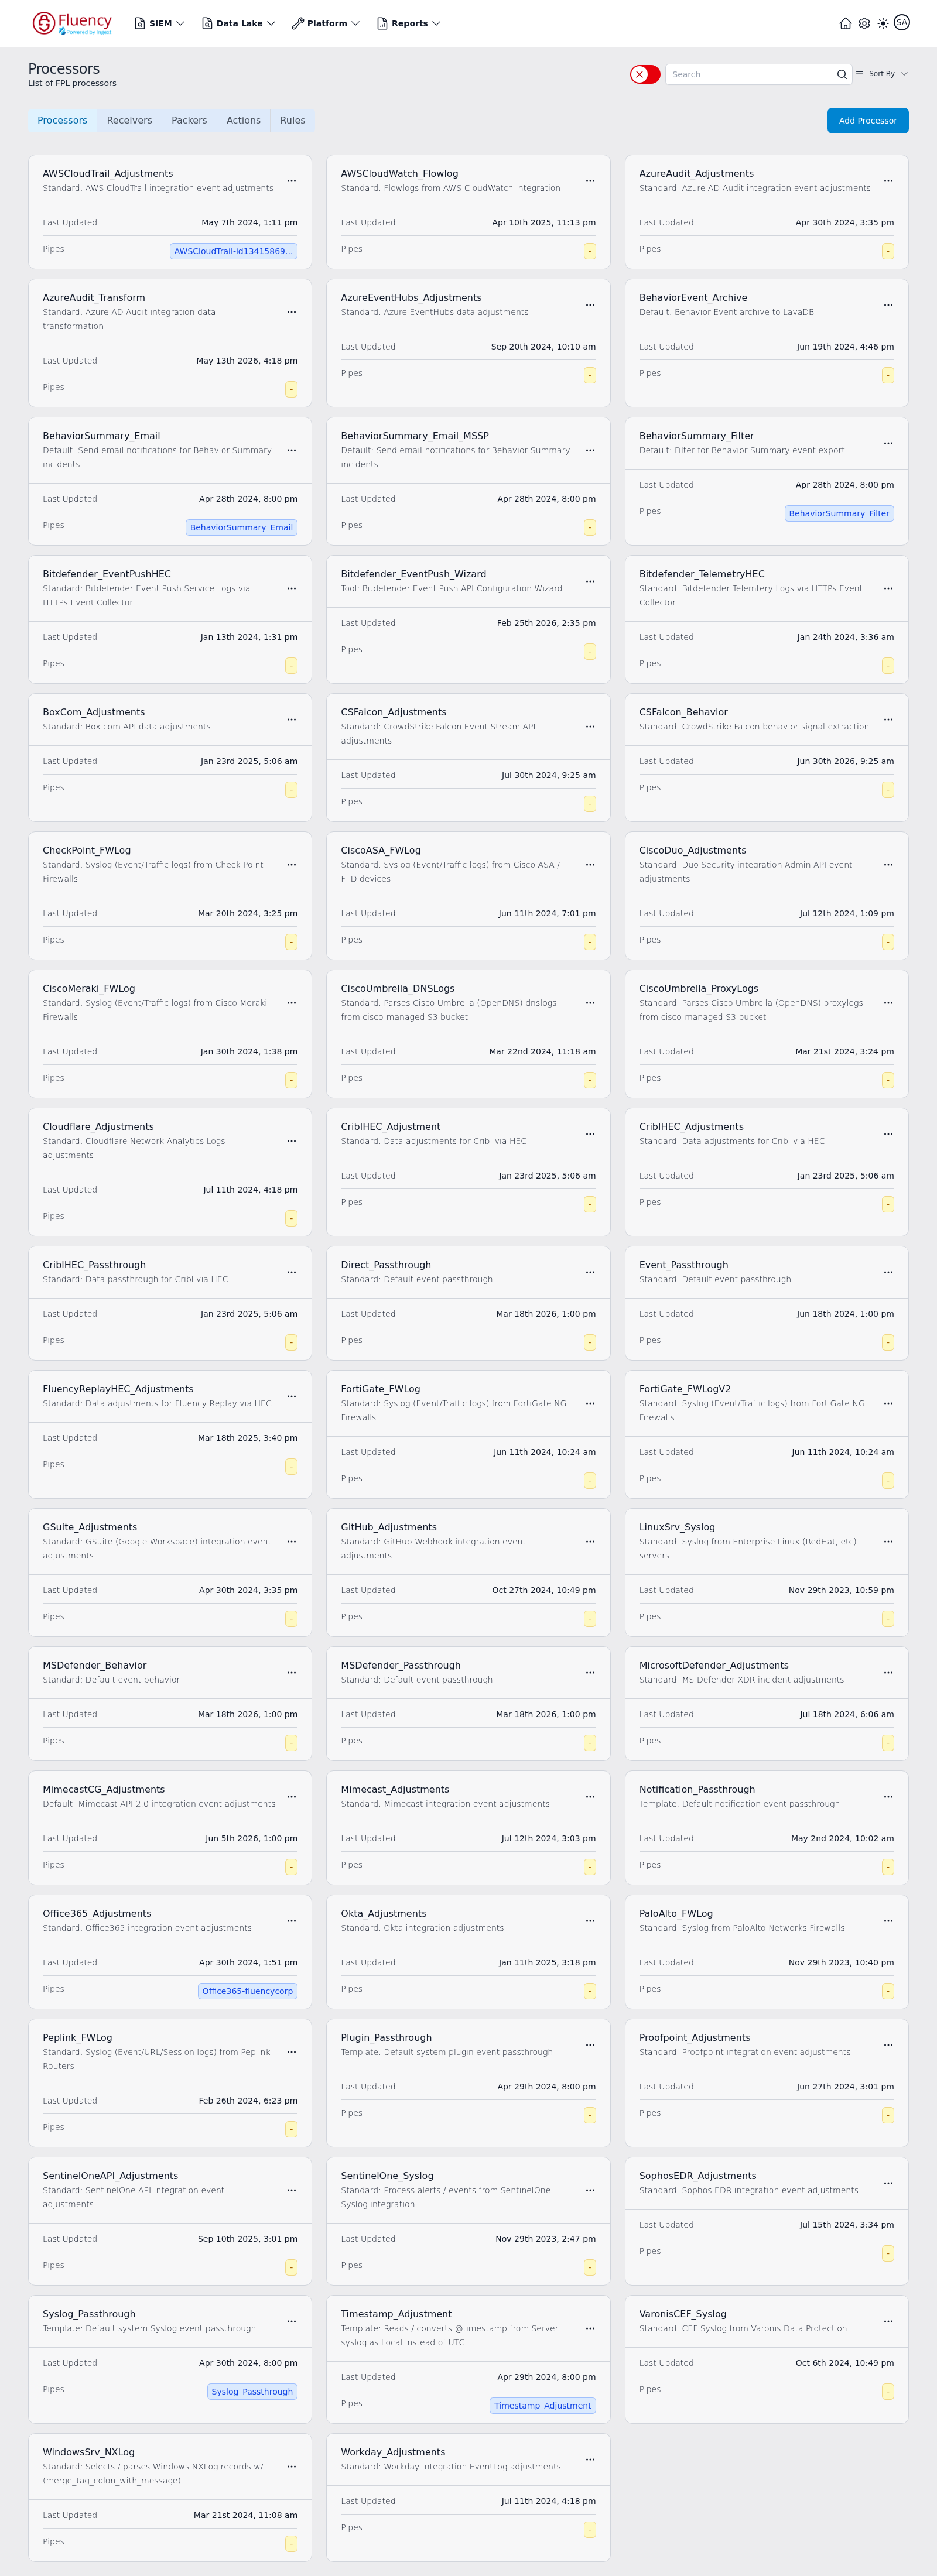
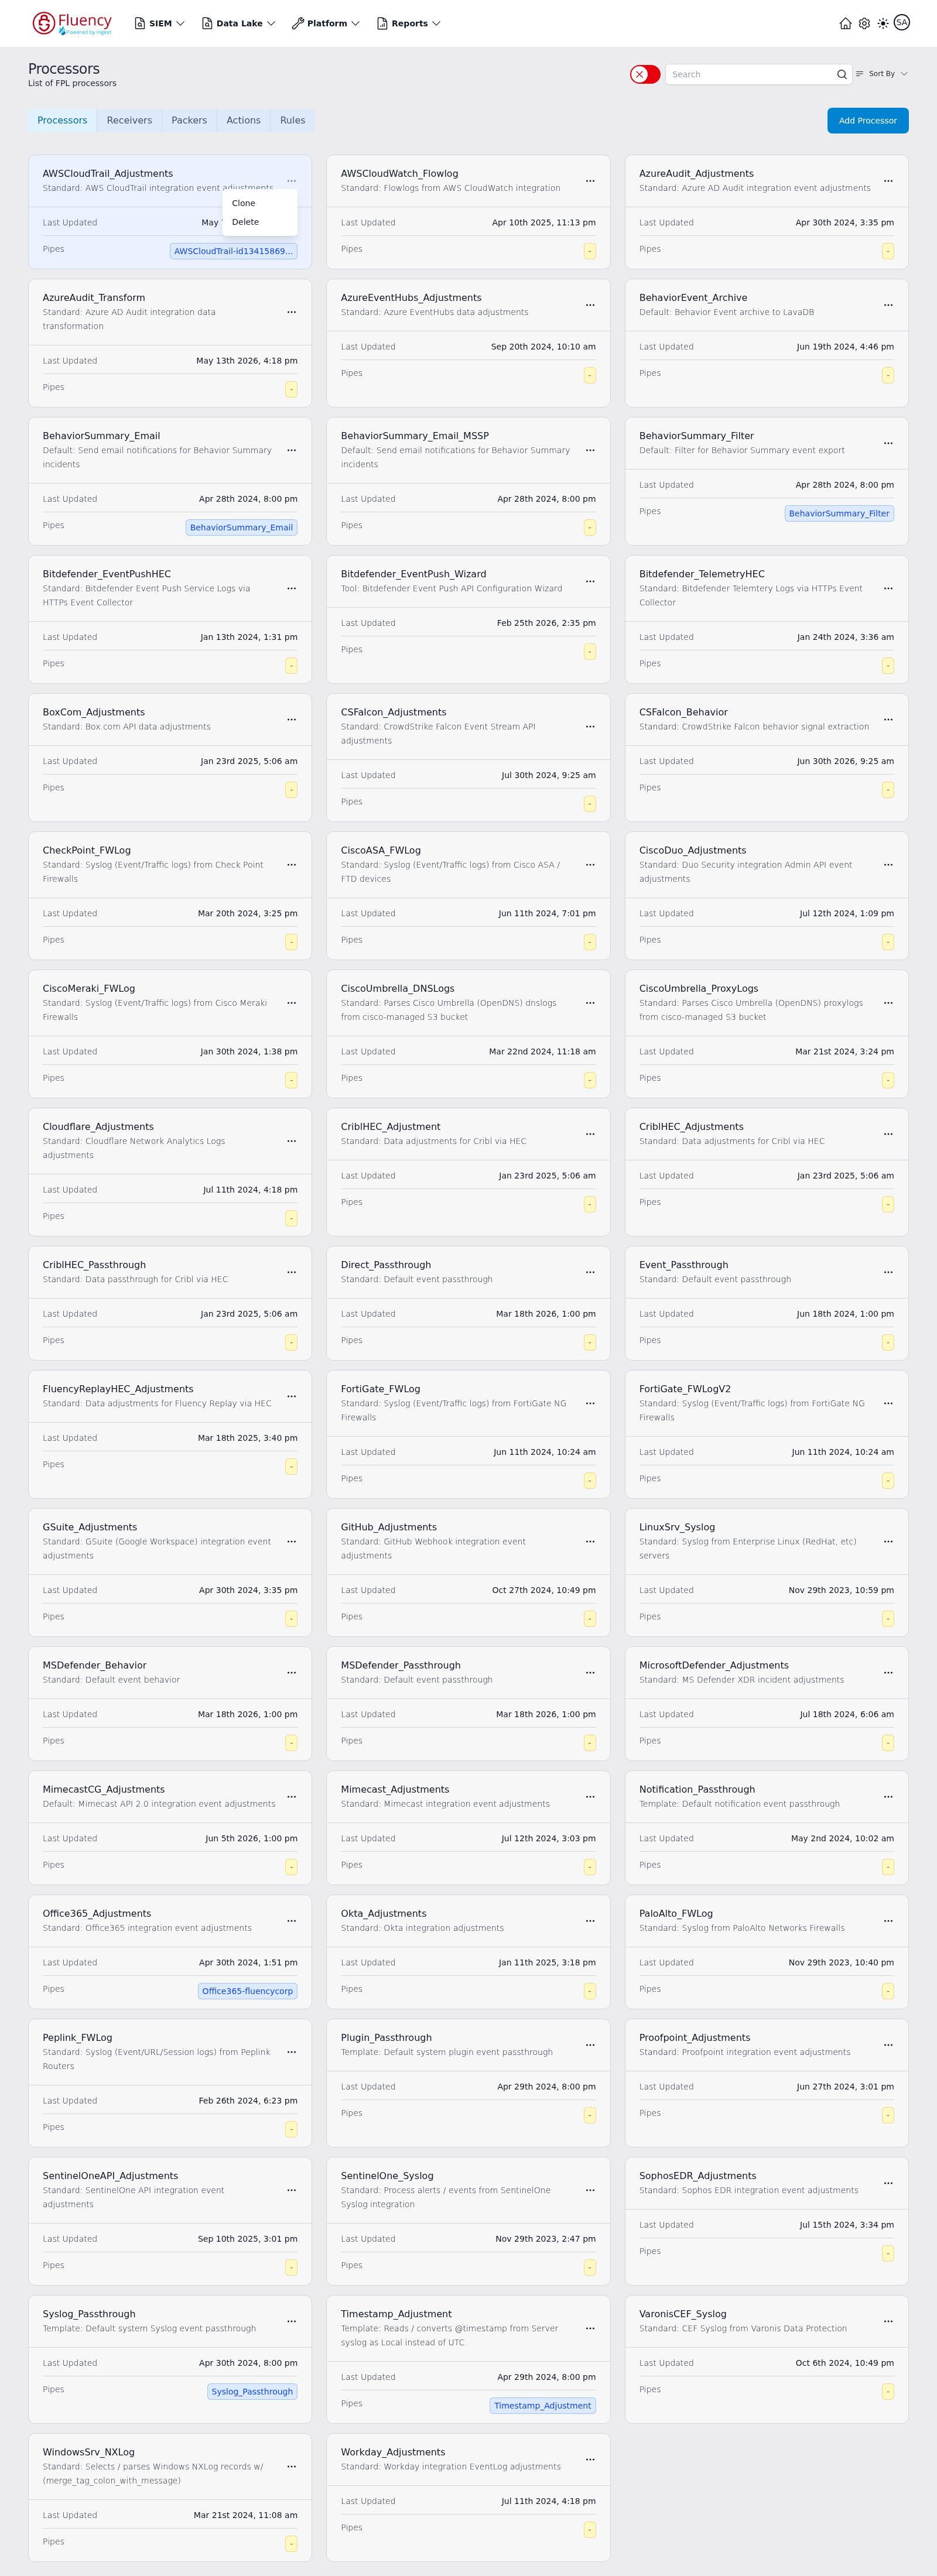
The Processors page lists the FPL (Fluency Programming Language) processors defined in the account and is where you create, clone, and delete them. Tabs at the top switch the list between the other FPL object types.
Menu path: Platform → Processors · URL path: /platform/processors/Processors
Page Layout
Under the Processors title and the subtitle List of FPL processors:
- The upper-right corner holds a deployed-only toggle, a Search box, and a Sort By control.
- A row of tabs — Processors, Receivers, Packers, Actions, Rules — selects which FPL object type is listed, with the blue Add Processor button at the right end of the row.
- The main area is a three-column grid of processor cards.
Filter, Search, and Sort
Only show deployed
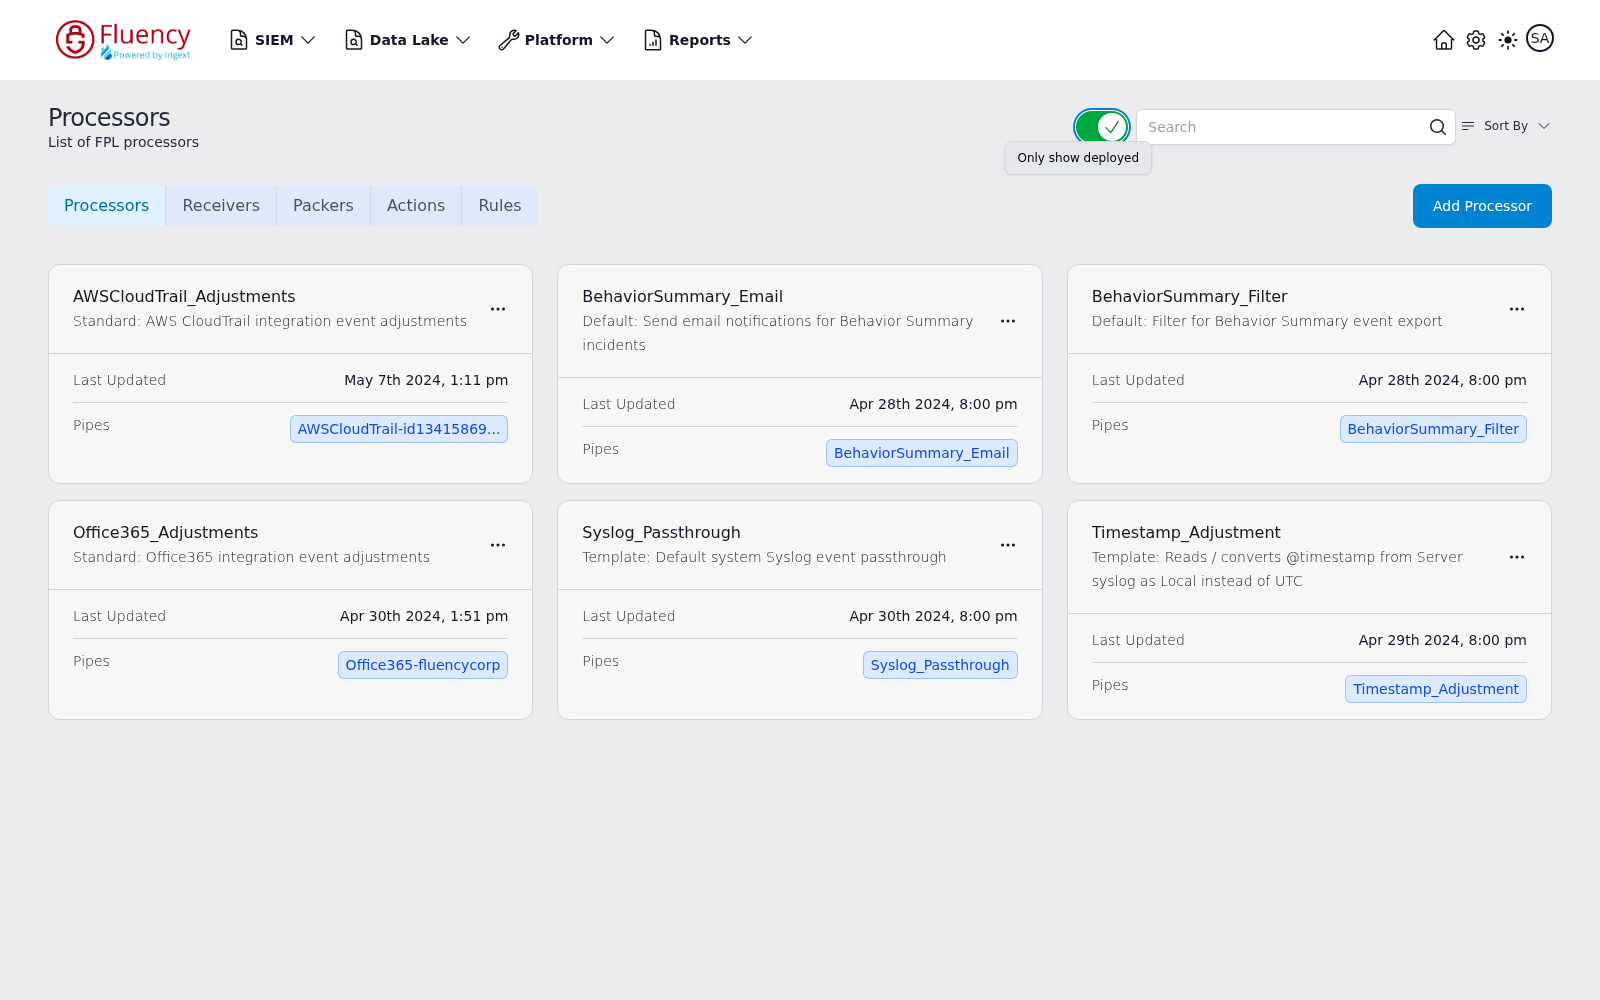
The switch to the left of the search box filters the grid to deployed processors. Off, it shows a red X and every processor is listed. Click it to turn it on — it shows a green check with the tooltip Only show deployed, and the grid reduces to only the processors that are attached to a pipe.
Search
Type in the Search box to filter the processor list by name.
Sort By
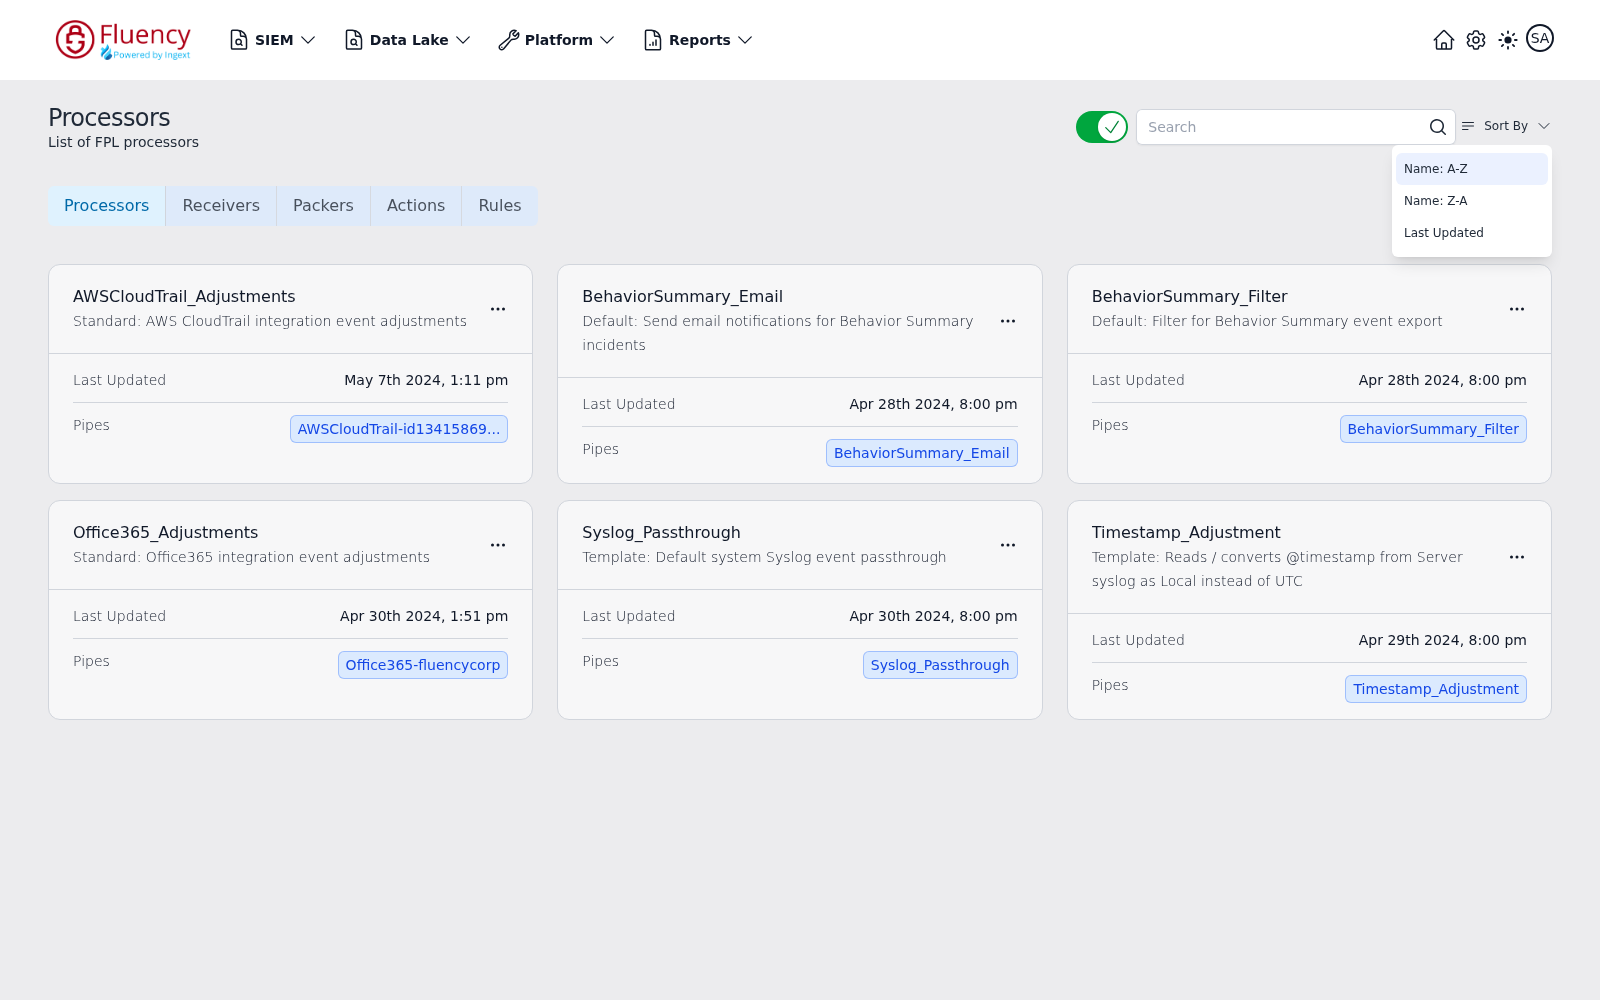
Click Sort By to open the sort menu with three options:
- Name: A-Z — orders the grid alphabetically by processor name.
- Name: Z-A — orders the grid in reverse alphabetical order.
- Last Updated — places the most recently updated processors first.
Selecting an option closes the menu and reorders the grid immediately; the sort combines with the deployed-only filter when it is on.
Object Type Tabs
The tabs above the grid switch the page between the FPL object types: Processors (shown in these captures), Receivers, Packers, Actions, and Rules. Each tab lists objects of that type in the same card layout.
Add Processor
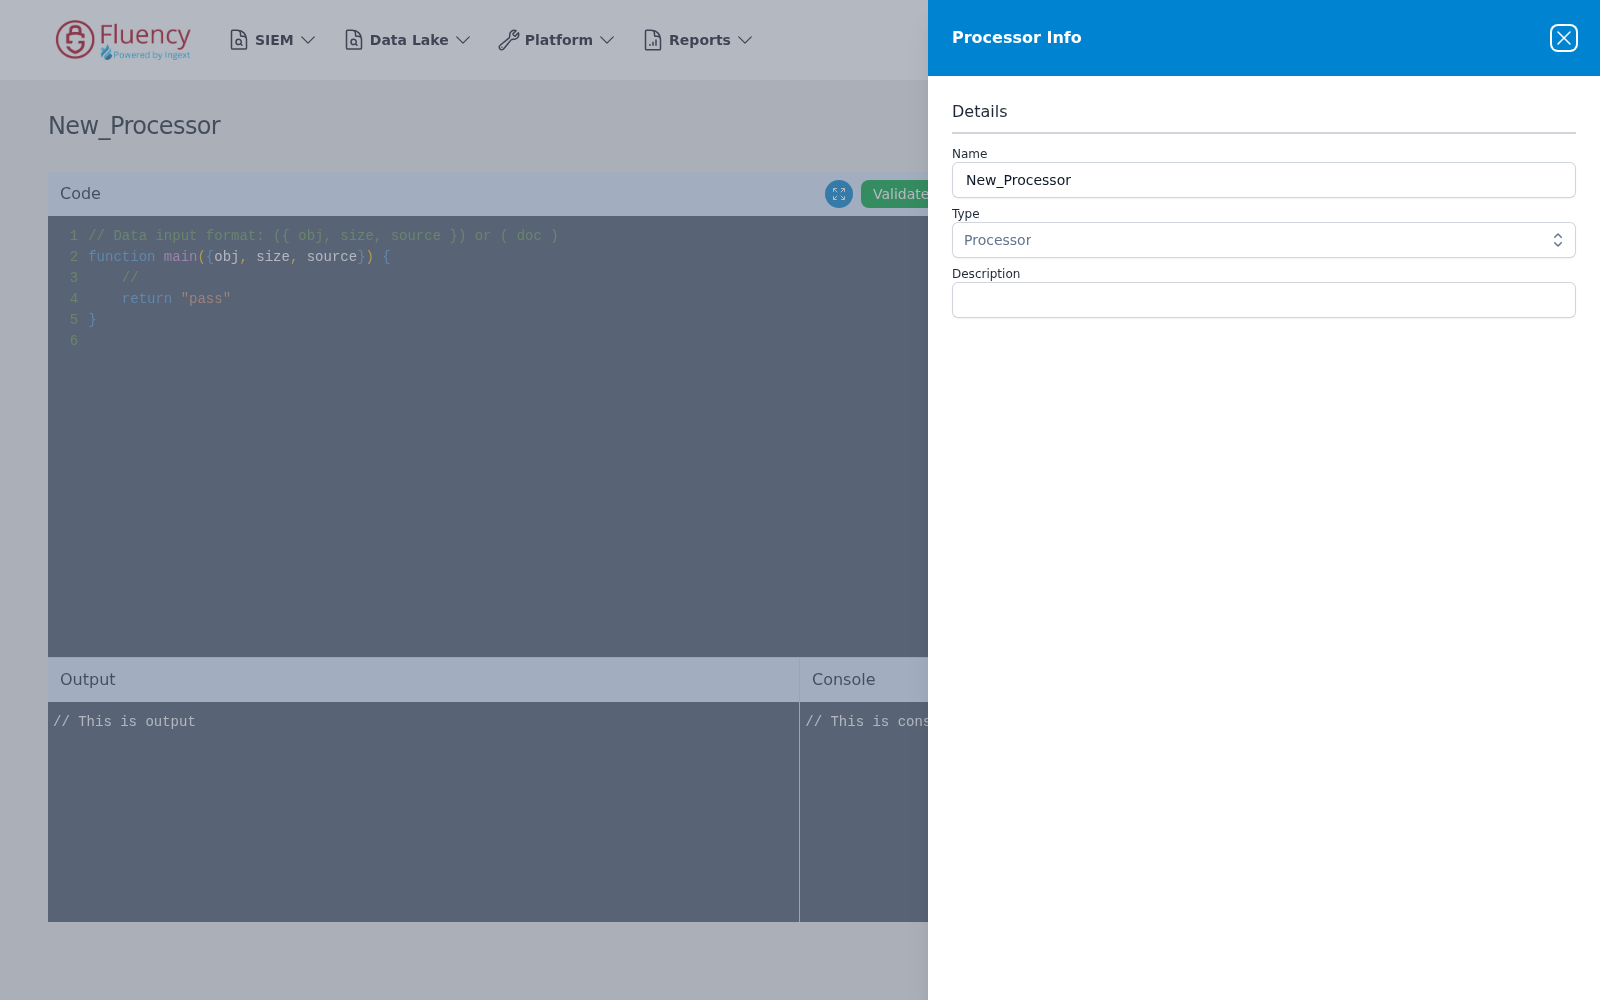
Click Add Processor to create a new processor. The button opens the processor editor at /platform/processors/new?type=Processors. The editor page is titled with the new processor's name and contains:
- A Code pane pre-filled with a starter FPL
mainfunction that returns"pass", with a Validate button and a full-screen icon in its toolbar. - Output and Console panes below the code for reviewing test results.
A Processor Info panel opens over the right side of the editor with a Details section:
- Name — the processor name, pre-filled with a default such as
New_Processor. - Type — a selector set to Processor.
- Description — a free-text description.
Close the panel with the X in its title bar to work in the editor.
Processor Cards
Each card in the grid shows:
- The processor name, with a classification prefix on the line beneath — Standard (built-in integration adjustment), Default, Template, or Tool — followed by a short description.
- An Open options button (three dots) in the upper-right corner of the card.
- Last Updated — the date and time the processor was last modified.
- Pipes — blue chips naming the pipes the processor is deployed in, or a small yellow dash badge when the processor is not attached to any pipe.
Card Options Menu
Click a card's Open options button to open a two-item menu:
- Clone — opens a pre-filled copy of the processor in the editor, described below.
- Delete — removes the processor.
Clone
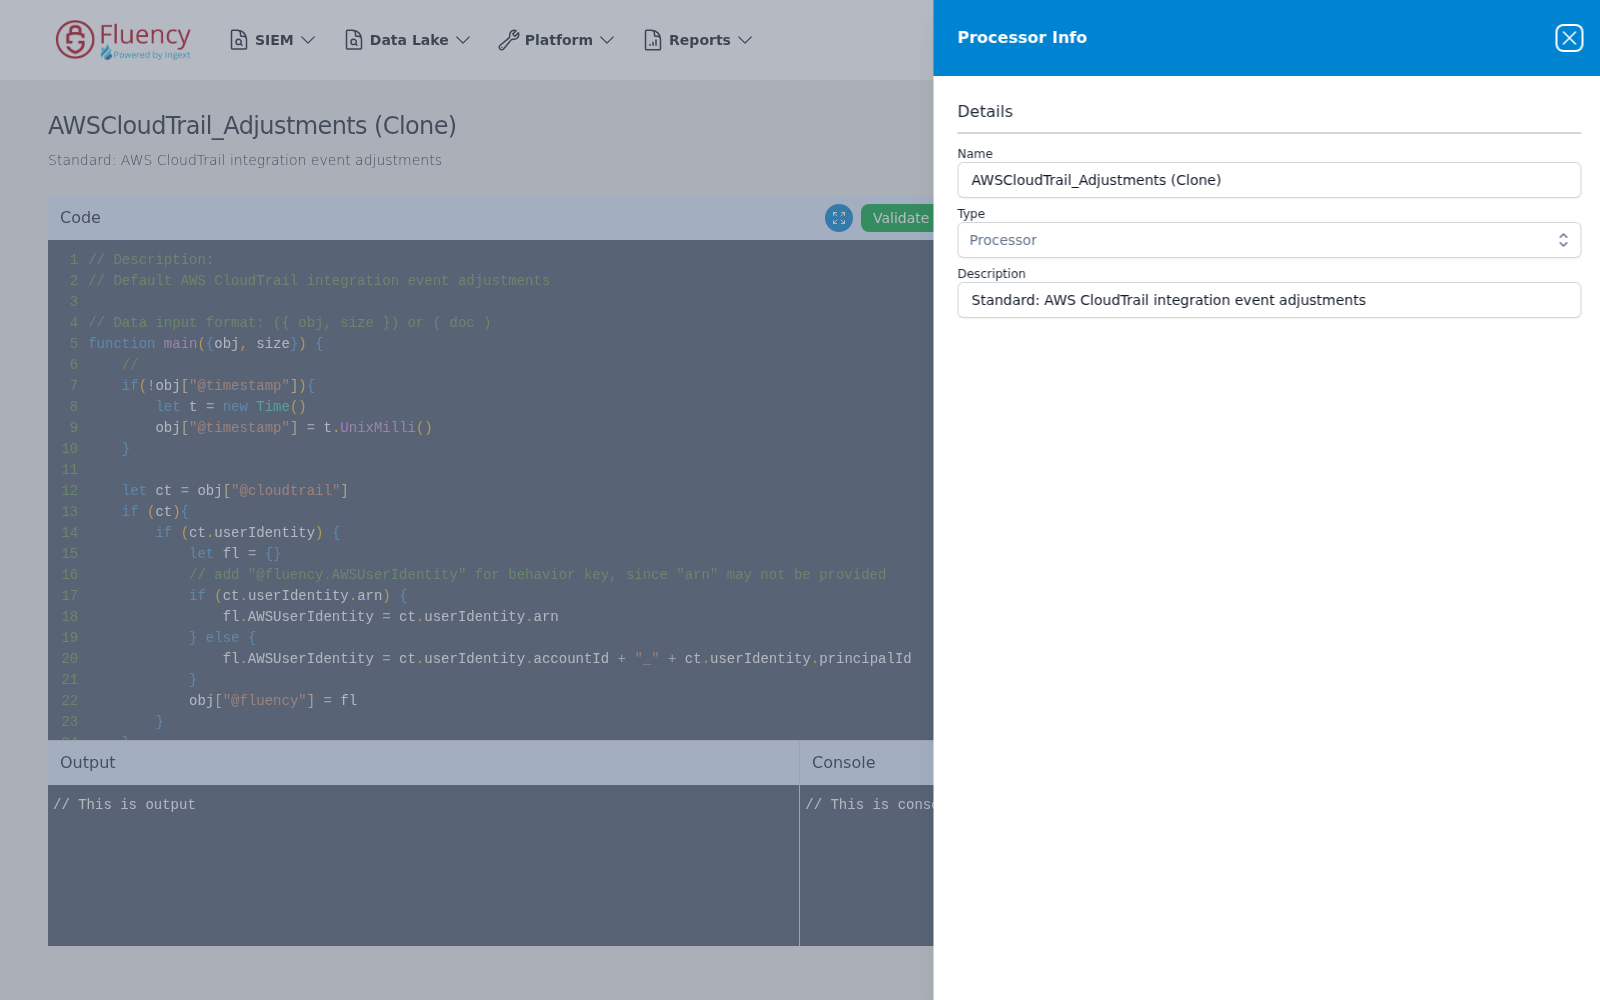
Choosing Clone opens the processor editor at /platform/processors/clone with the source processor's name as a query parameter; the same pre-filled editor opens from any card in the grid. The page is titled with the source name followed by (Clone), and the Code pane holds a copy of the source processor's FPL code above the same Output and Console panes as the new-processor editor.
A Processor Info panel opens over the right side of the editor with the Details section pre-filled from the source processor:
- Name — the source processor's name with a
(Clone)suffix, such asAWSCloudTrail_Adjustments (Clone). - Type — a selector set to Processor.
- Description — copied from the source processor.