Existing Integrations
Existing Integrations is the view the Integrations page opens on. It lists the integrations configured on this platform, grouped into the same category panels the New Integration catalog uses, and it is where an integration's connection settings are read back or changed.
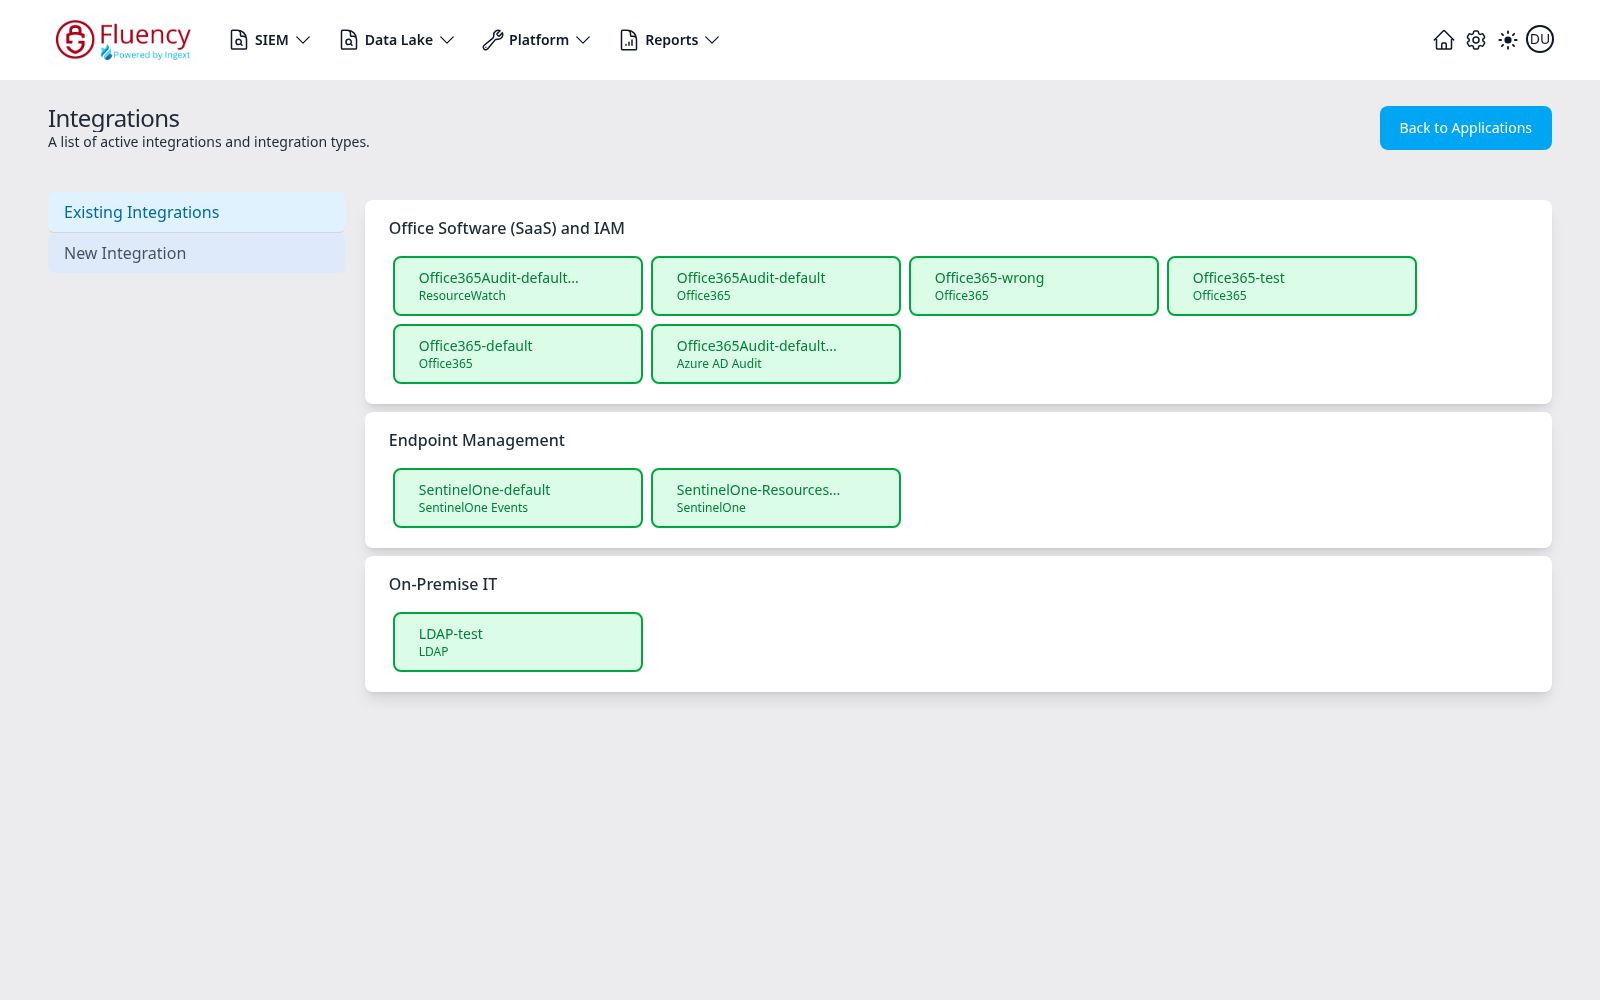
Integration Tiles
Only the categories that hold something are shown, so the panel list is short on a new platform and grows as sources are added. Each tile is one configured integration and carries two lines:
- The integration's name on the first line, truncated with an ellipsis when it is too long for the tile.
- Its integration type on the second, in smaller grey text — the type from the New Integration catalog.
Every tile is outlined and filled in green, which marks it as active.
The names give away where an integration came from. An application install names its integrations after the application instance, so one Office365-Audit application produces Office365Audit-default (type Office365), Office365Audit-default-ResourceWatch (type ResourceWatch) and Office365Audit-default-AzureAudit (type Azure AD Audit) — one template, three integrations, three tiles. A name you chose yourself, such as LDAP-test, came from the Name field on that application's setup form, and so did the Office365-default, Office365-test and Office365-wrong tiles above, one per Office365 application installed on this platform.
The list is not a complete census of what is installed, though. An application still waiting for consent has created no integration yet — its Actions list carries a Sent Invitation line and no Add Integration line — so the standalone Office365 Resource Watch application in these captures has no tile here at all.
Clicking a tile opens its dialog.
The Integration Dialog
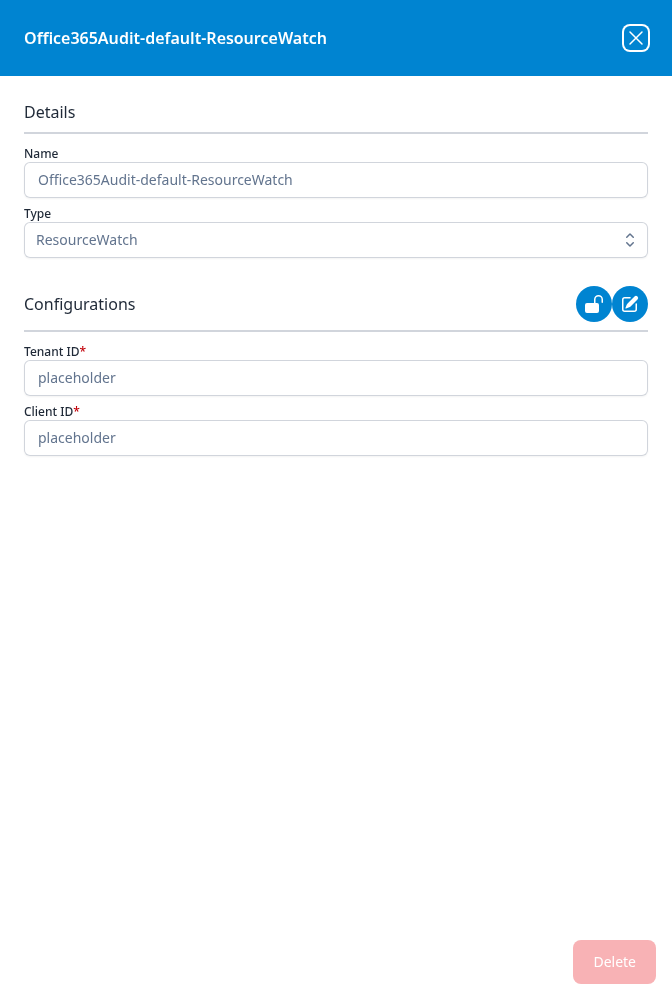
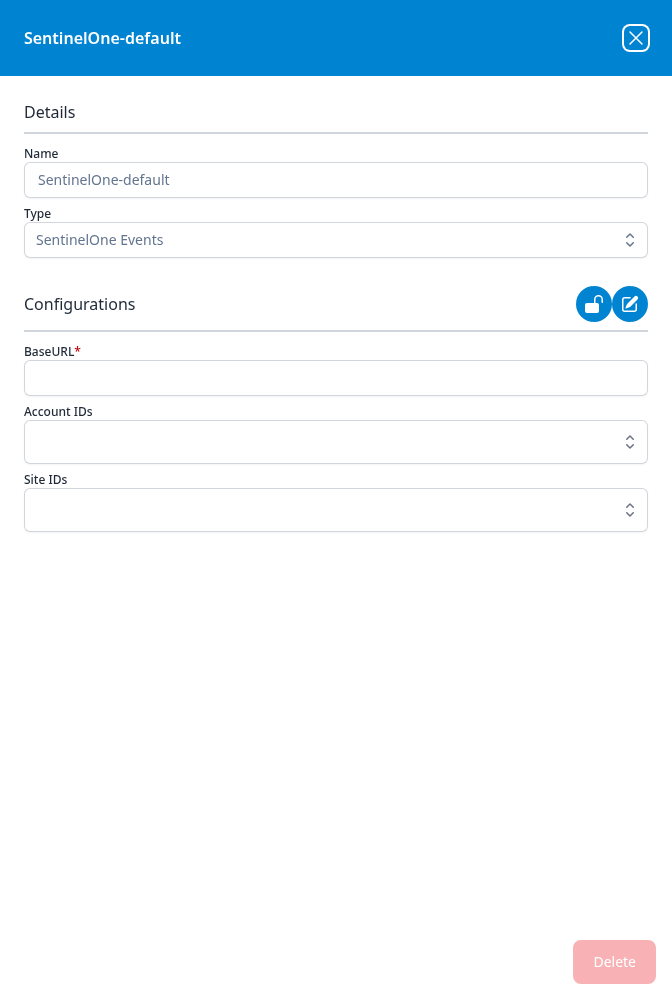
The dialog is titled with the integration's name — not Add or Edit — and holds two sections plus a footer:
| Section | Fields |
|---|---|
| Details | Name and Type, both read-only. Neither can be changed after the integration exists. |
| Configurations | The type's own connection fields, filled in with the current values and read-only until unlocked. |
Two round blue buttons sit at the right of the Configurations heading — an open padlock and a pencil — and they are what turns the dialog from a read-back into an edit. A Delete button sits in the lower-right corner, greyed out in the state the dialog opens in.
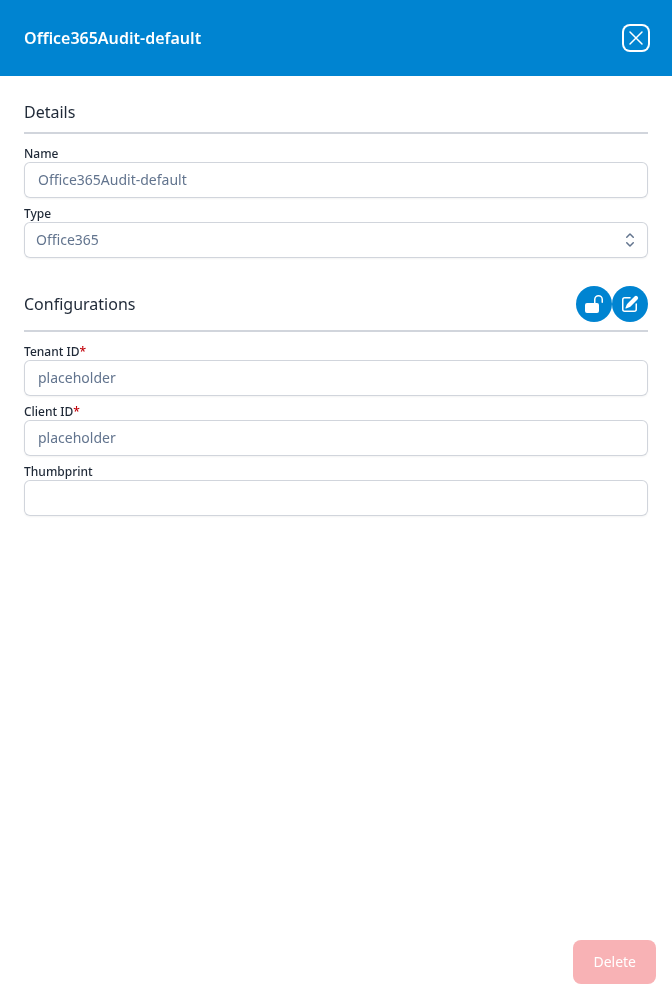
The fields a type stores are not always the fields anyone was asked for. Add Office365 opens on the Send Invitation configuration method and asks for nothing but an administrator's Email; an Office365 integration that exists holds a Tenant ID, a Client ID and a Thumbprint — a certificate thumbprint rather than a client secret, which is why the dialog can show it. So this dialog, rather than the one the integration was created from, is where the connection is actually described.
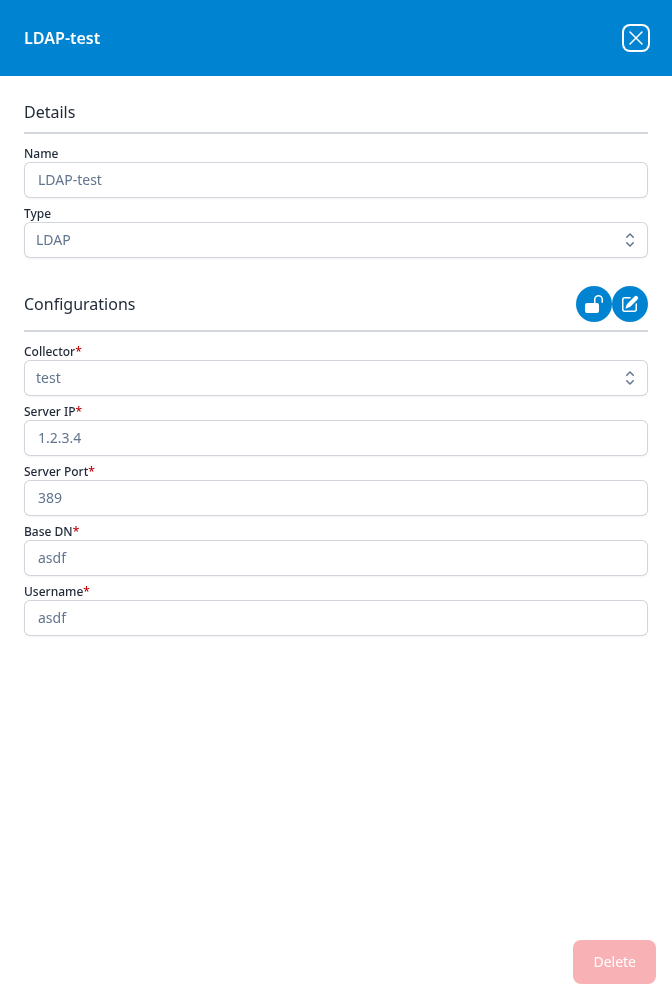
The Configurations section omits the type's secret fields entirely rather than showing them as asterisks. The LDAP dialog below lists Collector, Server IP, Server Port, Base DN and Username but no Password row, even though Add LDAP asks for one and the application details panel shows it masked. The same is true of the client secrets and API tokens on the other types: what you can see here is the non-secret half of the connection.
The dialog is also where an incomplete integration shows itself. SentinelOne-default below was created by a SentinelOne API Integration application, and its required BaseURL is empty — which is worth reading against that application's card in Installed Applications, where the matching plugin data source is outlined in red and the application carries a red ! beside its Running badge. Account IDs and Site IDs are unset too, but those are optional scoping fields the Add SentinelOne Events dialog offers and no application template does.
Deleting an integration
Delete removes the integration, and it is not reversible. An integration that an application created is part of that application's pipeline: the application's own Actions list records it as Add Integration, and deleting it out from under a running application leaves the source without credentials. To remove a source cleanly, uninstall the application from Installed Applications instead, which takes its integrations with it. Use Delete here for an integration you created on its own, or one left behind.