Scheduler
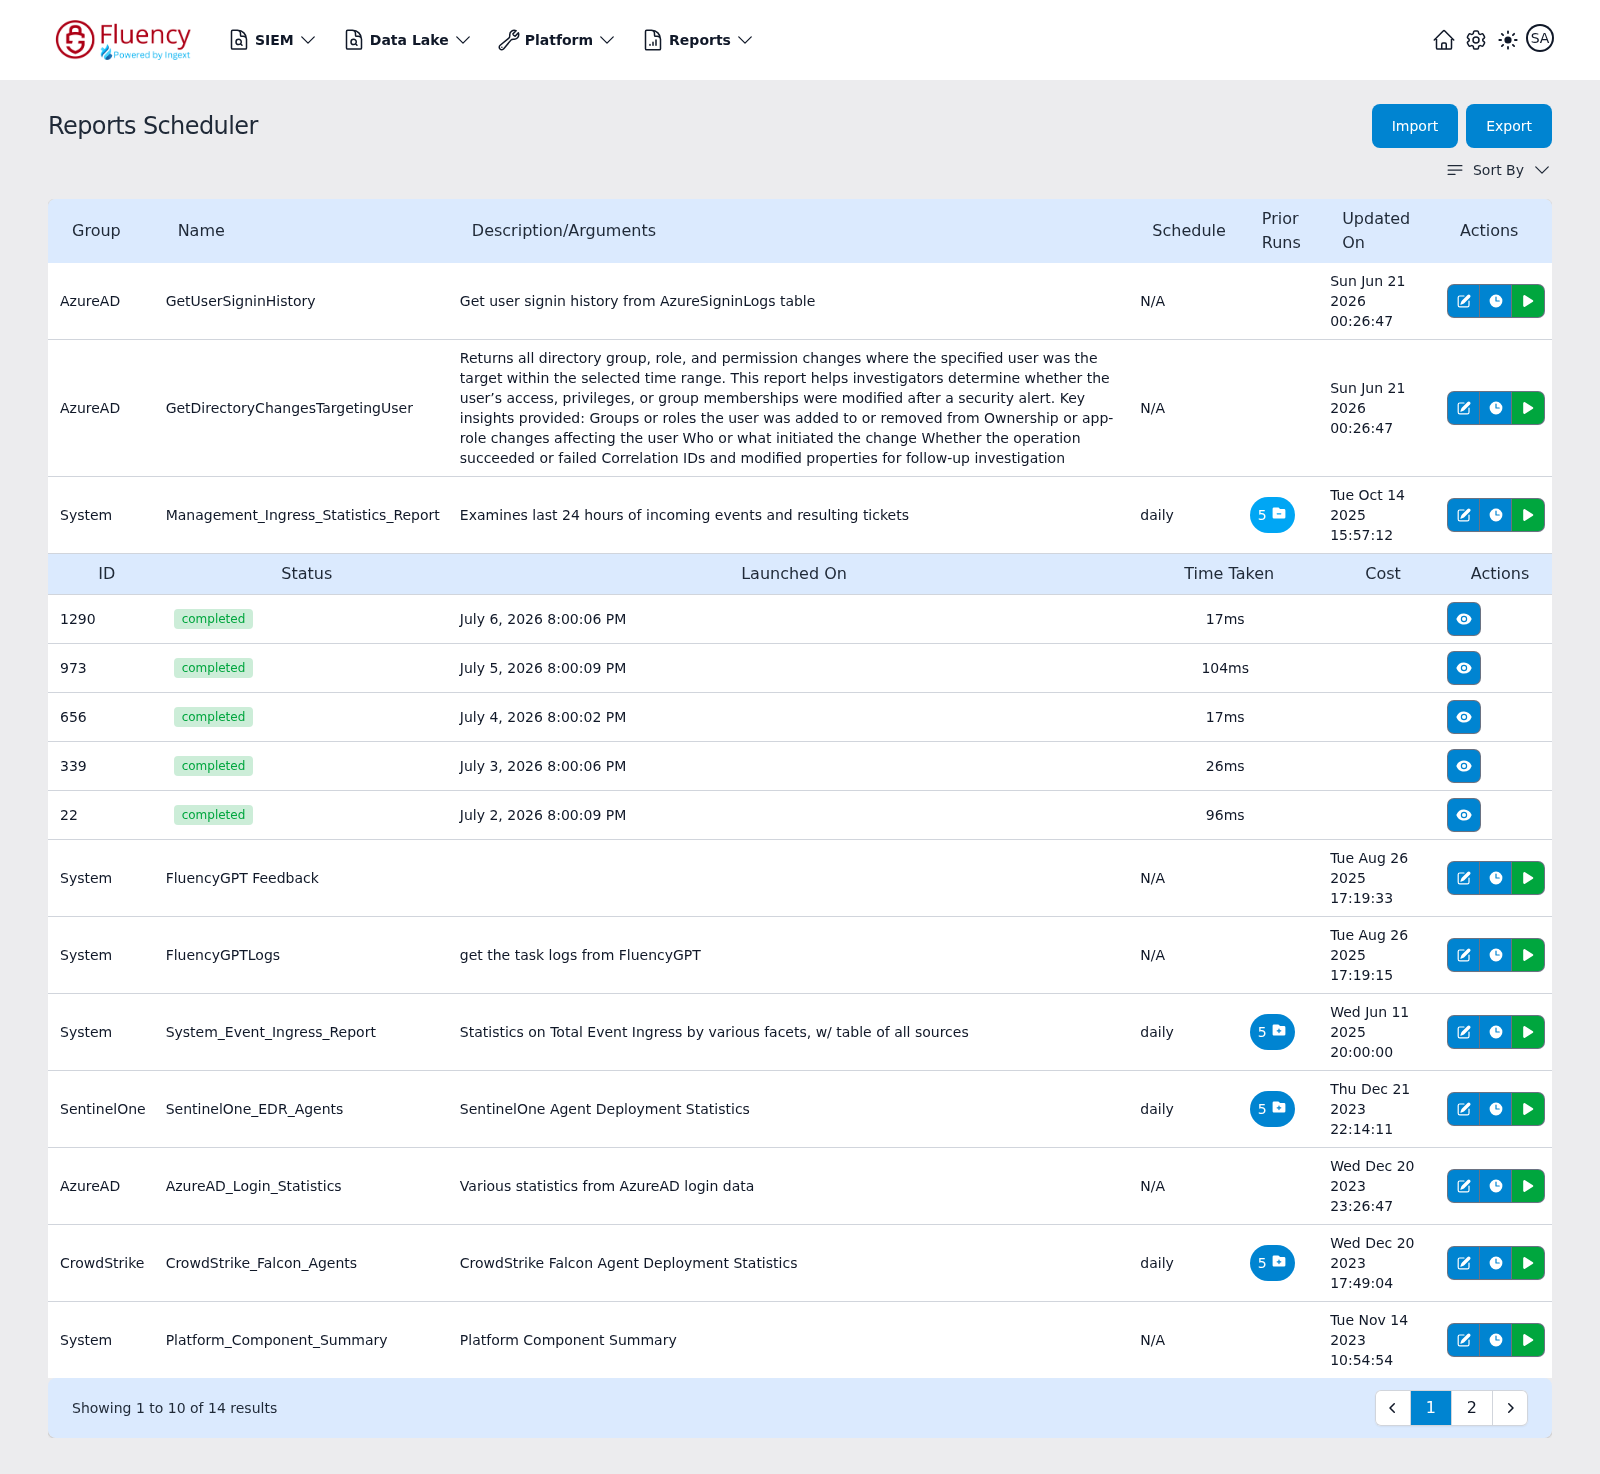
The Reports Scheduler page lists the FPL reports that can be scheduled, together with their schedules and run history. Each row provides actions to edit the report, set its schedule, and run it on demand.
Menu path: Reports → Scheduler · URL path: /reports/scheduler
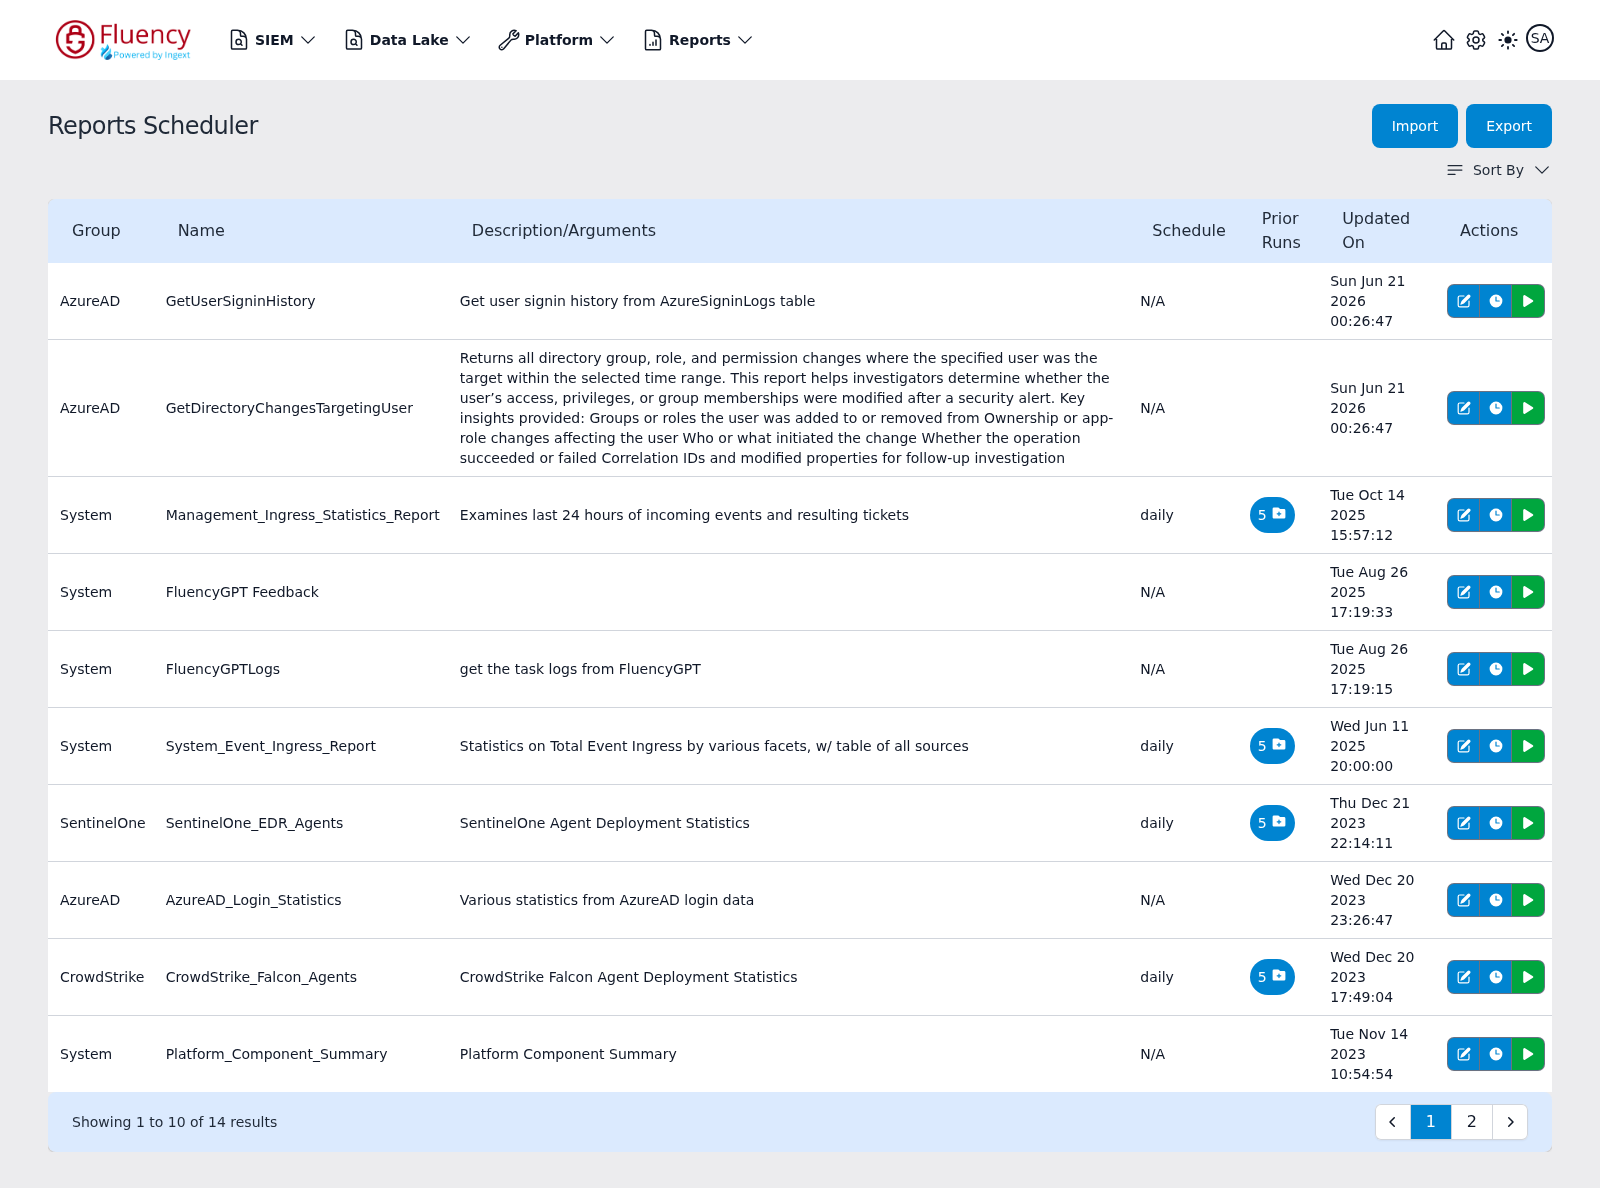
Page Layout
From top to bottom the page contains:
- A header with the title Reports Scheduler and the Import and Export buttons on the right.
- A Sort By dropdown above the table on the right.
- The report table with columns Group, Name, Description/Arguments, Schedule, Prior Runs, Updated On, and Actions.
- A footer bar showing the result range (for example Showing 1 to 10 of 14 results) with pagination controls: previous and next arrows and numbered page buttons.
Import
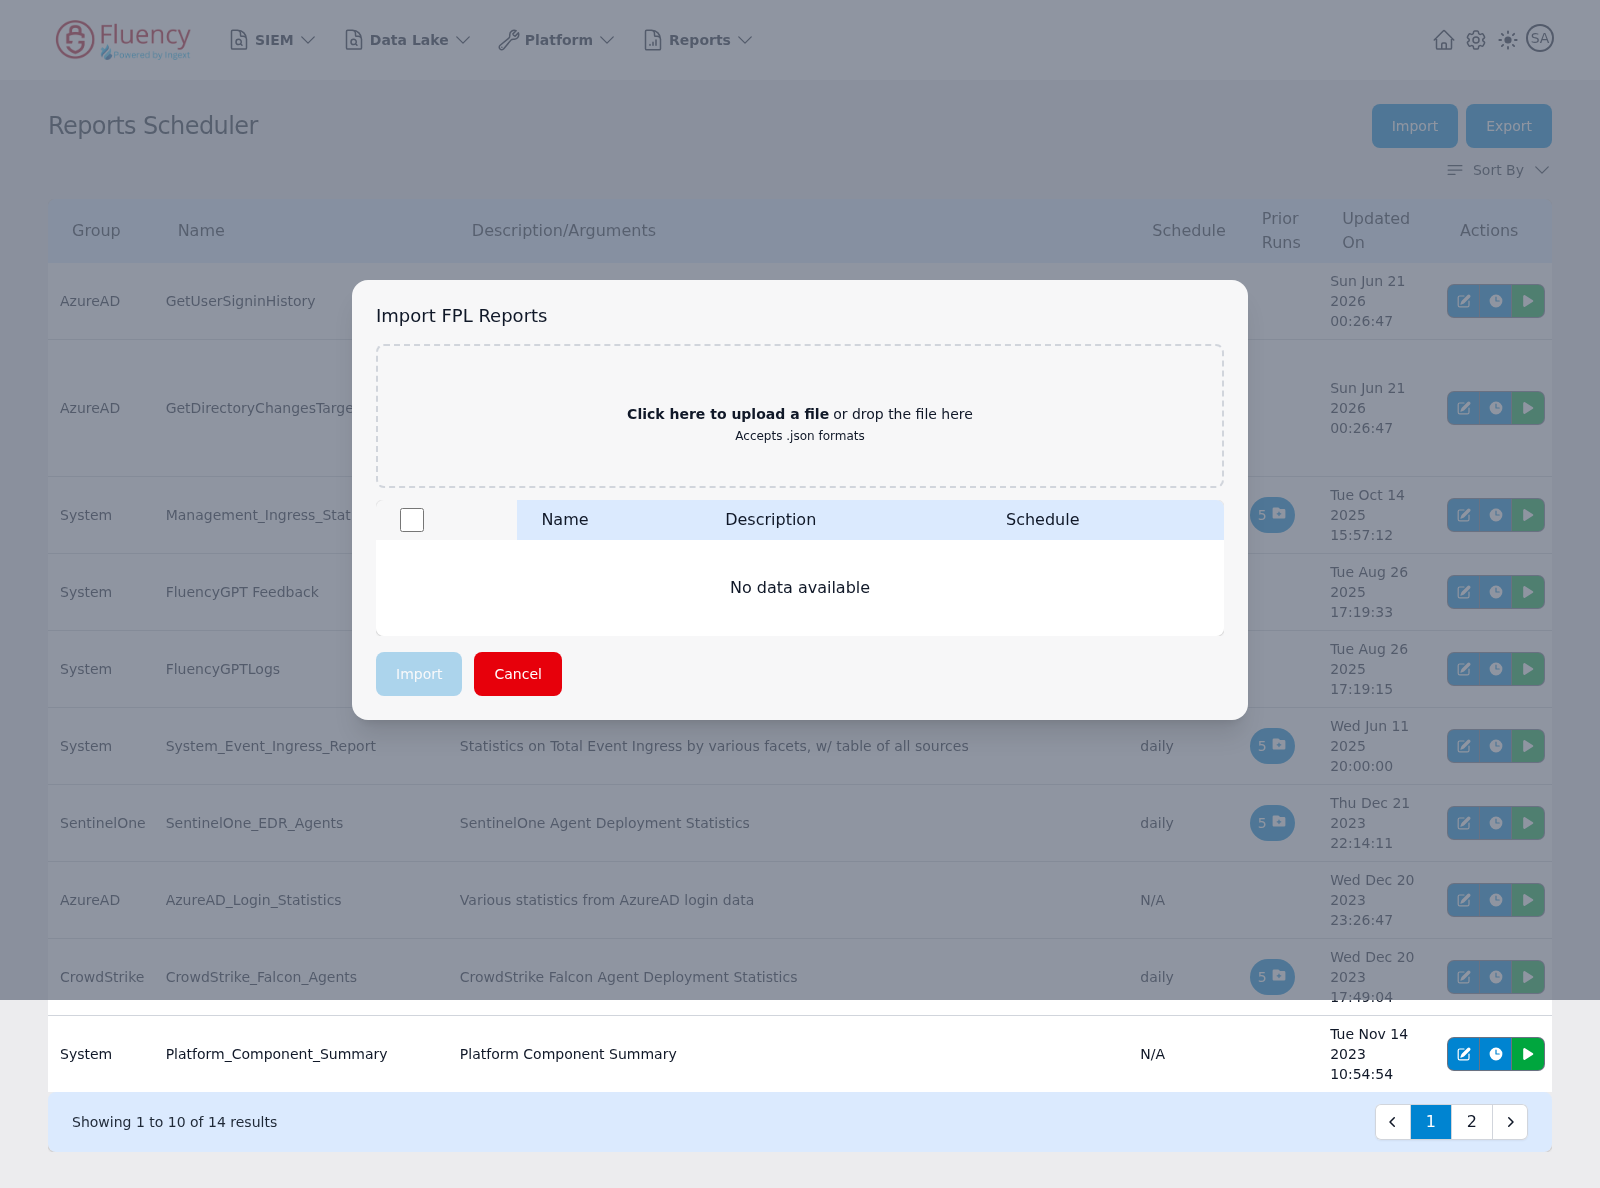
Click Import to open the Import FPL Reports dialog, which loads report definitions from a file:
- An upload area labeled Click here to upload a file or drop the file here; it accepts
.jsonformats. - A selection table with a checkbox column and Name, Description, and Schedule columns. Until a file is loaded it reads No data available.
- Import — imports the selected reports (disabled until a file is loaded and a row is selected).
- Cancel — closes the dialog without importing.
Export
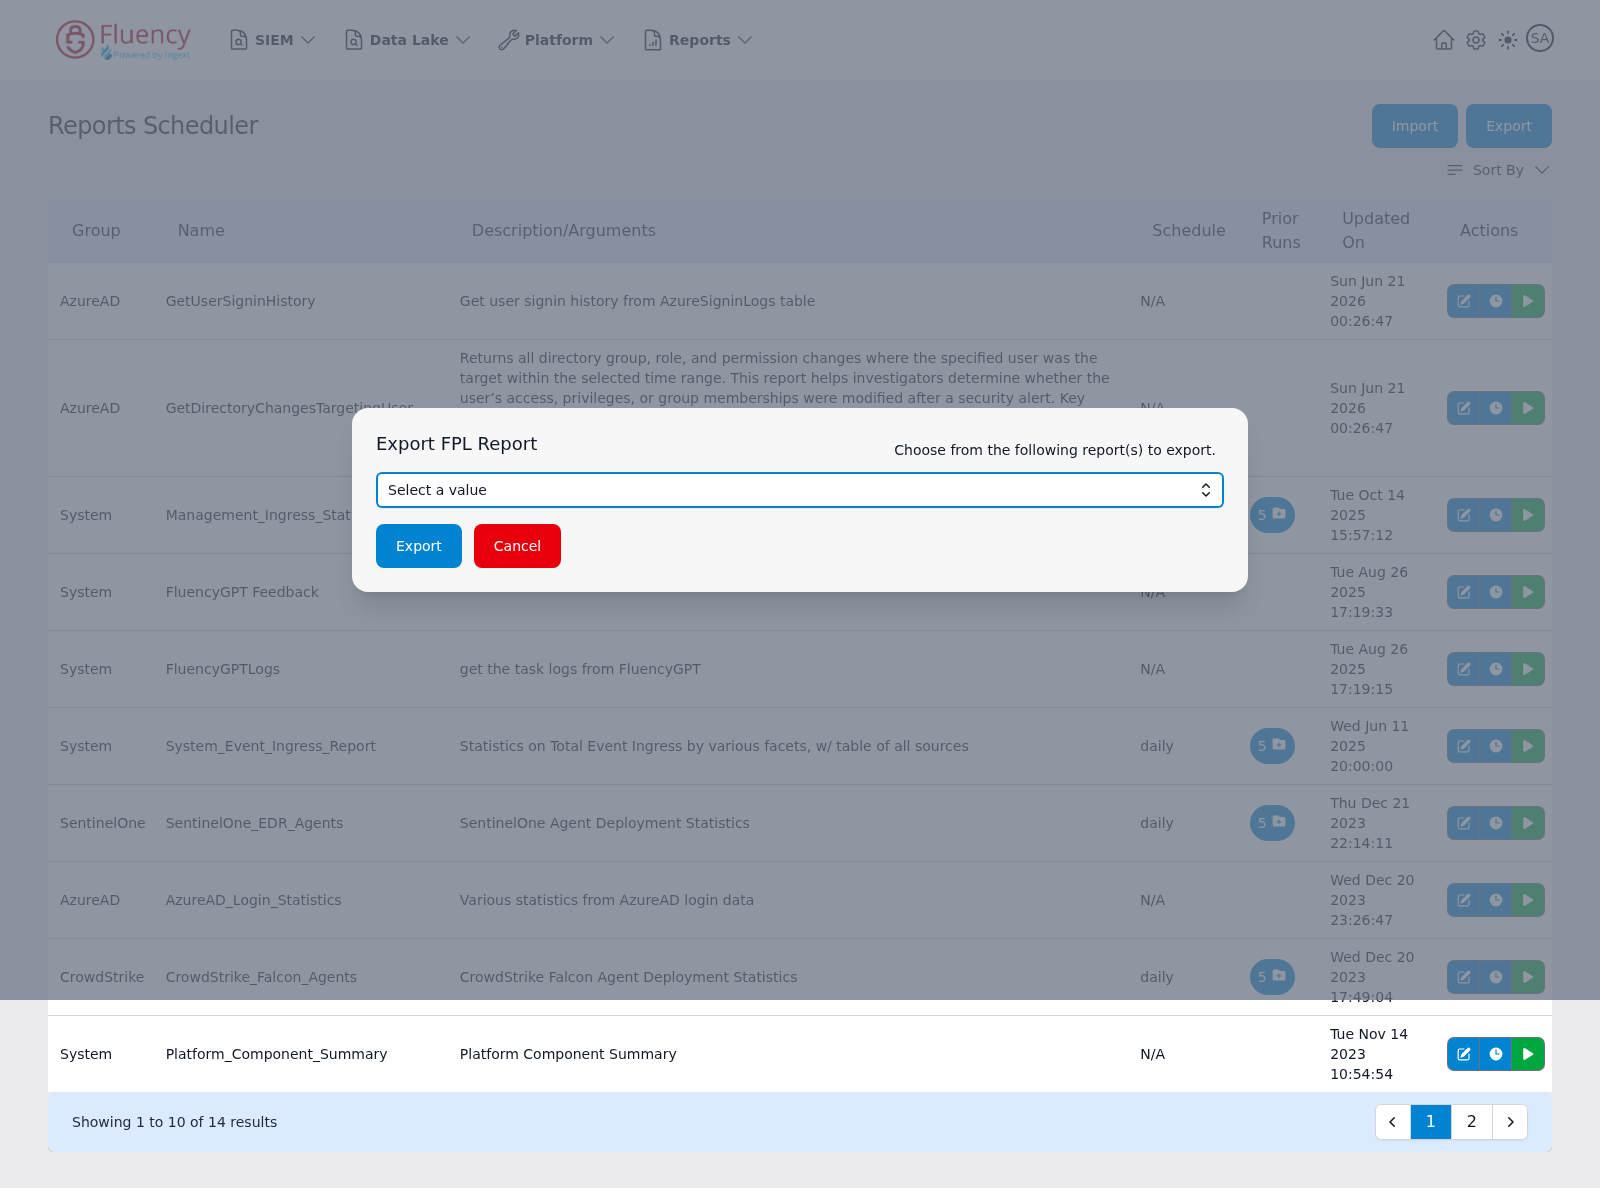
Click Export to open the Export FPL Report dialog, labeled Choose from the following report(s) to export. It contains:
- A Select a value dropdown for choosing the report to export.
- Export — downloads the selected report definition.
- Cancel — closes the dialog without exporting.
Sort By
The Sort By dropdown reorders the table. The options are:
- Report Name: A-Z
- Report Name: Z-A
- Last Updated
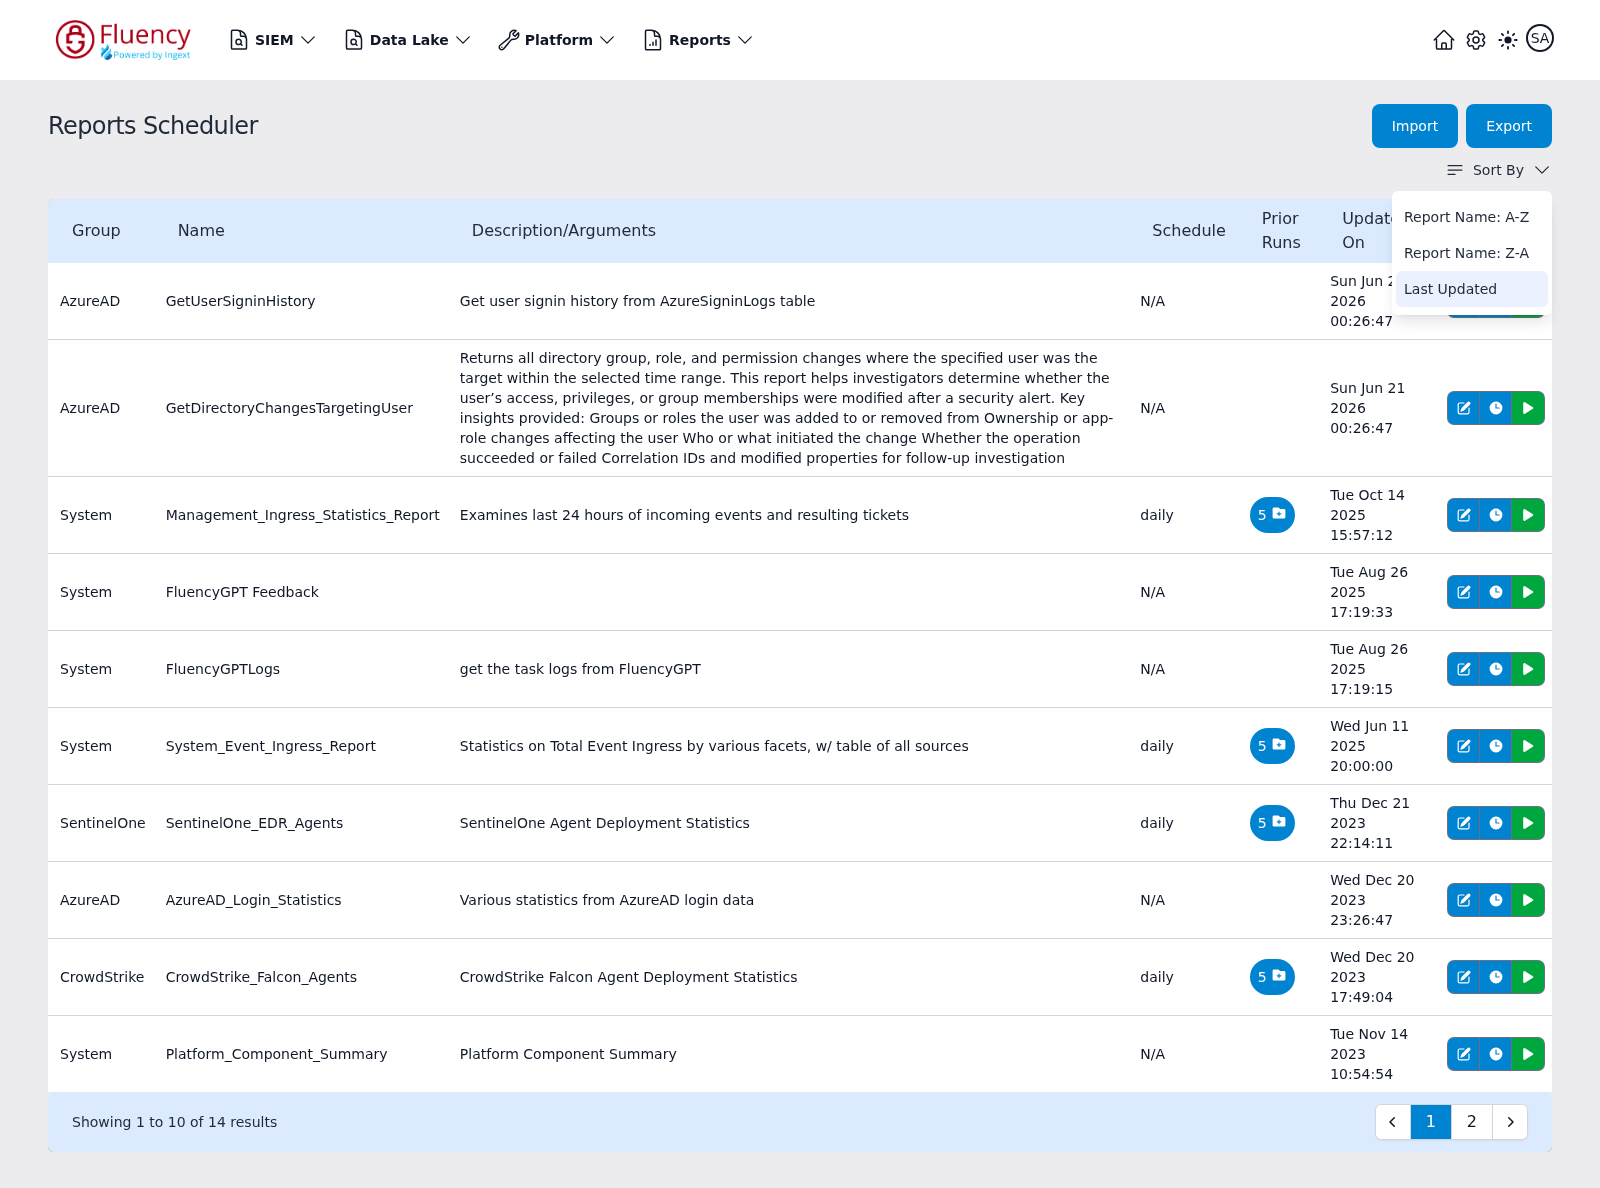
The table reorders as soon as an option is selected.
Report Table
Each row describes one report:
- Group — the category the report belongs to (for example a vendor or System).
- Name — the report name.
- Description/Arguments — the report's description text.
- Schedule — the recurrence, such as daily, or N/A when the report is unscheduled.
- Prior Runs — a blue count badge when the report has recent runs; empty otherwise.
- Updated On — the date and time the report was last updated.
- Actions — three icon buttons: edit (pencil), schedule (clock), and run (green play). Each opens one of the dialogs described below.
Prior Runs History
Click the count badge in the Prior Runs column to expand a run-history sub-table directly under the row. Its columns are ID, Status, Launched On, Time Taken, Cost, and Actions; each run row ends with a view (eye) icon button. Runs that finished normally show a green completed status badge:
Runs that did not finish show a red aborted status badge instead. Click the badge again to collapse the history.
Row Actions
Edit FPL Report
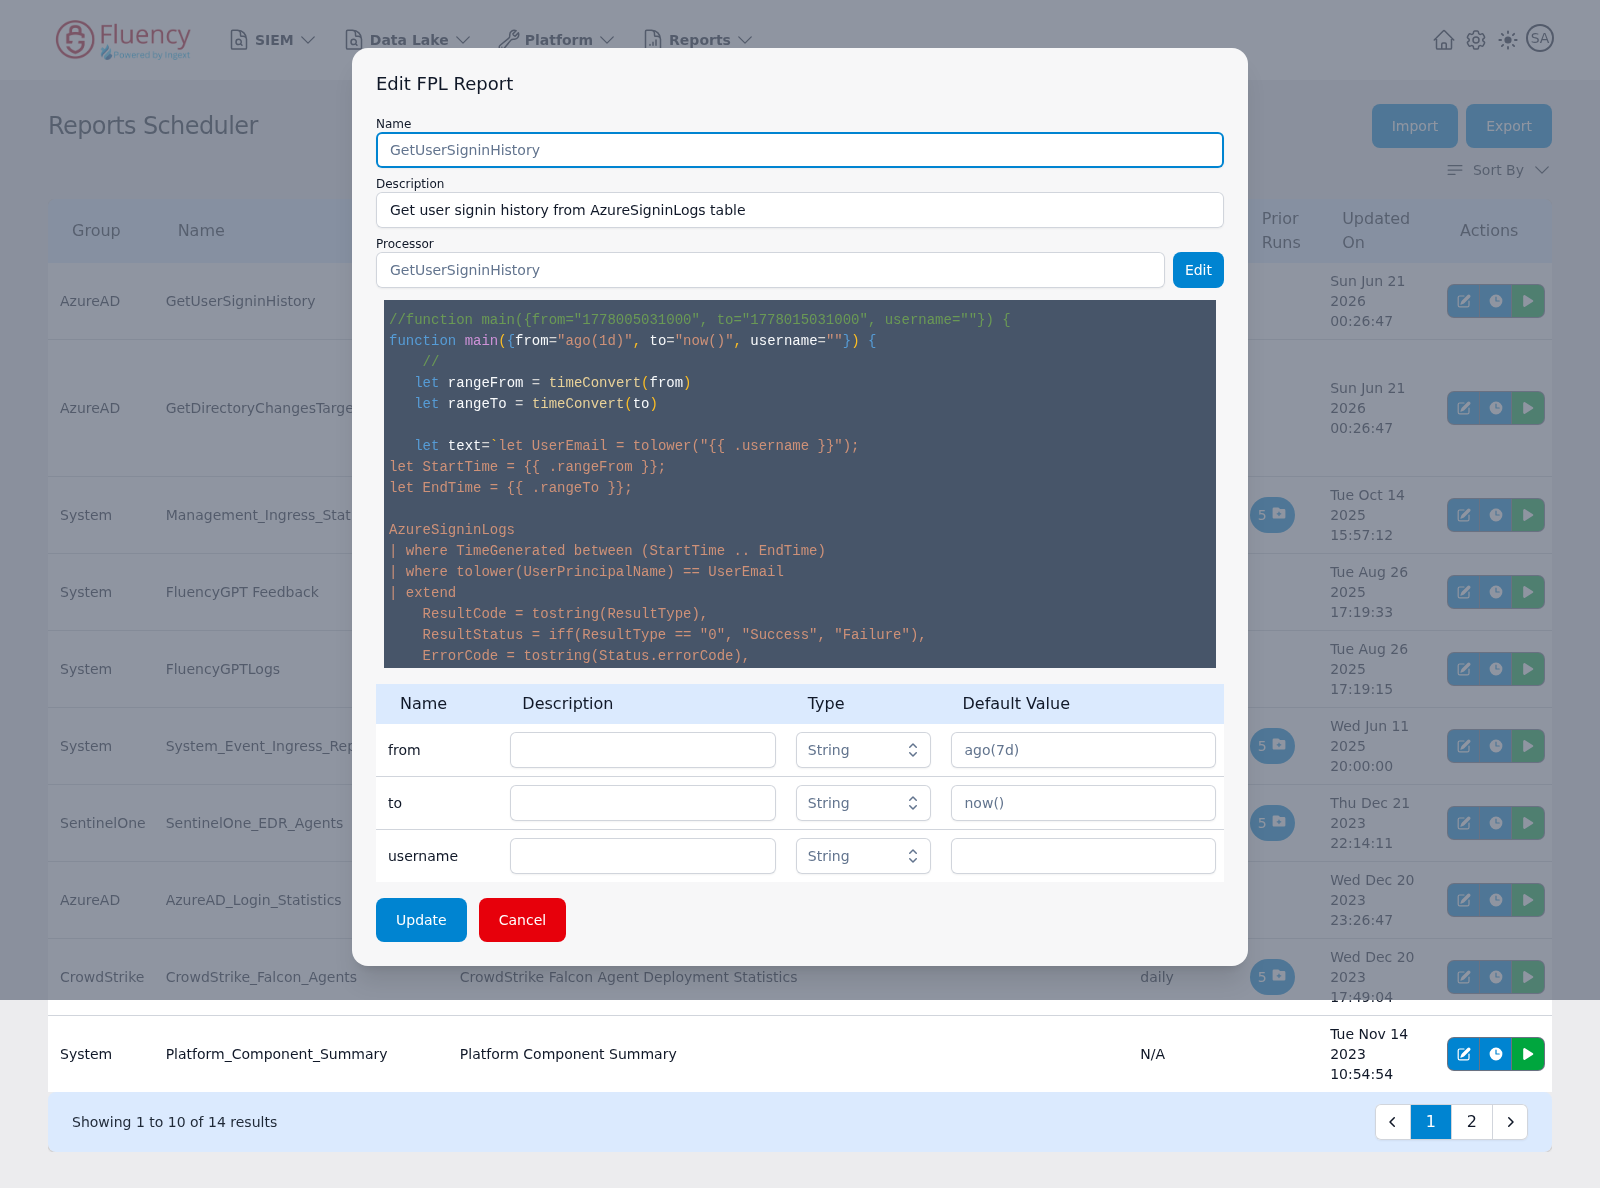
The pencil icon opens the Edit FPL Report dialog for the row's report:
- Name — the report name.
- Description — the report description.
- Processor — the FPL processor the report is based on, with an Edit button that opens the processor for editing. The processor can have a different name than the report.
- A read-only preview of the processor's FPL code.
- An arguments table with Name, Description, Type, and Default Value columns — one row per report argument (for example
from,to, andusername, each of type String, with defaults such asago(7d)andnow()). Other reports define arguments of other types, such as Integer and Boolean. - Update — saves the changes. Cancel — closes the dialog without saving.
Schedule Report
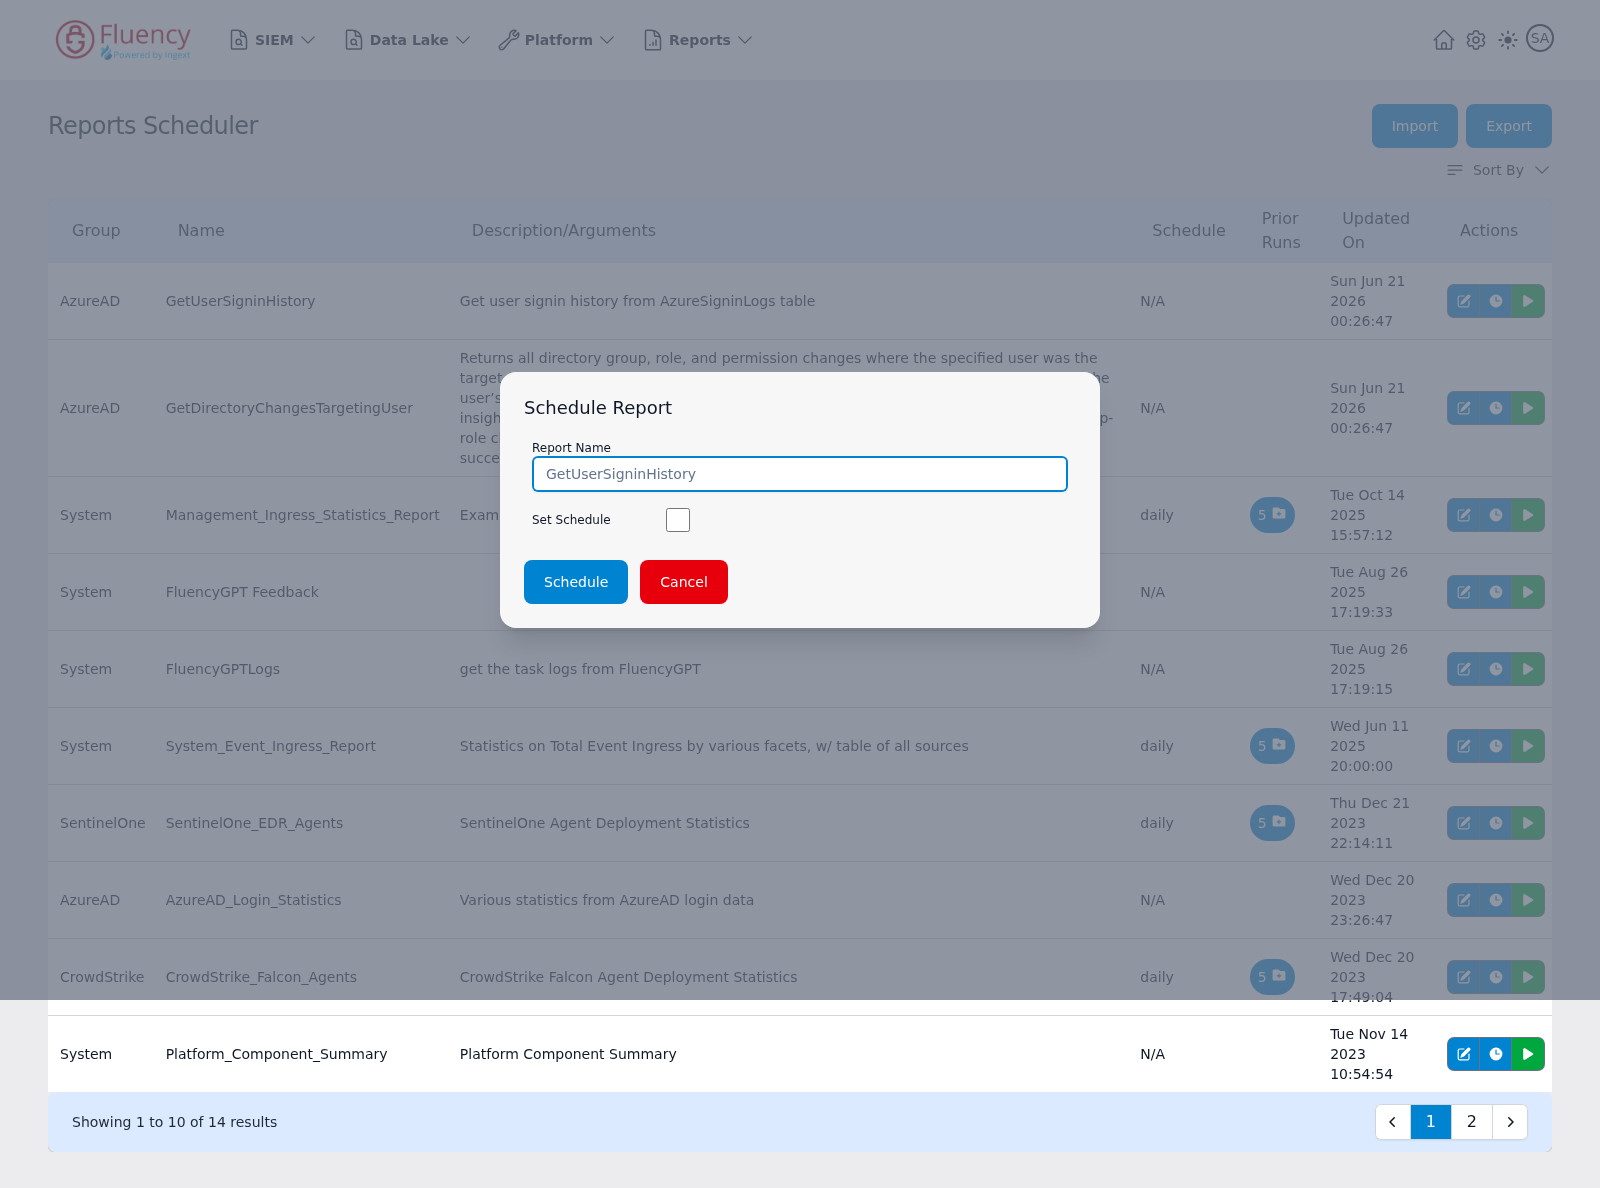
The clock icon opens the Schedule Report dialog. For an unscheduled report it contains:
- Report Name — the name of the report being scheduled.
- Set Schedule — a checkbox that enables the schedule.
- Schedule — saves the schedule. Cancel — closes the dialog without saving.
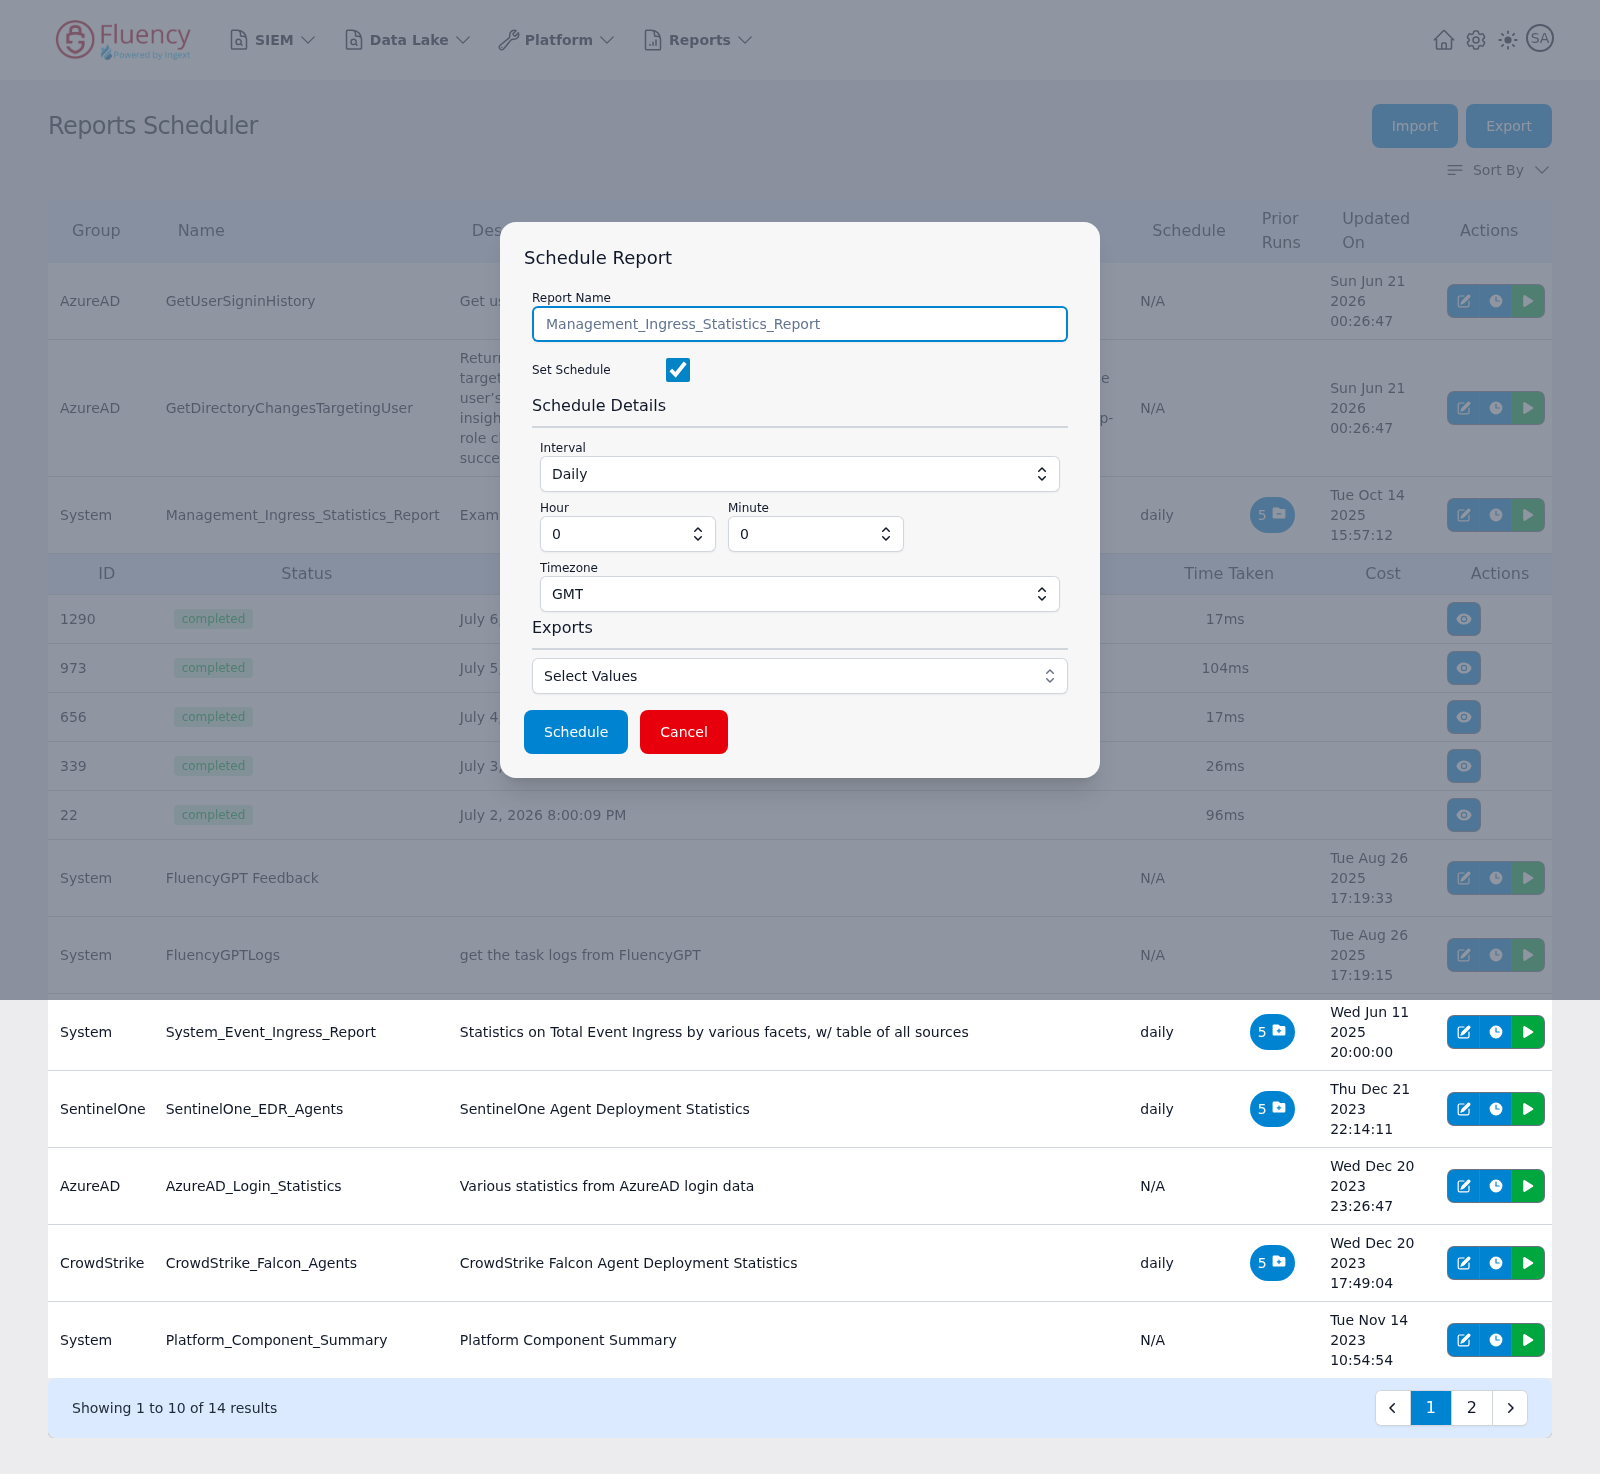
Checking Set Schedule expands the dialog with the schedule settings:
- Schedule Details — an Interval dropdown (for example Daily) with Hour, Minute, and Timezone (for example GMT) selectors that set when the report runs.
- Exports — a Select Values dropdown for choosing export targets for the scheduled report's output.
For a report that already has a schedule, the dialog opens with Set Schedule already checked and the current settings selected.
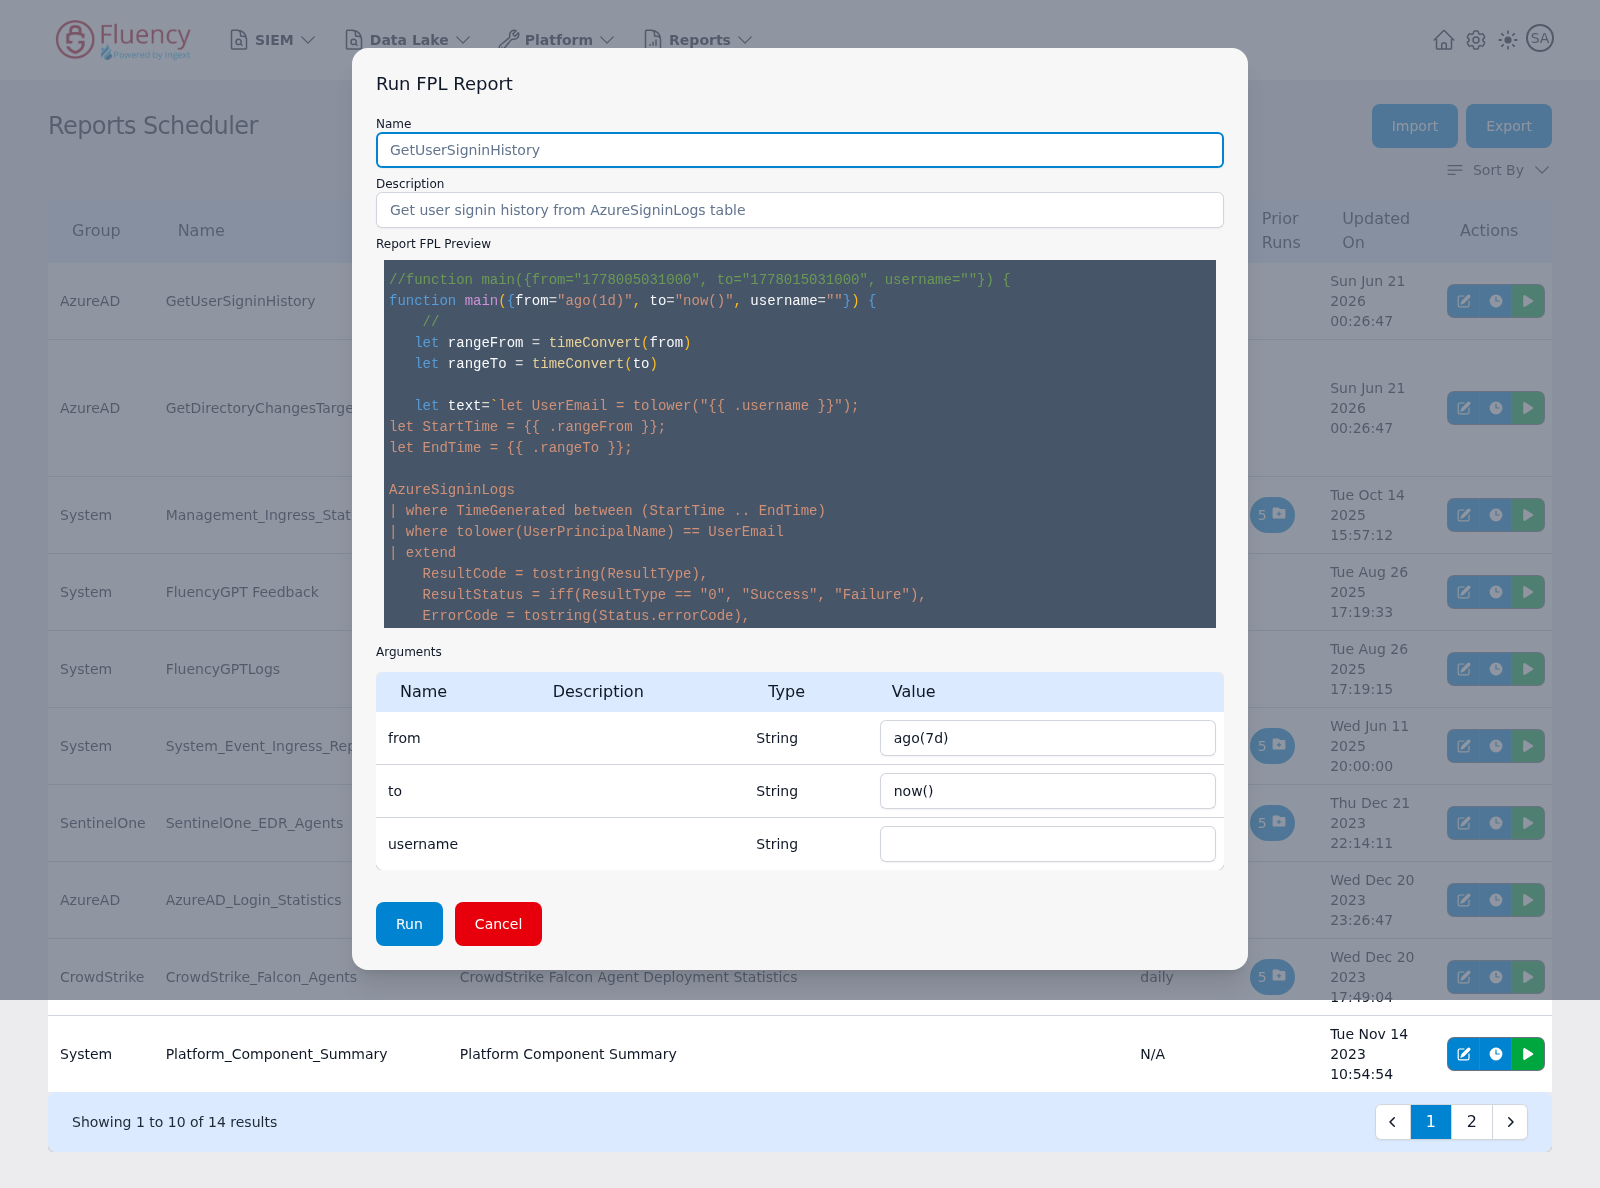
Run FPL Report
The green play icon opens the Run FPL Report dialog, which runs the report on demand:
- Name and Description — identify the report.
- Report FPL Preview — a read-only view of the report's FPL code.
- Arguments — a table with Name, Description, Type, and Value columns. Edit the Value fields to set the arguments for this run (for example
fromset toago(7d)andtoset tonow()). - Run — starts the report run. Cancel — closes the dialog without running.
Pagination
The footer shows the visible range (for example Showing 1 to 10 of 14 results). Use the numbered page buttons or the previous and next arrows on the right to move between pages of the table.