6. Set Up Your First Notification
The final step of the Quickstart: configure one notification endpoint and one rule, so the platform tells you when something happens instead of waiting for you to look. This page is for the administrator finishing the initial setup, and it is the step that turns everything built so far from a system you visit into a system that reaches you.
Before You Begin
- You can reach Platform → Administration → Notifications and Platform → Processors.
- You have the delivery details for wherever the notification should go: a distribution address for email, or a configured Slack workspace and a channel name.
- You have read step 5, so you know what a behavior summary is — that is what will be arriving in your inbox.
A badly scoped rule mails everyone on the list, repeatedly. If you are exploring an instance someone else runs in production, read this page rather than doing it, or use an endpoint that delivers only to yourself.
How Notifications Are Put Together
Three objects, and they are configured in three different places. That surprises people, so it is worth ten seconds before any clicking:
| Object | What it does | Where it lives |
|---|---|---|
| FPL action | The code that actually sends the message | Platform → Processors, Actions tab |
| Endpoint | Where a notification goes — an address or a Slack channel — backed by an FPL action | Platform → Administration → Notifications, Endpoints tab |
| Rule | What goes there — which patterns trigger which endpoints | The same page, Rules tab |
Two consequences follow from that shape, and both catch people out:
- The FPL Action is a required field on the endpoint form, not an advanced option. The action has to exist before you can save an endpoint, which is why the order below is actions first, endpoint second, rule third.
- An endpoint with no rule pointing at it delivers nothing, silently. There is no error and no warning — the endpoint simply sits there. When a channel that used to work goes quiet, check the Rules tab before assuming a delivery failure.
Why this is more flexible than a mail setting
Because delivery is an FPL action rather than a built-in mailer, the same mechanism that sends an email can post to Slack, call a webhook, or open a ticket in an external system. FPL is the Fluency Programming Language, and actions are one of its object types — the price of that flexibility is the extra object you are about to go and find.
Step 1 — Choose the Endpoint Type
The page offers two endpoint types.
Email
The right first choice, because it needs no external setup. You need a recipient address, and for a first notification that should be your own, not a team distribution list.
Slack
Better for a team that already triages in chat, but the Slack side has to be prepared first: the workspace is connected as an integration on Platform → Integrations, and the endpoint form then asks you to pick that integration and name a channel. See Slack Integration.
Step 2 — Find the FPL Action That Will Back the Endpoint
- Open Platform → Processors.
- Select the Actions tab from the row of object-type tabs — Processors, Receivers, Packers, Actions, Rules — above the card grid.
- Look for an action that sends the kind of message you want. Use the Search box to filter by name, and Sort By → Last Updated to see what has been touched recently.
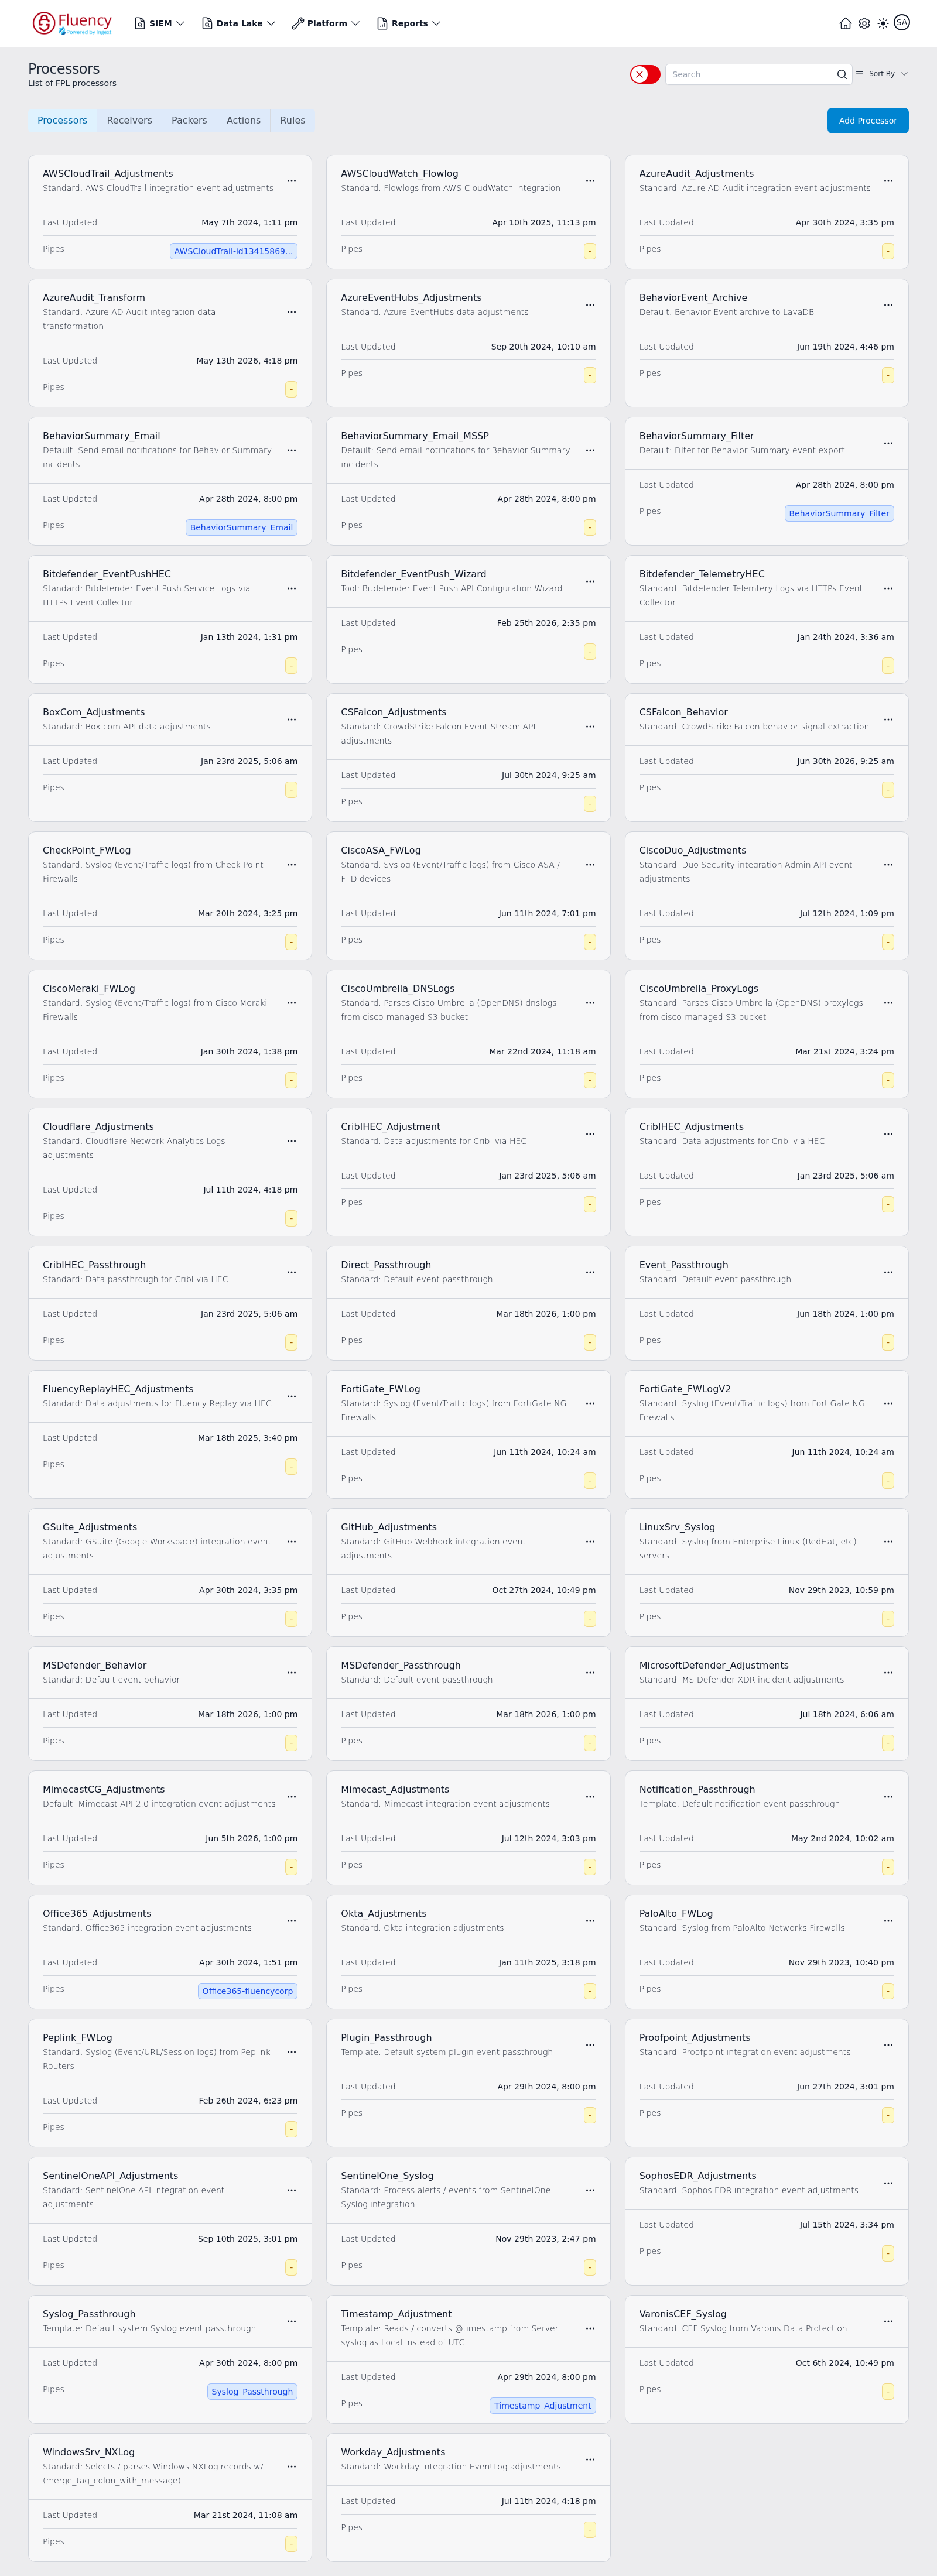
Note what you find, because the endpoint form in step 4 shows these by name in a Select a value drop-down and nothing else.
If there is no suitable action
The intended way to get the behavior-summary notification objects into an account is not to assemble them by hand — it is to install the BehaviorSummary Notification Export application template.
- Go to Platform → Applications → Install Application From Template.
- Choose BehaviorSummary Notification Export from the System Components category. Its description reads Internal: BehaviorSummary notification export (email).
- It takes no parameters, so the form is just Name and Display Name. Press Install.
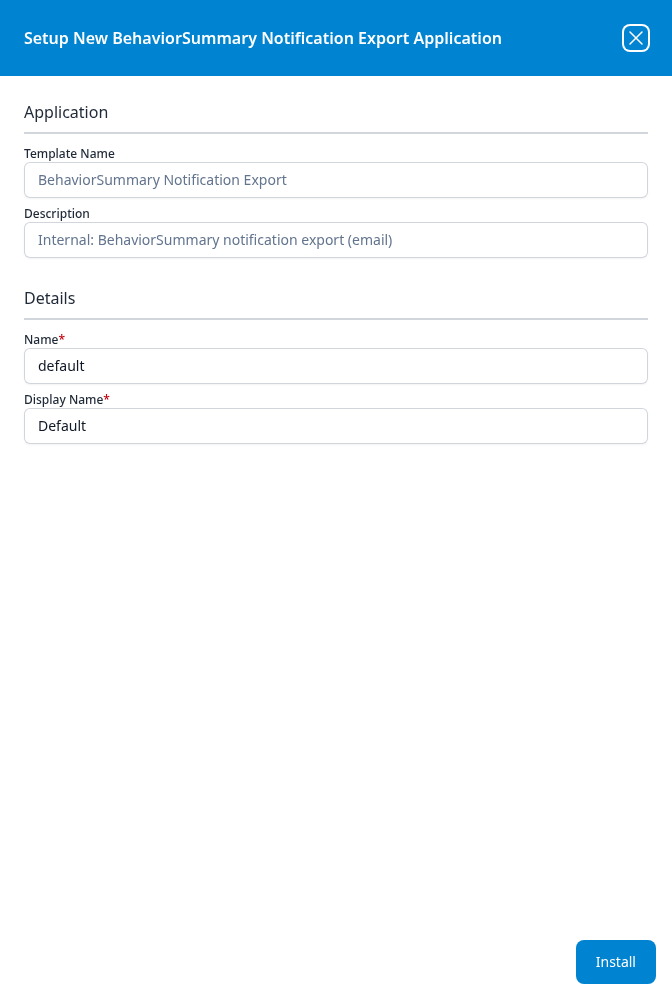
Open the installed application's details panel with the blue eye button on its card. Because the template takes no parameters, the panel goes straight from Details to Actions, which records what it built: a NotificationExport router, a BehaviorSummary data source, the connection between them, and the BehaviorSummary_Filter and BehaviorSummary_Email pipes.
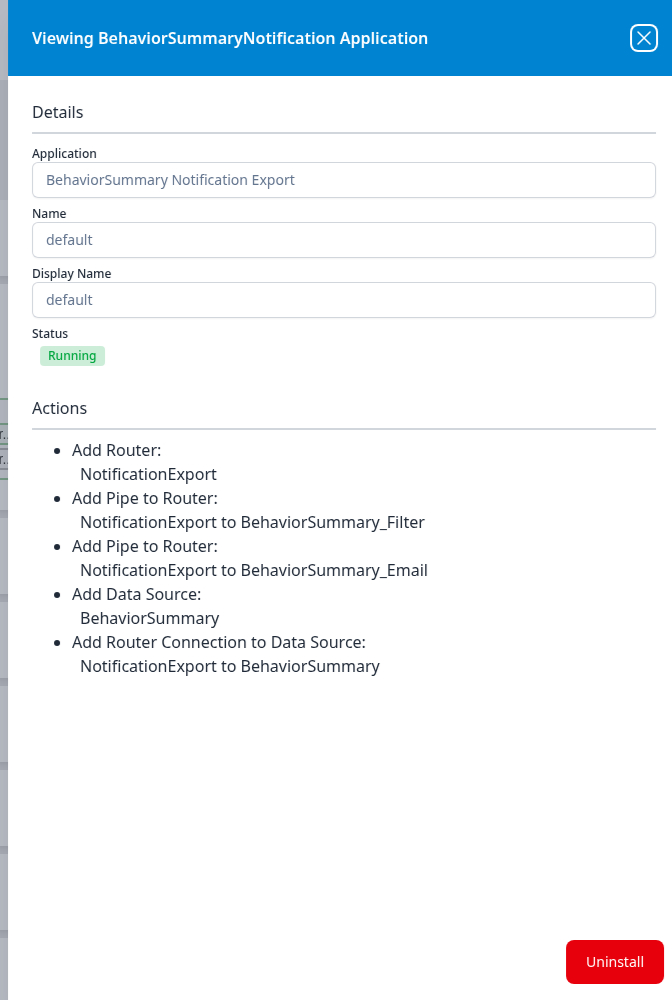
Read that list before editing any of those objects by hand — they belong to the application, and changing them outside it is how a working export quietly stops matching what the application thinks it installed.
Then go back to Platform → Processors → Actions and check the tab again. If the drop-down in step 4 is still empty afterwards, the action has to be written for your account: see FPL for the language, or raise a support ticket rather than working around it — an endpoint cannot be saved without one.
Step 3 — Open the Notifications Page
Open Platform → Administration → Notifications. The page is titled Platform Notifications, subtitled A list of configured notification rules and endpoints.
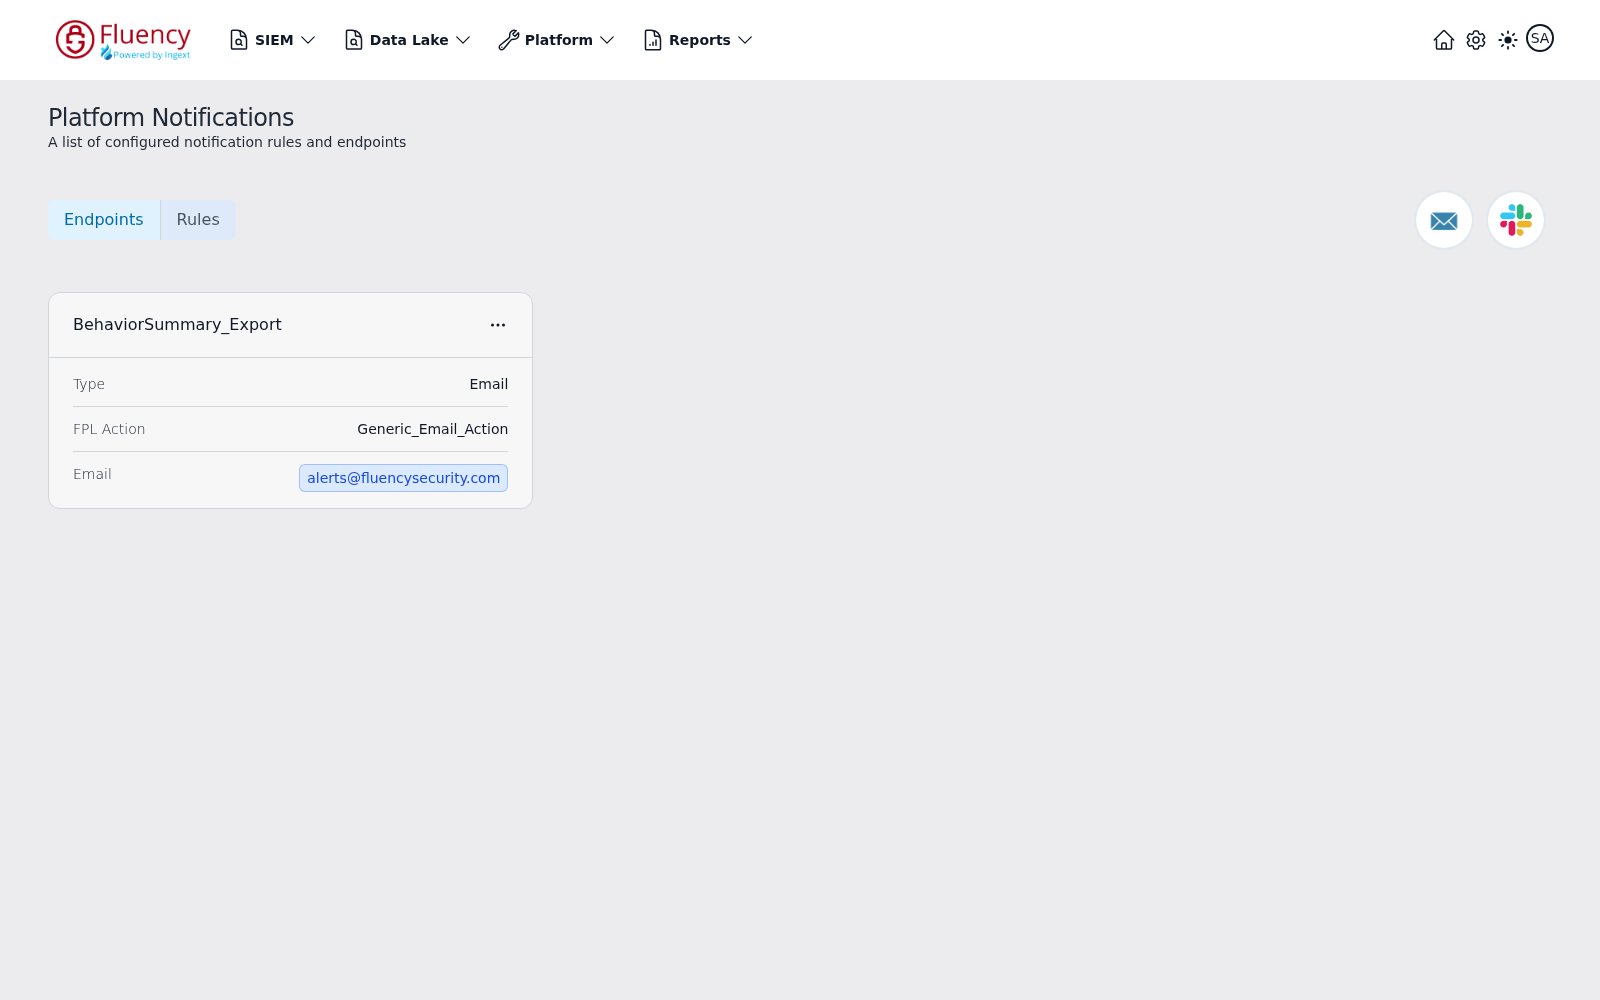
An Endpoints / Rules tab selector sits on the left below the header, with Endpoints shown by default. Two round icon buttons sit on the right of the header — an envelope for an Email endpoint and a Slack mark for a Slack endpoint. Configured items appear underneath as cards.
Step 4 — Add the Endpoint
- Make sure you are on the Endpoints tab.
- Click the round icon button for the type you chose. Each opens the Add Notification Endpoint dialog with Type already set and fixed.
- Fill in the form and click Save. Cancel closes it without saving.
For an Email endpoint:
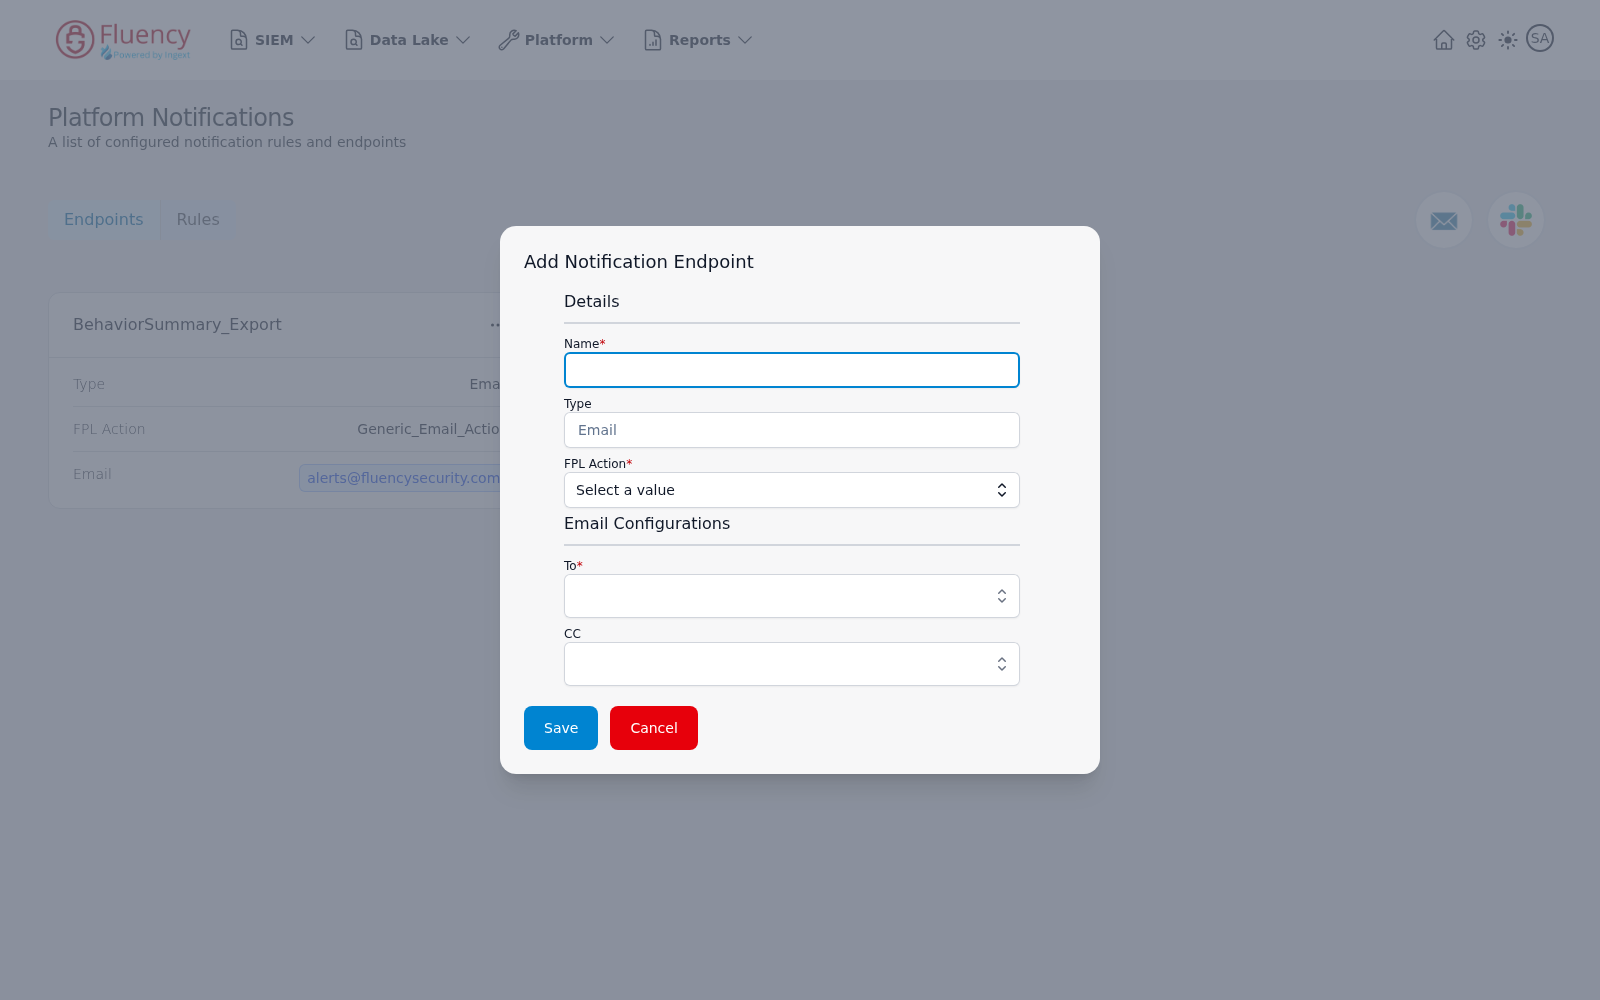
- Details — Name (required); Type, fixed to Email; FPL Action (required), a Select a value drop-down of the actions from step 2.
- Email Configurations — To (required), the recipient selection field, and CC for additional recipients.
For a Slack endpoint:
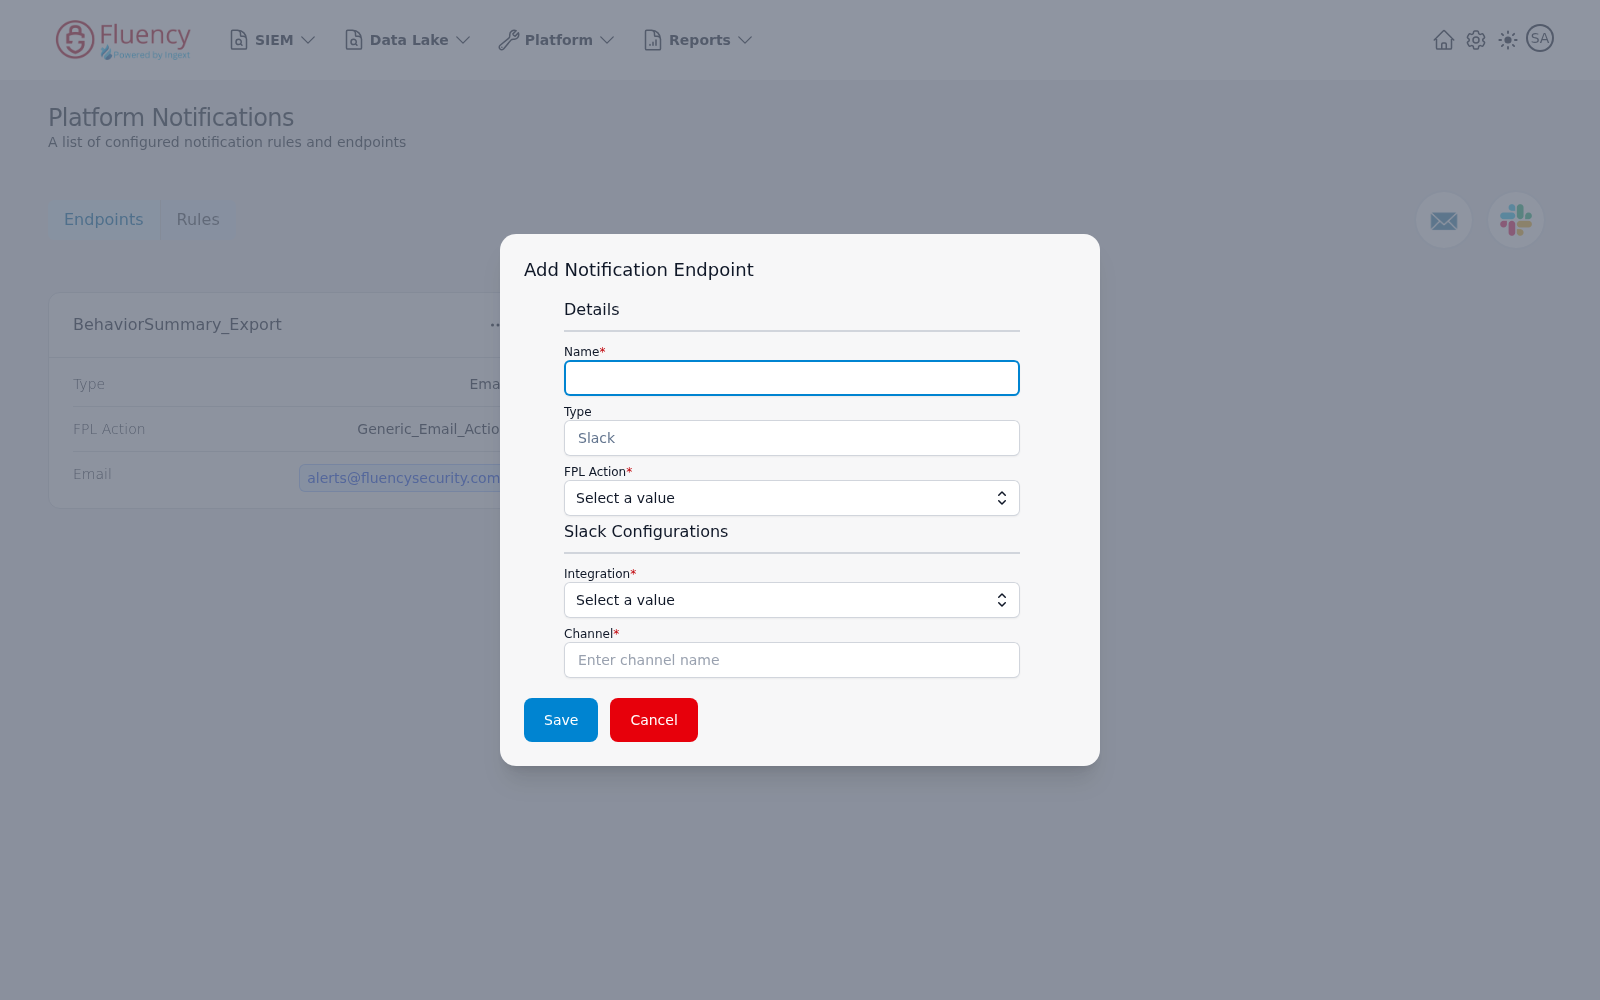
- Details — Name (required); Type, fixed to Slack; FPL Action (required), the same drop-down.
- Slack Configurations — Integration (required), a Select a value drop-down of configured Slack integrations, and Channel (required), a text field with the placeholder Enter channel name.
Give the endpoint a name that says where it goes rather than what it is for — soc-team-email, #sec-alerts — because the rule in step 5 refers to it by name, and one endpoint can serve several rules.
Reading and correcting the endpoint card
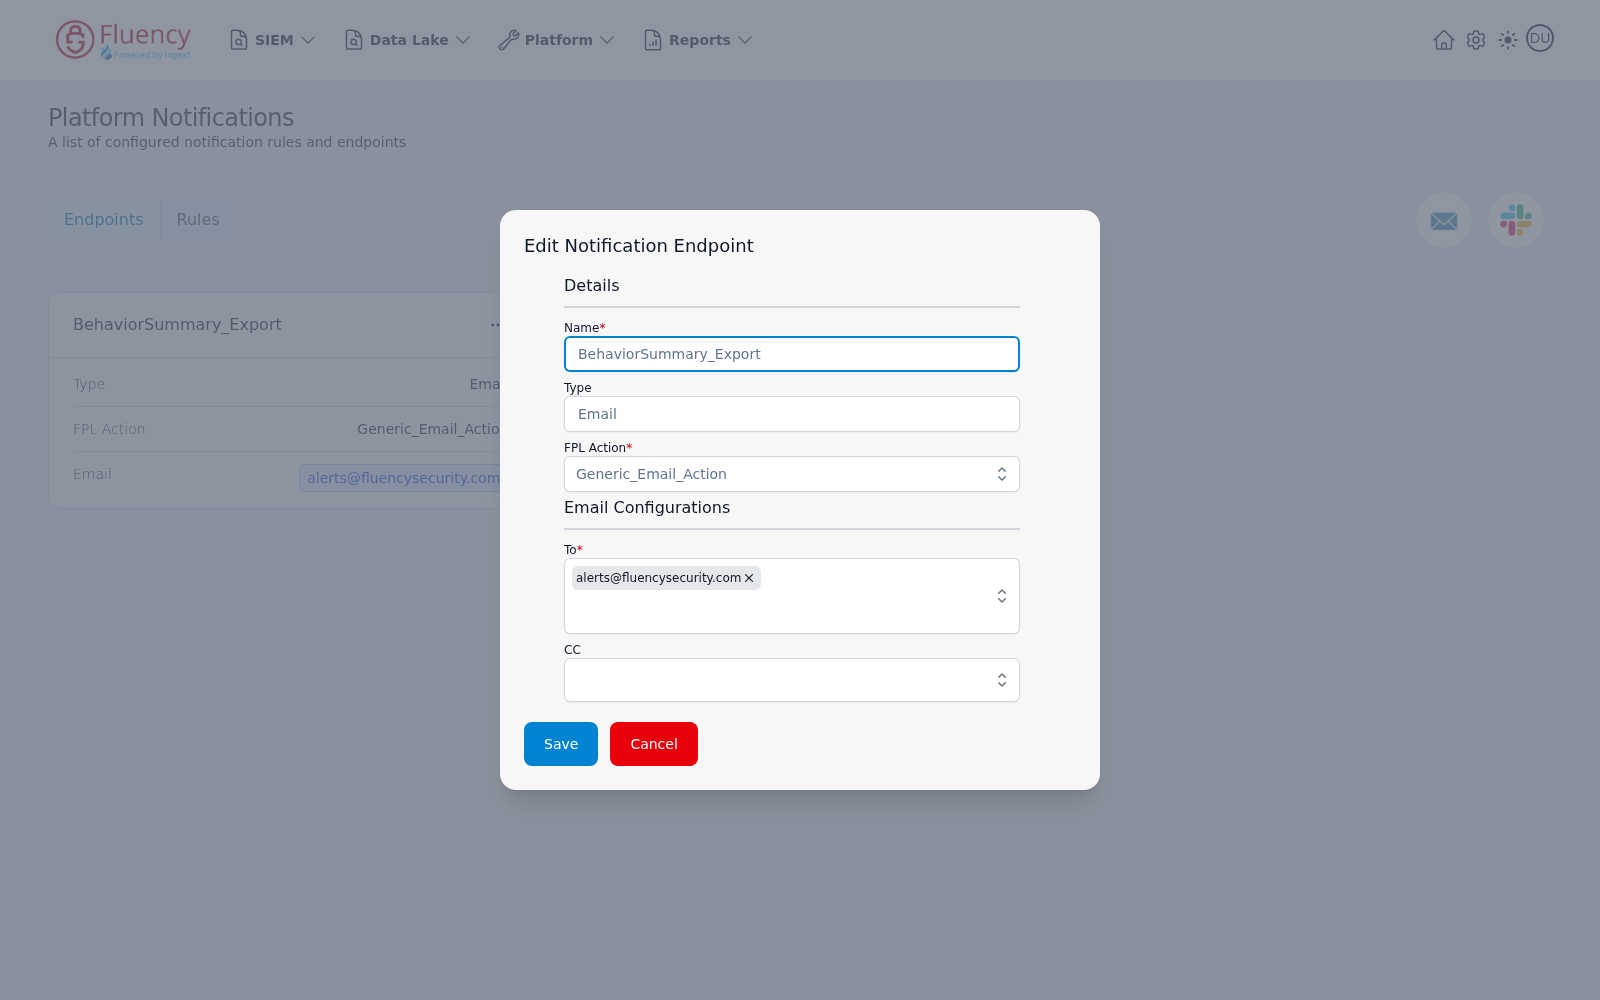
Each configured endpoint appears as a card. The header shows its name and an options button (...); the body lists its properties — for an Email endpoint, Type, FPL Action, and Email (the recipient address, shown as a tag).
Clicking the card body reopens it as the Edit Notification Endpoint dialog, pre-filled, so a wrong recipient or action can be corrected in place. Type is the one field that cannot be changed.
The ... menu is separate and holds a single entry, Delete, which opens a Delete Endpoint confirmation asking Are you sure you want to delete the endpoint followed by its name, with a blue Yes and a red No. Editing on the body and deleting in the menu is easy to get backwards the first time.
Step 5 — Define What Gets Sent
An endpoint on its own delivers nothing. A rule is what connects a trigger to it, and it is a separate object on a separate tab.
-
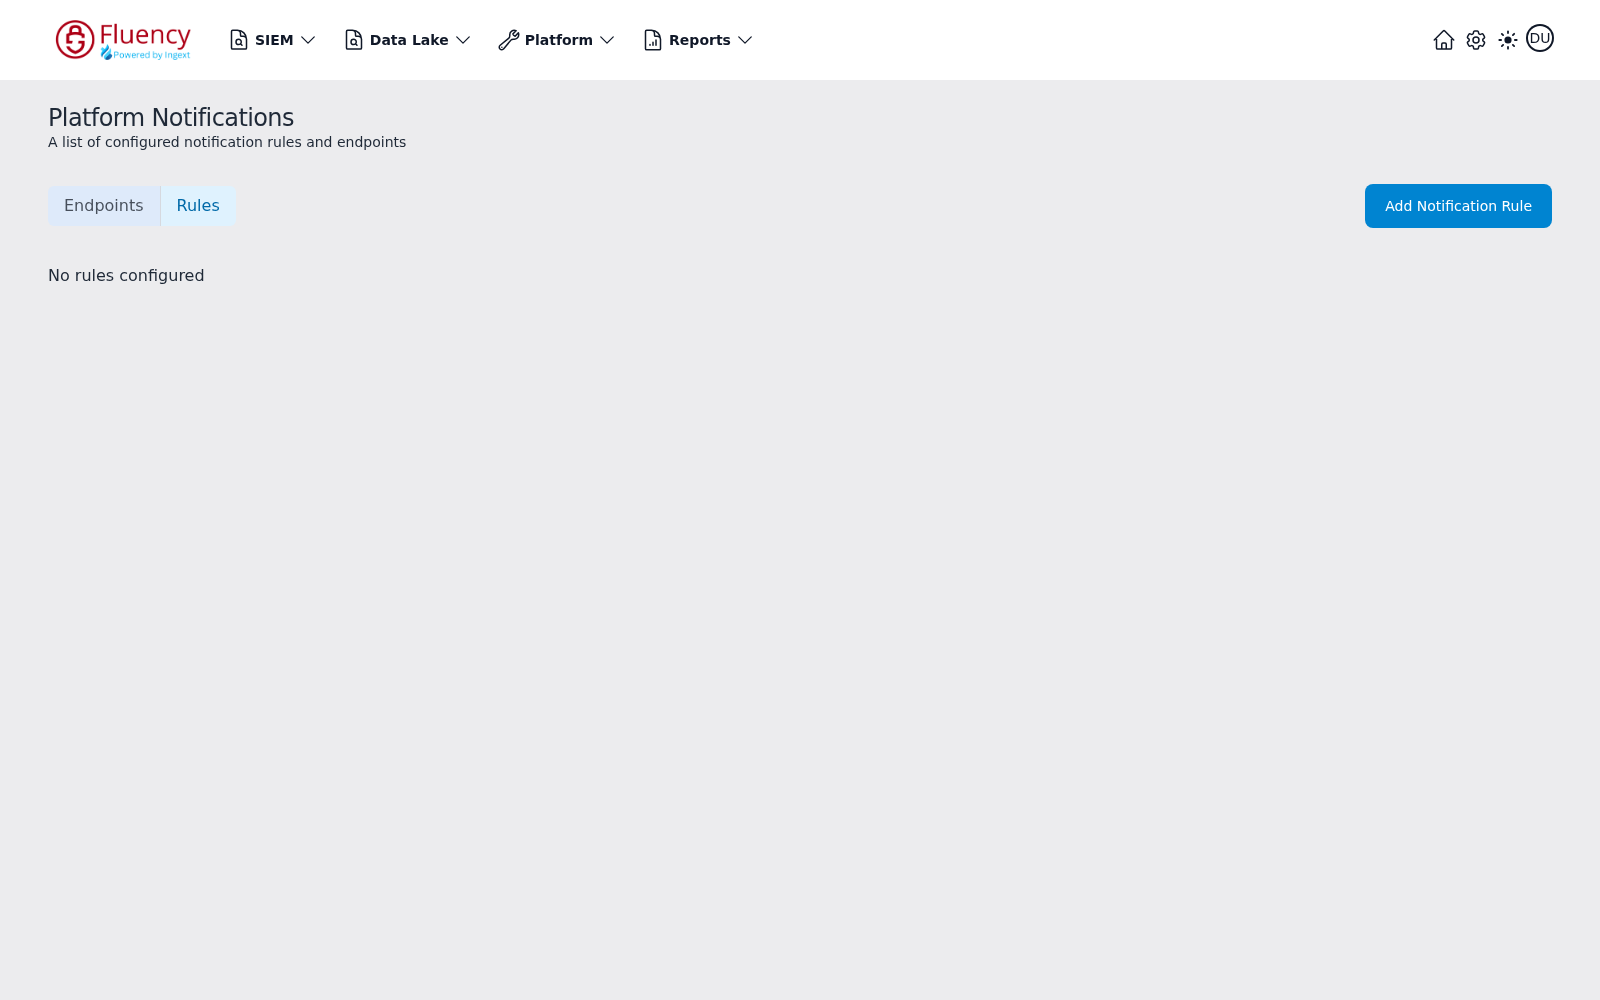
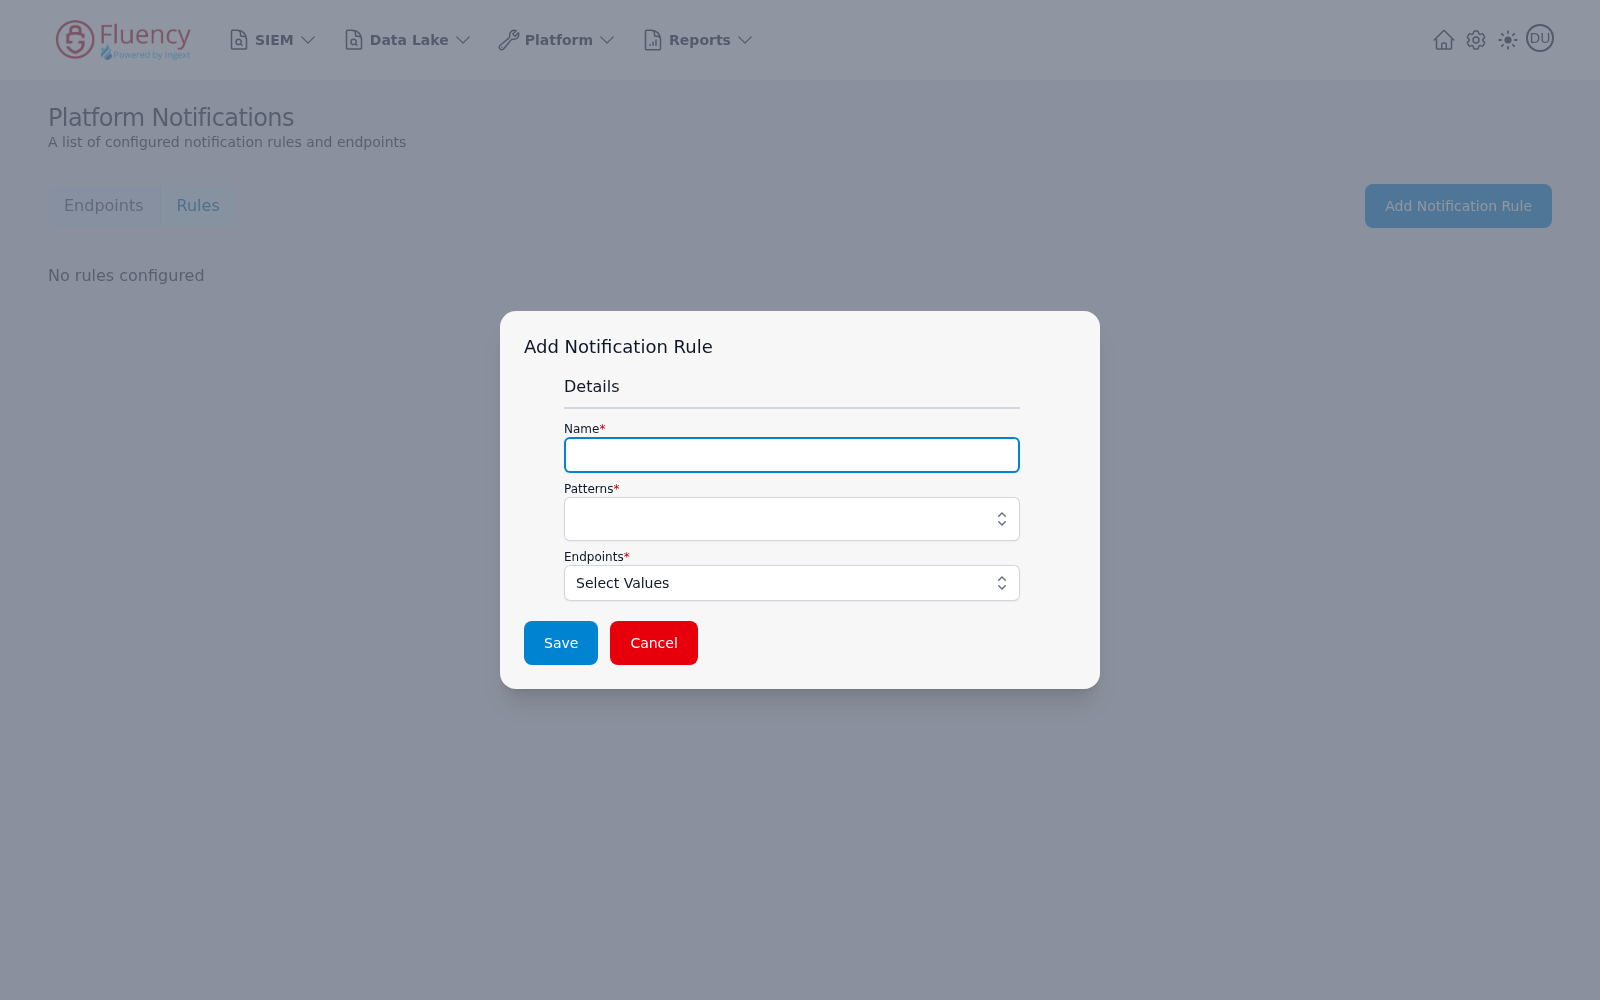
Switch to the Rules tab using the selector on the left of the header. The two round add-endpoint icons are replaced by an Add Notification Rule button; with nothing configured, the body reads No rules configured.
-
Click Add Notification Rule. The dialog has a single Details section with three fields, all required:
- Name — a name for the rule.
- Patterns — a drop-down of the patterns that trigger the rule. This is the only scoping control the dialog has.
- Endpoints — a Select Values drop-down of the endpoints the rule delivers to. It is a multi-select, so one rule can reach both an email list and a Slack channel.
-
Click Save.
Start narrow
An over-broad first notification rule is how a team learns to ignore notifications, and the damage is hard to undo — once people filter your alerts to a folder, a correct one will not reach them either.
The dialog has no severity control, so narrowness comes from Patterns and from the endpoint you point at. For a first rule: pick one pattern, point it at one endpoint that delivers to you, and live with it for a few days. Widen the pattern set and swap in the team's address once you know what the volume actually is.
Step 6 — Confirm It Is Wired Up
The endpoint dialogs offer Save and Cancel only — there is no send-a-test control on this page. Verification is therefore structural first, then real:
- On the Endpoints tab, confirm the endpoint card shows the expected Type, FPL Action, and destination.
- On the Rules tab, confirm the rule exists and names your endpoint under Endpoints. A rule that does not name it is the silent-failure case described at the top of this page.
- Wait for the first qualifying ticket, then read the delivered message: it should identify the entity, the severity, and give you a way back into the platform.
If nothing has qualified yet, that is step 5's situation and not a delivery problem — a quiet queue delivers quietly.
How to Tell It Worked
- The endpoint appears on the Endpoints tab with the expected type, FPL action, and destination.
- The rule appears on the Rules tab, names one pattern, and names your endpoint.
- When a qualifying ticket is raised, the message arrives.
- The delivered message contains enough context to decide whether to act, without first opening the platform.
If It Did Not Work
| Symptom | Likely cause | What to do |
|---|---|---|
| The FPL Action drop-down is empty and the endpoint cannot be saved | No action exists in the account | Install BehaviorSummary Notification Export (step 2), then re-check Platform → Processors → Actions |
| The endpoint saves, but nothing is ever delivered | No rule names it, or no ticket has qualified | Check the Rules tab first; then check that tickets are being raised at all on SIEM → Overview Summary |
| Email is not received, and the rule looks right | Delivery is being filtered on the recipient side | Check spam handling and any allow-list requirement on your mail gateway |
| Slack messages do not appear | The Slack integration, its token, or the channel permissions are wrong | Slack Integration |
| Too many notifications | The pattern set is too broad | Narrow the Patterns on the rule rather than deleting the endpoint — deleting it hides the problem and loses the configuration |
| It worked, then stopped | A pipeline object the notification export owns was edited by hand | Compare against the Actions list on the application's details panel |
Deeper symptom-by-symptom diagnosis is in Notification Delivery.
You Have Finished the Quickstart
You now have a Microsoft 365 tenant delivering three feeds into the data lake, ingress you can verify in three places, a search you know how to scope and read, a detection you have traced from a risk score back to the vendor's own record, and a notification that reaches you without you looking.
That is one source. The rest of the manual is about the other ones, and about making what you just built specific to your organization.
Where to Go Next
- Connect the rest of your sources — Integration Matrix lists every supported source and the method each uses. How Data Gets In covers the on-premises paths this quickstart did not touch: syslog, HEC, agents, and collectors.
- Bring the team in — Managing Users and Managing Roles.
- Tune what you are alerted on — Detections, Managing Rules, and the Behavior Filters you read about in step 5.
- Learn the triage routine properly — Investigating a Behavior Alert.
- Report on it — Reports for scheduled and on-demand reporting.
- Understand the pipeline you installed — Fluency Platform, and FPL when you want to change what a processor does.
Related
- Platform → Administration → Notifications — the page reference for this step
- Notifications and Alerts and Actions — the wider notification and action system
- Platform → Processors — where FPL objects are managed
- Slack Integration
- Notification Delivery — when a channel goes quiet
- Notification and ticketing integrations — sending into an external ticketing system instead