Managing Roles
The Roles editor is now a tab of the Permissions page, described from the July 2026 capture in the sections immediately below. Everything from The older Roles page onward is from a build of the portal that is no longer shipping and is kept only until it is rewritten.
Where roles live in the current interface
Roles are managed on Settings → Advanced → Permissions, on that page's Roles tab (URL path /settings/permissions/Roles).
The Permissions page itself, control by control, is documented in the interface reference at Settings → Permissions, which is canonical for what the screen contains.
Open the Settings page with the gear icon in the navigation bar, then click Advanced in the sidebar. The group expands in place to three entries — GitHub, AWS Roles, and Permissions:
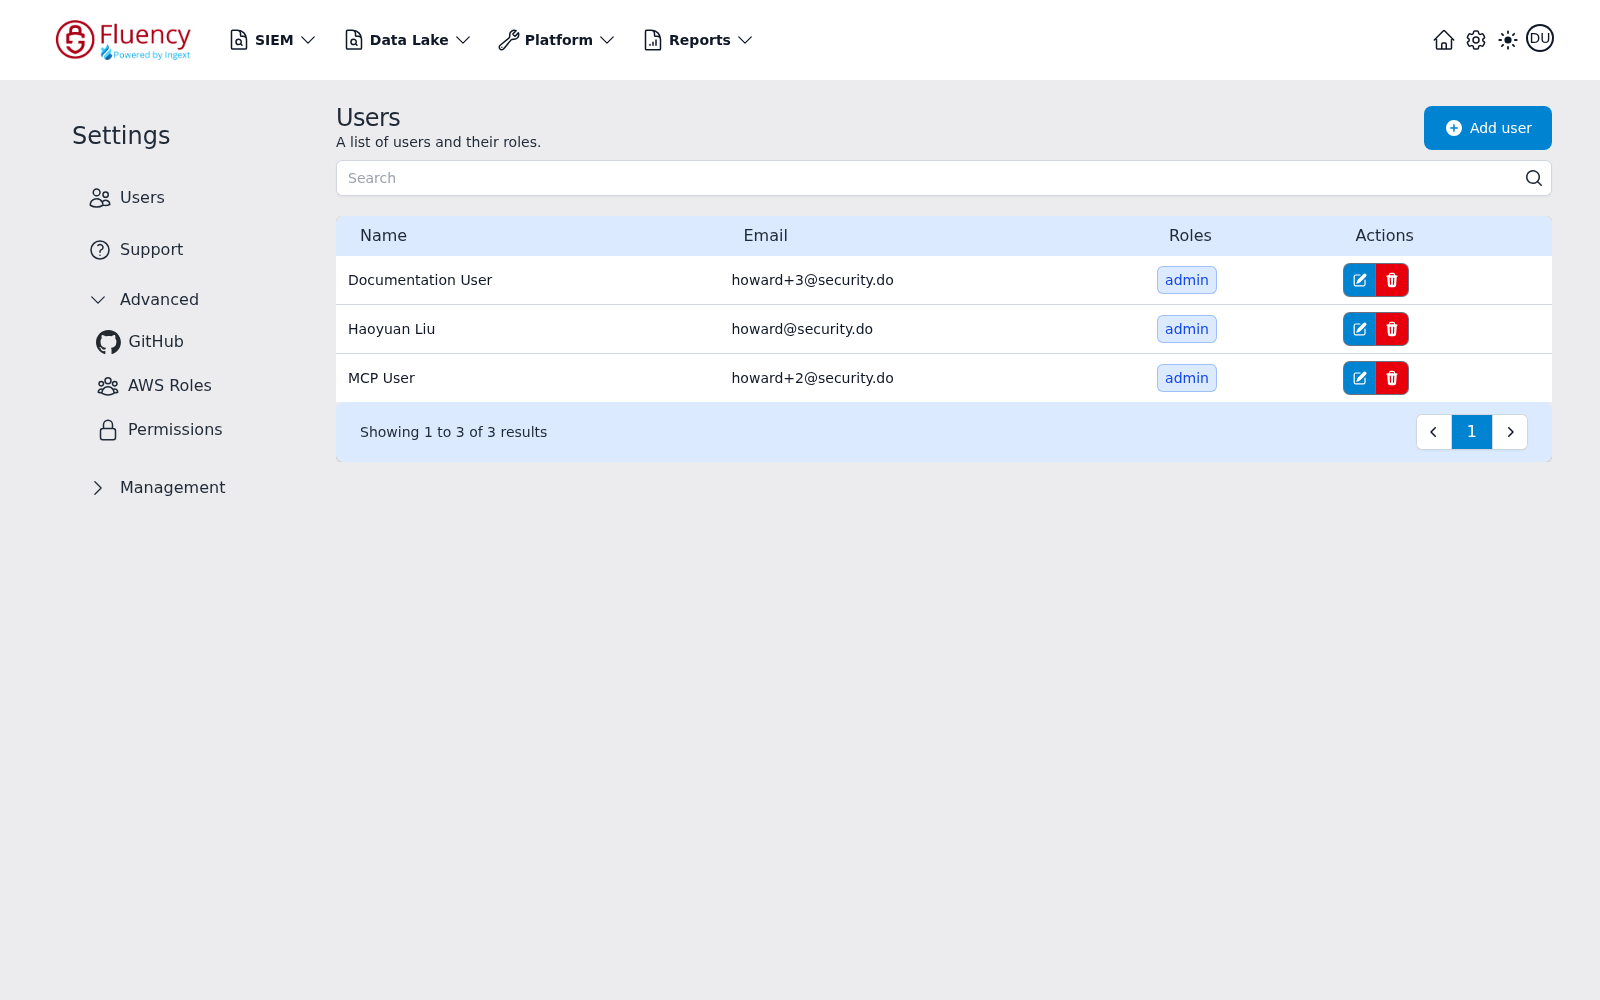
Choose Permissions, then select the Roles tab. The page is titled Permissions, subtitled A list of roles and policies for users, with four tabs — API Tokens, Roles, API Policies, and Data Policies — and an Add button on the right whose label matches the active tab.
The Roles tab
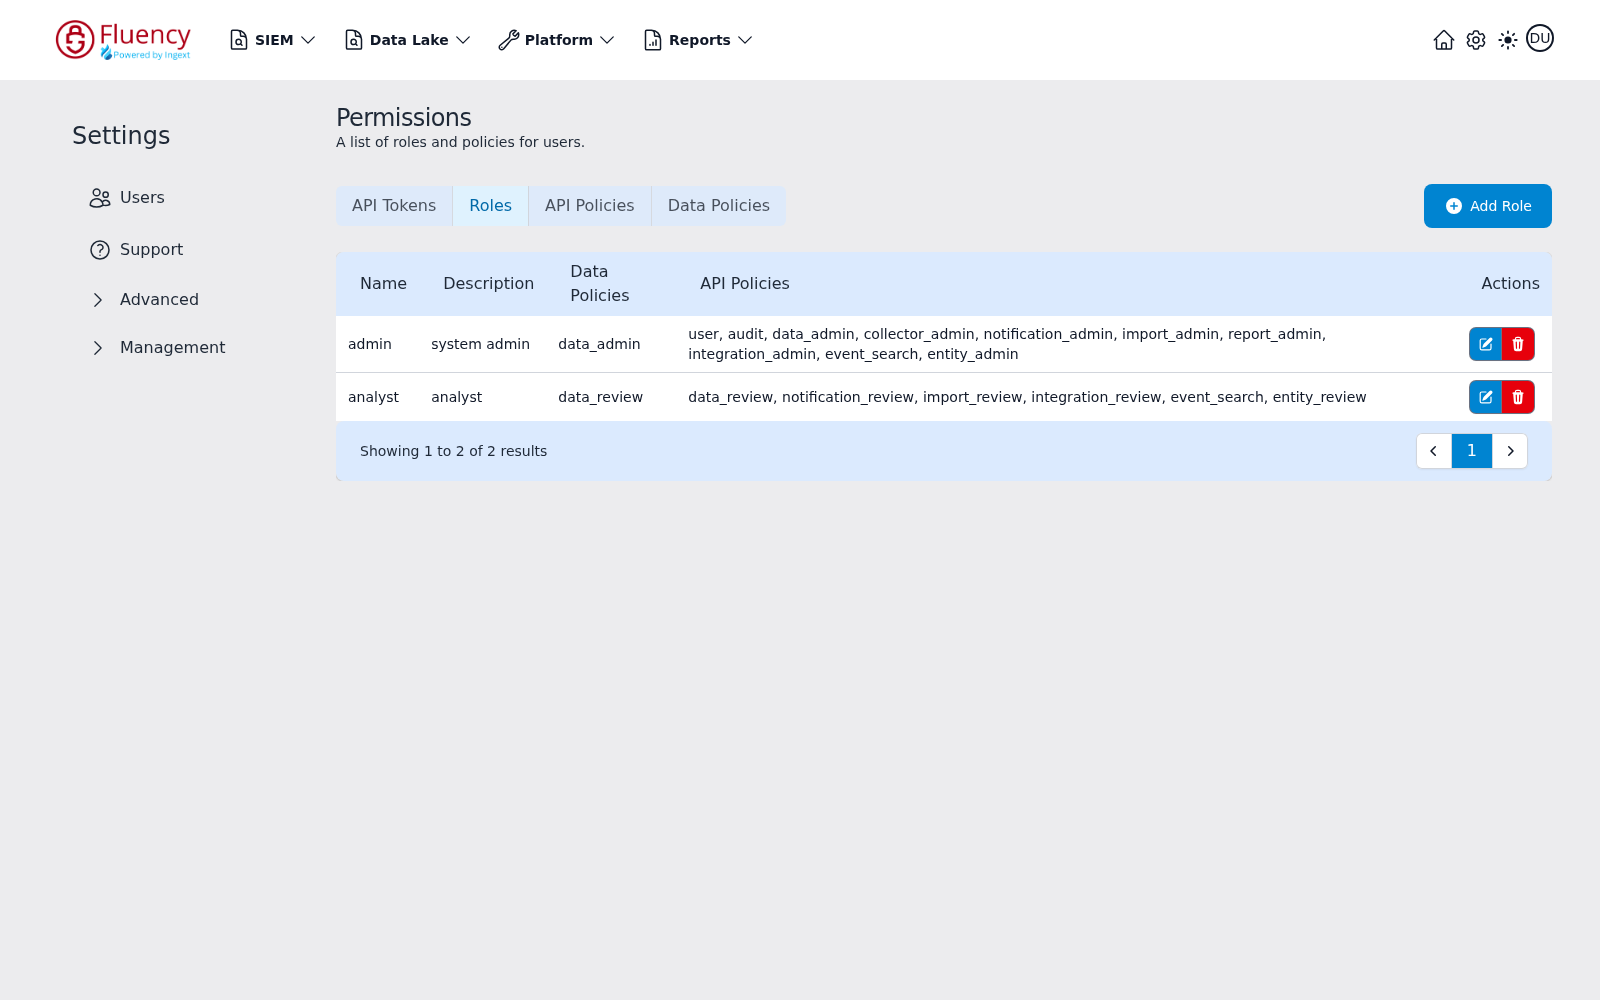
The table has five columns — Name, Description, Data Policies, API Policies, and Actions — and each row's Actions column carries a blue edit button and a red delete button. The Add Role button sits above it on the right.
Two roles ship by default:
| Name | Description | Data Policies | API Policies |
|---|---|---|---|
| admin | system admin | data_admin | user, audit, data_admin, collector_admin, notification_admin, import_admin, report_admin, integration_admin, event_search, entity_admin |
| analyst | analyst | data_review | data_review, notification_review, import_review, integration_review, event_search, entity_review |
The pattern is visible in the policy names: admin carries the *_admin policies, which grant full access to a resource, while analyst carries the matching *_review policies, which grant read access. Both carry event_search, so an analyst can search events.
What analyst does not carry matters as much as what it does. It has no collector, report, audit, or user policy of any kind — not even the review variants — so those areas are closed to it entirely rather than read-only.
There is no client role in the current interface.
Adding a role
Click Add Role, above the table on the right, to open the Add Role dialog. A role is defined by the four values the table shows: a Name, a Description, the Data Policies attached to it, and the API Policies attached to it. The name is what appears in the Roles drop-down when a user is added or edited.
The policies you choose from are themselves defined on the two remaining tabs of the same page:
- API Policies — resource-and-action grants such as
data:[*]orsearch:[read]. See API Tokens → API Policies. - Data Policies —
data_admin("review flow and event data; see original value") anddata_review("review flow and event data").
Note: To save a new role, there must be at least one API policy or data policy attached.
Editing and deleting a role
The blue edit button on a row reopens the role with its current values so its description and attached policies can be changed. The red delete button removes the role. Deleting a role that users still hold leaves those users without the access it granted, so reassign them first.
Assigning a role to a user
Roles are assigned on the user rather than the other way around. The Roles field is a required Select Values drop-down in the User Information section of the Add User dialog, opened with the Add user button on Settings → Users, and of the Update User dialog opened with a row's edit button.
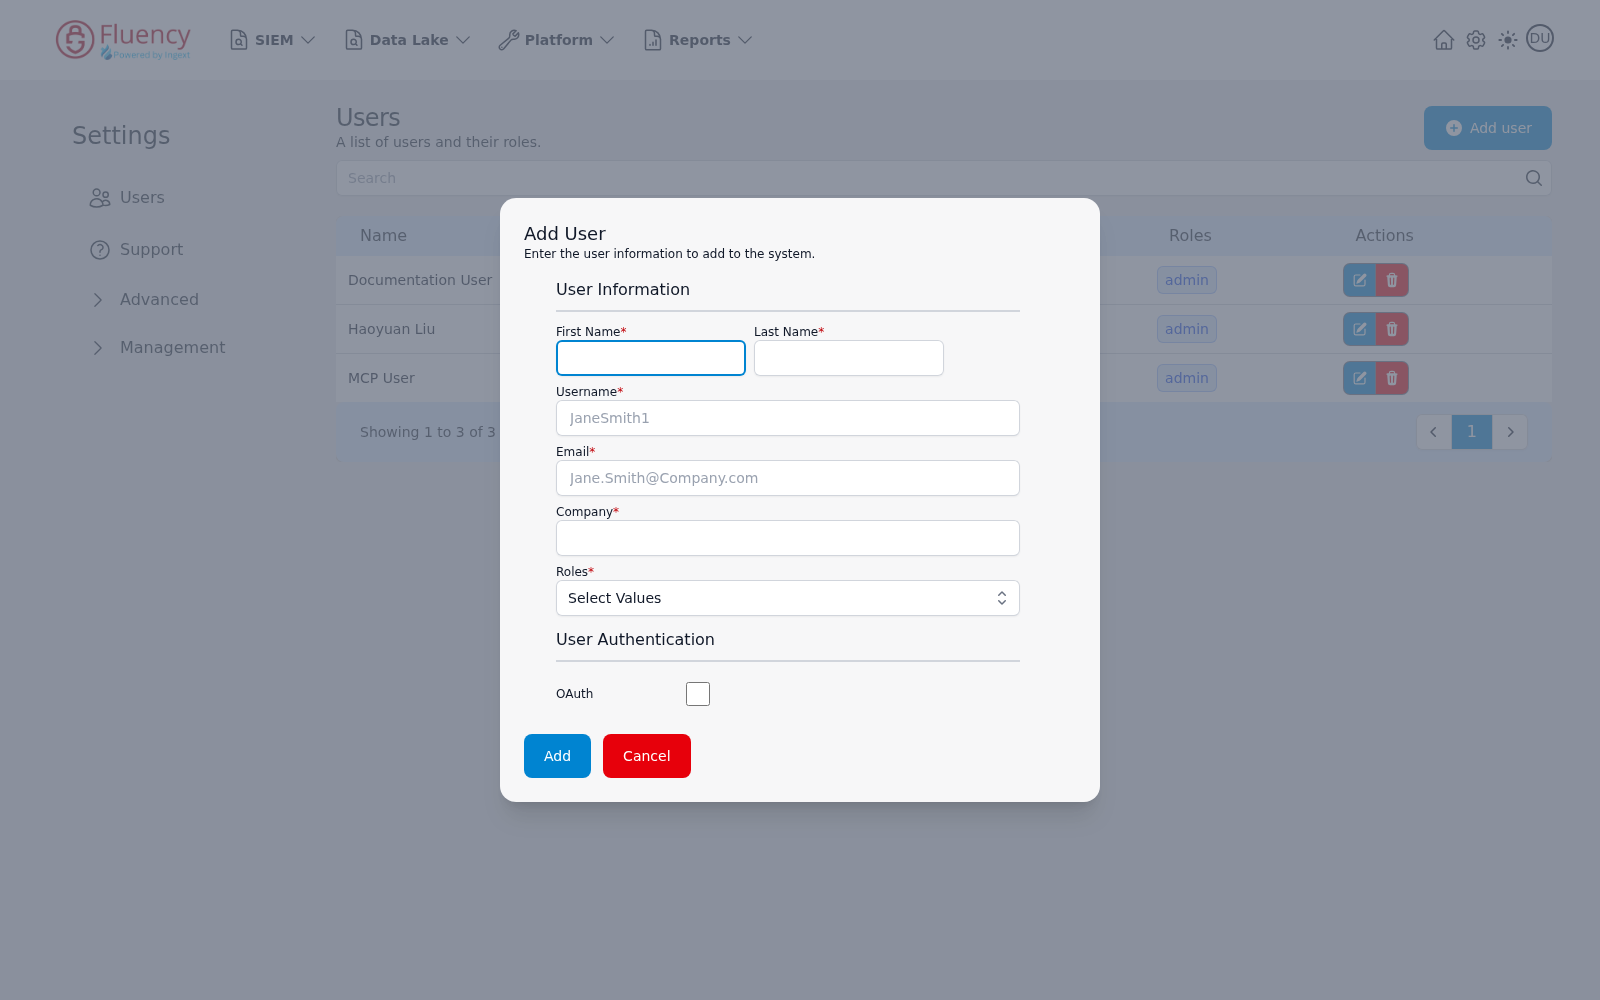
A user may hold more than one role; each assigned role appears as a removable tag in the field and as a tag in the Roles column of the user table.
The older Roles page
Everything from here to the end of the page describes a build of the portal that is no longer shipping.
Page Layout
Sign in to your Fluency portal at https://<companyname>.app.ingext.io — see Fluency Web Interface for the URL formats.
Open the Main Menu from the upper left-hand corner and choose the Roles option under the User Admin section.
This page consists of a table containing the roles that have been configured. The Roles page comes preconfigured with three roles: admin, analyst and client. The admin role has access to all available actions, including configuration. The analyst role is only able to perform actions related to data and analysis. Roles can be added to a user on the Users page to determine what access and permissions they have throughout the Fluency system.
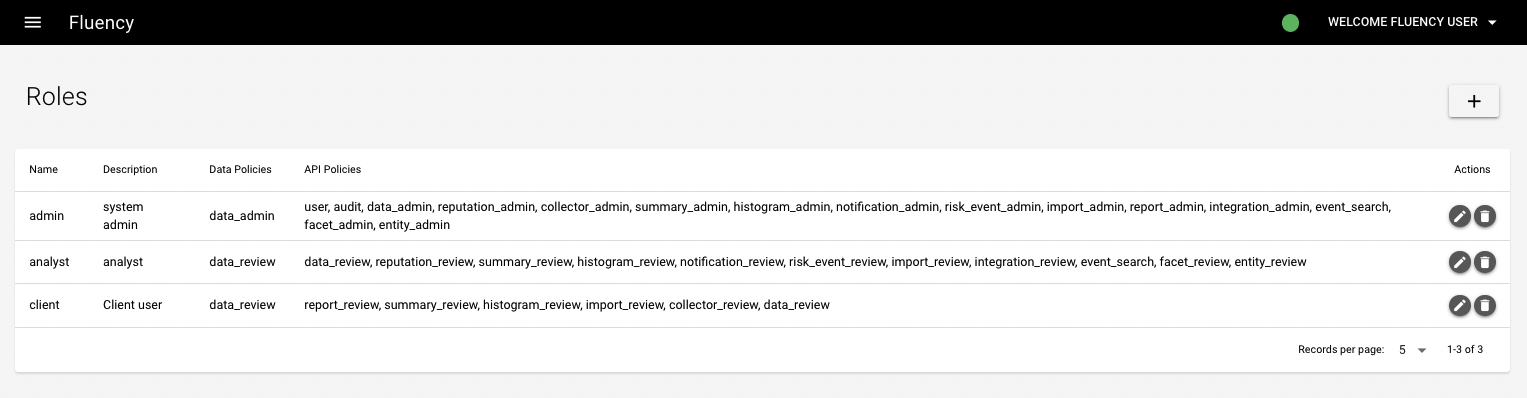
To the right of a role there are two buttons. The left button allows you to edit a role to change its description or associated API and data policies. The right button deletes the role. The "+" button opens a window that allows you to create a new role with predefined API and data policies associated.
Note: Please contact Fluency support for detailed instructions on creating additional custom roles.
If you do not wish to create a custom role, or wish to add more privileges to a pre-existing role, you are also able to manually select any API and data policies you want associated with a user on the Users page. This will allow the user to perform actions that are usually outside the scope of their current role.
Adding a Role (older interface)
There are four fields available when adding a role. The first two are the name of the role and its description. The name will appear on the Users page when adding or editing a user, allowing you to select this role from the drop-down menu and assign that user the policies associated with the role.
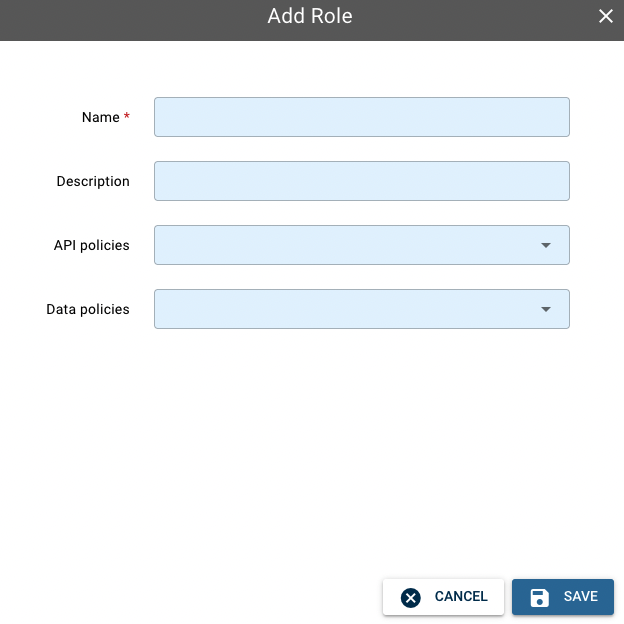
The last two fields allow you to add preconfigured API policies and data policies. The selected policies will give those permissions to the user this role is attached to.
Demo
An interactive demo of managing roles is available here: Managing Roles (Storylane)