Managing Users
Viewing Users
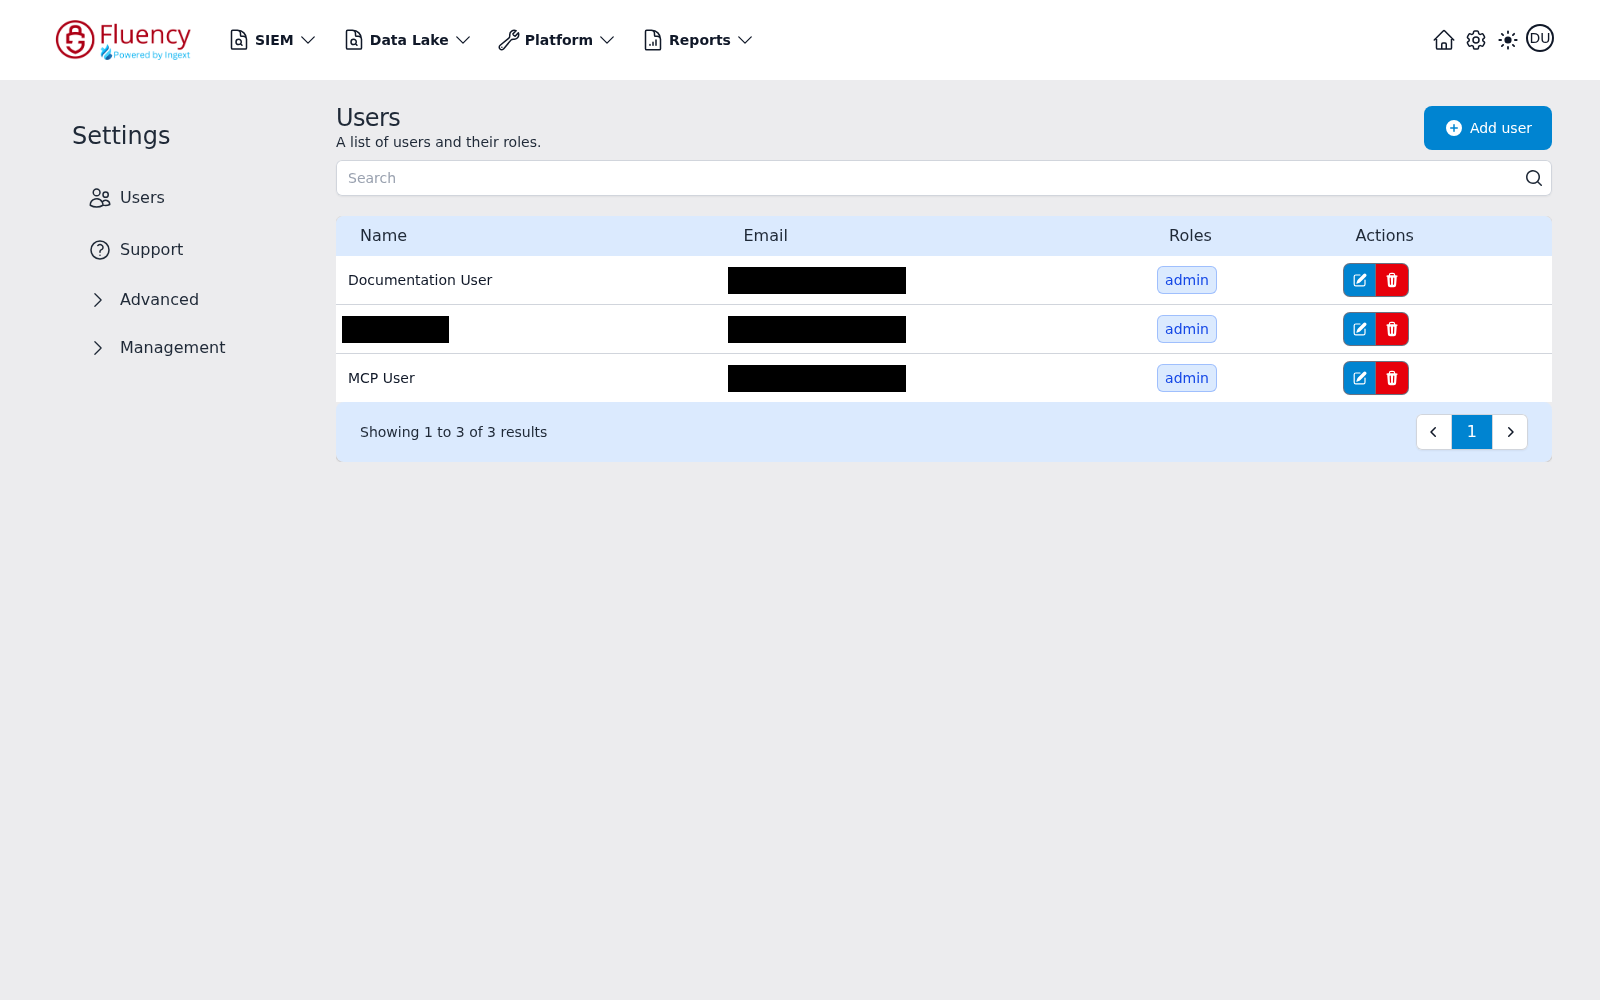
The Users area of the Settings page (URL path /settings/team) lists the account's users and the roles assigned to each. It is titled Users with the subtitle "A list of users and their roles," and its single header action is the Add user button in the upper-right corner.
The page itself, control by control, is documented in the interface reference at Settings → Users, which is canonical for what the screen contains.
Below the header is a Search box, then the user table, then a pagination bar. The table has four columns:
- Name — the user's display name.
- Email — the user's email address.
- Roles — the roles assigned to the user, each shown as a tag.
- Actions — a blue edit (pencil) button and a red delete (trash) button for that row.
The pagination bar reports the range and total — for example Showing 1 to 3 of 3 results — with page controls on the right.
Adding a User
To add a user, select the Add user button on the Settings → Users page to open the Add User dialog, subtitled "Enter the user information to add to the system." Required fields are marked with a red asterisk.
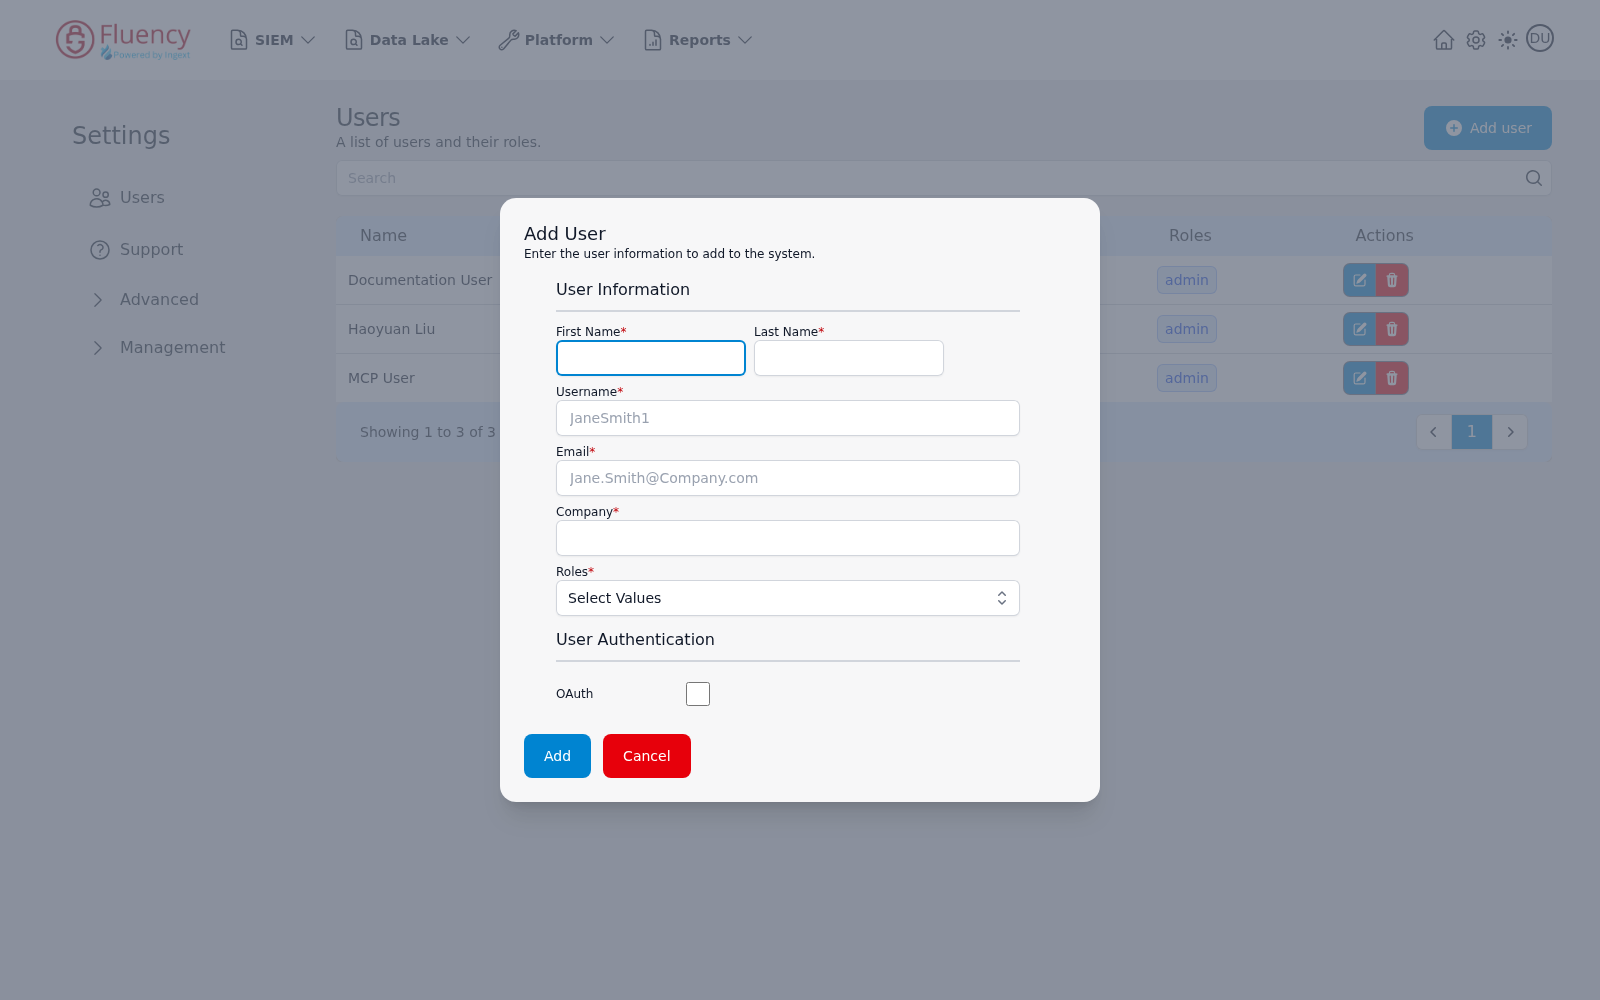
The current dialog is a single form in two sections:
User Information
- First Name (required) and Last Name (required) — side-by-side name fields.
- Username (required) — the sign-in name; placeholder text shows the expected format.
- Email (required) — the user's email address; placeholder text shows the expected format.
- Company (required) — the user's organization.
- Roles (required) — a Select Values drop-down for assigning roles to the user.
User Authentication
- OAuth — a checkbox that enables OAuth authentication for the user.
Click Add to create the user, or Cancel to close the dialog without saving.
Policies are not set on the user — they are attached to the roles you assign. See Managing Roles and API Tokens for the Settings → Advanced → Permissions tabs where they are defined.
Welcome Email
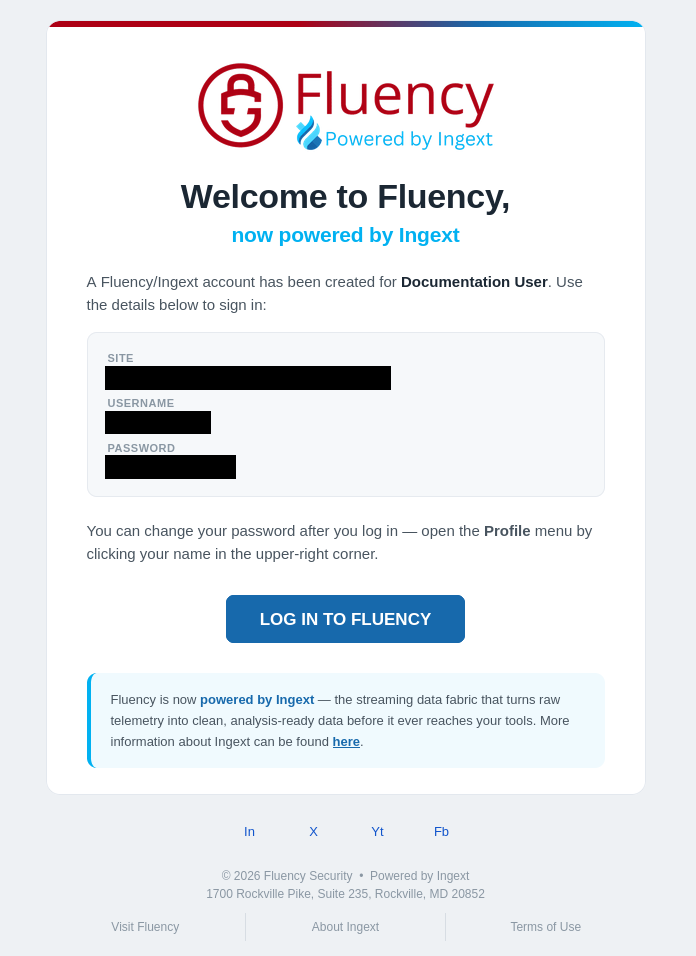
An automated Welcome email will be sent to the email address specified above from Fluency Admin to confirm the user addition. For accounts with the User/Password authentication method, this email will also contain the login Username and a randomly generated Password.
Editing a User's Profile and Access
Once a user has been added to the system, their details and roles can be modified at any time from the Users page.
On the Settings → Users page, locate the user in the list and click the blue edit (pencil) button in the row's Actions column. The Update User dialog opens, carrying the same fields as Add User, pre-filled with the user's current values.
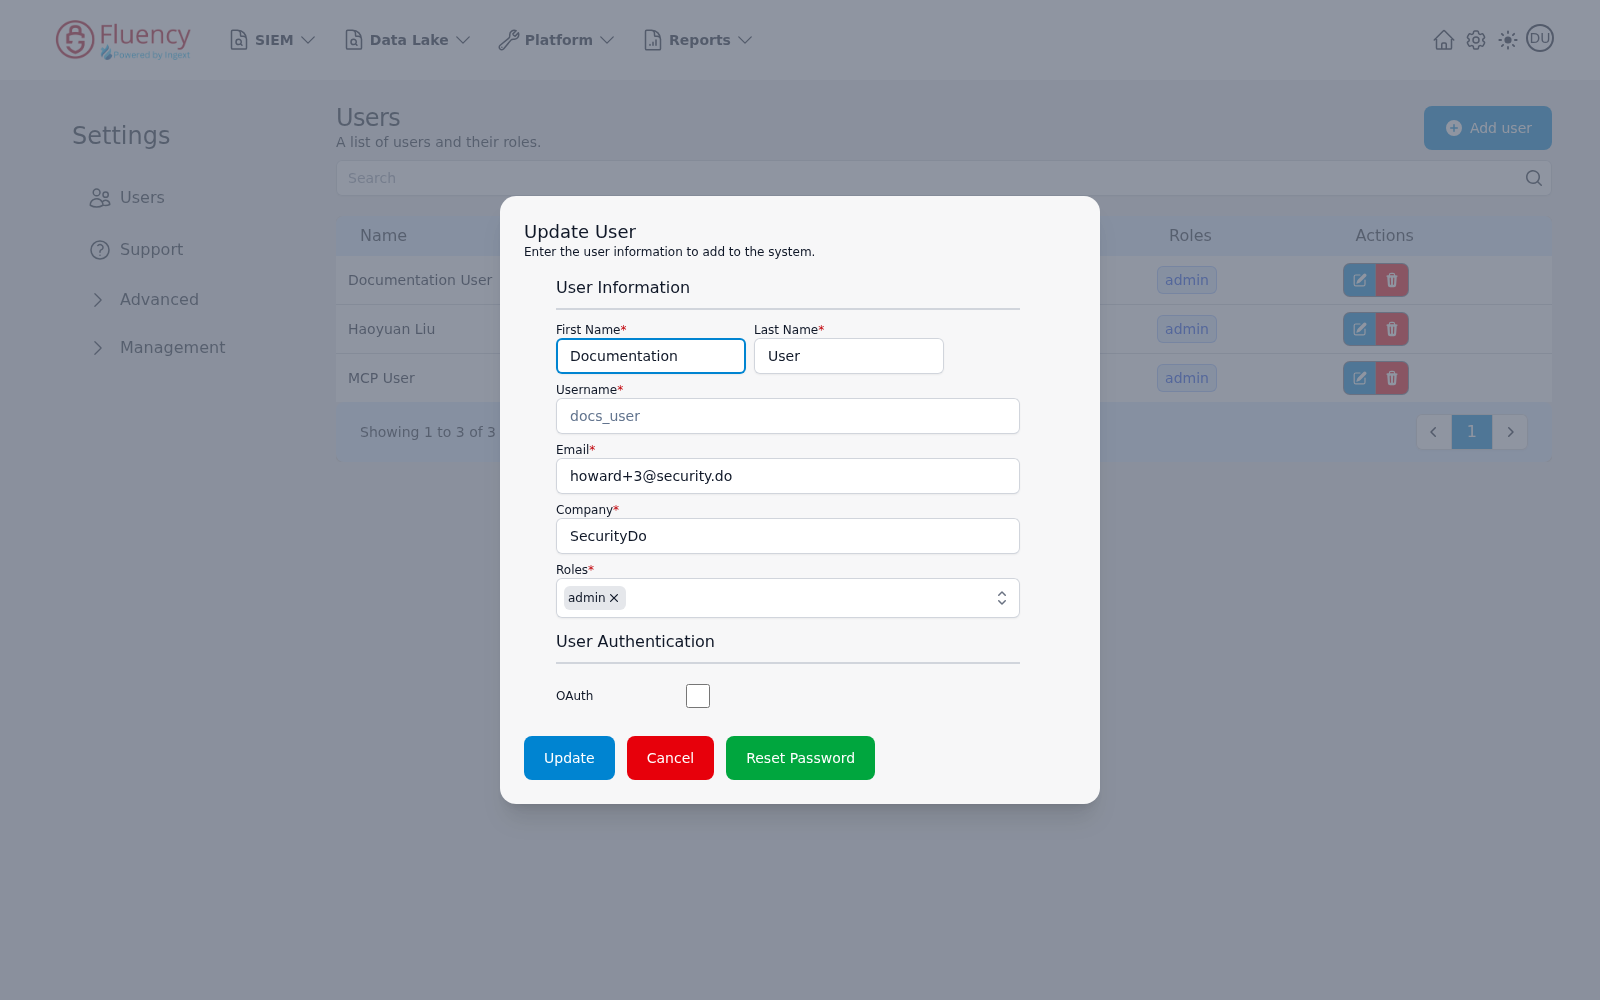
The following can be modified:
- First Name, Last Name, Email, Company
- Roles — the Select Values drop-down; existing roles appear as removable tags
- OAuth — the User Authentication checkbox
Refer to Adding a User for the meaning of each field. Three buttons sit at the bottom of the dialog:
- Update (blue) — saves the changes.
- Cancel (red) — closes the dialog without saving.
- Reset Password (green) — resets the user's password; see below.
Access is granted through the Roles field rather than by attaching policies to the user directly — the API and data policies come from the role. The older interface's per-user API-policy, data-policy, and home-page fields are not in the current dialog.
Note: Changing the role takes effect on the user's next login or page refresh.
Resetting a Password
For accounts using User/Password authentication, open the user's Update User dialog (the blue edit button on their row) and click the green Reset Password button.
For accounts using OAuth2, password management is handled by the identity provider (Azure AD or Google) and not by Fluency.
Users change their own password from their Profile page, reached from the account avatar rather than from Settings — see Login → Changing your password.
Disabling a User
The disable (lock) toggle described below does not appear in the July 2026 capture of Settings → Users; the only per-row controls are edit and delete. Until this is re-verified, treat removing the user's roles — or deleting the account — as the way to stop access.
If you do not want the user to be deleted but only want their access stopped, use the disable button (lock icon). This is a toggle icon on the far right in the user row. Click the icon to disable or re-enable the user.
A disabled user is preserved in the system — their profile, role, and audit history remain — but they cannot log in.
Deleting a User
Deleting is done one user at a time from the row itself; there are no per-user checkboxes and no header-level bulk delete in the current interface.
- Locate the user in the table on Settings → Users.
- Click the red delete (trash) button in the row's Actions column.
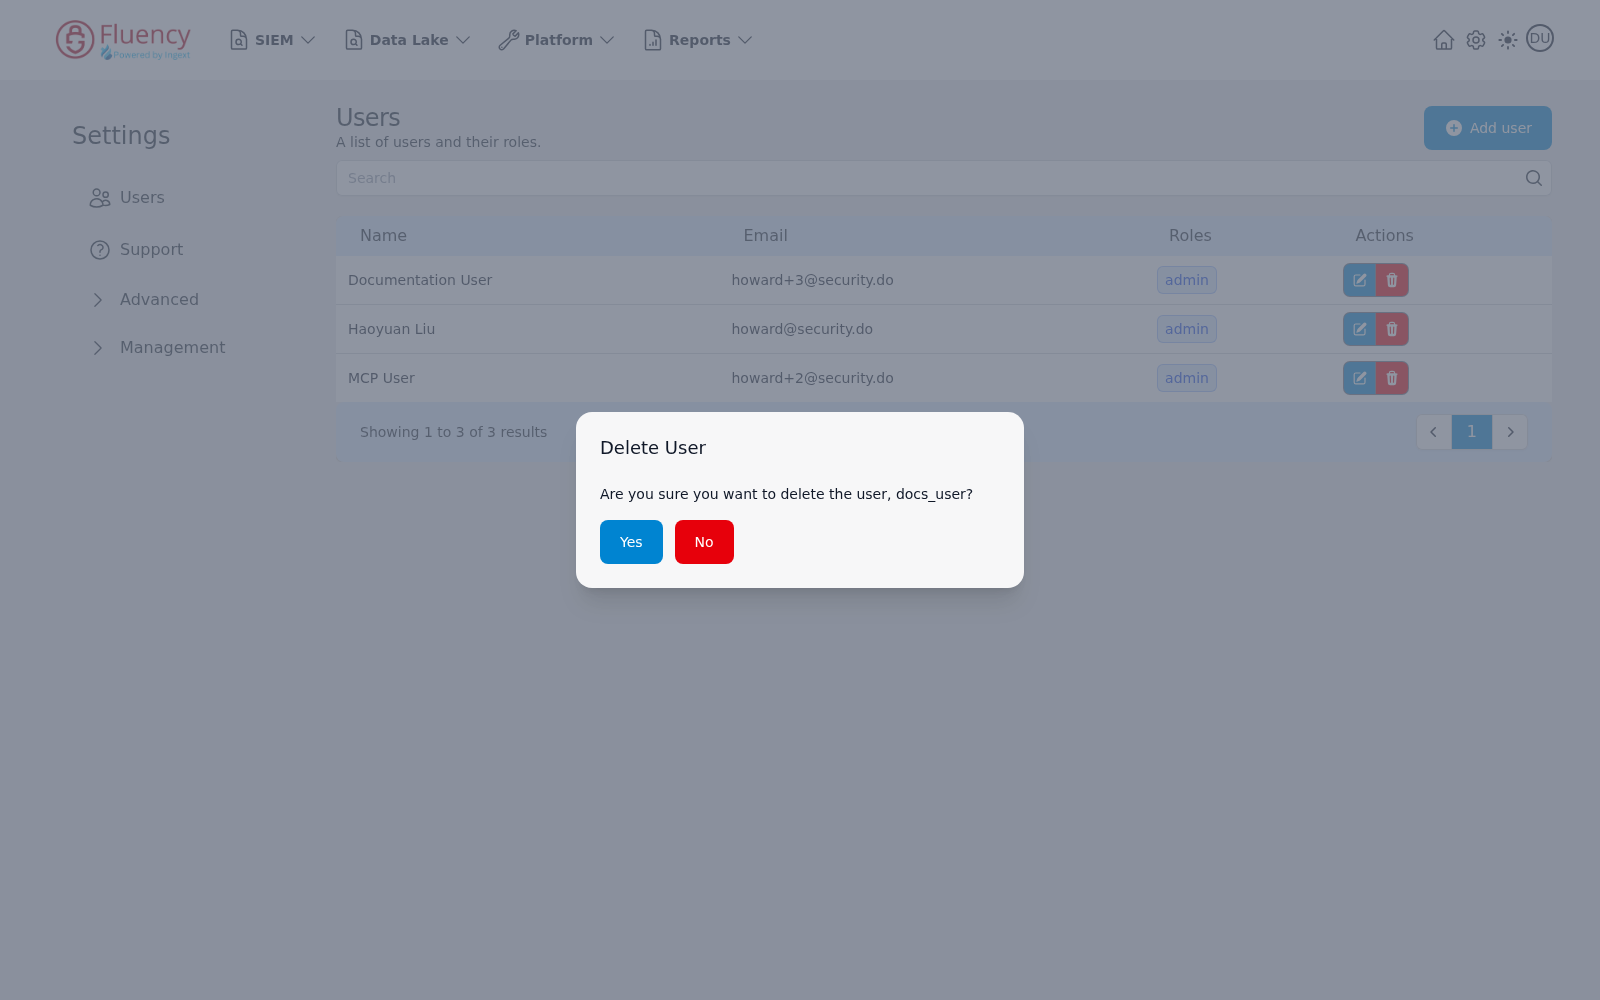
- The Delete User confirmation opens, asking Are you sure you want to delete the user, followed by the username. Click the blue Yes to delete the account, or the red No to keep it.
Warning: The Delete action removes the user from the system completely.
The deletion is recorded in the audit log as a Delete User entry in the management category, attributed to the administrator who performed it — see Audit.
It is best practice to disable or delete users that have not accessed the system in thirty (30) days. Some standards, such as NIST 800-53, require ongoing administrative activity to maintain an account.