Resource Release / Sync Deployment (for MSSP partners)
This page documents the GitHub-based release workflow partners use to author resources once and deliver them to many client instances — the repository layout, the sync_cli tool, and the manifest files that drive the hourly pull. It is the concept and CLI half of resource sync.
The interface half is the Platform → Administration → Resource Sync page, a toggle table of the built-in Fluency_* sync groups on each instance — described in The Resource Sync page below. Use that page to see which groups an instance subscribes to; use the rest of this page to publish content into a group of your own.
This page is mostly a server-side / CLI workflow and remains applicable. In the current web interface, the related pages are Platform → Administration → Resource Sync (enable or disable the built-in Fluency_* sync groups) and Settings → Advanced → GitHub. The screenshots below for obtaining an API token show the older interface and need to be re-verified.
The Resource Sync page
Platform → Administration → Resource Sync (URL path /platform/resourceSync) lists the platform's resource sync groups — one per supported integration — and lets you turn each group on or off. Enabled groups keep that integration's resources synchronized to the instance.
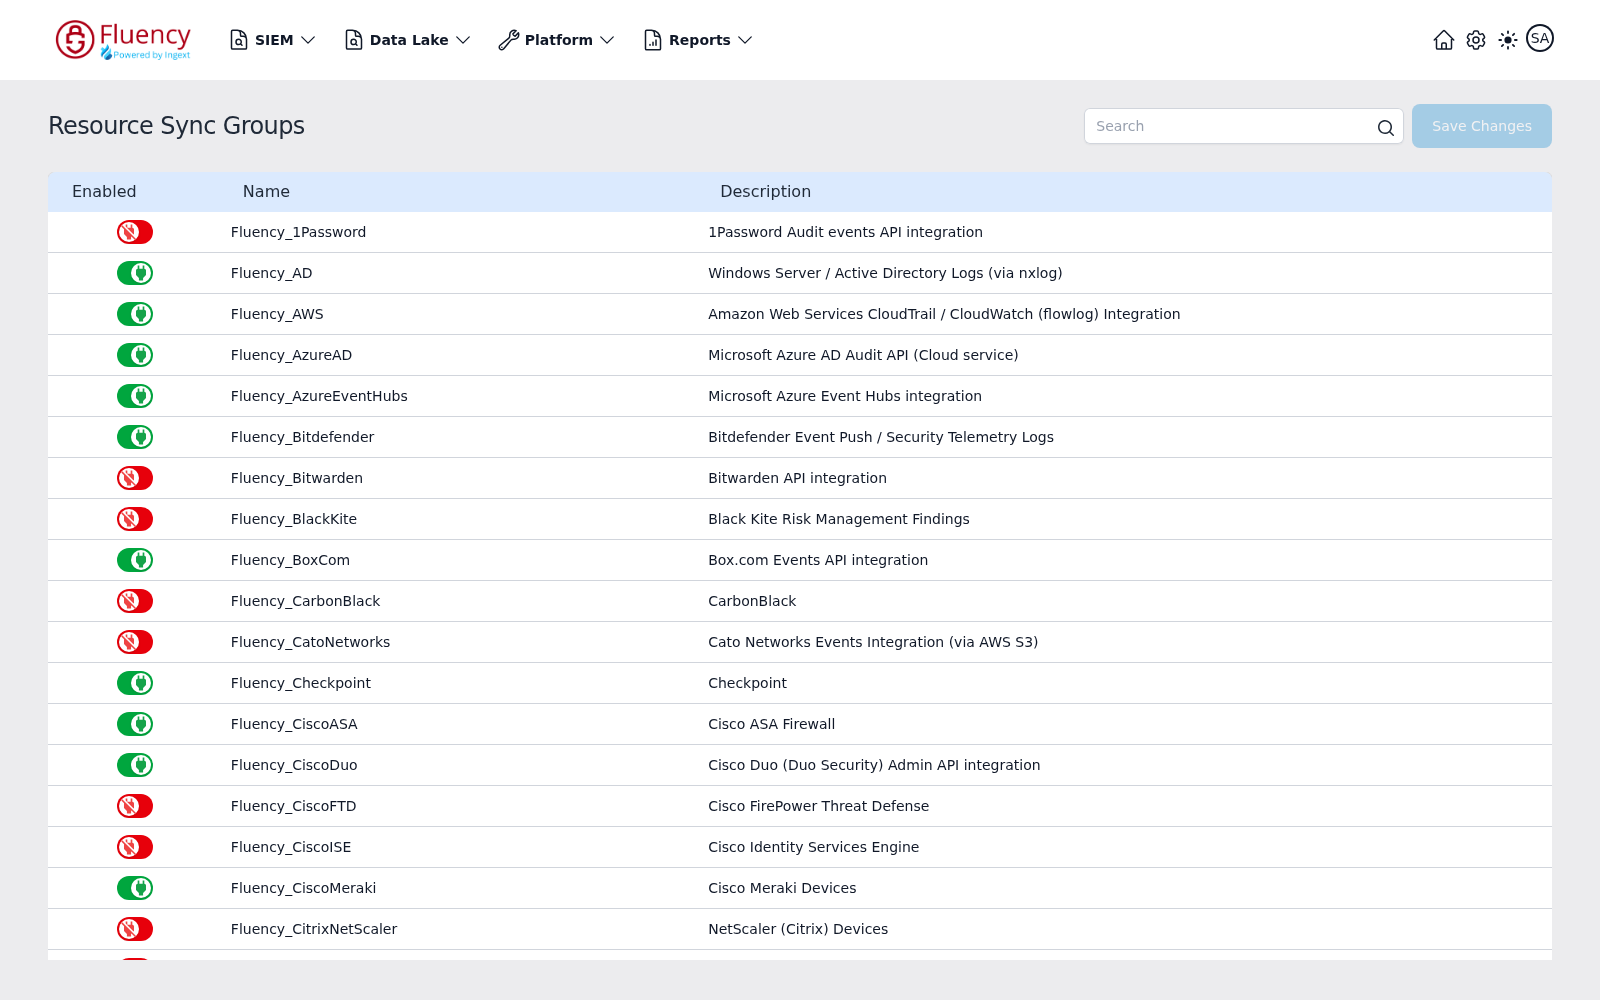
The header shows the title Resource Sync Groups with a Search box and a Save Changes button on the right. The rest of the page is a table of sync groups with Enabled, Name, and Description columns:
- Enabled — a toggle switch per group. A green toggle means the group is enabled; a red toggle means it is disabled.
- Name — the group's identifier. Groups follow a
Fluency_naming pattern, for exampleFluency_AWS,Fluency_AzureAD, orFluency_CiscoMeraki. - Description — the integration or log source the group covers, such as an audit events API integration, a cloud service audit API, or a firewall product.
Type in the Search box to find a sync group by name. Click a toggle to change its state, then click Save Changes to apply; before any toggle is changed the button appears inactive.
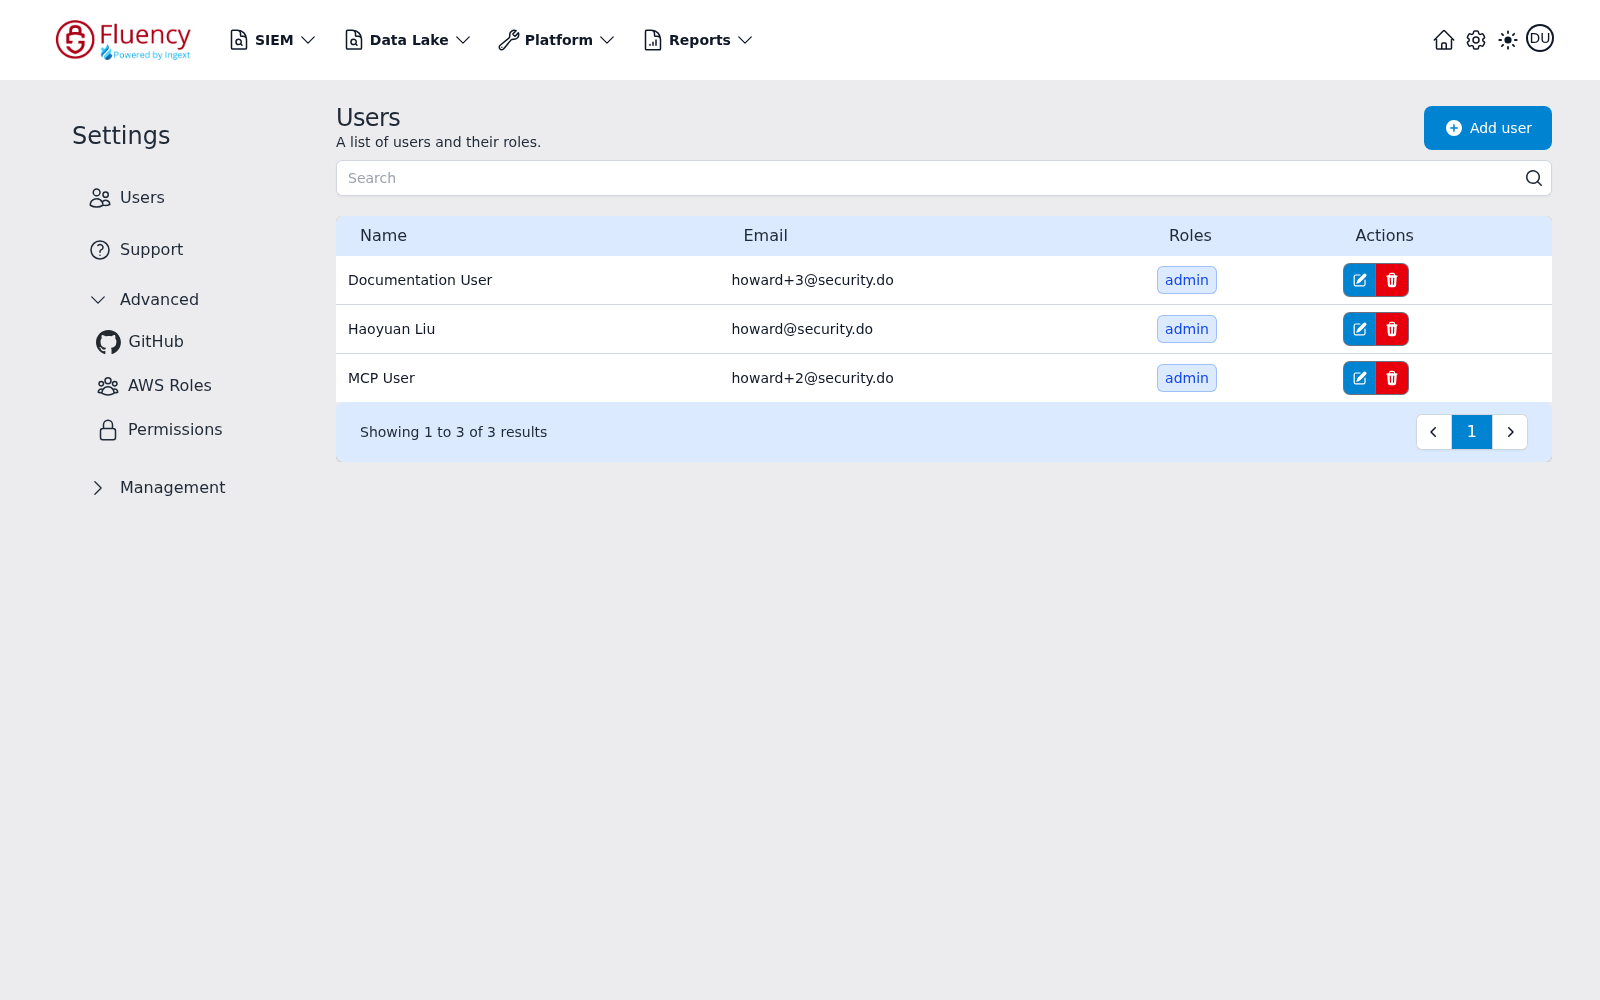
The other related entry, GitHub, sits under Settings → Advanced. Clicking Advanced in the Settings sidebar expands the group in place to reveal GitHub, AWS Roles, and Permissions:
Release Management
Fluency uses an integration with GitHub to manage and sync / deploy resources to existing client instances. This functionality is provided for use by Fluency's MSSP partners, to facilitate resource deployments to multiple client sites.
Each Fluency instance can be configured to sync resources with one or more GitHub repositories. By default, Fluency's own content repository is configured:
/etc/repos/Fluency.json
{
  "name": "Fluency",
  "token":"<github access token>",
  "owner": "SecurityDo (<account/company name>)",
  "repo":"Scripts (<repository name>)",
  "branch":"master (<branch name>)"
}
Additional repositories can be added with a new file placed in the same directory, on the server-side.
NOTE: For MSSPs looking to add their own repository(s), please contact Fluency Support to deploy the additional configuration file(s) to all of their client instances.
GitHub Repository
An additional GitHub repository can be added. Normally, this repository is owned by the MSSP.
- Create a repository on GitHub.com
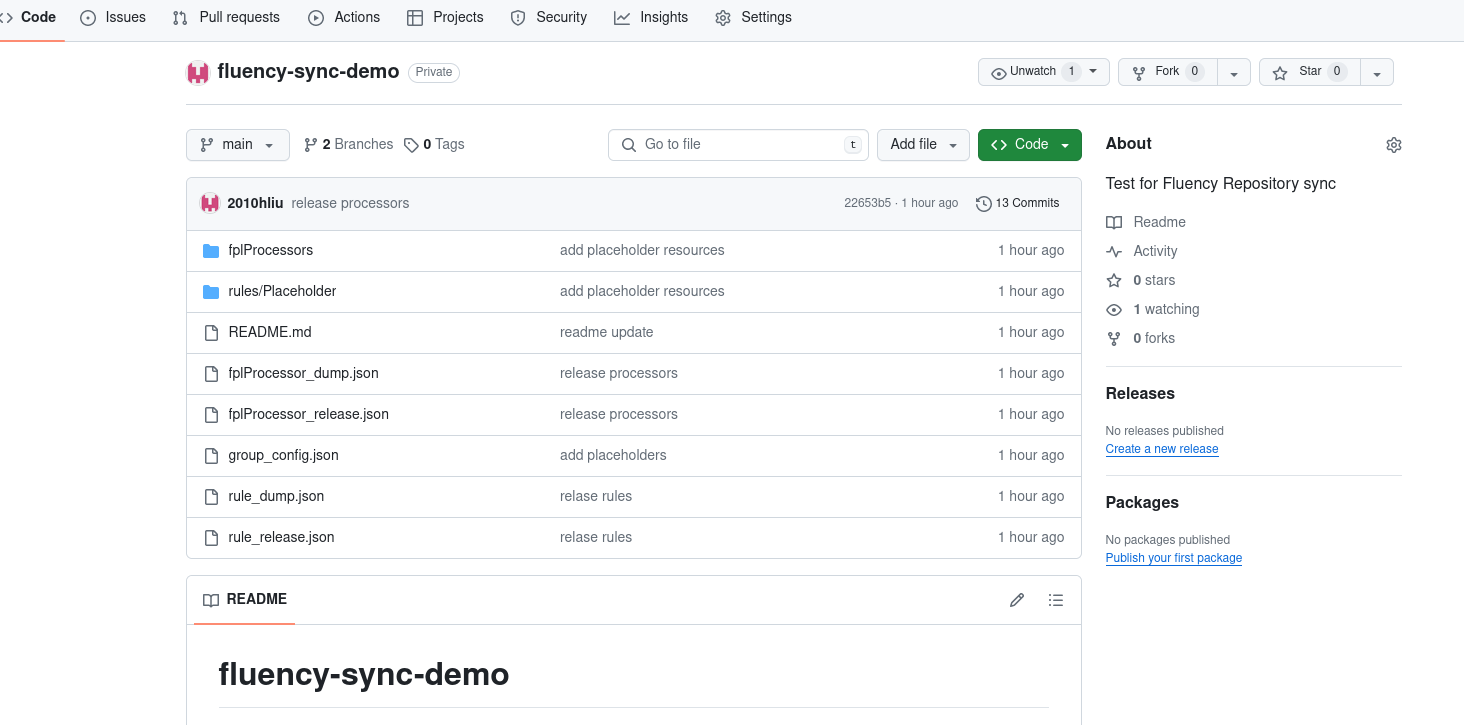
Fluency will access this repository via a GitHub user's personal access token.
- Create Personal access token for the user
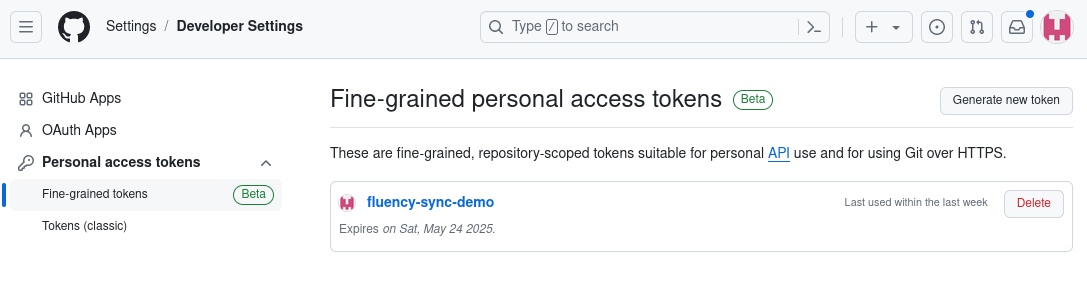
- Allow the github user (access token) to access the repository (Read access)
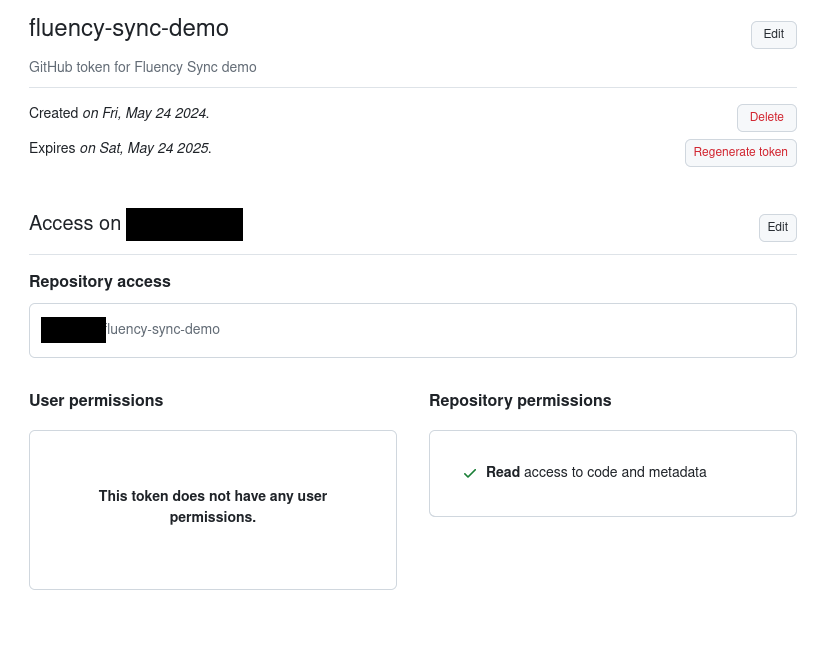
Repository structure
The repository expects, at a minimum, the group_config.json file. Each resource type is located in its corresponding folder. The sync_cli will create the correct sub-folders, as long as the main resource folder exists.
- /
    EntityInfos/
    Filters/
    fplProcessors/
    rules/
    group_config.json
    ...
NOTE: The resoure_dump.json and resource_release.json files are automatically generated by the sync_cli tool. These files are the release manifest files, and should be commited to the repository whenever they are modified.
Contact Fluency Support
Raise a support ticket with the following information, so Fluency can create and deploy the repository file to your client instances.
- MSSP Name (short name)
- GitHub Account / repository owner name
- GitHub Repository name
- GitHub branch (normally master, or main)
- GitHub access token, for user with access to repository
Command Line Tool
Fluency provides a command line tool (CLI) to assist with managing the content of the repository, and to facilitate the creation of release manifest files. This tool can be run on a Linux instance, such as any x86 based RHEL variants. (This tool was developed and tested on CentOS, but other Linux variants may also work.)
Additionally, the CLI also makes use of Fluency APIs to copy/download specific resources from an existing Fluency site.
To setup the CLI environment:
- Create a Linux machine / instance
- this instance will run 'git' and the binary CLI tool via command line
- ensure that "git" can be installed on this machine (likely via "yum/dnf")
- Download CLI tool
Configuration File
- Create the tool configuration file, in /etc/account_config.json ('root' user or 'sudo' may be required for this operation)
/etc/account_config.json
{
  "idOffset": 50000,
  "accounts":[
    {
        "name":"mssptestsite",
        "url": "https://mssptestsite.app.fluencyplatform.com",
        "token": "f032261b-68e0-47ff-4d3f-a55bac9db3ff"
    },
    ...
    {
        "name":"mssptestsite2",
        "url": "https://mssptestsite2.cloud.fluencysecurity.com",
        "token": "9fedf0e6-c479-4c29-4eb0-55a437c9d306"
    }
  ]
}
NOTE: Raise a support ticket to request an Offset ID (idOffset). This offset value is used to ensure resource ID's between different MSSP partners and Fluency's own resources do not conflict.
- Designate one (or more) site(s) as the "test" or "origin" site(s), for example:
mssptestsite
NOTE: this should be an existing Fluency site currently managed by the MSSP.
- Obtain an API token from the designated site(s), via the Fluency Web Interface.
https://mssptestsite.app.fluencyplatform.com
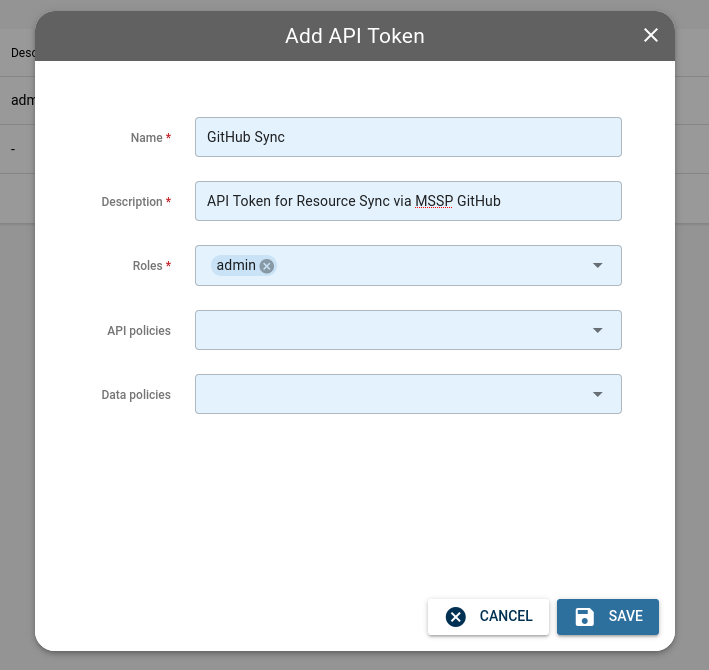
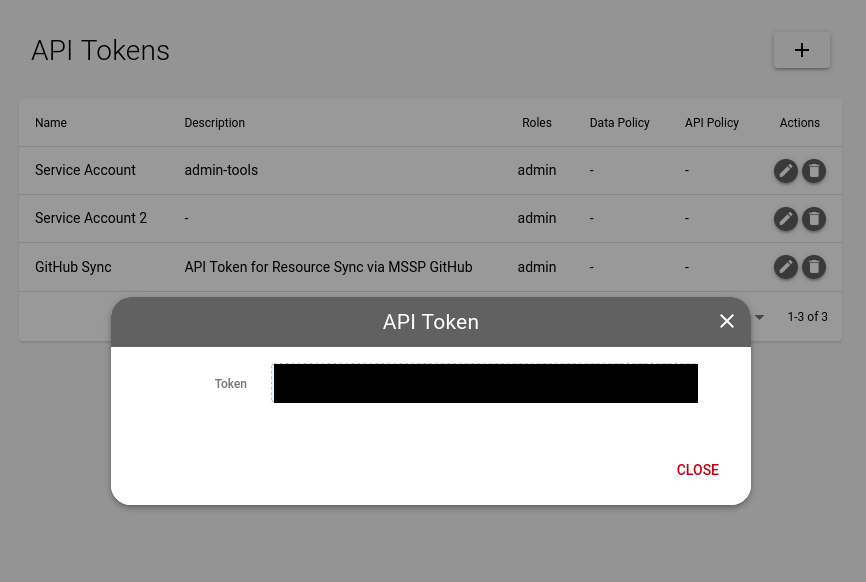
For the /etc/account_config.json file, these three items above consitute one entry in the accounts array:
  "accounts":[
  ...
    {
        "name":"mssptestsite",
        "url": "https://mssptestsite.app.fluencyplatform.com",
        "token": "f032261b-68e0-47ff-4d3f-a55bac9db3ff"
    },
  ...
  ]
Workflow
The MSSP will create/test/deploy resources on this (these) designated sites initially. The CLI tool will then connect to these sites to download a copy of the resources to the local Linux machine.
Using "git", add and commit these files to the repository.
Using the CLI tool, generate the release manifest file.
Using "git", add and commit the release manifest files to the repository
Using "git", push the changes to the remote origin.
Within one hour, all connected Fluency instances should receive the updated manifest files, and will download the newly made resource changes.
Related
- Administration — how resource release fits the wider partner workflow.
- Resource Sync page reference — the
Fluency_*sync group toggles in the interface. - Resources — what the synced resources are once they land on an instance.
- API Tokens — obtaining the token each
accountsentry needs.