Peplink SD-WAN
Fluency's integration with Peplink devices has three portions.
- Firstly, as a SIEM, Fluency has the ability to accept Syslog export from Peplink devices.
- Secondly, utilizing Fluency's expertise in network reconstruction, Fluency can ingest NetFlow (IPFIX) data.
- Lastly, Fluency can integrate with InControl and leverage the API to further collect data, or to perform additional actions.
Syslog Export
System Event Log configuration
The Syslog settings should be configured as follows. The log server could either be your Fluency server, or your local Fluency collector, whichever works better for your deployment. The default Syslog port is UDP 514.
Note: Syslog over TCP or with TLS is not supported as a sending option in Peplink.
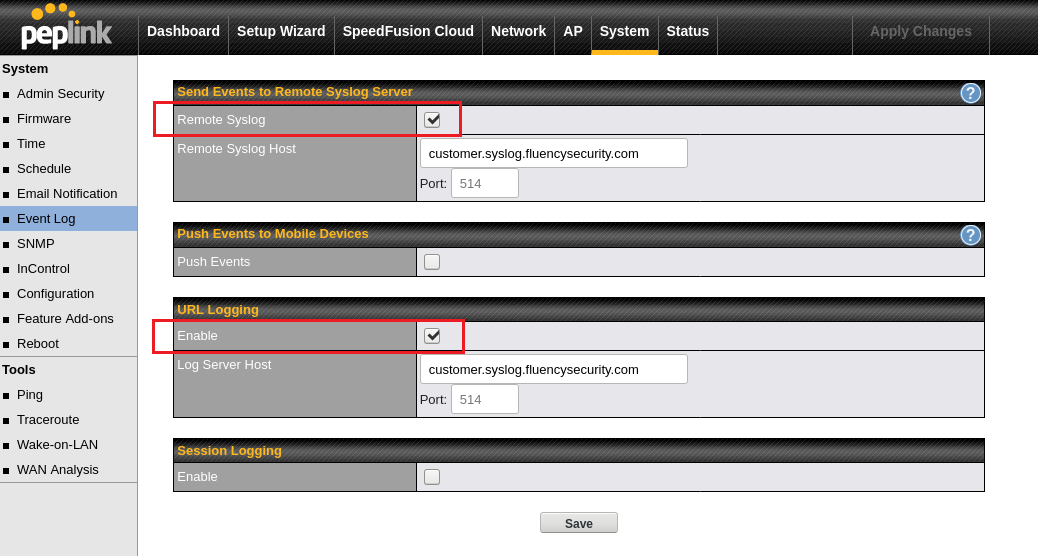
Session Logging is not required/needed if NetFlow data is also being sent (See following section).
Firewall configuration
Add a log rule to your Firewall settings. The configuration procedure is slightly different, depending on if the equipment is managed locally or remotely via Peplink's InControl.
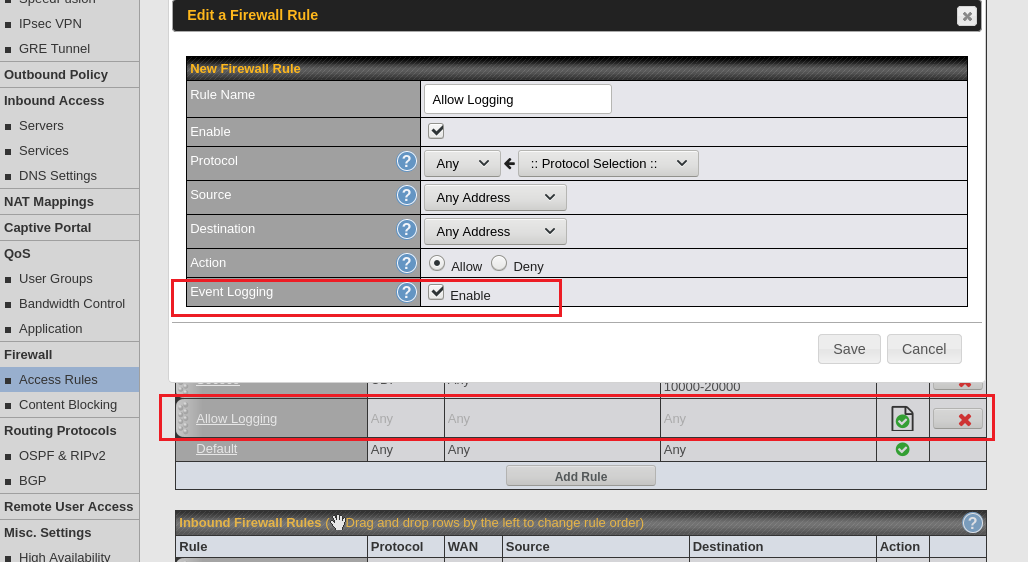
The Firewall logging rule is critical. Without this setting, Fluency will not be able to fully reconstruct the network traffic seem by the Peplink device (Some data, such as URL filtering logs, or Peplink system logs will still be sent).
Install the Application
This section covers the syslog portion only. NetFlow and the InControl API integration below are separate paths and are not built by this template.
Go to Platform → Applications → Install Application From Template and choose Peplink Router/Firewall Syslog from the On-Premise IT category, then press Install. The template takes no parameters: it supplies the parser and builds the pipeline, and the transport is configured on the syslog listener rather than on the form. There is no source to add, no processor to attach, and no sink to wire by hand.
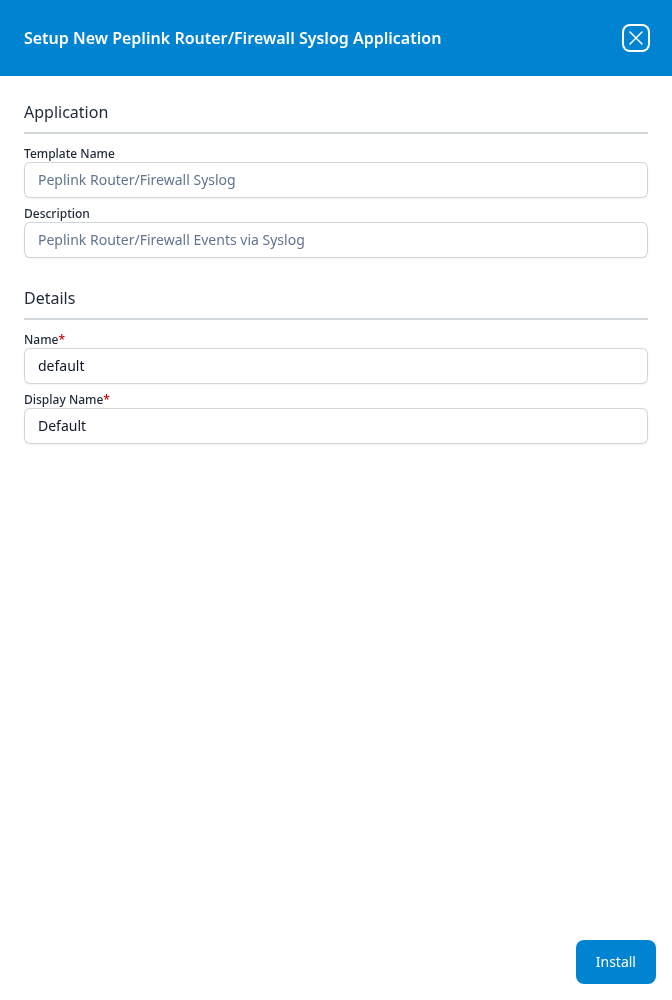
The Peplink Device parser cookbook is only needed if you want to customise the parsing.
NetFlow Export
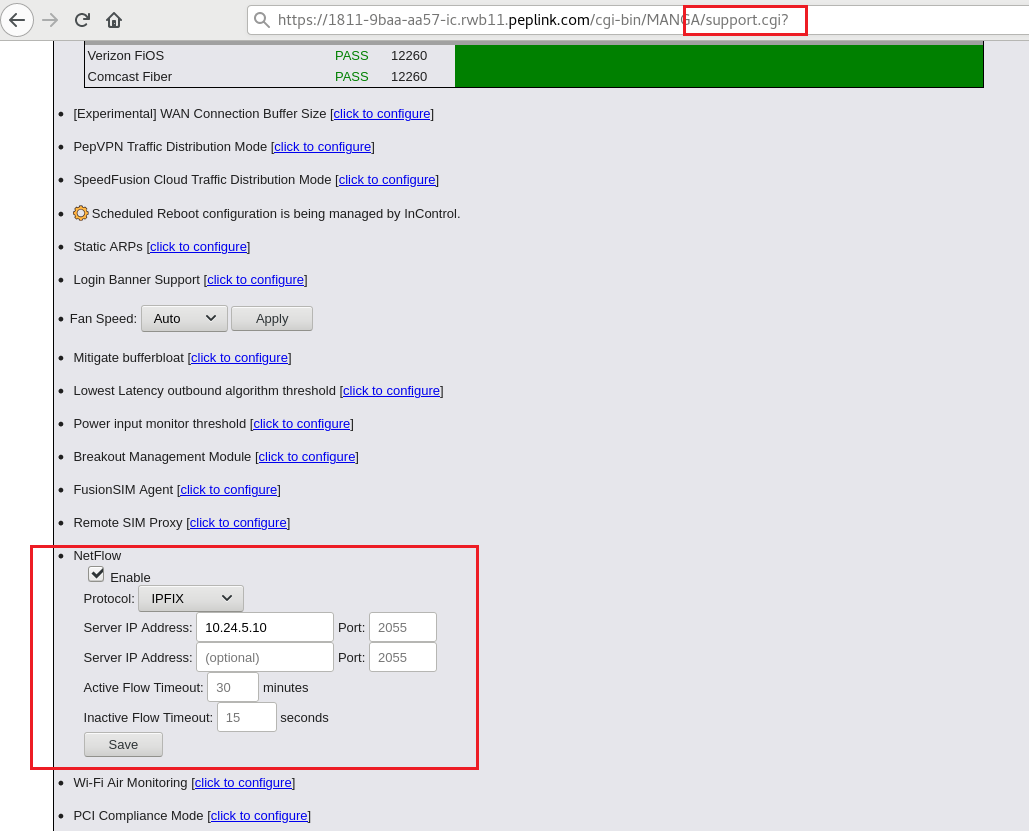
Depending on Peplink device model, or firmware version (>8.1), there may be a NetFlow option. According to Peplink documentation, manually edit the URL to get to the support page. The server again could either be your Fluency server, or local collector. The default NetFlow port is UDP 2055.
Note: NetFlow over UDP is not encrypted in transit.
InControl API
An API token from the InControl portal is used by Fluency to provide API integration.
Creating an API Token
To create an API token, log in to the InControl portal.

From the top right corner, select your username to navigate to the user setting edit page.

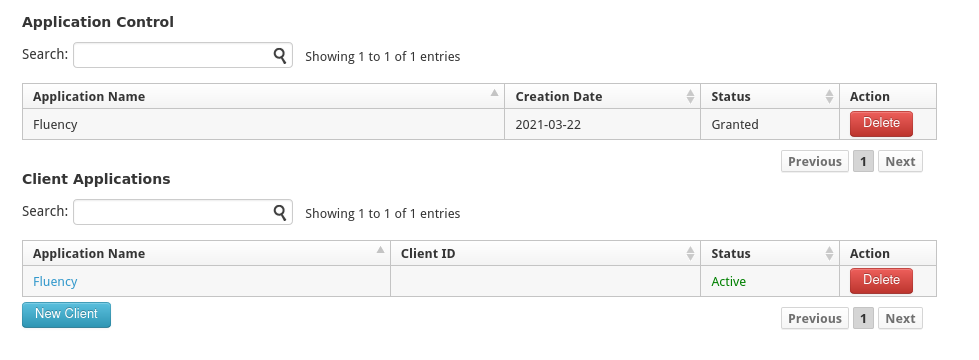
Scroll down to the bottom of this page, to create a new Client application.
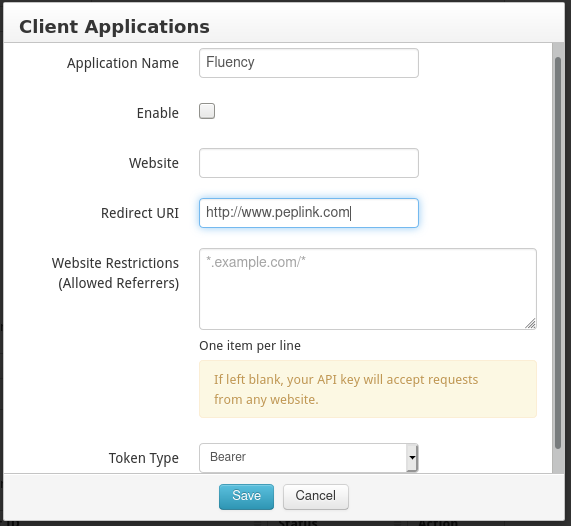
Use the following settings when creating the application. The redirect URI is not used by this integration — the credential is consumed server-side — but InControl requires the field, so enter an https:// address you control rather than a third party's. Do not leave Website Restrictions empty: the dialog's own warning notes that an unrestricted key accepts requests from any website.
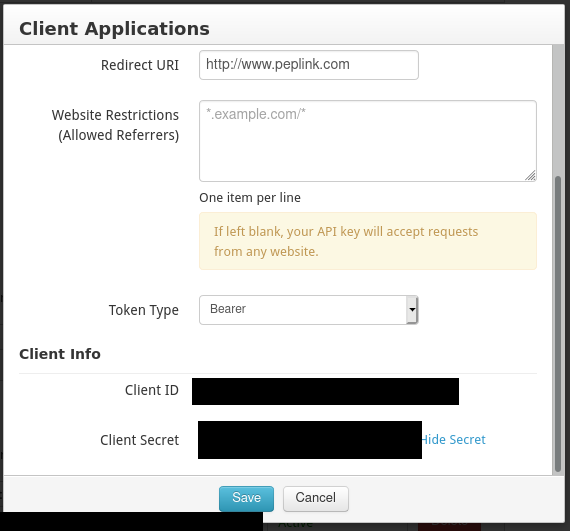
Once created, select the Application name to navigate back to the Application settings page. Make a note of the Client Info values ("Client ID" and "Client Secret").
Authorizing an API Token
The token must be authorized prior to being used. Navigate to the following URL in a browser in a new tab/window: (Authorization Endpoint: https://api.ic.peplink.com/api/oauth2/auth?client_id=[CLIENT_ID]) where the [CLIENT_ID] is the ID shown in the previous step.
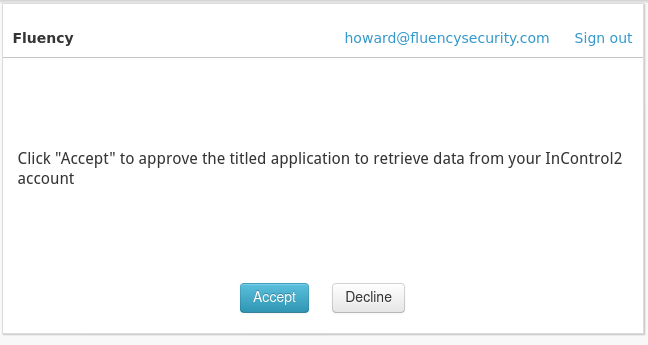
Click "Accept" on the following page to authorize the token for the InControl account.
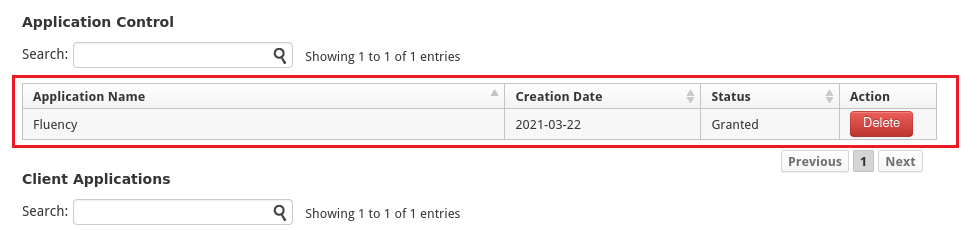
Back on the previous user setting page in the InControl portal, ensure that the Application above is now authorized.
NOTE: Provide these API credentials to Fluency Support by raising a support ticket. The InControl API integration is established from the back end once the credentials are received.