EntityInfo Tables
The EntityInfo Tables page lists the EntityInfo tables in the account — lookup tables of entity values (such as event IDs, watchlists, and translations) referenced by the SIEM. From here you can create a new table and edit or delete existing ones.
Menu path: SIEM → EntityInfo Tables · URL path: /SIEM/entityInfo
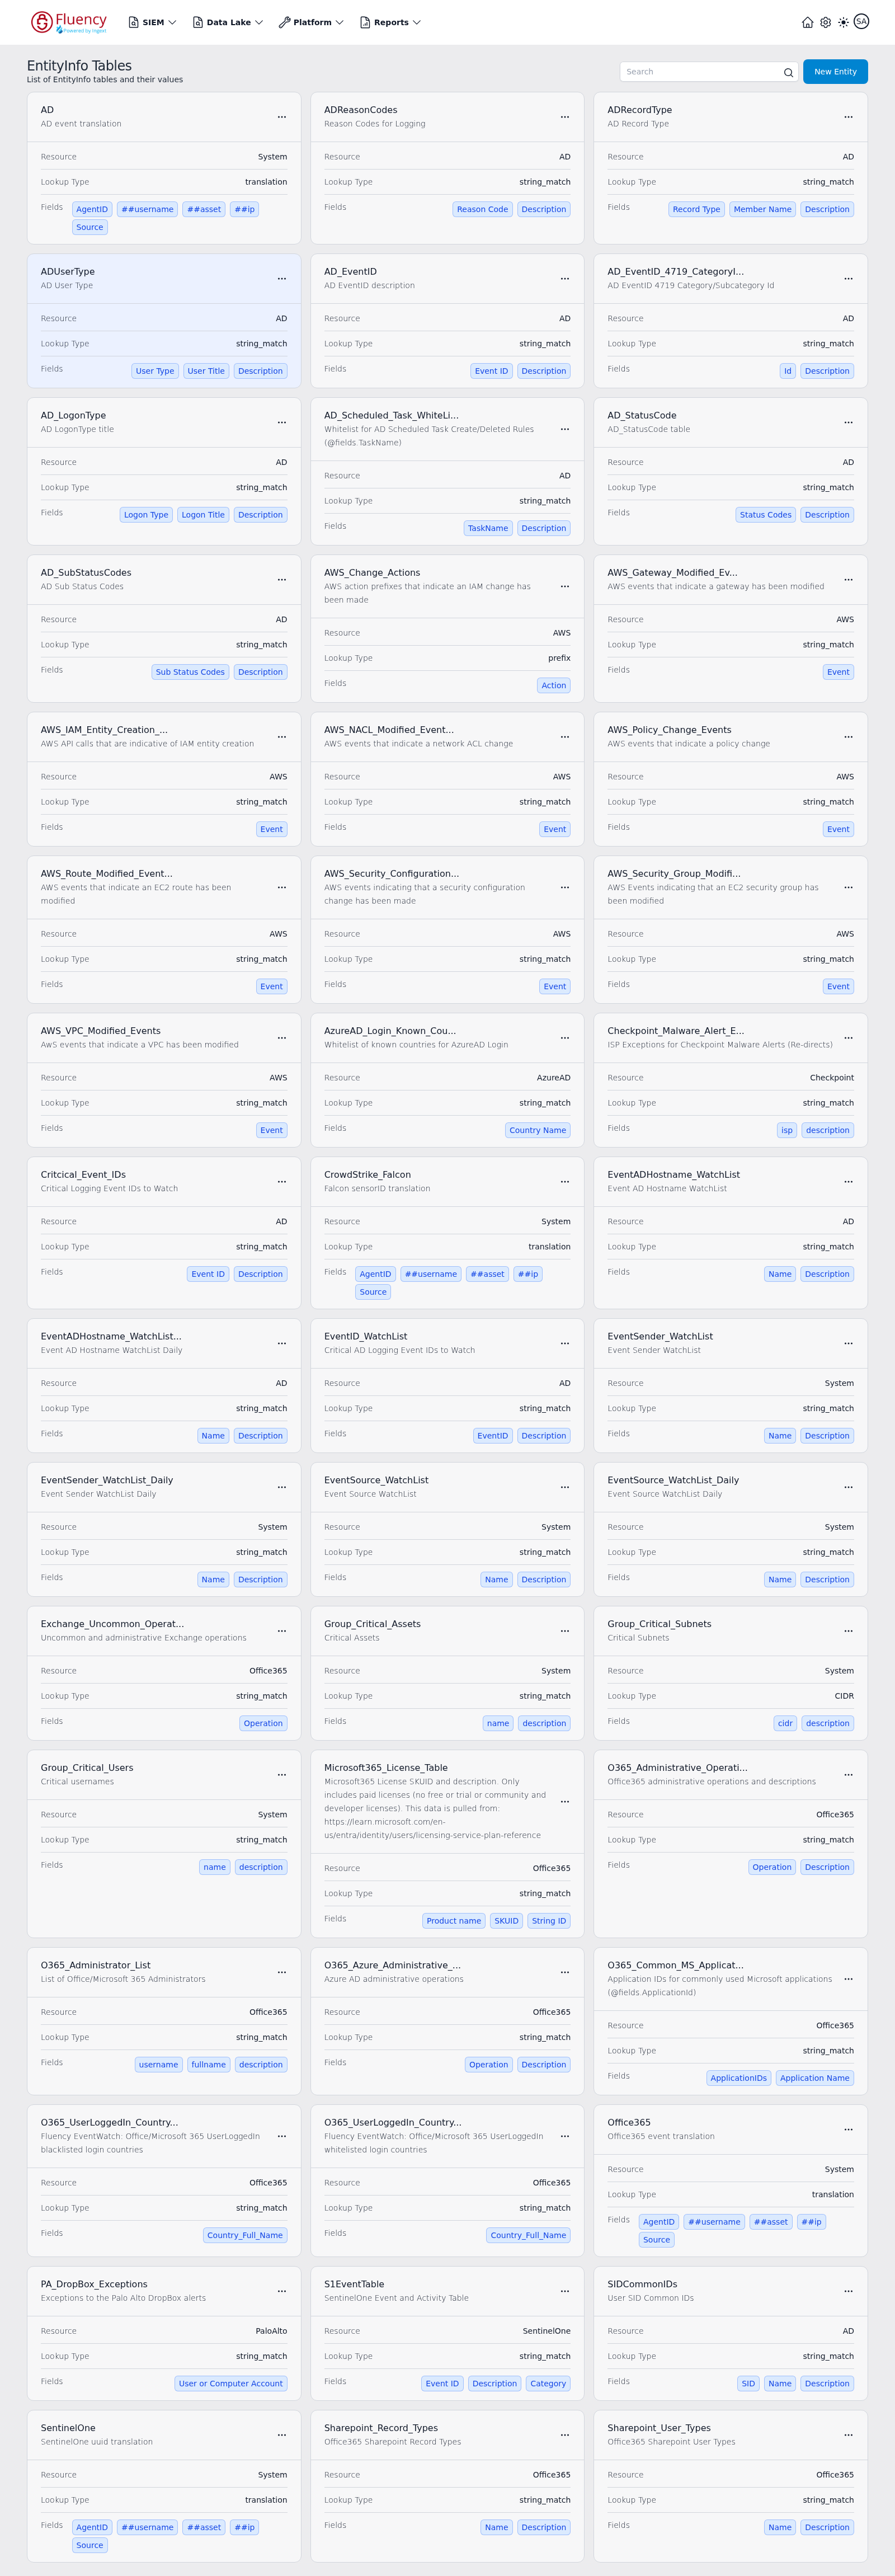
Page Layout
- Header — the page title EntityInfo Tables with the subtitle List of EntityInfo tables and their values on the left, and a Search field with a blue New Entity button on the right.
- Table grid — the rest of the page is a three-column grid of cards, one card per EntityInfo table. All tables appear in a single scrolling grid; there are no pagination controls.
Header Actions
Search
Use the Search field in the upper-right corner to find a table in the grid.
New Entity
Click New Entity to open the Add Entity dialog — "Enter the Entity information to add to the system."
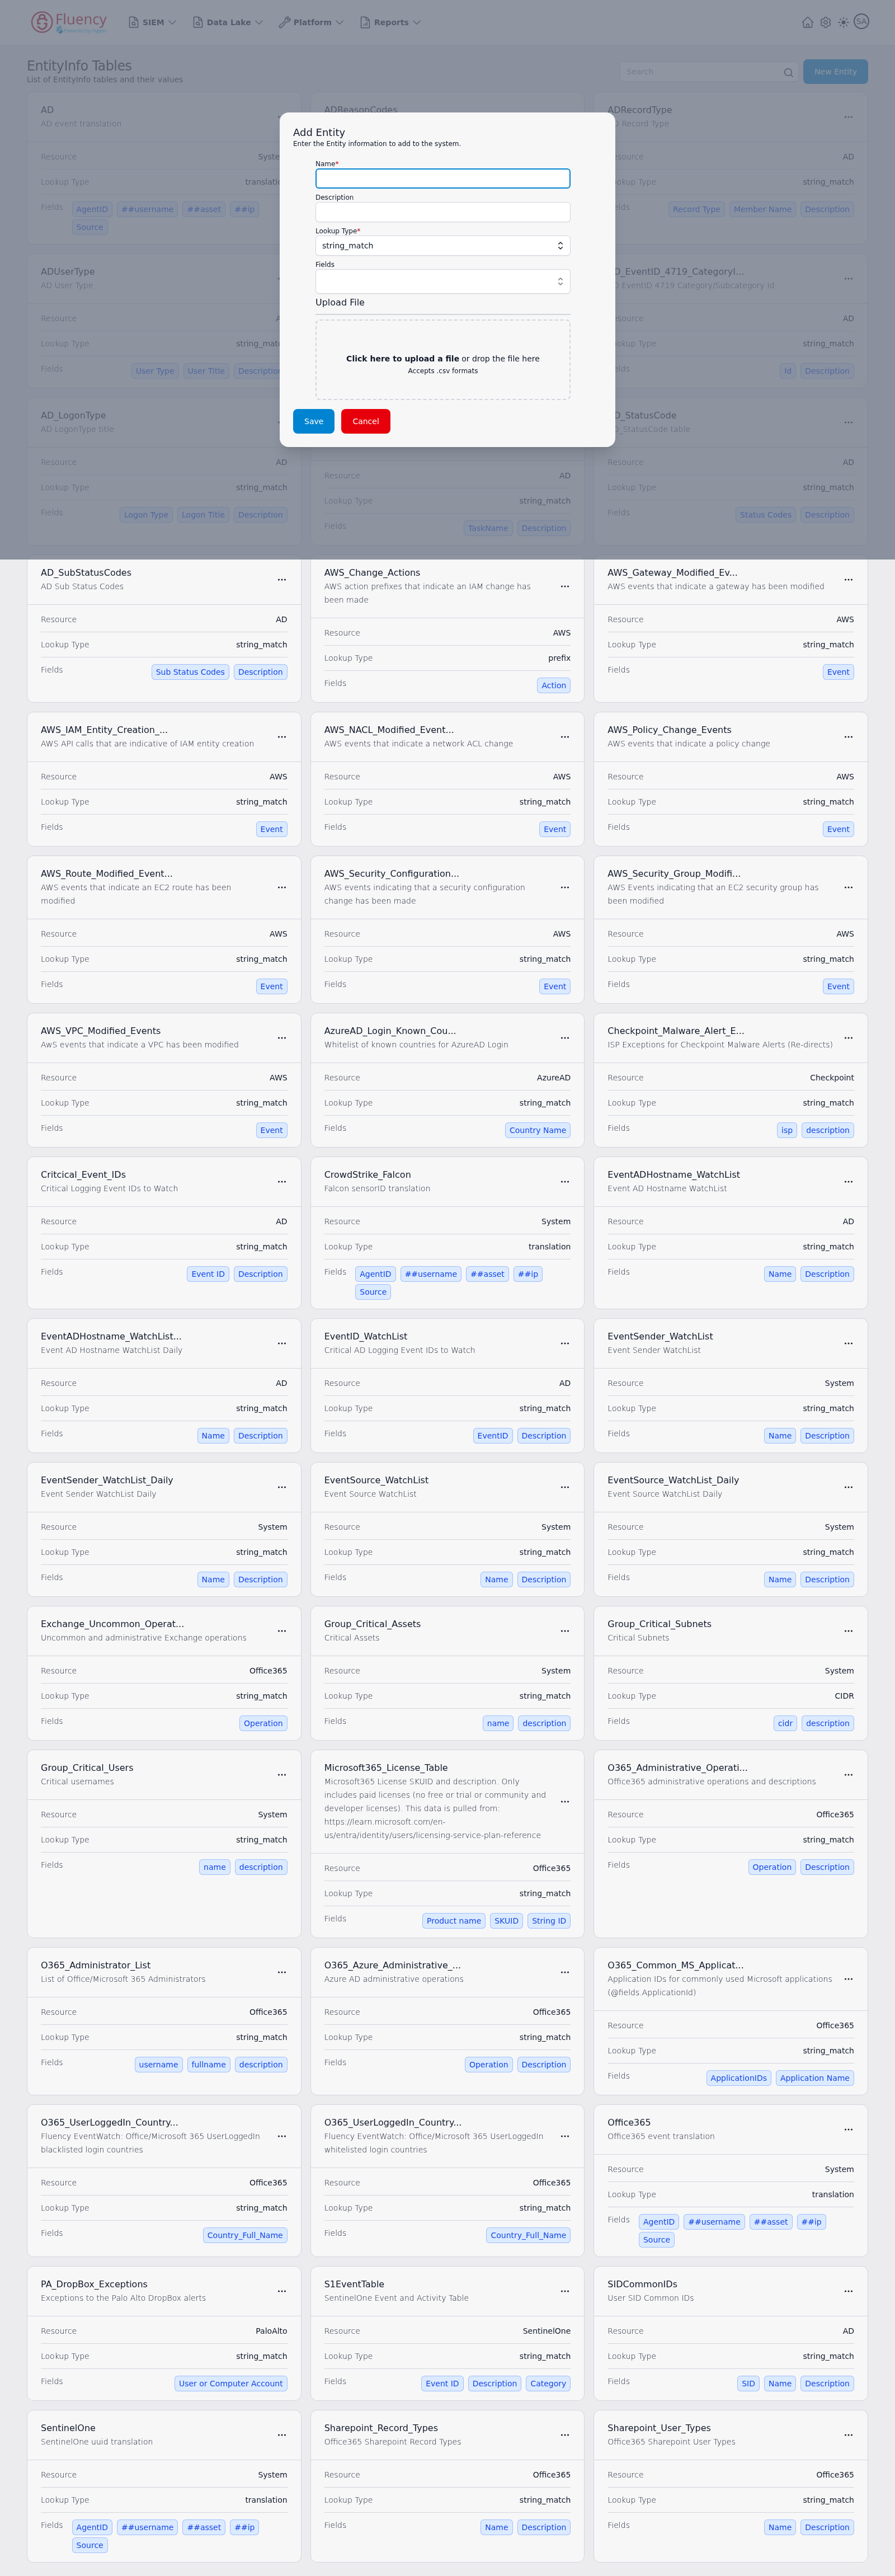
The dialog contains:
- Name — required text field.
- Description — text field.
- Lookup Type — required drop-down, preset to
string_match. - Fields — drop-down for choosing the table's field columns.
- Upload File — a drop zone labeled Click here to upload a file or drop the file here; it accepts
.csvformats for loading the table's values.
Save creates the table; Cancel closes the dialog without saving.
Table Cards
Each card in the grid describes one EntityInfo table:
- The table name and a short description at the top, with a three-dot (Open options) button in the upper-right corner.
- Resource — the product the table relates to (values in the demo include System, AD, AWS, AzureAD, Checkpoint, Office365, PaloAlto, and SentinelOne).
- Lookup Type — how values are matched (values in the demo include
translation,string_match,prefix, andCIDR). - Fields — the table's columns, shown as chips (for example
Event ID,Description,Name, or translation fields such asAgentID,##username,##asset,##ip, andSource).
Card Options Menu
Click the three-dot (Open options) button on a card to open its actions menu.
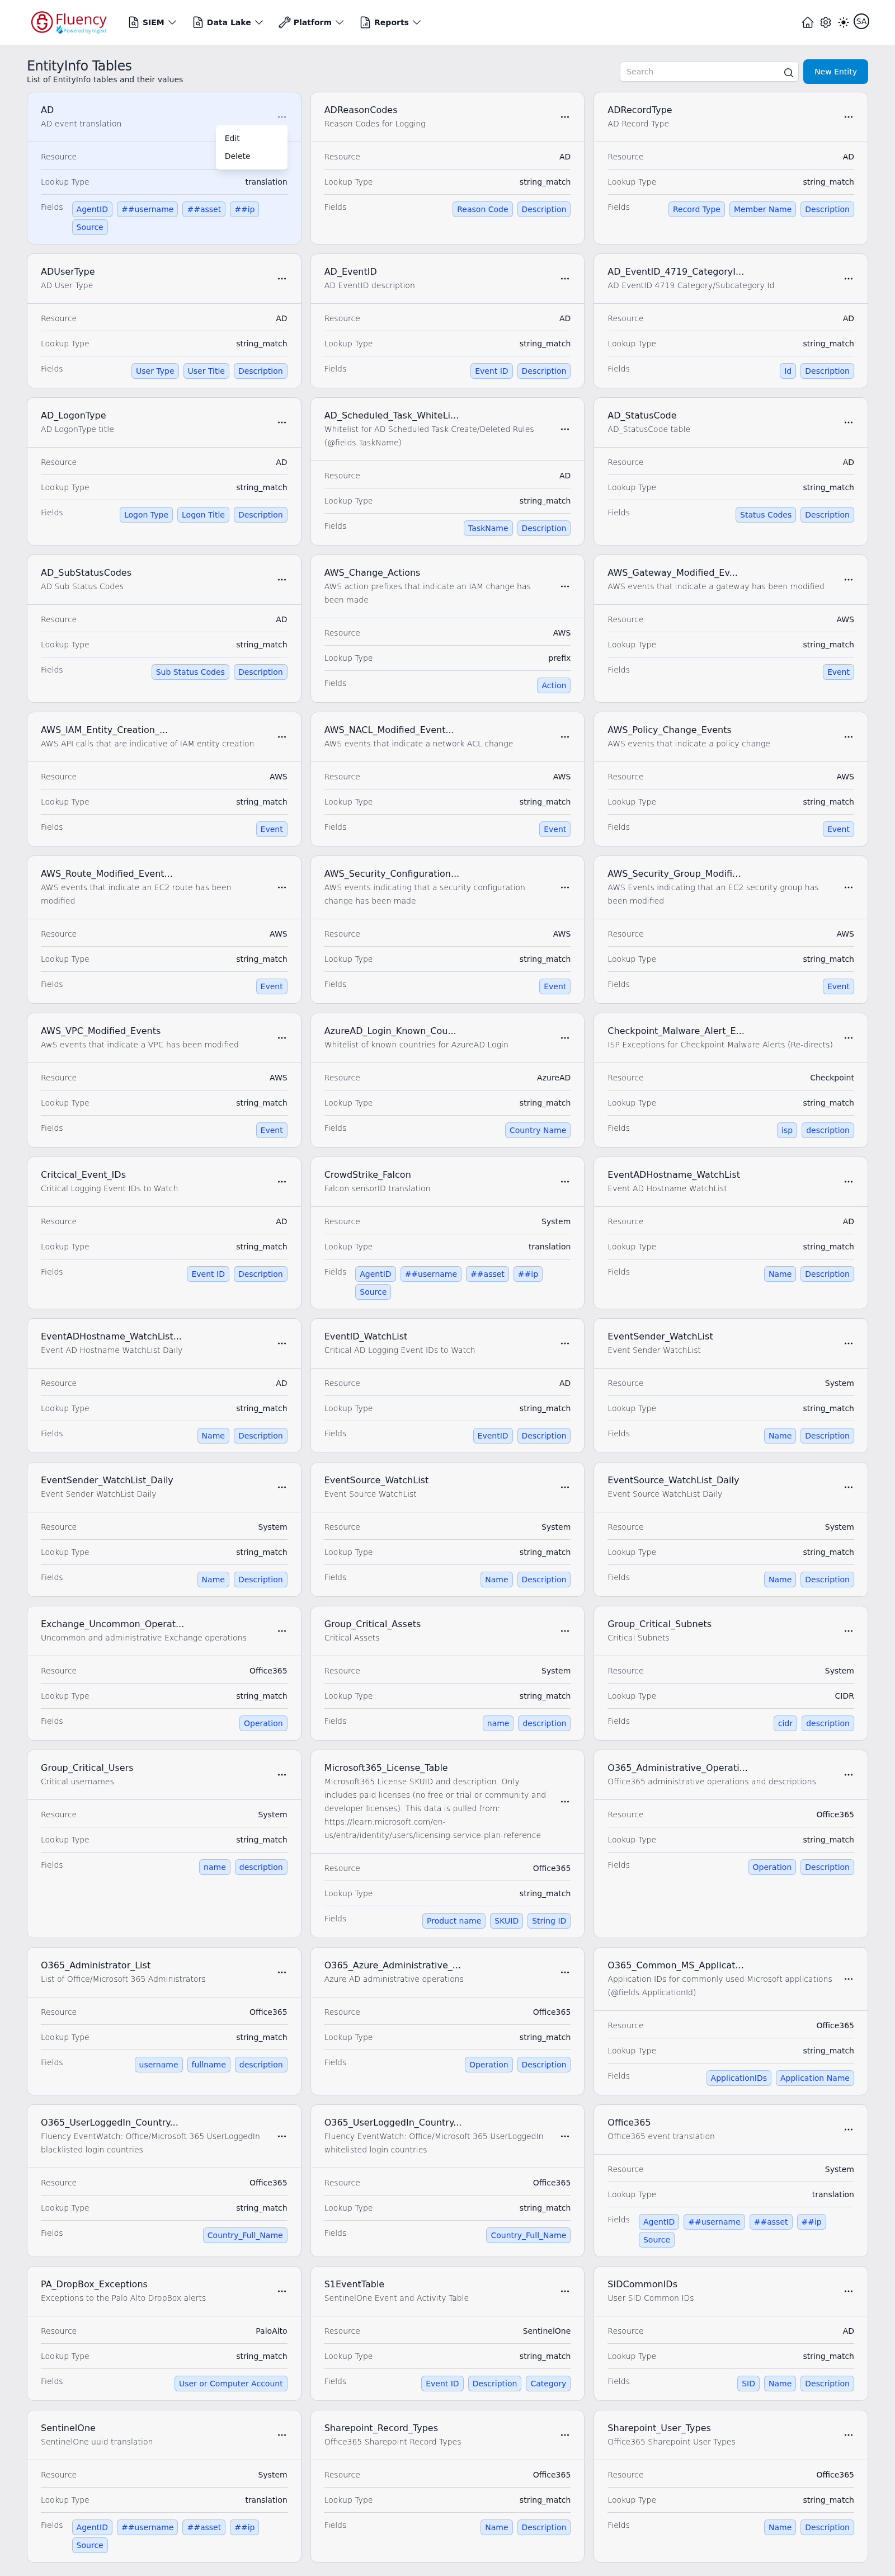
The menu contains two options:
- Edit — open the table for editing.
- Delete — remove the table.
The same menu is available on every card in the grid, and both options work the same way on every table.
Edit
Choosing Open options → Edit reopens the Add Entity dialog (the title reads Add Entity even when editing) pre-filled with the selected table's values.
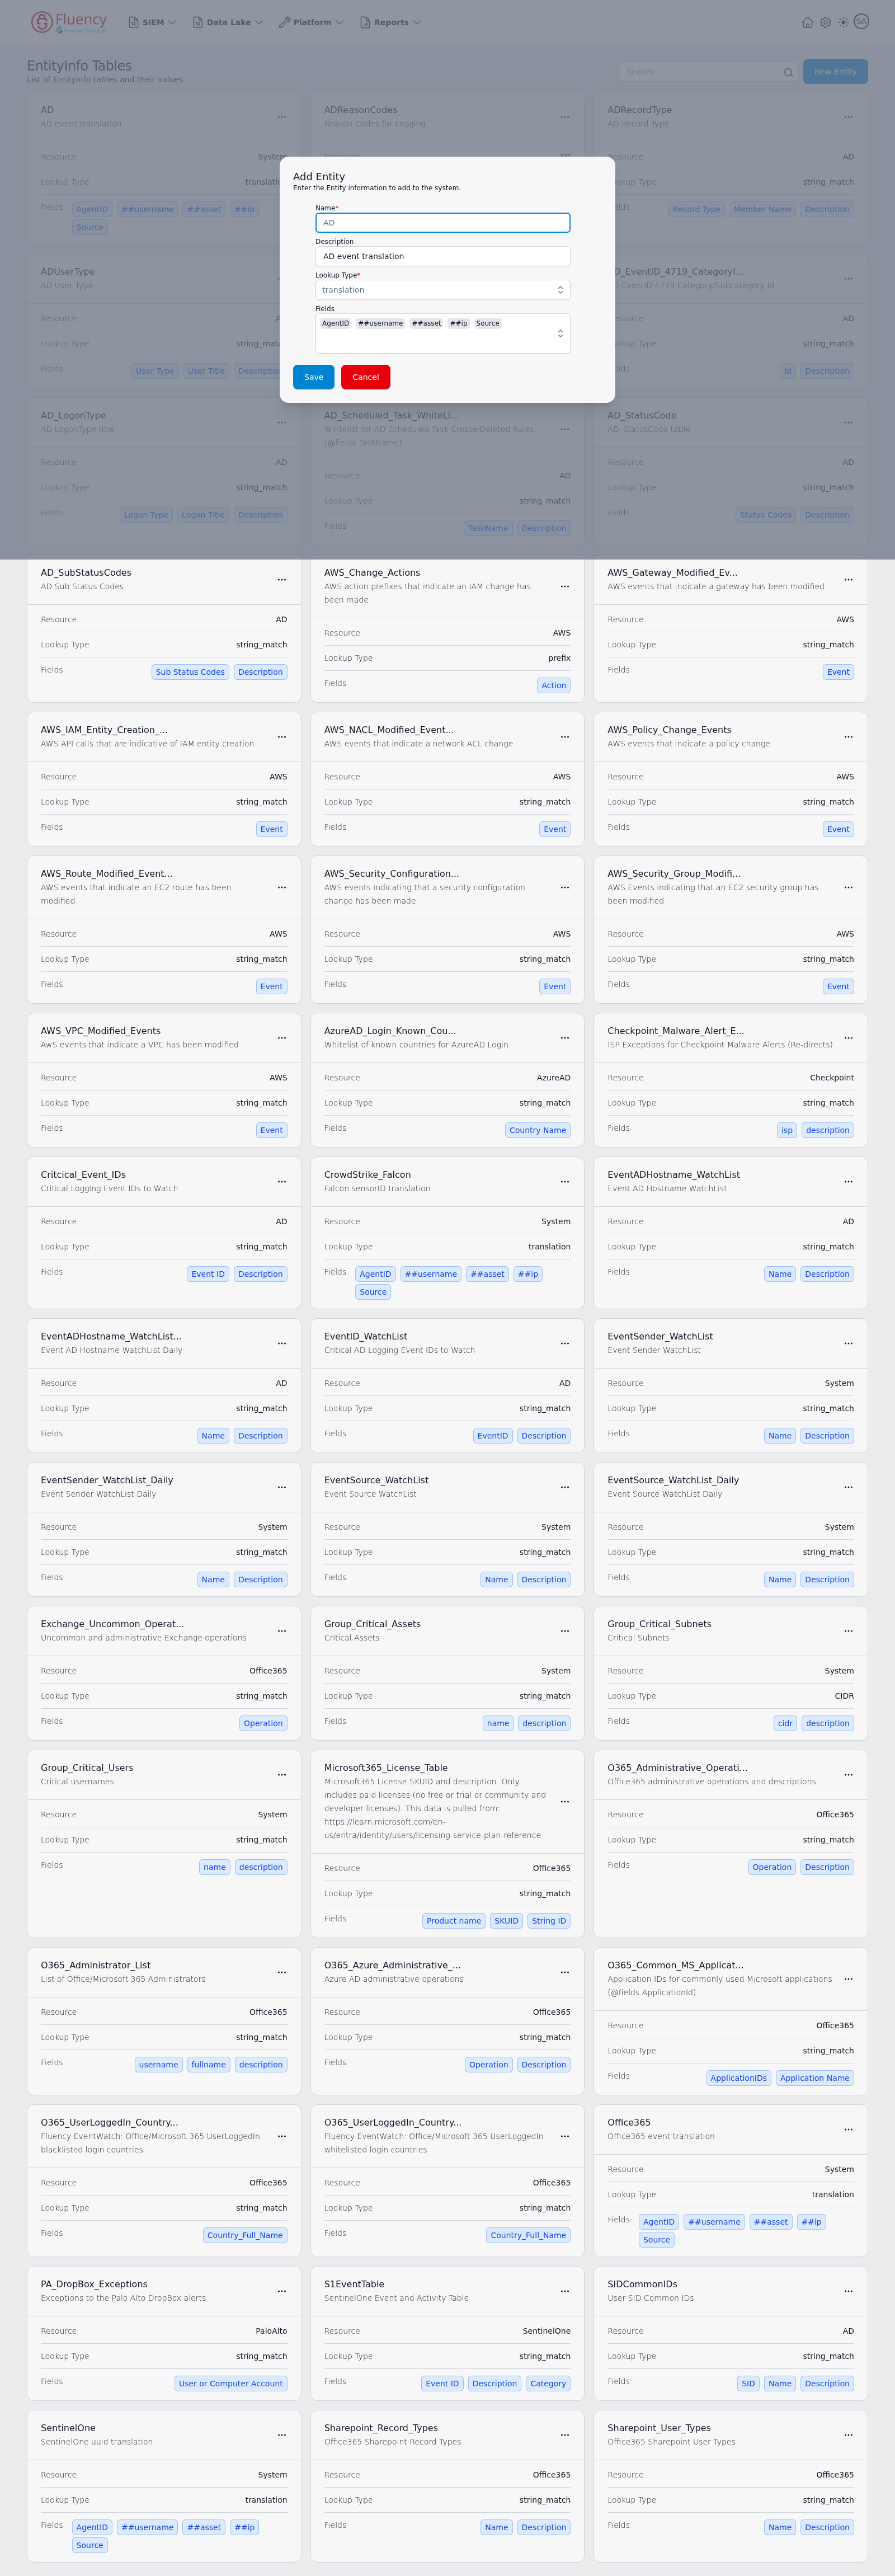
The dialog shows the same Name, Description, Lookup Type, and Fields controls as when creating a table, with the table's current values filled in — the Fields box lists the table's existing field chips. The Upload File drop zone is not shown when editing. Save applies the changes; Cancel closes the dialog without saving.
Delete
Choosing Open options → Delete opens the Delete Entity Table confirmation, which asks "Are you sure you want to delete the entity table …?" and names the selected table.
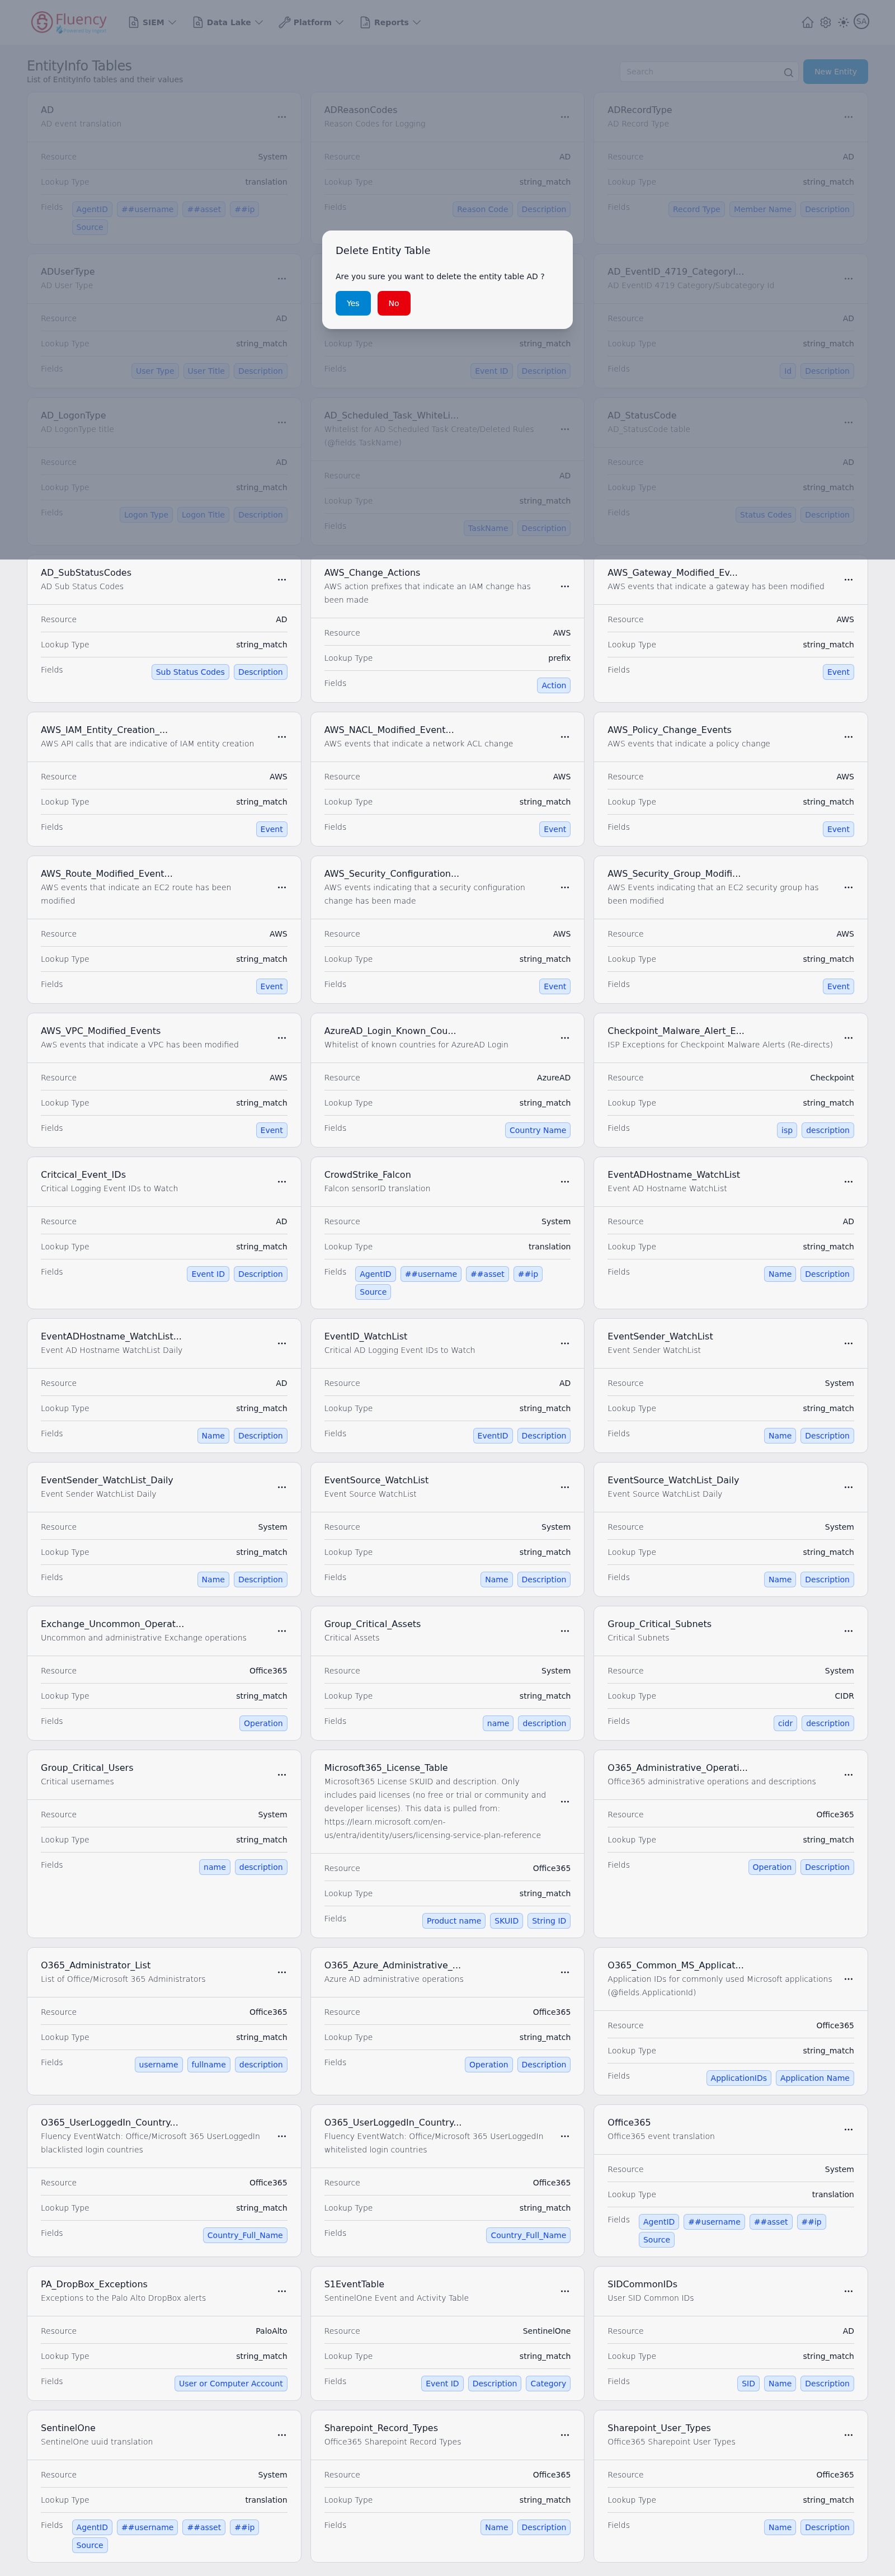
Click Yes to delete the table or No to keep it.