AWS CloudTrail
AWS CloudTrail is a service that logs AWS account auditing data to a new/selected AWS S3 (Simple Storage Service) bucket. Fluency Platform will integraton with S3 to collect and process this data stream.
AWS S3 buckets integrates with AWS SQS (Simple Queue Service) by way of Event Notifications. Fluency will make use of this integration to collect data, in order, as they arrive in AWS S3.
- CloudFormation
- Manual
AWS CloudFormation
AWS CloudFormation allows you to configure AWS resources from script/code. This makes deployment easy, consistent, and greately decreases the possiblity of errors or misconfigurations.
Fluency offers a CloudFormation scripts to facilitate this integration. While these scripts are free to use, keep in mind that AWS CloudFormation is a paid service, and you will incur a charge from AWS for using it.
Fluency provides a single CloudFormation script to complete all the steps to collect CloudTrail data. The process to configure CloudTrail can be complicated, as can be seen from the CloudTrail Manual Set-up/Configurations section (provided below for reference).
Link to the CloudFormation file on S3:
https://fluency-cloudformation.s3.us-east-2.amazonaws.com/Fluency_AWS_Import_CloudTrail.yaml
Link to the CloudFormation file on S3 (for AWS GovCloud users):
https://fluency-cloudformation.s3.us-east-2.amazonaws.com/FluencyGovCloudTrail.yaml
Deploying a CloudFormation template
Navigate to the CloudFormation section of the AWS Management Console.
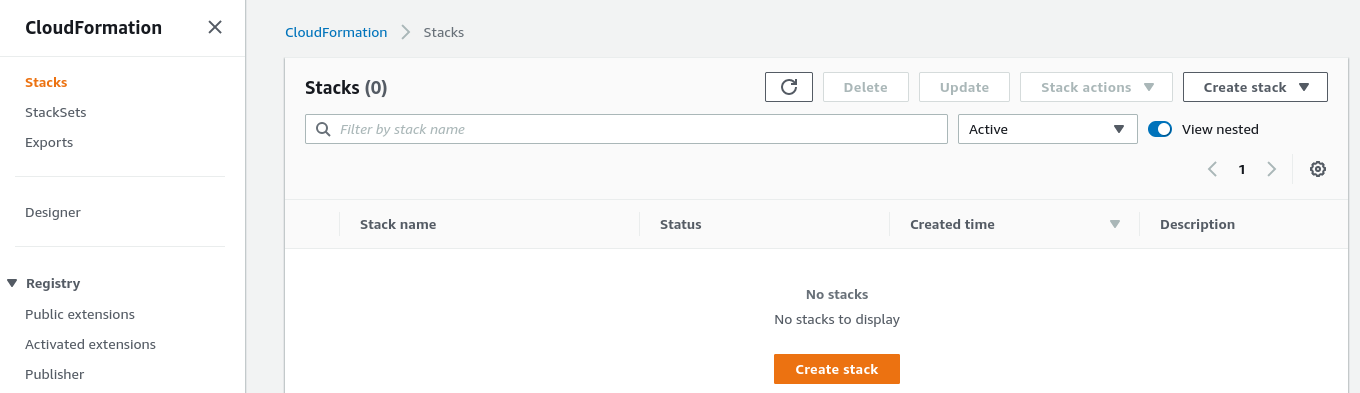
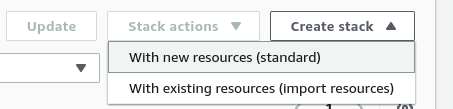
Under the "Stacks" section, choose "Create stack" (with new resources, standard).
On the following page, specify a template, and choose the desired template (using Amazon S3 URL) from above:
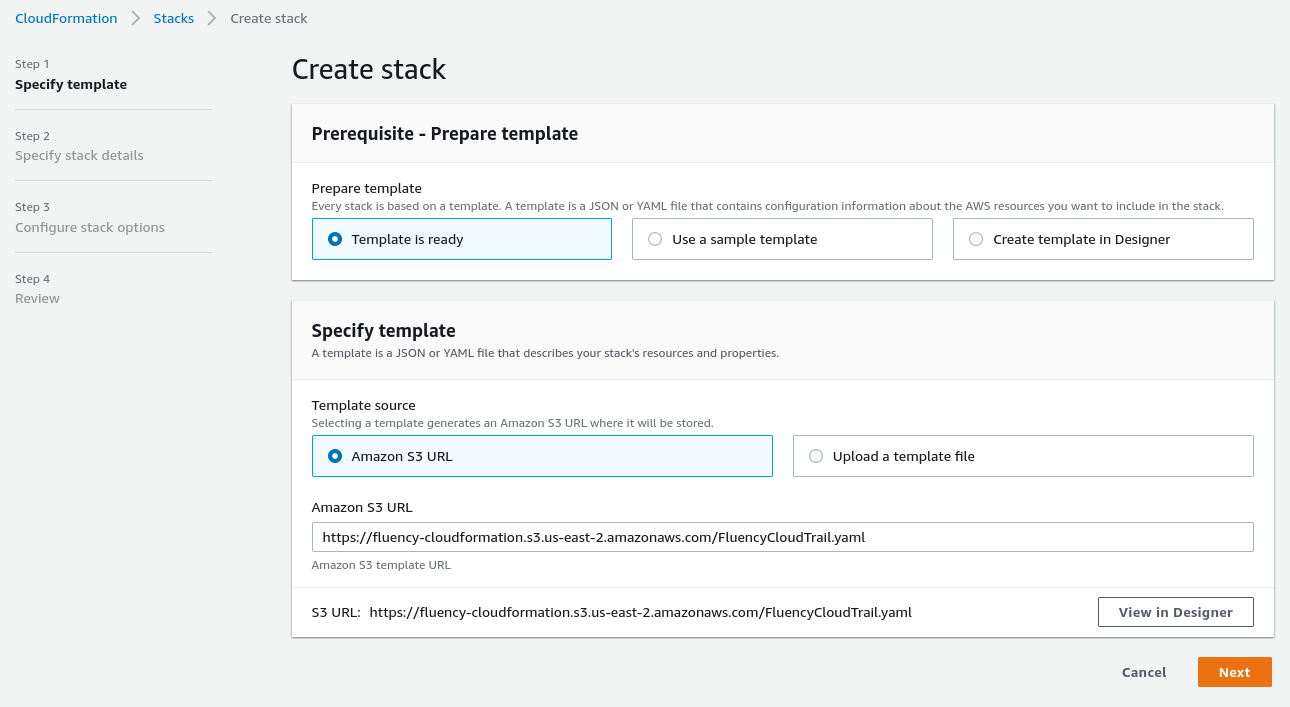
Click "Next" to continue.
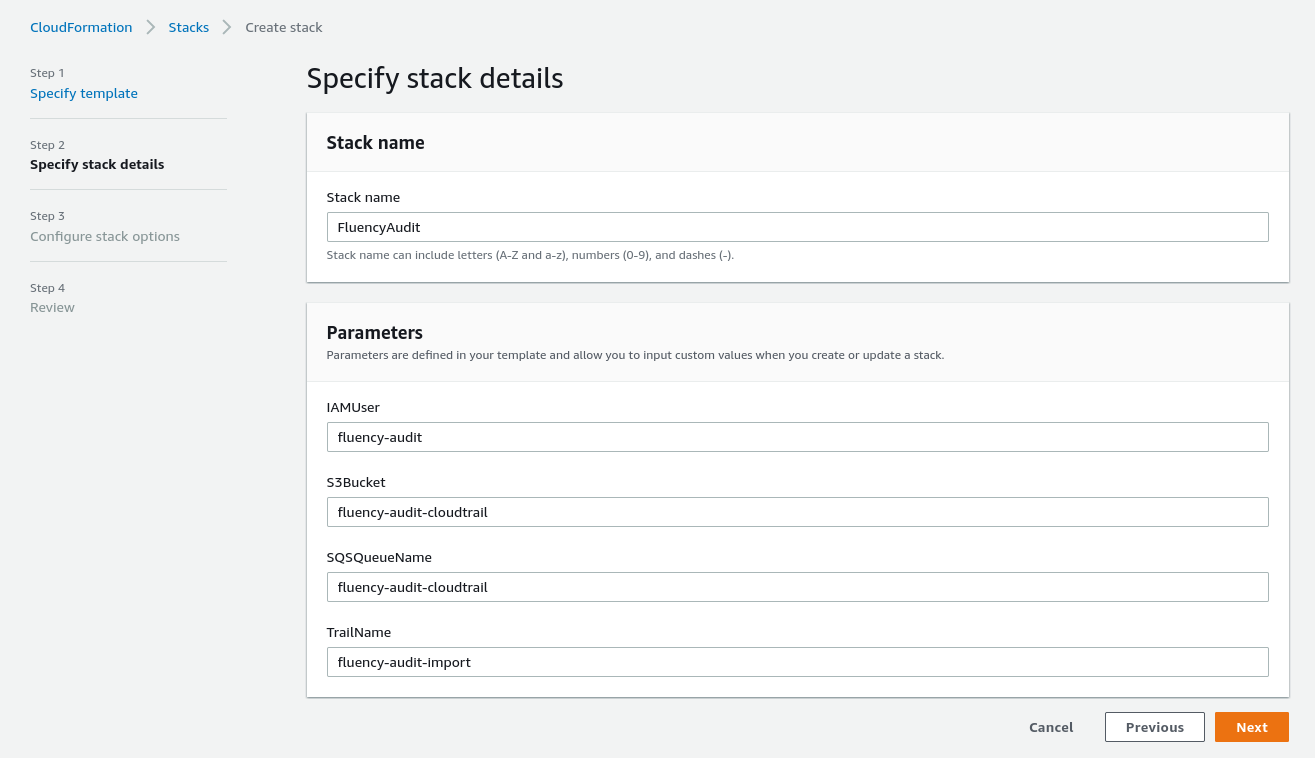
Give this deployment a name, and specify some parameters of the queue. You can choose your own name, or keep the default values provided by Fluency.
NOTE: You must change the default value of the S3Bucket. Or the CloudFormation will always fail and be rolled back.
AWS S3 Bucket names must be Globally Unique; the default S3 bucket name already exists elsewhere in AWS.
Ensure that the AWS S3 Bucket name chosen follows the AWS Bucket naming rules.
Click "Next" to continue.
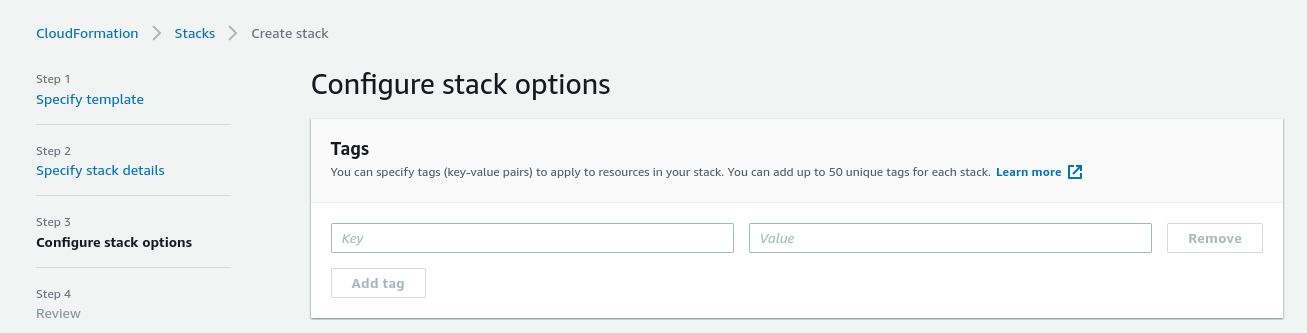
Configure additional items (optional).
Click "Next" to continue.
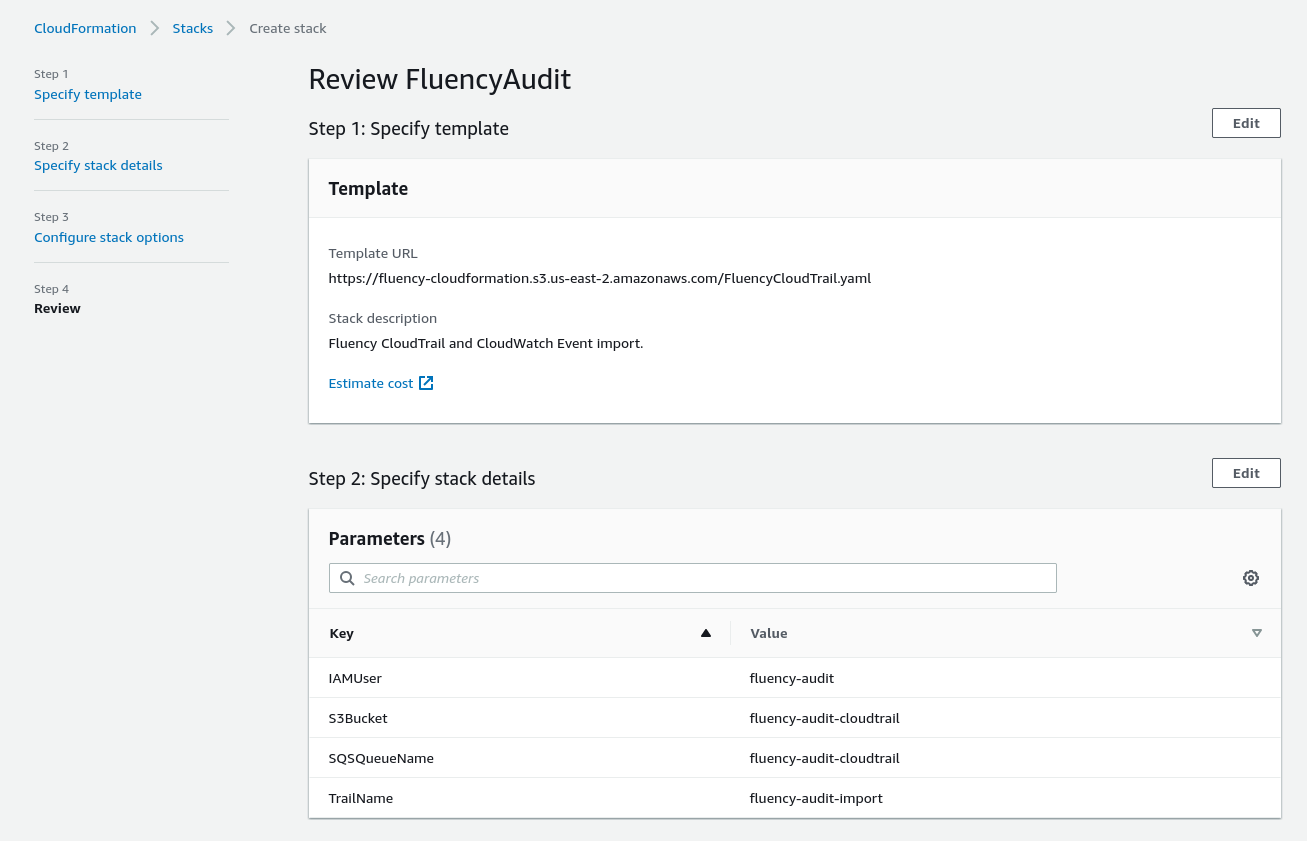
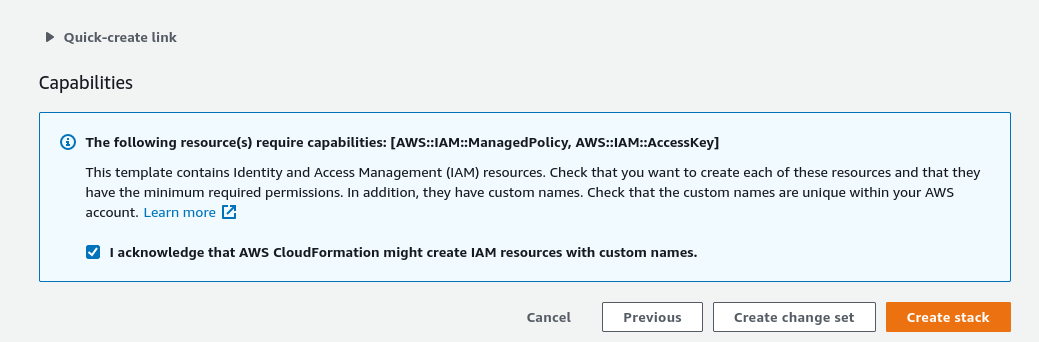
Review the deployment, when complete, choose "Create stack" to deploy.
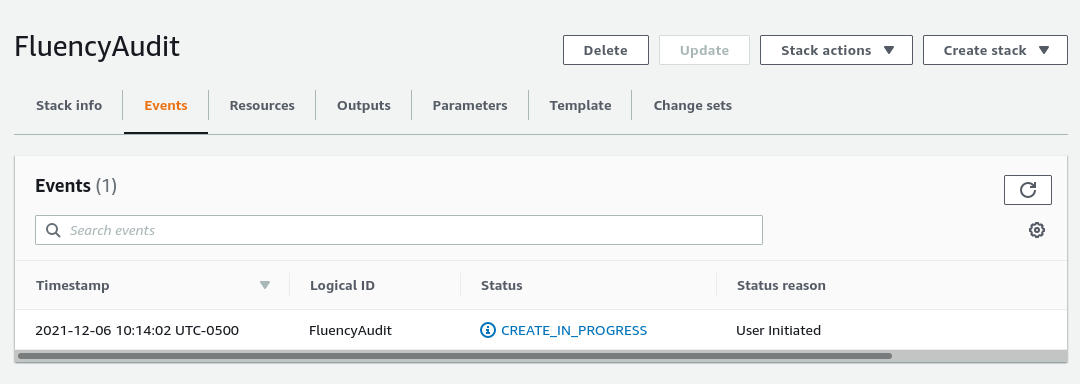
The deployment in progress:
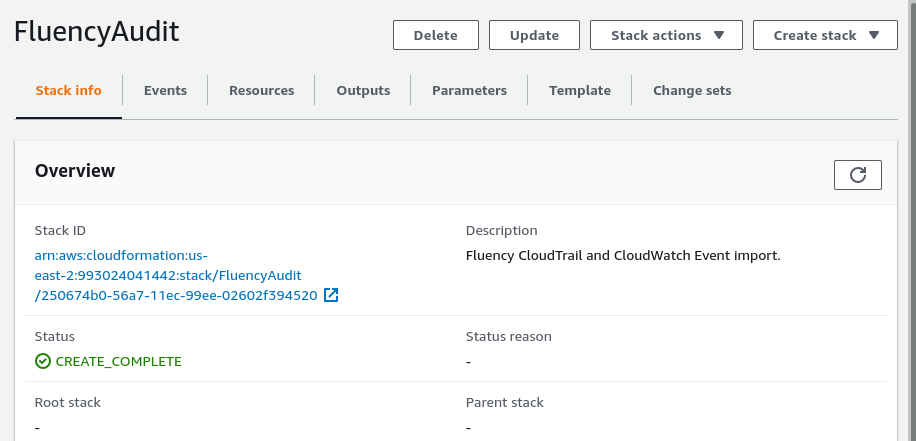
Once the deployment is complete, navigate to the "Outputs" tab.
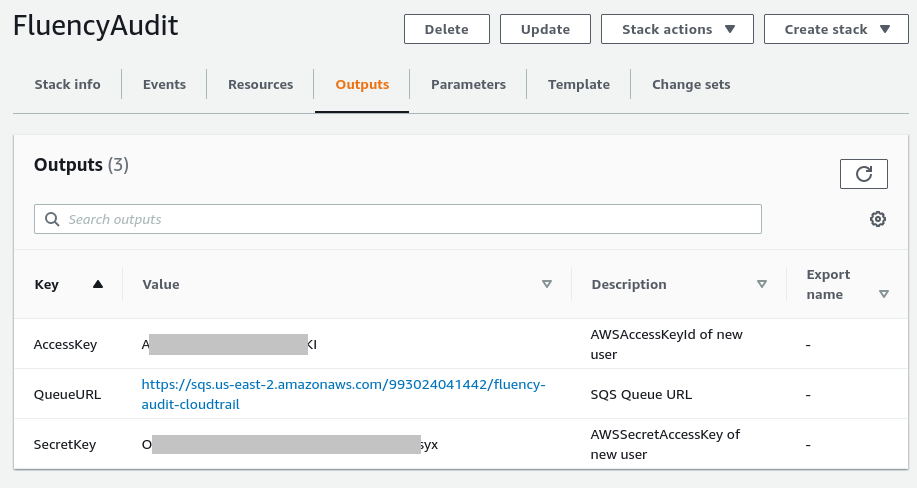
Copy the details (Key/Values) shown. You will be asked for these items on the Fluency interface.
Manual Set-up/Configuration
NOTE: Skip this section if using CloudFormation instructions from above. The instructions presented here are for reference.
First, a CloudTrail will be created and configured to send logs to an AWS S3 bucket. Then the bucket will be configured to send Event Notifications to an SQS queue. Finally, Fluency will read the SQS URL to determine the location of the logs in S3.
Follow the instructions in the next sections to create and configure AWS CloudTrail for use with Fluency.
This guide addresses the procedures required to export AWS CloudTrail logs to Fluency. For more detailed information regarding AWS usage, refer to the official vendor documentation.
For complete instructions on using AWS CloudTrail, you may also visit the Official AWS Documentation:
https://docs.aws.amazon.com/awscloudtrail/latest/userguide/cloudtrail-create-and-update-a-trail.html
Setting up a CloudTrail
Creating a CloudTrail and sending log to an S3 Bucket
Navigate to the CloudTrail section of the AWS Management Console and create a CloudTrail.

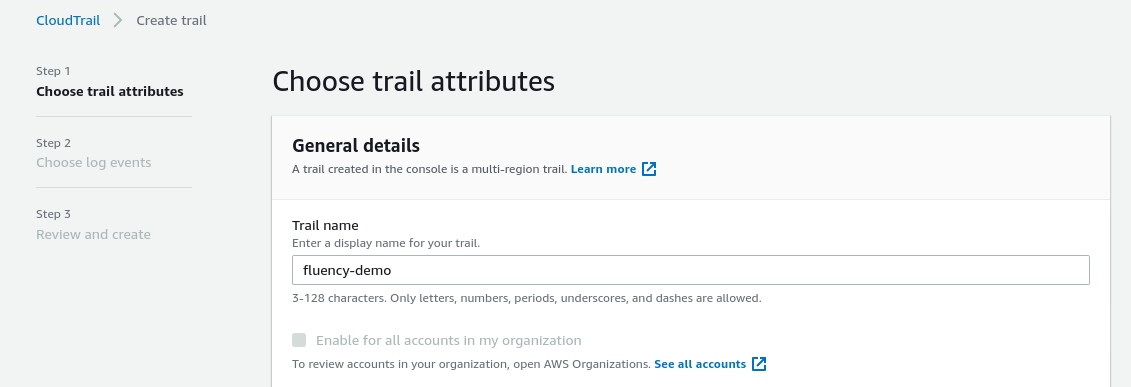
Pick a name for the trail. (By default, this trail is applied to all regions available to your account.)
Under the "Storage location" section, create/choose an S3 bucket for this trail. It is suggested to create a new dedicated S3 bucket for Fluency to access. Make a note of the bucket name, as it will be used in a later step.
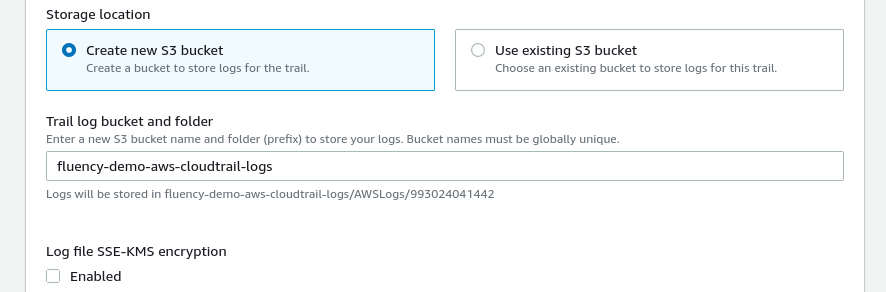
Additionally, uncheck the “Enabled” box to disable Log file encryption. (Instructions for using encryption are provided in the AWS Documentation link above.)
Click on the "Next" button, to continue to the next section to choose the event types that are to be logged.
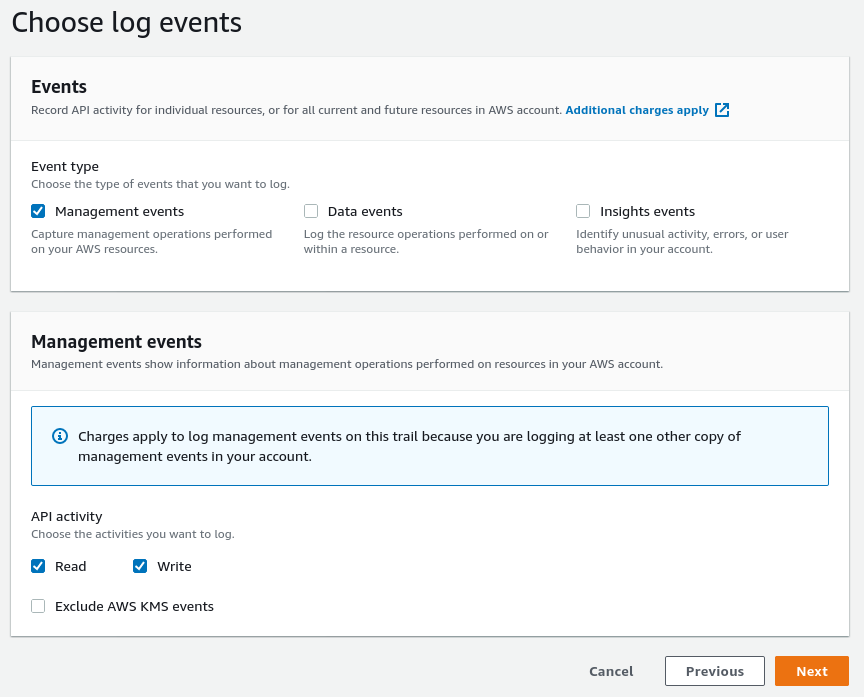
Select the "Management events", choosing both “Read” and “Write” events.
Click on the “Next” button to review settings, and then the "Create trail" button to finish (not shown). The CloudTrail, and S3 bucket should now be created.
AWS SQS
Creating a SQS Queue
Setup a SQS queue to be the recipient of event notifications from the CloudTrail S3 Bucket created above. Fluency will then poll this queue for the S3 location to fetch the log files.
Create a SQS queue from the AWS web console.
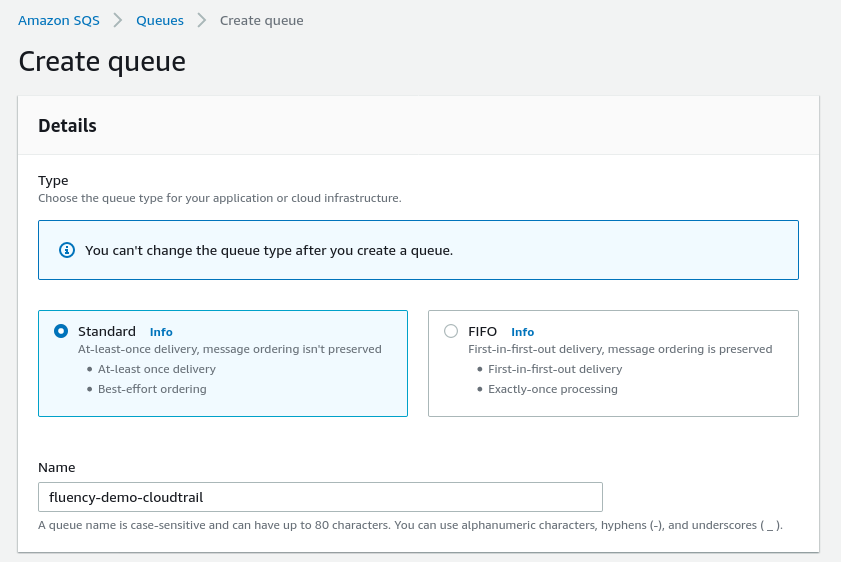
Choose a name for this queue. Select the “Standard” queue type.
Scroll down to the Access Policy section. Choose the “Advanced” method to define the Access Policy via a JSON object.
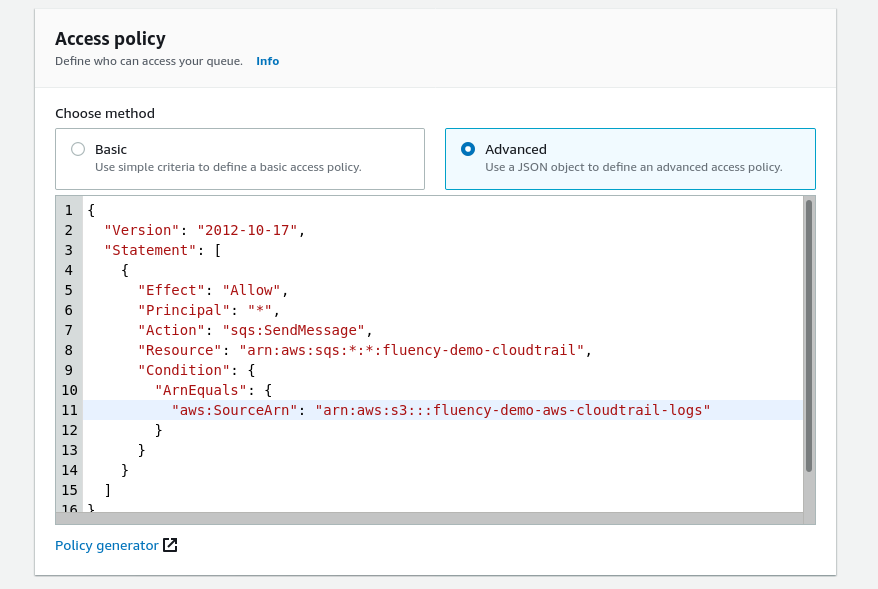
Use the Access policy JSON object shown below, replacing the (values) in the “Resource:” and “Condition:ArnEquals:” sections with the SQS queue name (defined above) and the S3 bucket name (from the previous section) respectively.
Access policy
{
  "Version": "2012-10-17",
  "Statement": [
    {
      "Effect": "Allow",
      "Principal": "*",
      "Action": "sqs:SendMessage",
      "Resource": "arn:aws:sqs:*:*:<aws-sqs-queue-name>",
      "Condition": {
        "ArnEquals": {
          "aws:SourceArn": "arn:aws:s3:::<aws-s3-bucket-name>"
        }
      }
    }
  ]
}
Click on the "Create queue" button to finish. The SQS queue should now be created.
AWS S3
Configuring S3 Bucket Event Notification
The next step involves configuring the CloudTrail S3 bucket used/created to send Event Notifications to the SQS queue created in the previous section.
Navigate to the S3 section of the AWS Management Console. Select the S3 Bucket used for the CloudTrail. Select the “Properties” tab.

Scroll down to the “Event notifications” section.
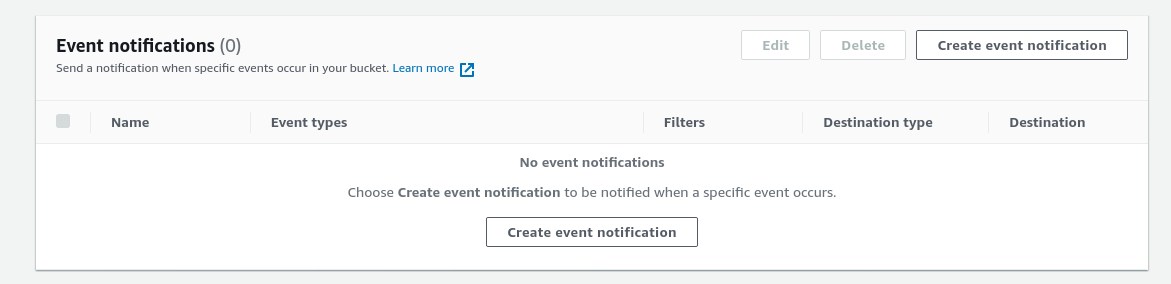
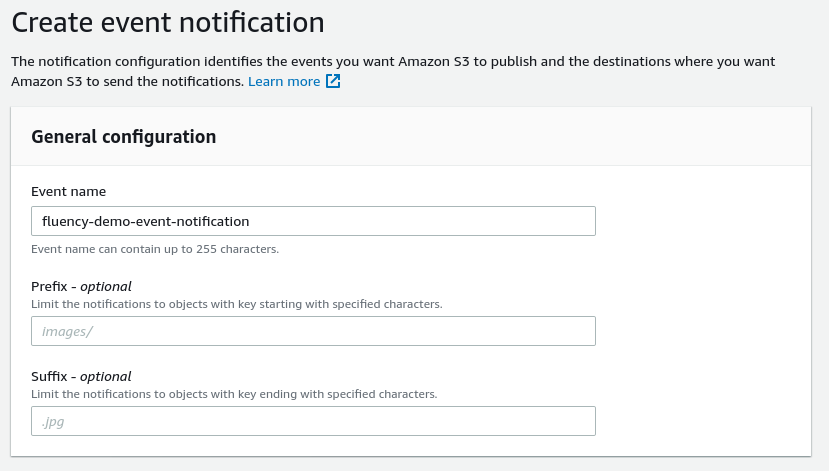
Click the “Create event notification” button to set up a new Event Notification. Provide an “Event name” for this item.
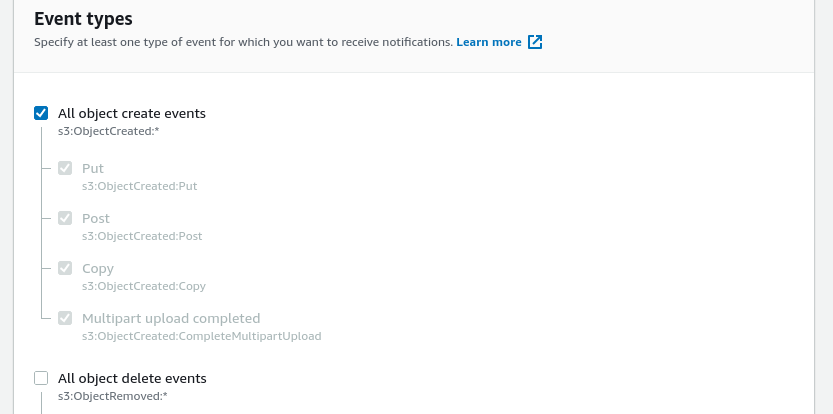
In the Event Type section, select the “All object create events” checkbox. Leave the other types un-selected.
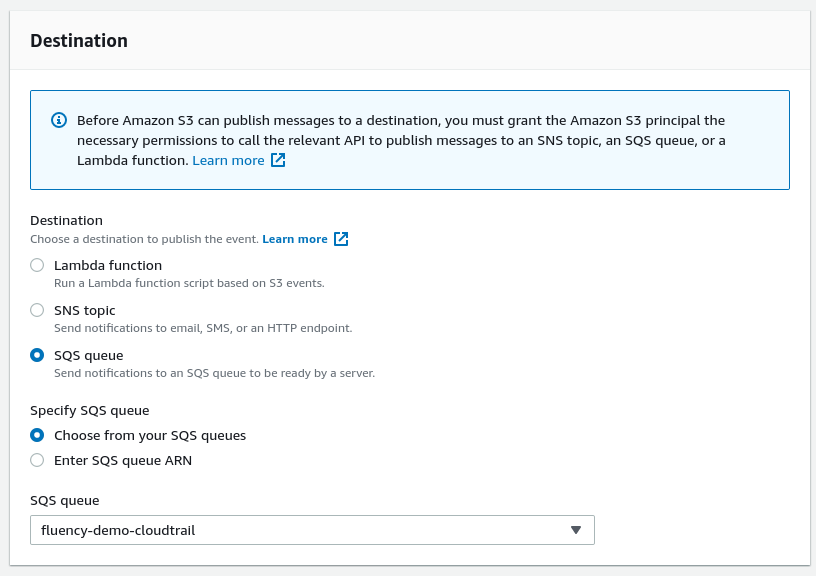
Configure the “Destination” to be an “SQS queue” and select the queue created in the previous step.
Click on the "Save changes " button to finish.
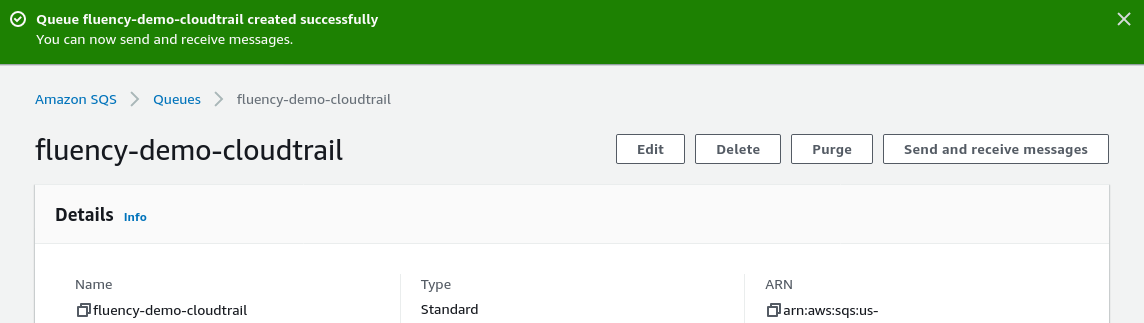
Make a note of the URL field in the Details section. It will be used in a later step.
AWS IAM
Fluency will access AWS resources via an IAM (Identity and Access Management) user. The access rights of this user will vary, depending on the services that send data to Fluency. In this section, an IAM user will be created. Additional permissions will be added to this user in the following section as needed.
For complete instructions on creating AWS IAM users, you may also visit the Official AWS Documentation: https://aws.amazon.com/documentation/iam/.
Creating a new IAM user for Fluency
Navigate to the IAM section of the AWS Management Console.

Add a new IAM user for Fluency. For Access Type, select the "Programmatic access" option.
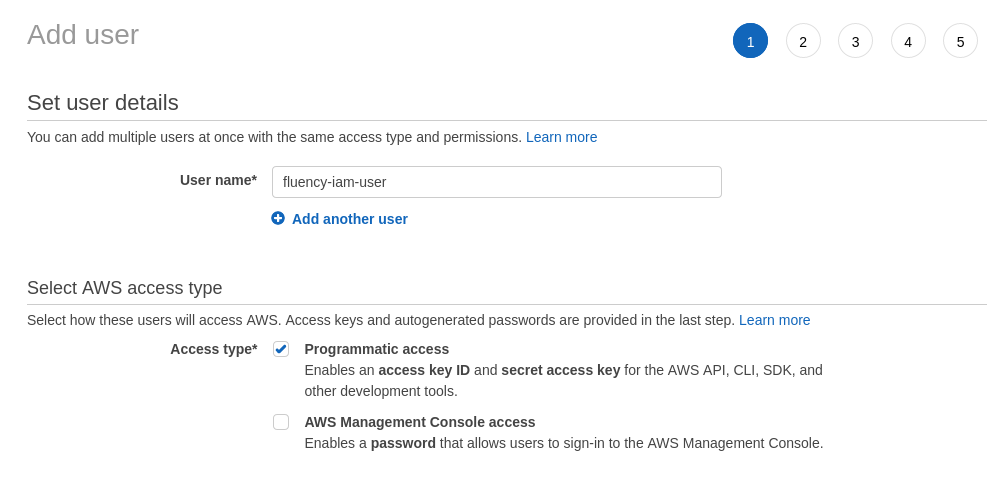
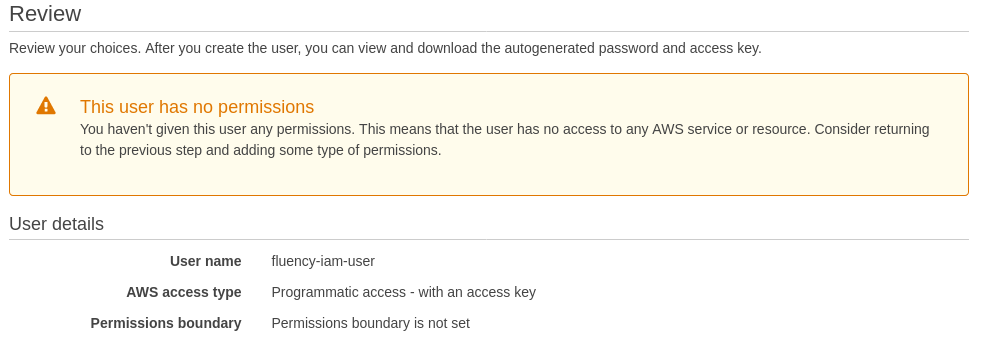
Click through and continue to add the IAM user without any permissions. These will be added in the next section.
NOTE: Make a note of the Access key ID and the Secret access key. These credentials will be used by your Fluency appliance to access your AWS data.
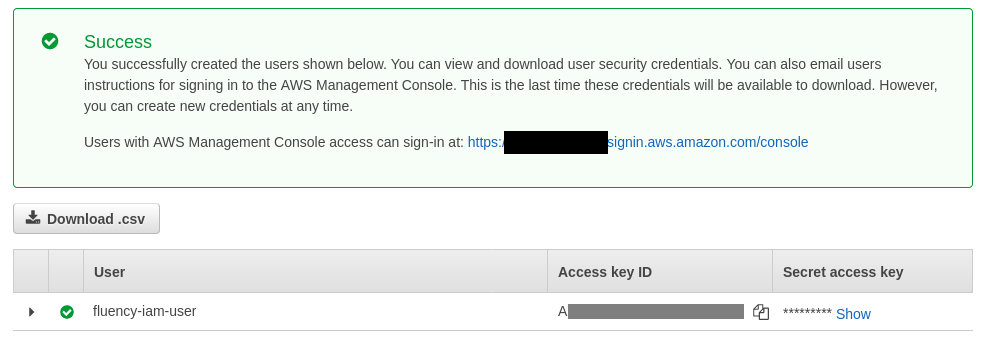
Click on the "Close" button to exit. The IAM user should be created.
Adding permissions to the IAM user
To integrate with AWS CloudTrail, your Fluency appliance will need access to AWS S3 and AWS SQS.
Navigate to the IAM section of the AWS Management console. In the "Users" tab, select the IAM user created in the previous step to modify.

Choose the Permissions tab and select the "+ Add inline policy” option.
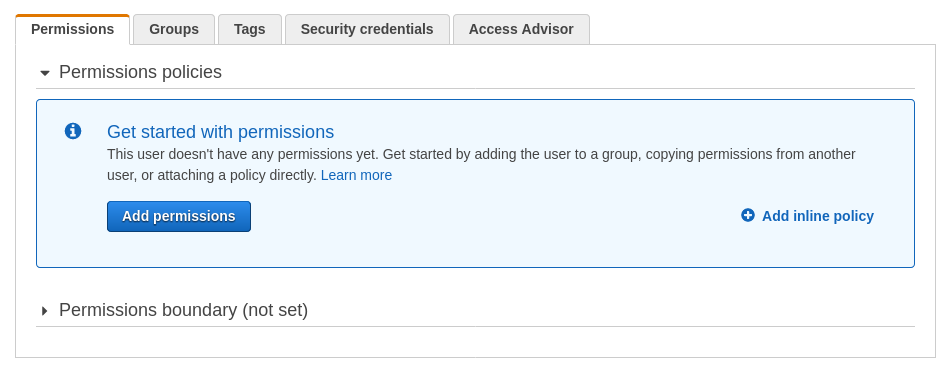
In the Create policy page, navigate to the JSON tab.
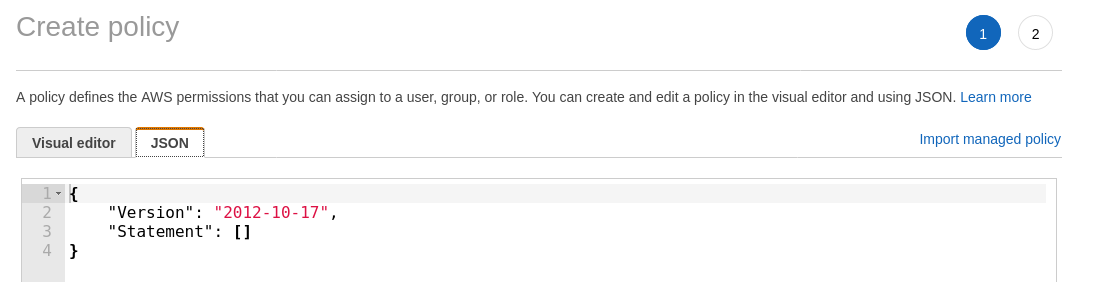
Use the editor to modify the policy. The required JSON object is shown on the following page. This file is also available for download at the following link: https://s3.amazonaws.com/SecurityDo/public/in-line-policy.json.
In the in-line policy JSON object shown below, replace the three (values) in the “Resource:” sections with the SQS queue name (once) and the S3 bucket name (twice), both from the previous sections, respectively.
IAM in-line policy
{
    "Version": "2012-10-17",
    "Statement": [
        {
            "Sid": "VisualEditor0",
            "Effect": "Allow",
            "Action": [
                "sqs:DeleteMessage",
                "sqs:GetQueueUrl",
                "sqs:ReceiveMessage",
                "s3:ListBucket"
            ],
            "Resource": [
                "arn:aws:sqs:*:*:<aws-sqs-queue-name>"",
                "arn:aws:s3:::<aws-s3-bucket-name>"
            ]
        },
        {
            "Sid": "VisualEditor1",
            "Effect": "Allow",
            "Action": "s3:GetObject",
            "Resource": "arn:aws:s3:::<aws-s3-bucket-name>/*"
        }
    ]
}
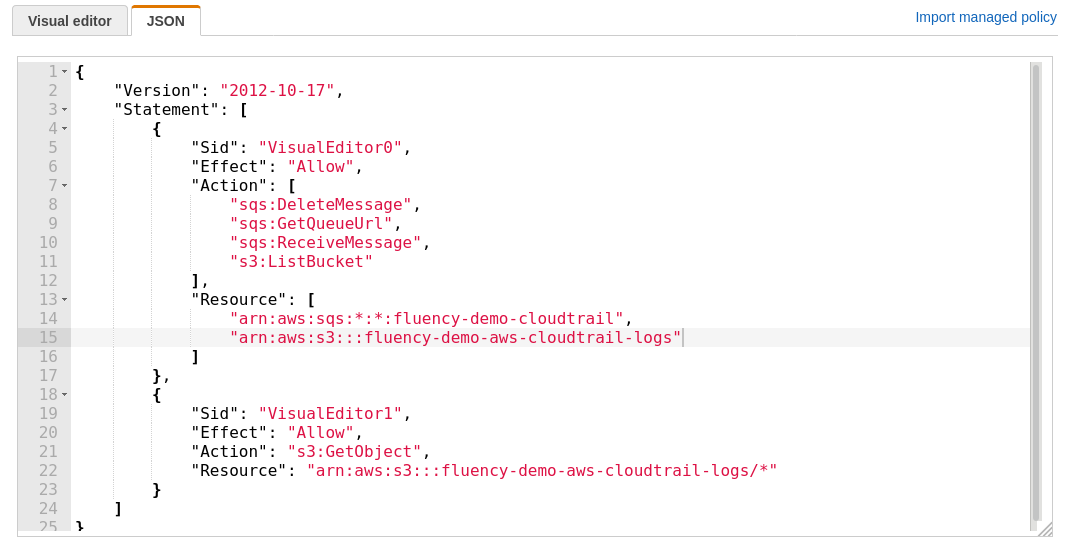
Click on the “Review policy” button.
On the next page, name and review the policy.
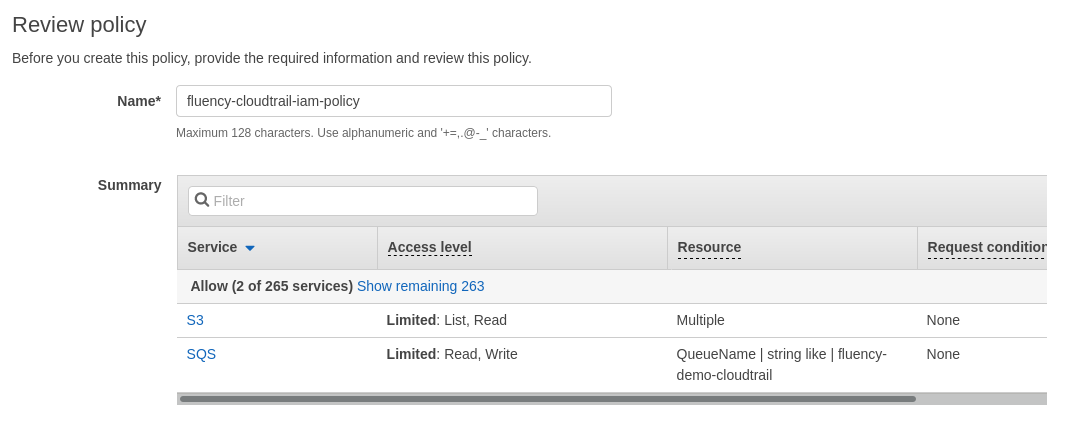
Click on the "Create policy" button to finish.
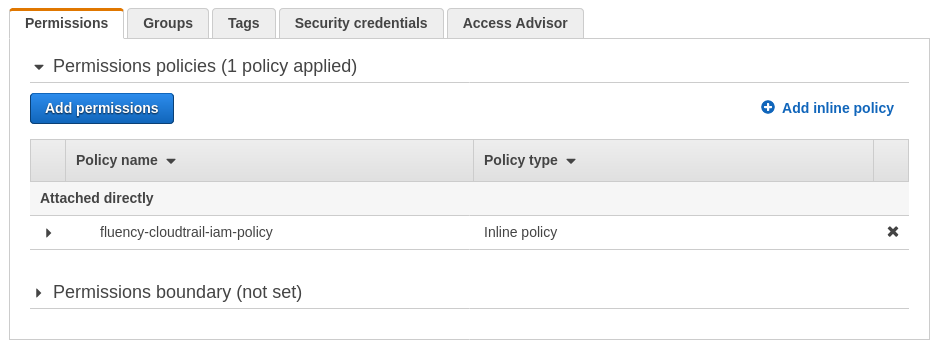
The IAM user permissions should now be added.
Install the Application
Everything the AWS side produced — region, SQS queue URL, and either a role or an access key pair — goes into one form.
Go to Platform → Applications → Install Application From Template and choose AWS CloudTrail from the AWS Services category.
| Parameter | Notes |
|---|---|
| AWS Region | Drop-down, opens on US N.Virginia. Must match the region of the SQS queue. |
| SQS notification queue url | The full queue URL from the CloudFormation output, not the ARN. |
| Pre-defined AWs Role | Optional. A role registered on Platform → Integrations. |
| Pre-defined AWs User | Optional. A user registered the same way. |
| IAM access key | Optional. Use instead of a role or user, not as well as. |
| IAM access secret | Optional. |
| datalake | Pre-filled managed. |
| datalake index name | Sits below the fold when the panel opens — scroll the panel body. Two applications writing to the same index name in the same lake will collide, and the second one aborts. |
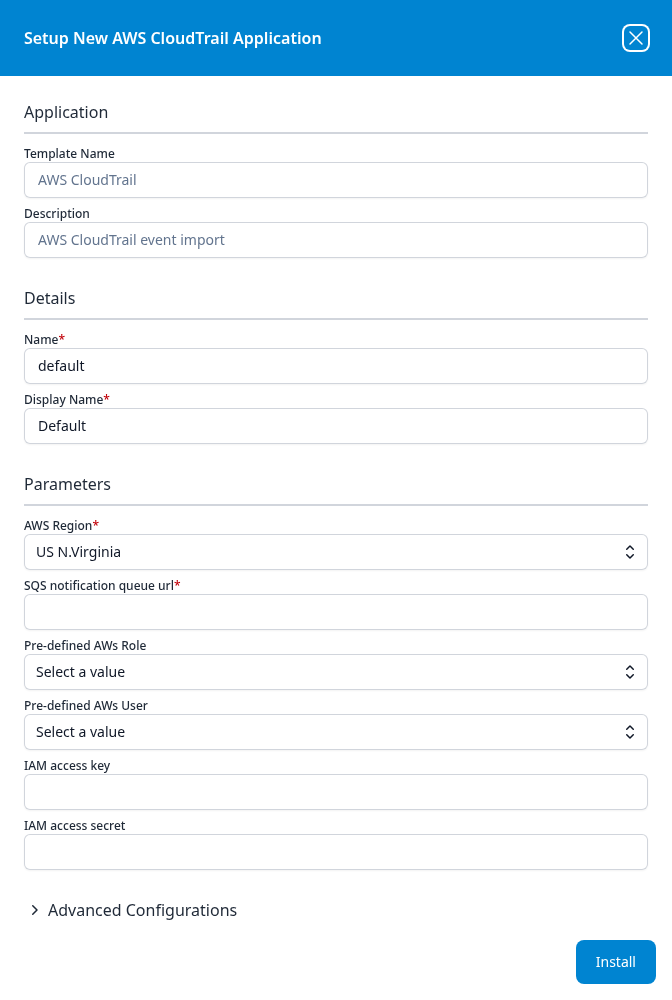
Press Install. The application appears under Installed Applications and builds the data source, the router with its adjustment processors, and the sink as a unit — the pieces the Configuration section below builds one at a time.
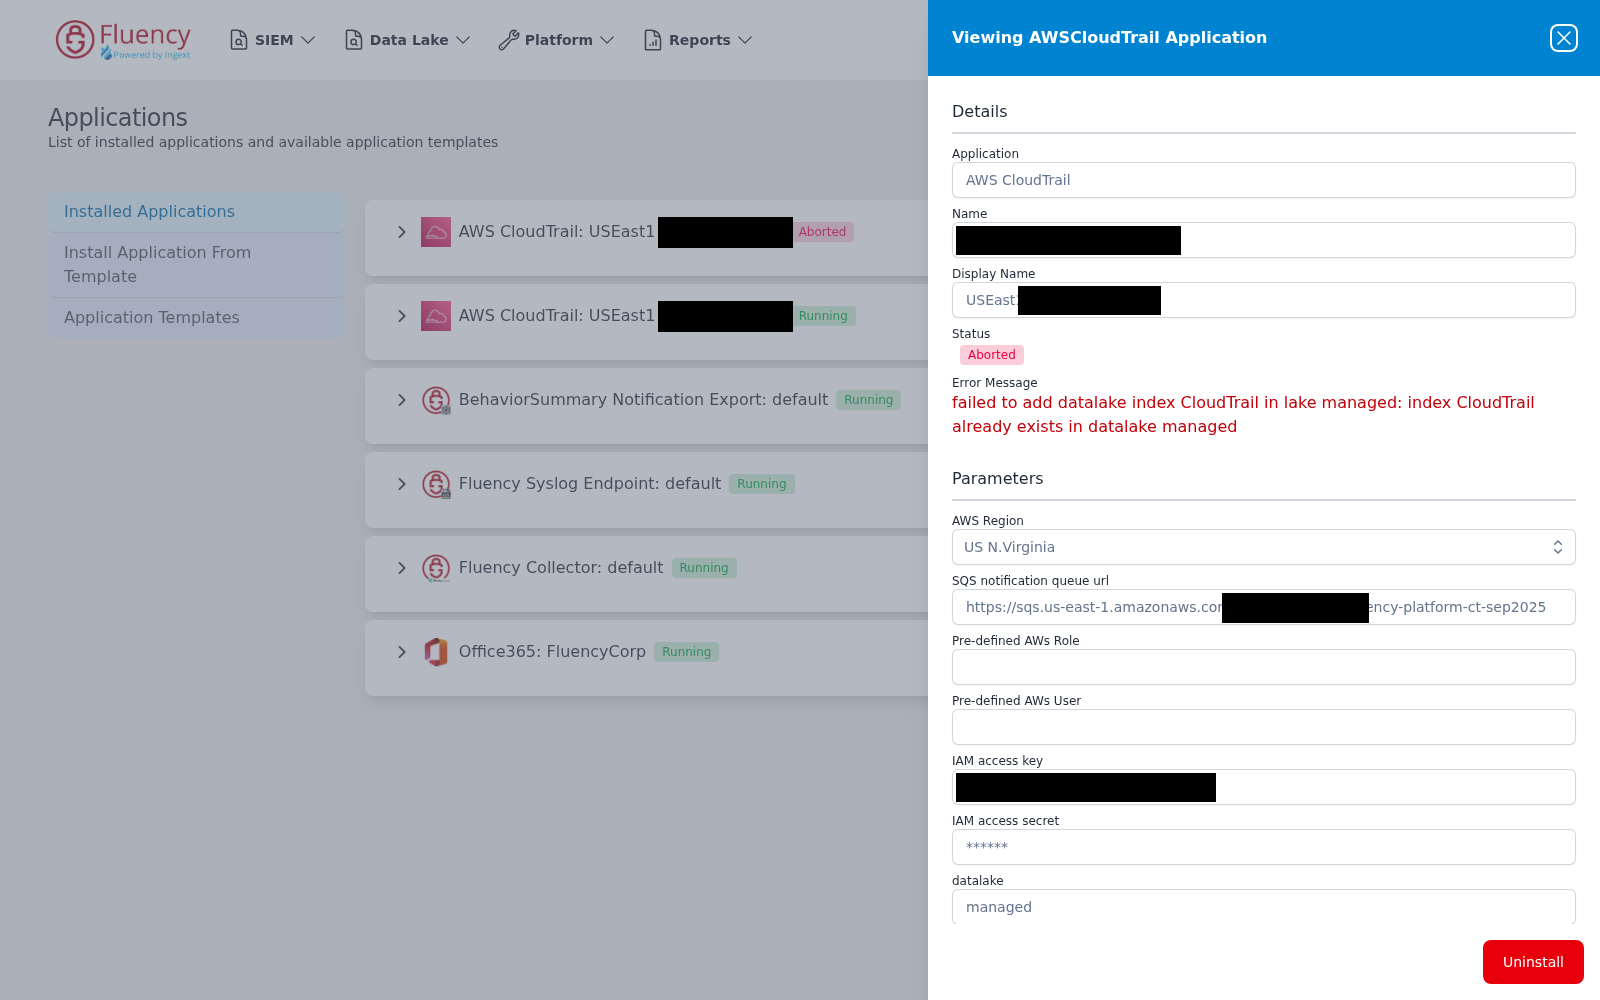
If the index name was already taken, the card comes up with a red Aborted badge instead of the green Running one; the blue eye button at the right of the card opens a details panel whose Details section carries the Error Message in red. Uninstall it from the bottom of that panel, then install again with a different index name.
What follows is the long way round. The Install the Application section above is verified against the 2026-07 interface capture and is the supported path; the manual build below — creating an AWS S3 w/ SQS integration, then adding a data source, router, sink and connections by hand on the Configuration page — produces the same pipeline the template builds for you. It is kept because it documents the moving parts, and because registering the integration separately is still worthwhile when several applications share one AWS account. Its screenshots have not been re-verified against the current interface.
Fluency Web Interface
Integration
AWS CloudTrail
Login to the Fluency portal:
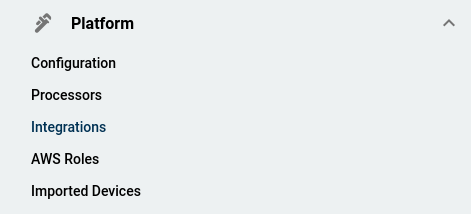
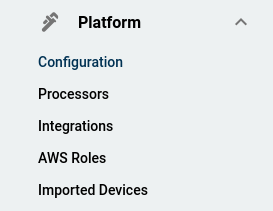
Choose the Integrations option under the Platform menu in the navigation bar.
Select the AWS S3 w/ SQS integration (S3Notification).

In the left-hand panel, give the integration a short name (such as CloudTrailUSEast1), and optionally, a description. For Authentication Method, choose Access Key ID/Secret Key.
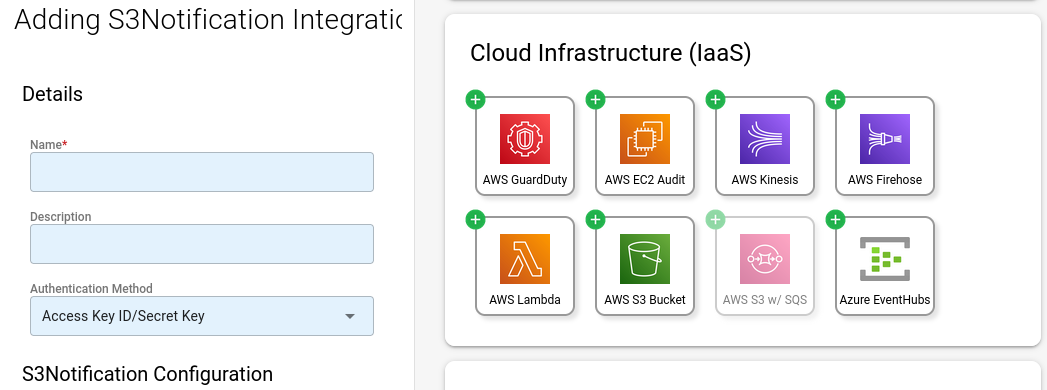
Using the values from the CloudFormation run in the previous step, populate the rest of the values. Ensure that the Region selected matches that of the SQS queue URL.
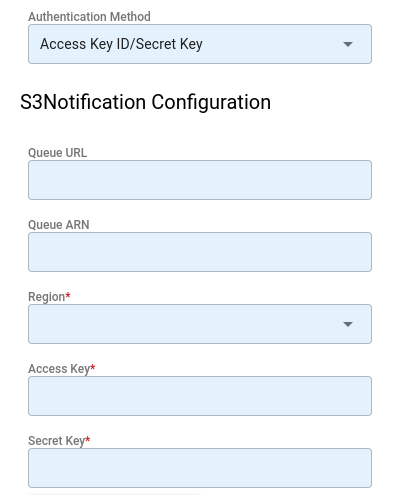
Click Save to finish adding the integration.
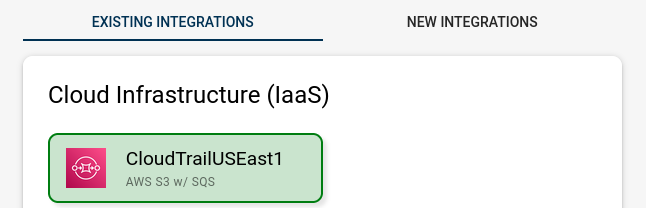
Configuration
Data Source
Navigate to the Configuration option under the Platform menu in the navigation bar.
Select the Add Data Souce + option on the left bottom side of the main page section.
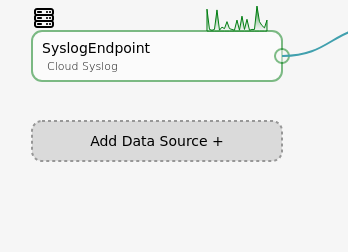
In the left-hand panel, choose AWS S3 w/ SQS as the source Type, and give the integration a short name (such as AWSCloudTrail).
For the Format, choose json.
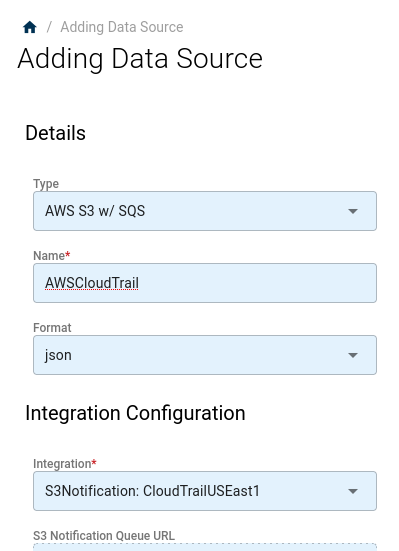
Review the populated values, and click Save to finish adding the source.

The integration should now appear under the sources column.
Router
Staying on the Configuration page, select the Add Router + option on the center bottom side of the main page section.

In the left-hand panel, choose AWSCloudTrail_Adjustments as the Processor Name, and give the integration a short name. Optionally, you can select the checkbox to use the Processor name as the Router name.
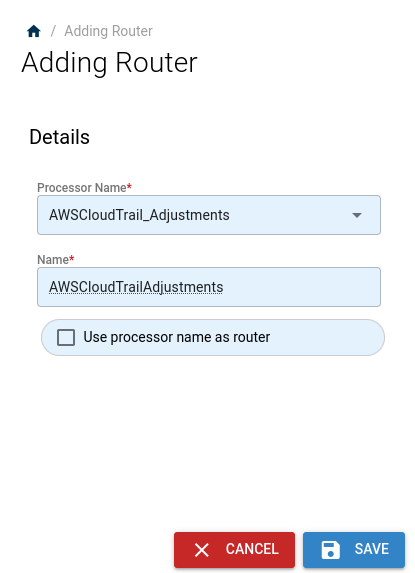
Click Save to finish adding the router.
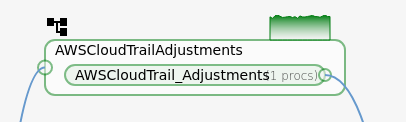
Sink
Again staying on the Configuration page, ensure that the desired Data Sink is present. In most cases, it will be EventWatch.

Connections
Finally, with all three components in place, click on the circles on the Configuration page, to logically connect the components together in a pipe line.

The icons will turn Green when data is present.