Fluency Collector
The Fluency Collector is a virtual device (VM) that acts as a local collection server. It collects events from various log sources (such as Syslog) and continuously forwards (compresses and uploads) these events to the connected Fluency Cloud instance, via a secure HTTPs connection.
The collector provides an additional method of data ingestion, for data sources that lacks a mean of sending data securely to cloud-basexd endpoints, or if there are concerns with upload bandwidth or latency.
Additionally, the collector can also facilitate support for LDAP and NetFlow integrations, if installed on-prem.
Installation
The Fluency Collector is installed on top of Enterprise Linux operating systems (RHEL variants). Prior to Enterprise Linux 8 (EL8), CentOS was the operating system of choice. Currently, for EL9, Fluency supports Rocky Linux 9 and also AlmaLinux 9.
For more detailed information regarding Rocky Linux, refer to the official vendor documentation:
Install Rocky Linux OS
This section assumes that the Rocky Linux OS installation takes place on a virtual machine with a new, empty disk, and that the system has been booted from the Minimal install ISO.
NOTE: If your virtual machine already has Rocky Linux pre-installed, such as the case when launching an instance from an AWS, GCP, or MS Azure image, this section may be skipped; follow the instructions in the next Running the Fluency installation package section
The Rocky Linux 9 Minimal install ISO can be found at the following direct link(s):
https://download.rockylinux.org/pub/rocky/9/isos/x86_64/Rocky-9-latest-x86_64-minimal.iso
https://mirror.cs.vt.edu/pub/rocky/9/isos/x86_64/Rocky-9-latest-x86_64-minimal.iso
(Other official Mirrors/Repositories may be used to download the same ISO.)
The recommended size for the Fluency Collector is 2 vCPU, 8GB RAM and 80GB to 1TB of disk space.
For detailed instructions on Rocky Linux installation, please refer to the official documentation:
Booting from ISO image
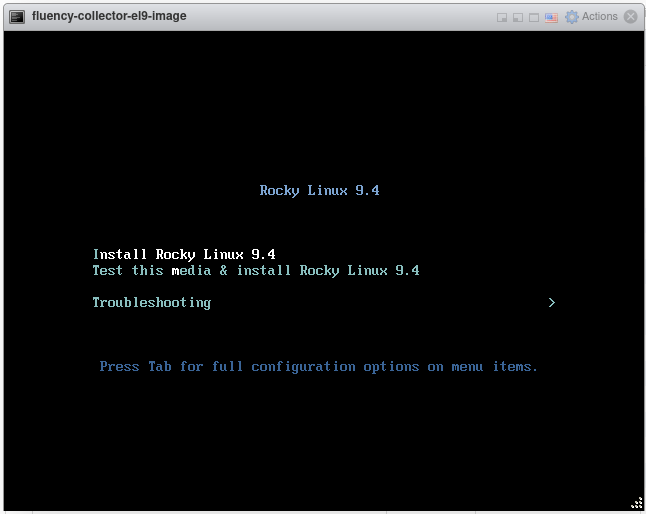
Start/boot the machine from the installation disk/image. Select the Install Rocky Linux 9 option from the launch menu.
Configuration
On the following screen(s), select the installation language.
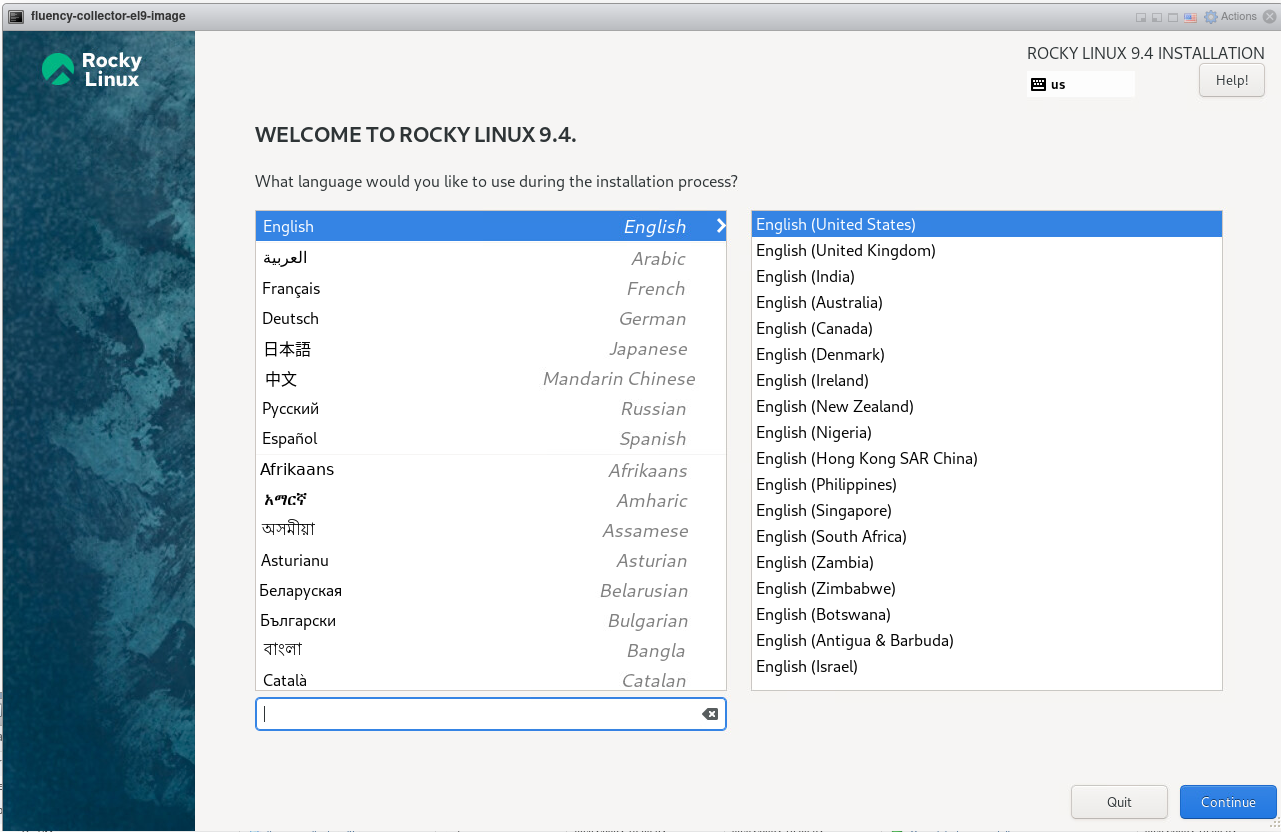
Select Continue to proceed to the Installation Summary page.
Localization
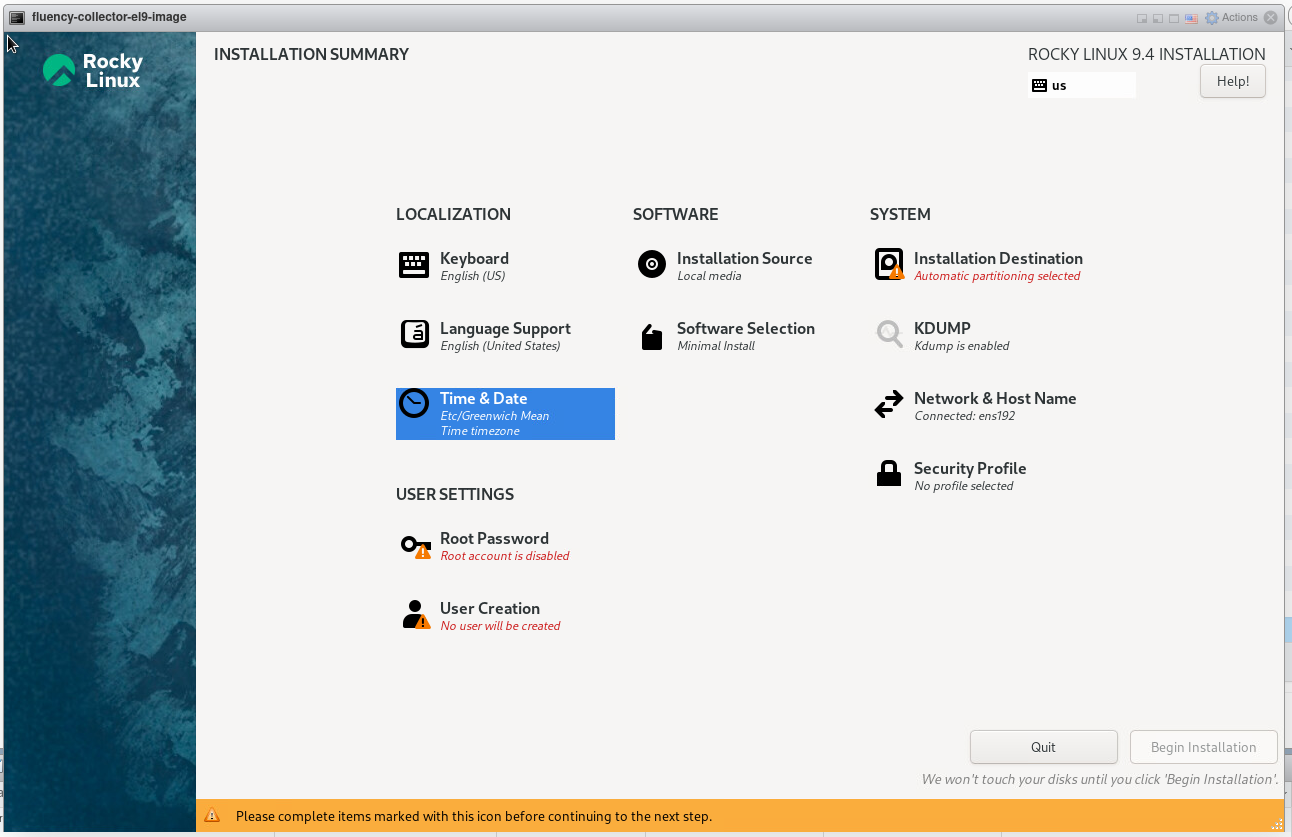
Under the LOCALIZATION section, select Time & Date to modify the timezone of the Fluency Collector.
Choose Etc as the Region. Select Greenwich Mean Time as the City.
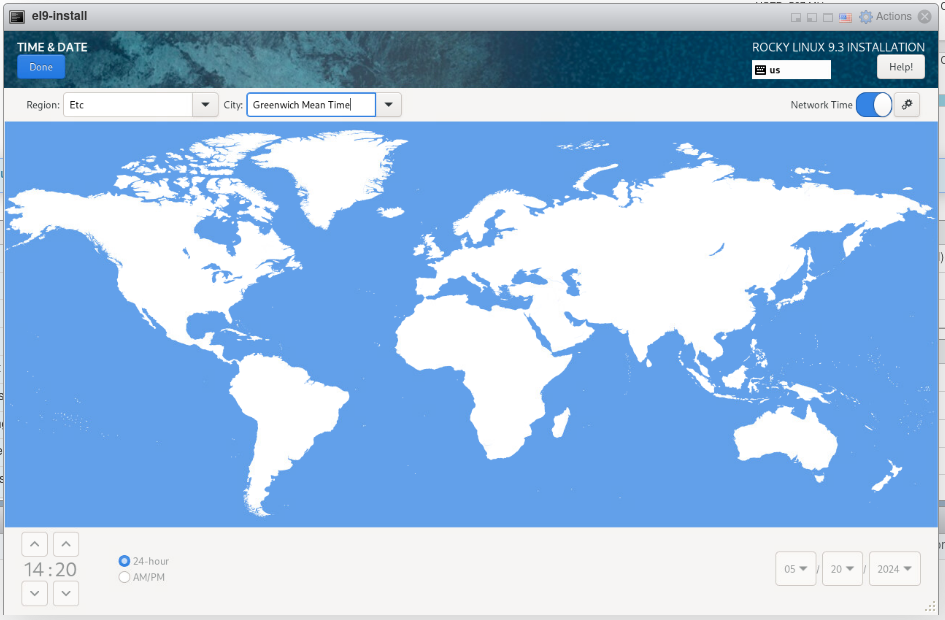
NOTE: It is strongly suggested to set the Fluency Collector timezone as shown above. Fluency Cloud instances uses the UTC timezone, and having both systems on the same timezone settings will simplify data ingress. However, if this not possible, Fluency does provide standard time adjustment scripts for use.
Disk Partitioning
Return to the Installation Summary page, and navigate to the SYSTEM section.
Select Installation Destination to configure disk partitioning.
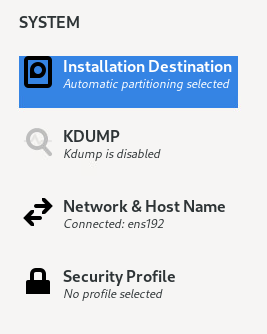
- Manual
- Automatic
Manual Disk Partitioning
NOTE: (Skip this section if using Automatic partitioning.)
Choose the Custom option, for Storage Configuration to proceed.
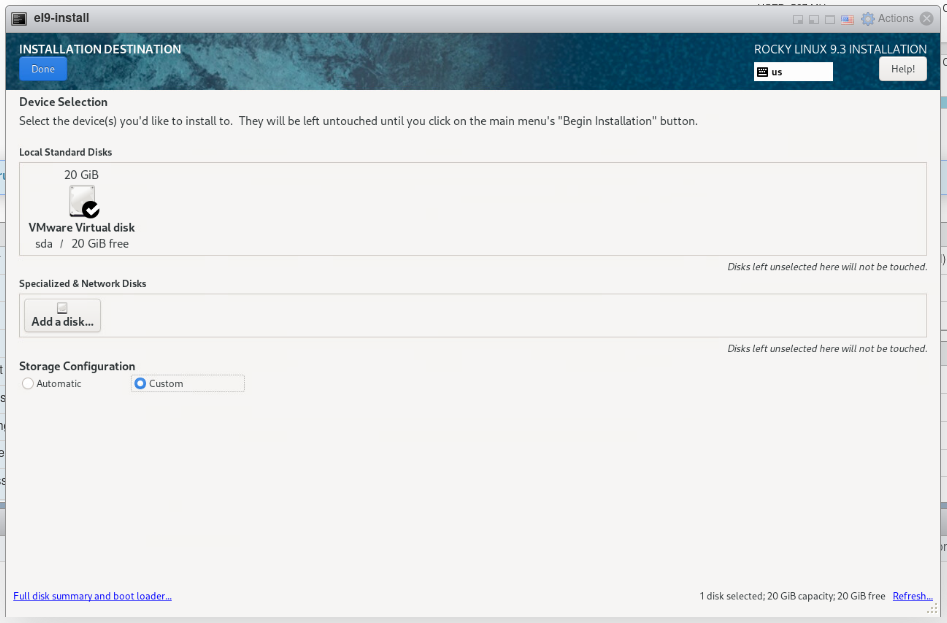
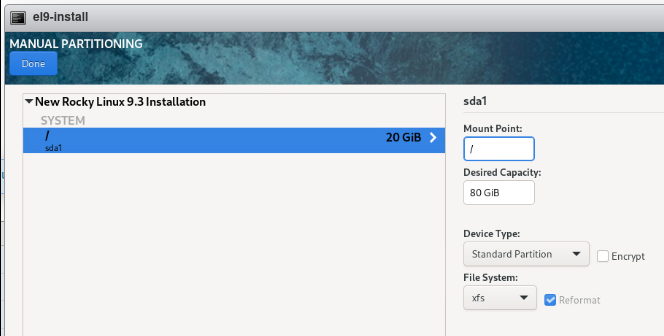
Select Standard Partition and create a mount point (via the "+" button) for the root directory “/”.
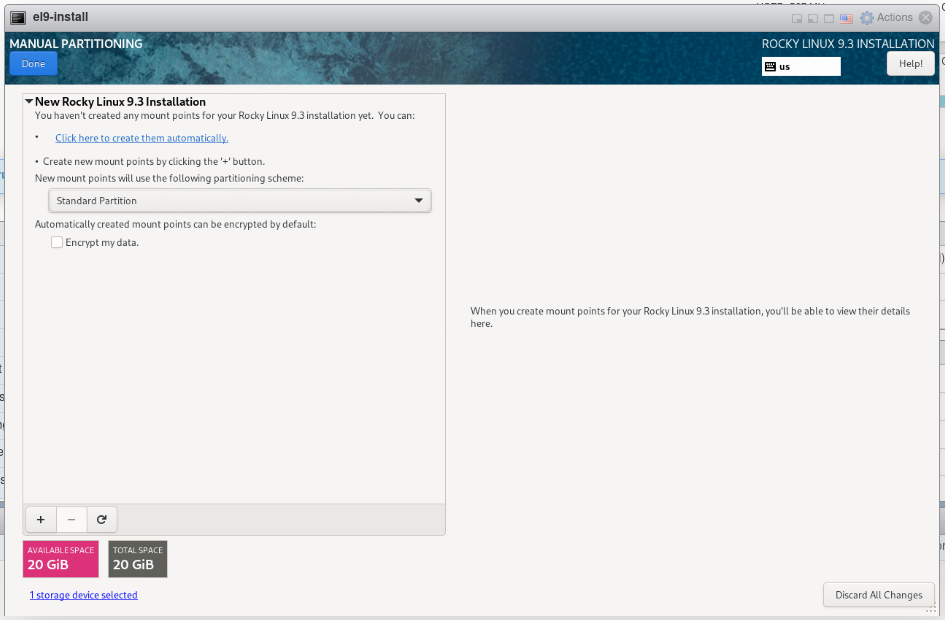
For the Desired Capacity, choose the entire available space.
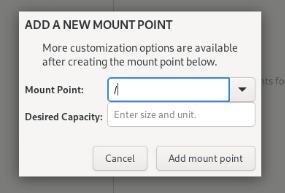
NOTE: (Advanced Option) For larger Collector deployments, it is also advisible to create a smaller root "/", partition, and allocate the remaining free space to a separate, and larger, "/data" partition. Please reserve a minimum of 10GB for the root partition in this scenario.
Click Done when finished configuring. The File System can use the default xfs setting.
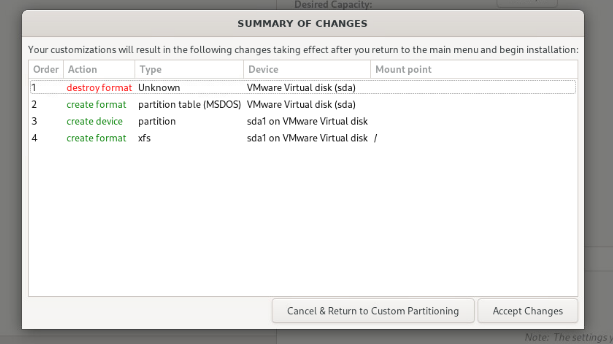
Accept/confirm the changes and acknowledge the warnings to continue.
Automatic Disk Partitioning
NOTE: (Alternative Option, skip this section if using Manual partitioning.)
On the following page, choose the Automatic option, for Storage Configuration to proceed.
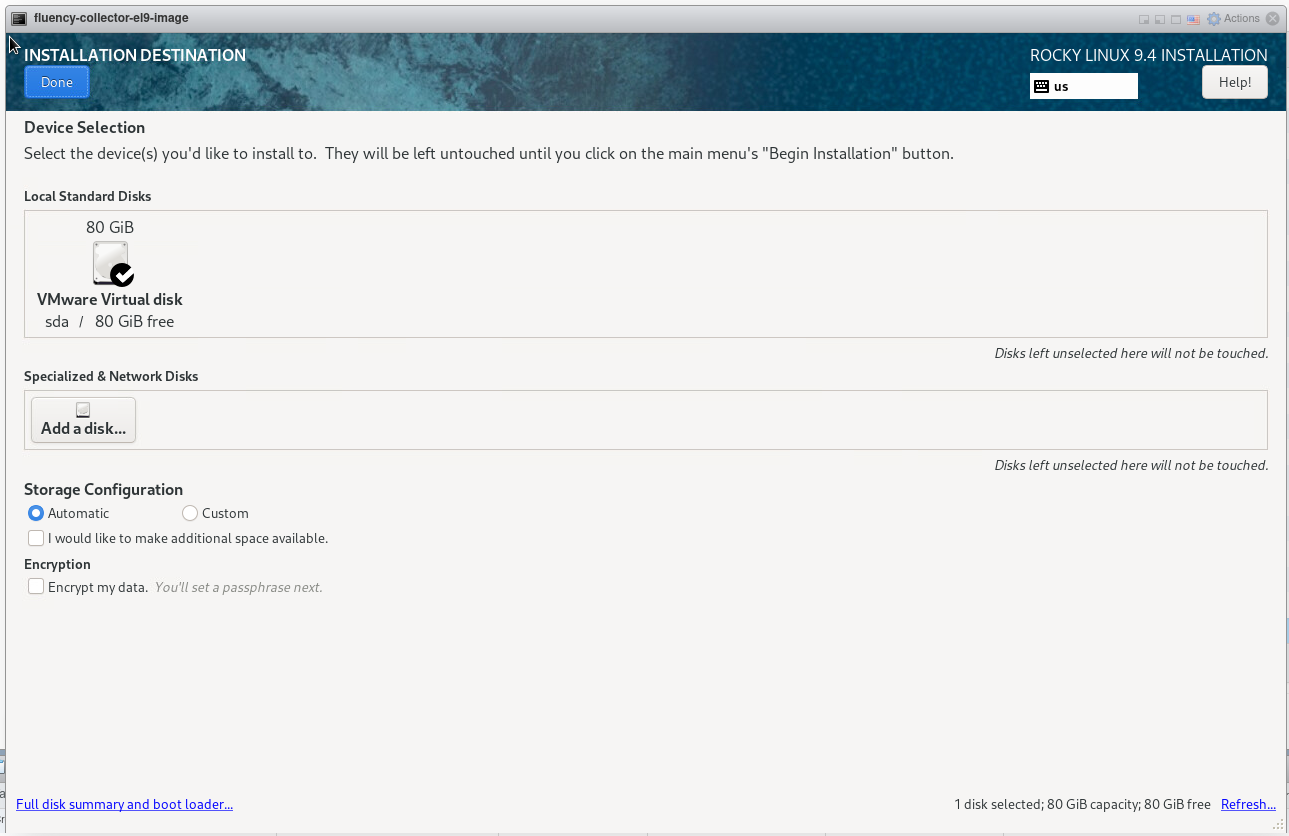
Click Done when finished configuring.
NOTE: Automatic partitioning may some allocate a portion of the free disk space to create a /home partition. This will reduce the available space for data storage, as Fluency does not make use of this directory.
Network Settings
Return to the Installation Summary page, and navigate to the SYSTEM section.
Select Network & Host Name to configure the network settings.
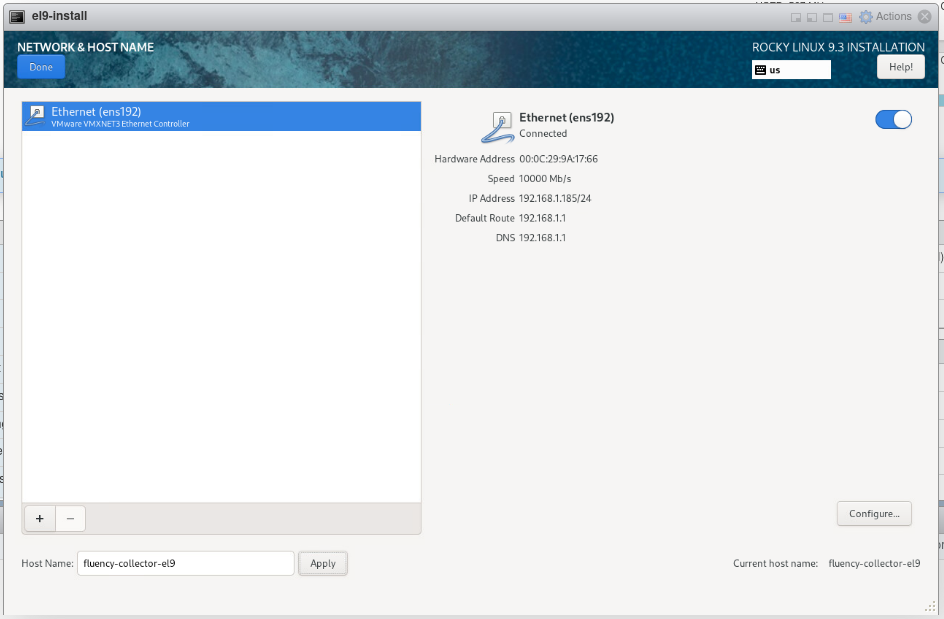
For the Host Name, choose a valid name for the machine, avoiding spaces.
Toggle the On/Off switch for the Network interface to enable the port on boot.
Advanced options can be found under Configure. Please refer to the OS vendor's documentation for additional instructions.
Click Done when finished.
Additional System Settings
Return to the Installation Summary page, and navigate to the SYSTEM section.
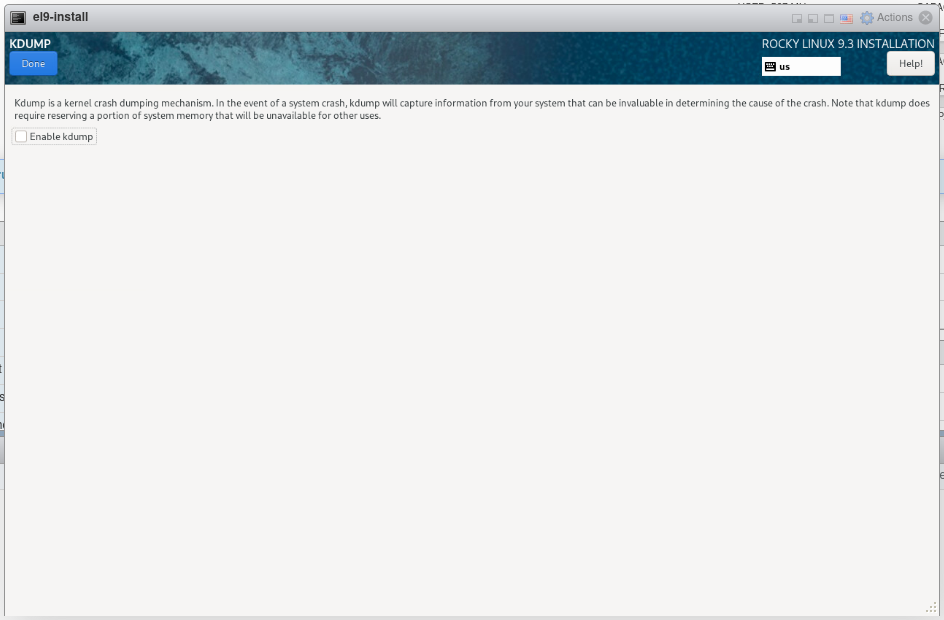
Select KDUMP to configure the KDUMP settings.
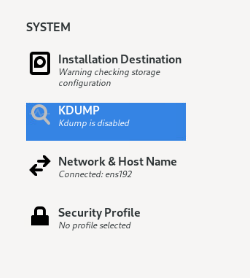
It is suggested to disable this feature.
Default User Settings
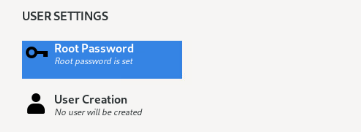
Return to the Installation Summary page, and navigate to the USER SETTINGS section.
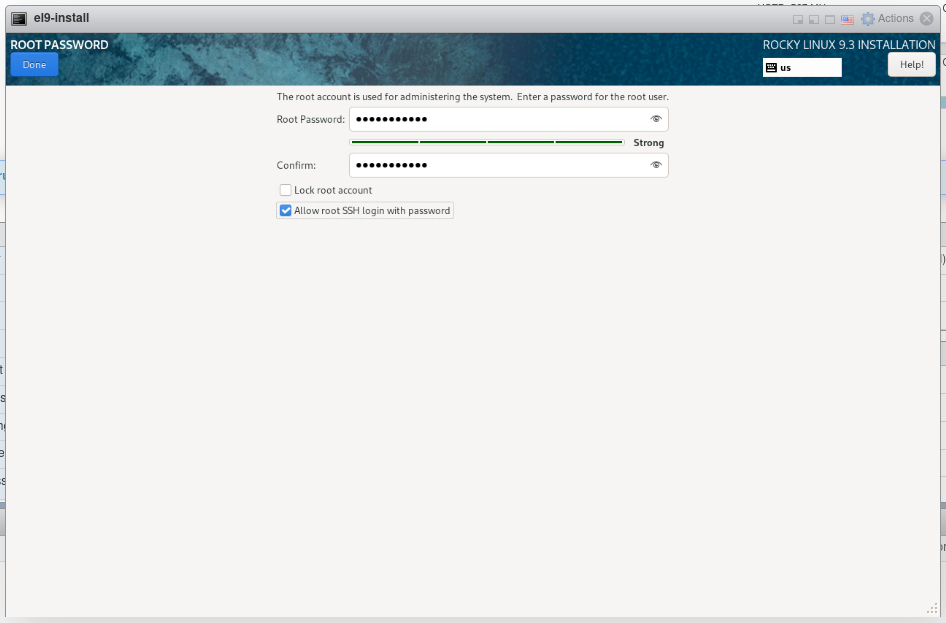
Select Root passwor to configure the default root user password.
Select a password for the root user. It is suggested to also Allow root SSH login with password to facilitate initial access and installation.
Begin Installation
Return to the Installation Summary page, and select Begin Installation to start.
Wait for the progress bar to indicate that the installation is complete.
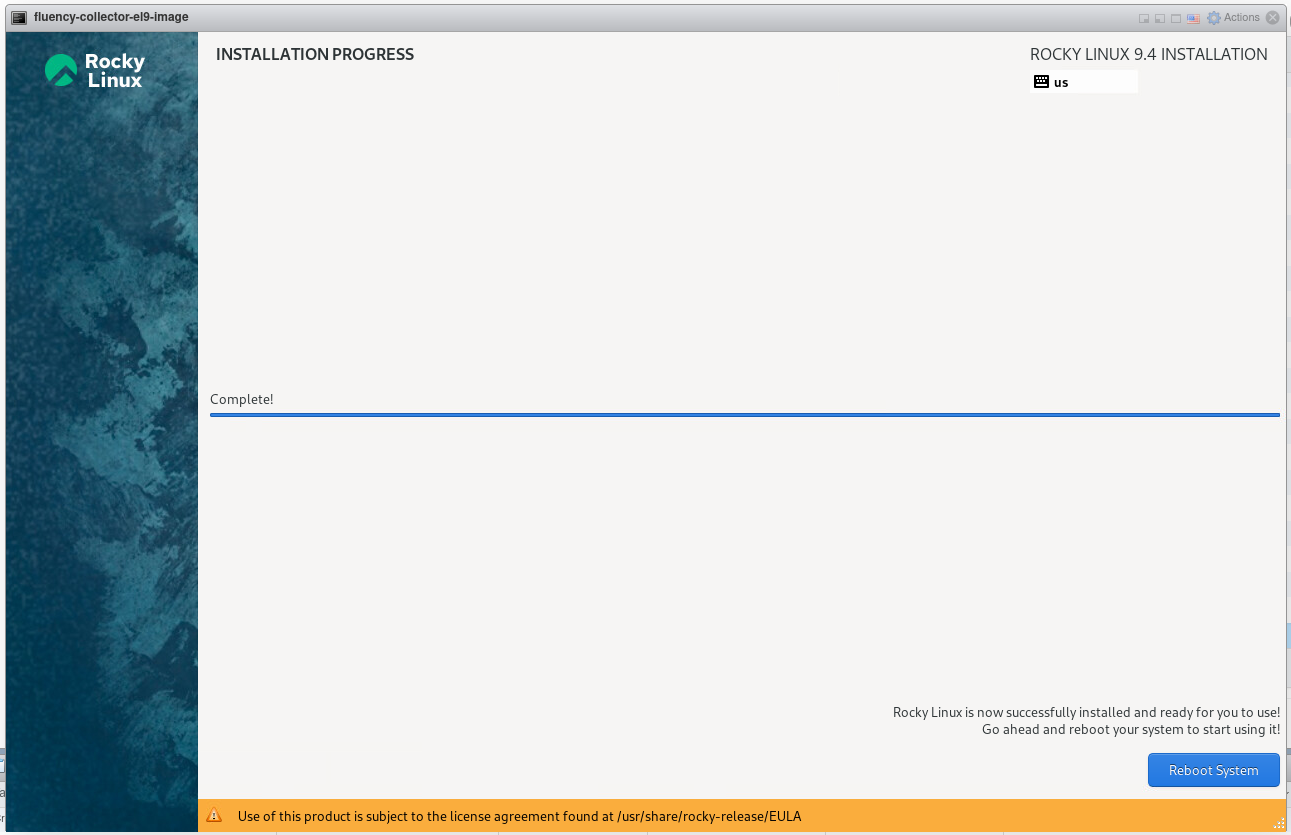
Select Reboot System to complete the installation. You will be prompted to log into the system terminal when the machine completes the reboot.
Running the Fluency installation package
Login to the system with the root user credentials created in the above step. If the Rocky Linux installation is from a major cloud service provider, use the vendor provided credentials to log in.
(If not using a root account, add the prefix “sudo” for each of the commands shown below.)

Download Install package
Download the Fluency installation package (and make it executable) via the following commands:
yum -y install wget
wget https://fluency-public.s3.us-east-1.amazonaws.com/installation/Fluency-installer-v913.package
chmod 755 Fluency-installer-v913.package
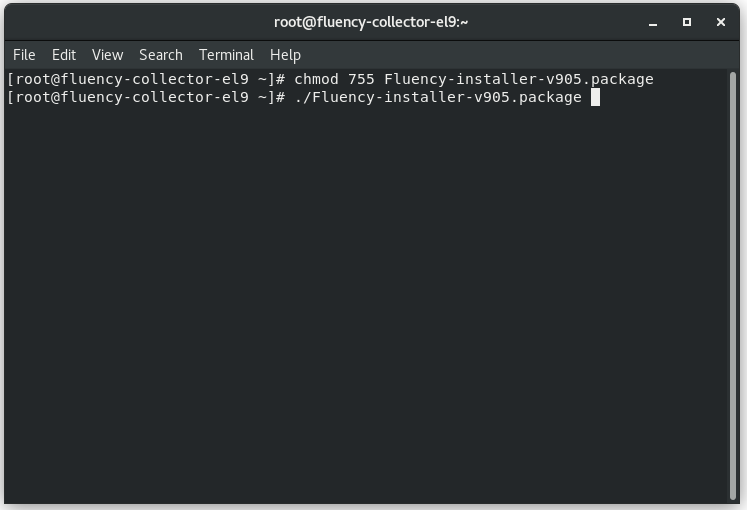
Execute Install package
Run the installation package with the following command:
./Fluency-installer-v913.package
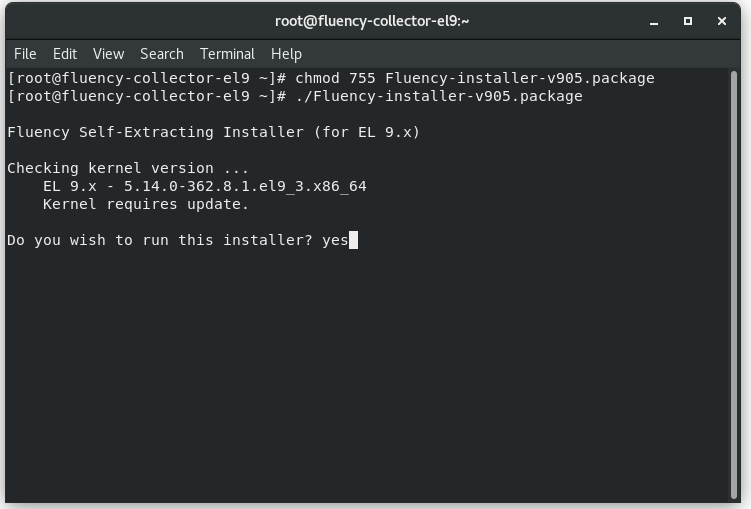
Follow the on-screen interactive prompts.
Kernel Update/Reboot
You will be asked to update kernel and restart during the installation process.
Configuration/Install Package
Once the VM restarts, log back in and run the installation package again.
./Fluency-installer-v913.package
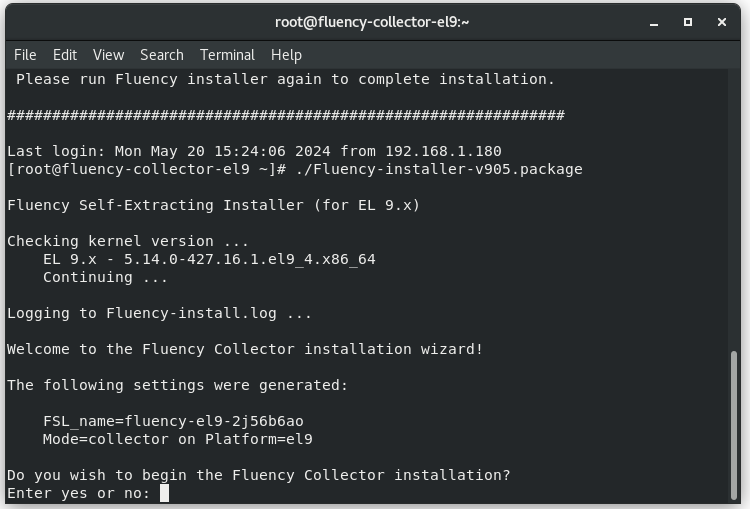
Follow the on-screen interactive prompts to continue with the installation.
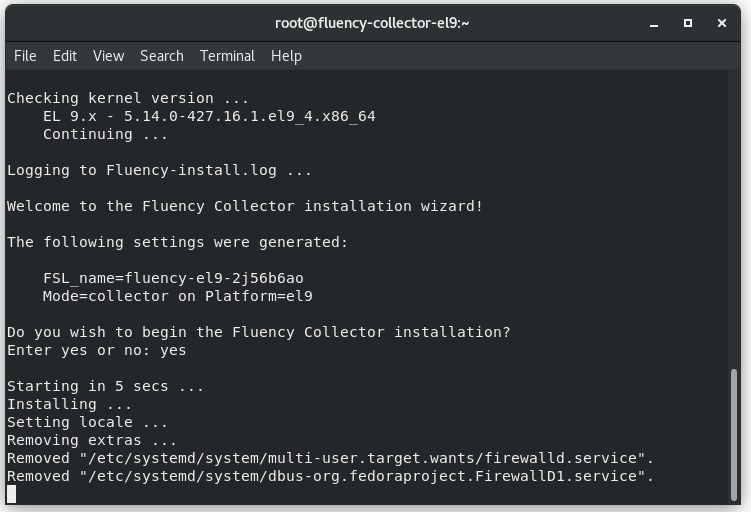
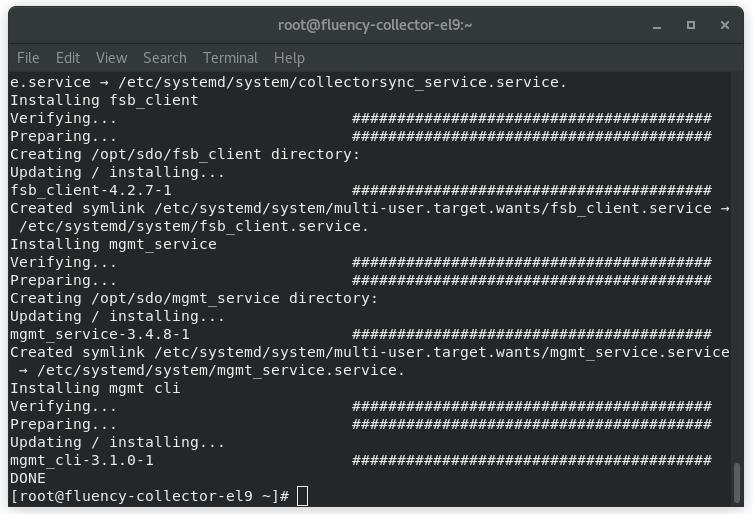
The console prompt should display DONE when installation is completed.
Fluency Portal Configurations
The normal path is installing a Fluency Collector application from Platform → Applications, described first. Adding a collector from the Collectors page bypasses the application and leaves the collector unconnected to the pipeline.
Install the Fluency Collector application
The supported path. Go to Platform → Applications → Install Application From Template and choose Fluency Collector from the System Components category. The template takes no parameters — press Install.
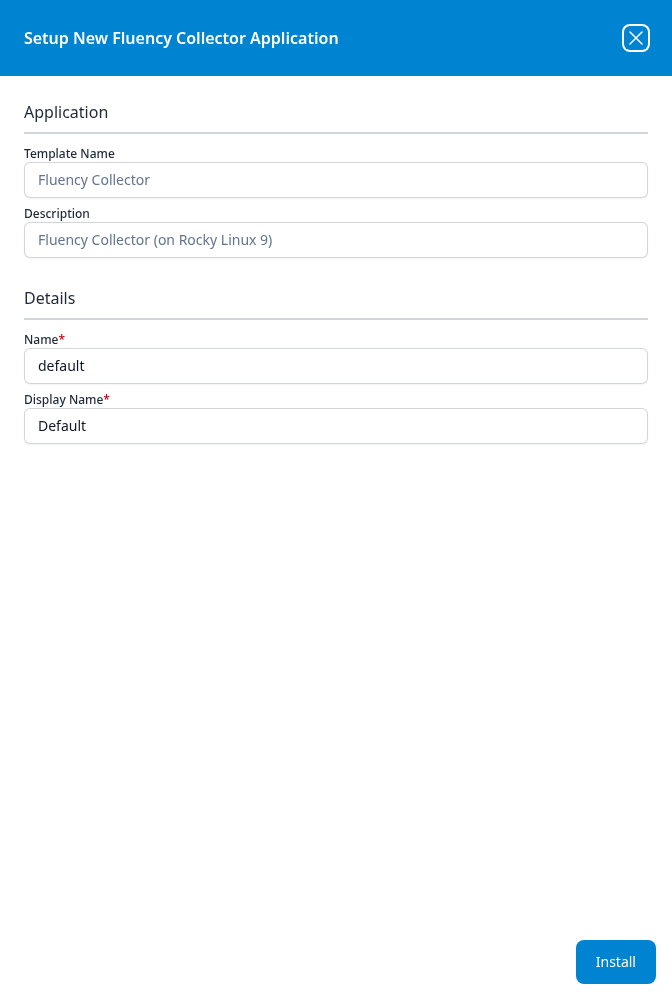
Once installed, open the application's details panel with the blue eye button on its card. Under Outputs is a Security token with a copy button at the right of the field; that token is what the collector authenticates with below. (The token is blanked out in the capture.)
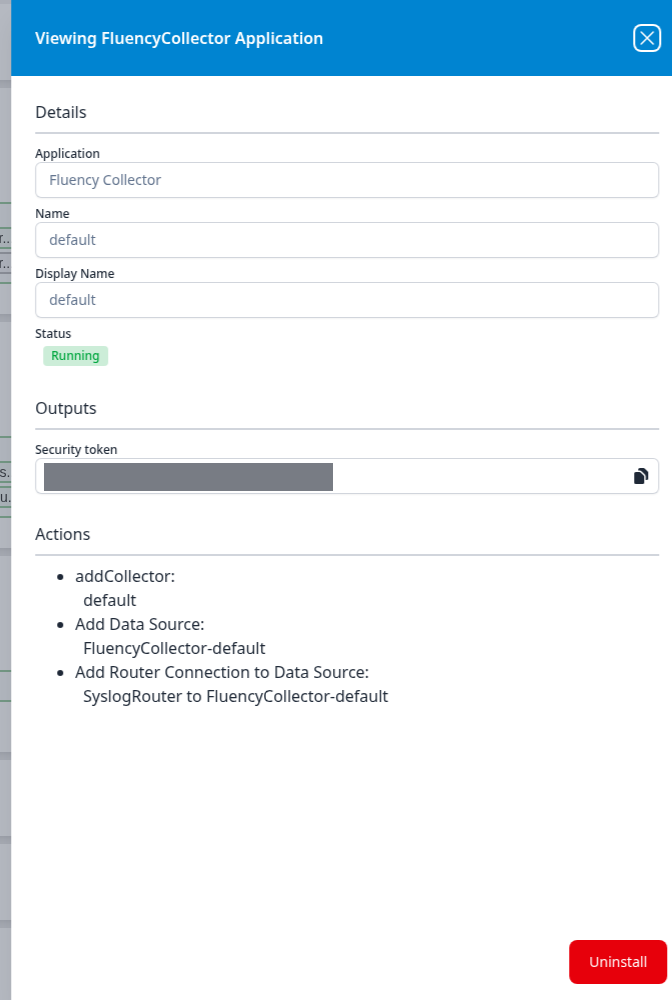
The Actions list below the token records what the install built — it added the collector, added a FluencyCollector-default data source, and connected the SyslogRouter to it. Nothing there needs to be wired by hand.
Adding a collector from the Collectors page instead — the steps below — bypasses the application, so the collector is not connected to the data pipeline automatically.
Adding a collector from the Collectors page
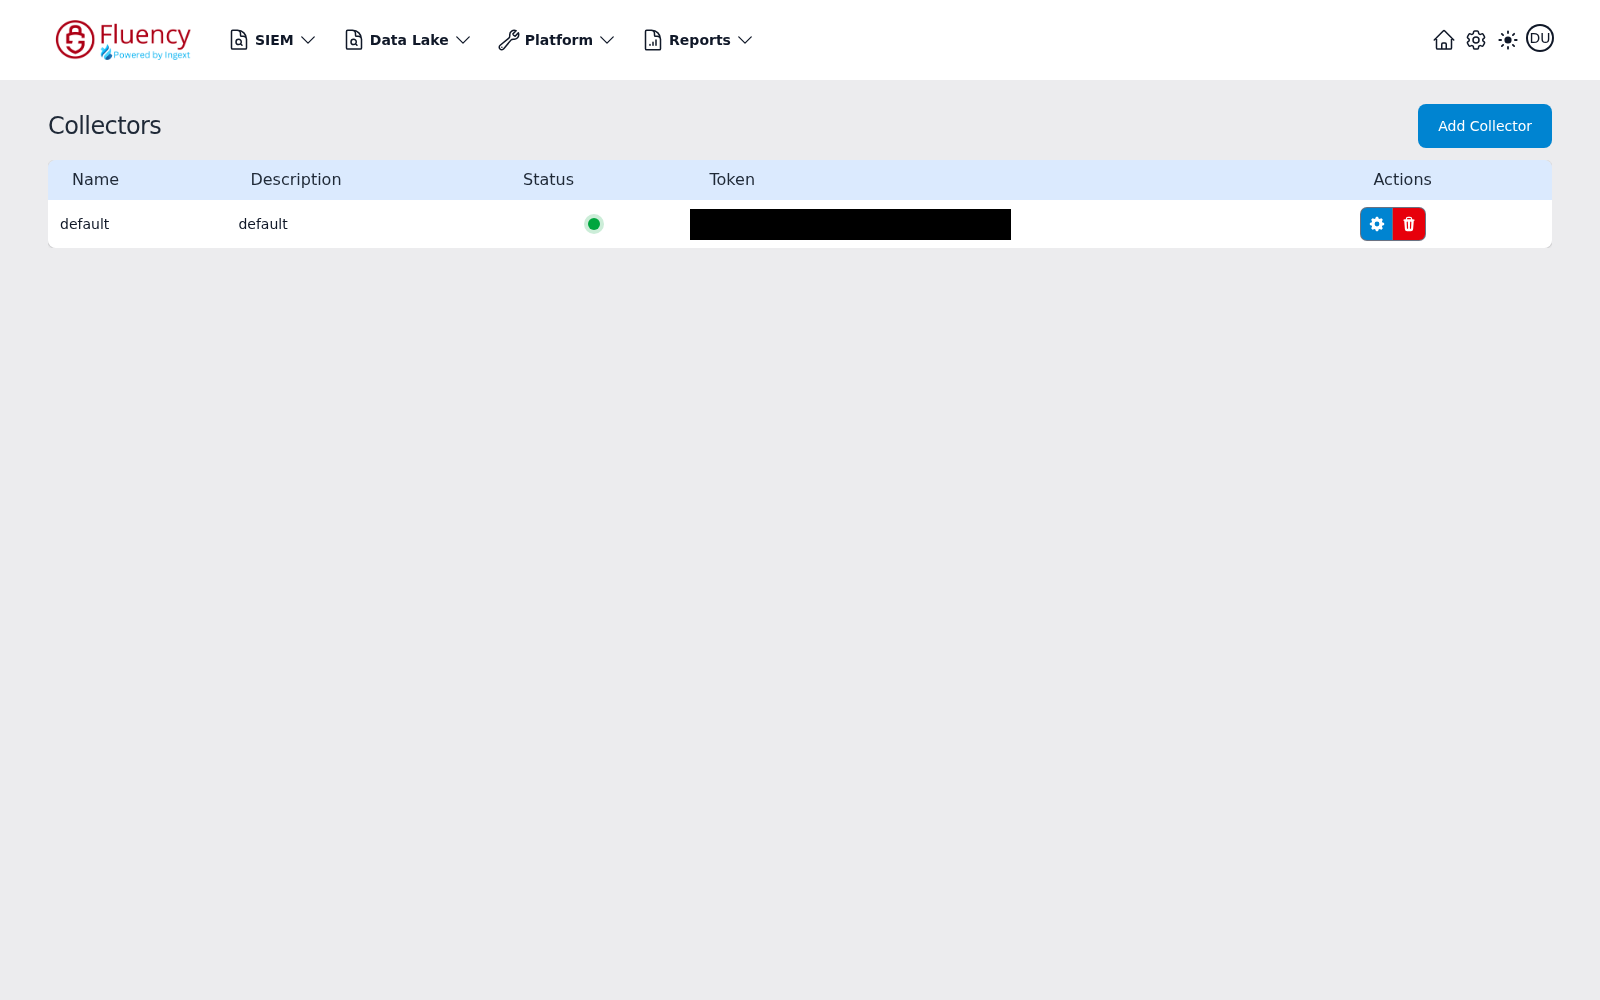
Navigate to the Collectors page (Platform → Administration → Collectors) on the Fluency portal. The page lists the registered collectors with Name, Description, Status, Token, and Actions columns, and carries the Add Collector button in its header.
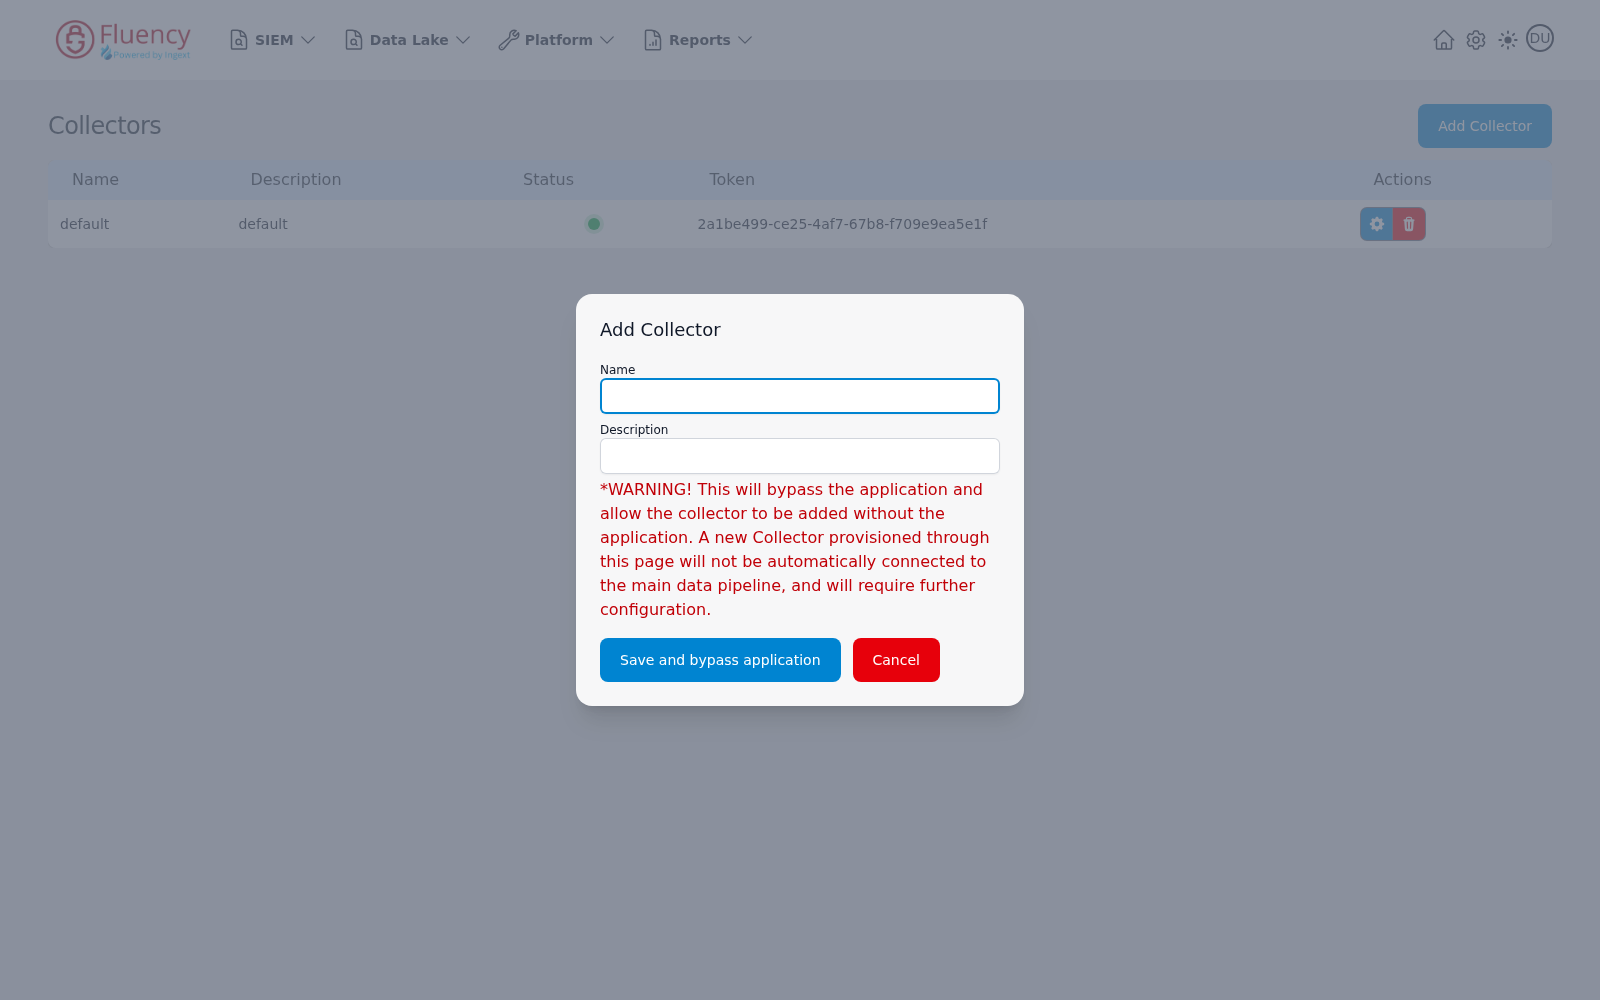
Click Add Collector to open a dialog with two fields, Name and Description, above a warning in red text: a collector provisioned here is added without an application, is not automatically connected to the main data pipeline, and requires further configuration. The confirm button is labelled Save and bypass application.
Connecting the Collector to a Fluency Cloud Instance
Obtain a collector token from your Fluency portal — either from the Token column of the Collectors page shown above, or from the Fluency Collector application's Security token output, which has a copy button at the right of the field. The portal confirms with a Token Copied to Clipboard! message.
This token must then be added to the collector with the mgmt add_server command. The collector registers against the same host you use to reach the web interface — there is no separate collector hostname — so take the URL from your browser's address bar, keeping only the scheme and host:
mgmt add_server https://<your-instance-hostname> <your-token>
For a current standard deployment that is:
mgmt add_server https://<companyname>.app.ingext.io <your-token>
Older and custom deployments are reached at a different hostname — cloud.fluencysecurity.com, cloud.fluencyplatform.com, app.fluencyplatform.com or a regional <region>.fluencyplatform.com — and the rule is the same in every case: use the host you sign in at. See Fluency Web Interface for the URL formats.
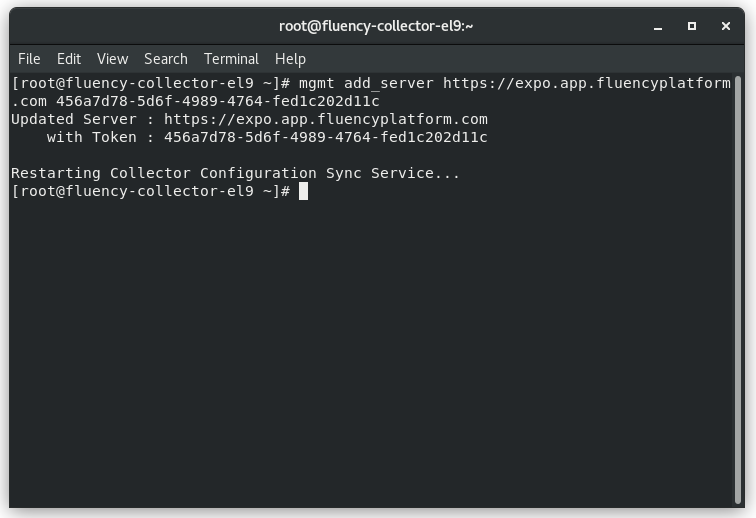
NOTE: If the Fluency collector has previously been configured for another Fluency Cloud instance, running the above command will overwrite those settings.
Connection Complete
This completes the process to install and configure a Fluency collector.
Refresh the Collectors page on the Fluency portal. The Status dot for the new collector should turn from grey to green, and its Actions column should now offer a blue gear alongside the red trash.
Additional Settings
The gear button opens Collector Configuration, where the appliance's syslog listeners, network settings and health are managed — see Managing Collectors → Collector configuration, or the Collectors screen reference for the full detail.
In this section
- Why Use a Collector — when a local appliance is the right aggregation point, and when it is not.
- Collector Login — reaching the appliance's own console and management commands.
- Managing Collectors — adding, configuring and monitoring collectors from the portal.