Data Sources
Data enters the Platform from a Data Source. The first step in collecting data is getting access to the data — this requires "connecting" the data source to the pipeline.
You define how to connect to a data source by its protocol or type. The Platform supports the following data source types:
- API Plugin
- HTTPs Event Collector (HEC)
- Kinesis Stream
- AWS S3
- AWS S3 with SQS
- Webhook
- Cloud Syslog
- Management Queue
Notice that this is not a product list, such as CrowdStrike Falcon or SentinelOne. Connecting to a data source is just a means to move the data from the product. Products often document multiple connection means.
Where is the Add button?
There are three (3) columns on the Platform Configuration page (Platform → Configuration), where data collection is configured: Sources, Routers, and Sinks. The Sources column is the definition of the data sources. At the bottom of that column is the Add Source + button.
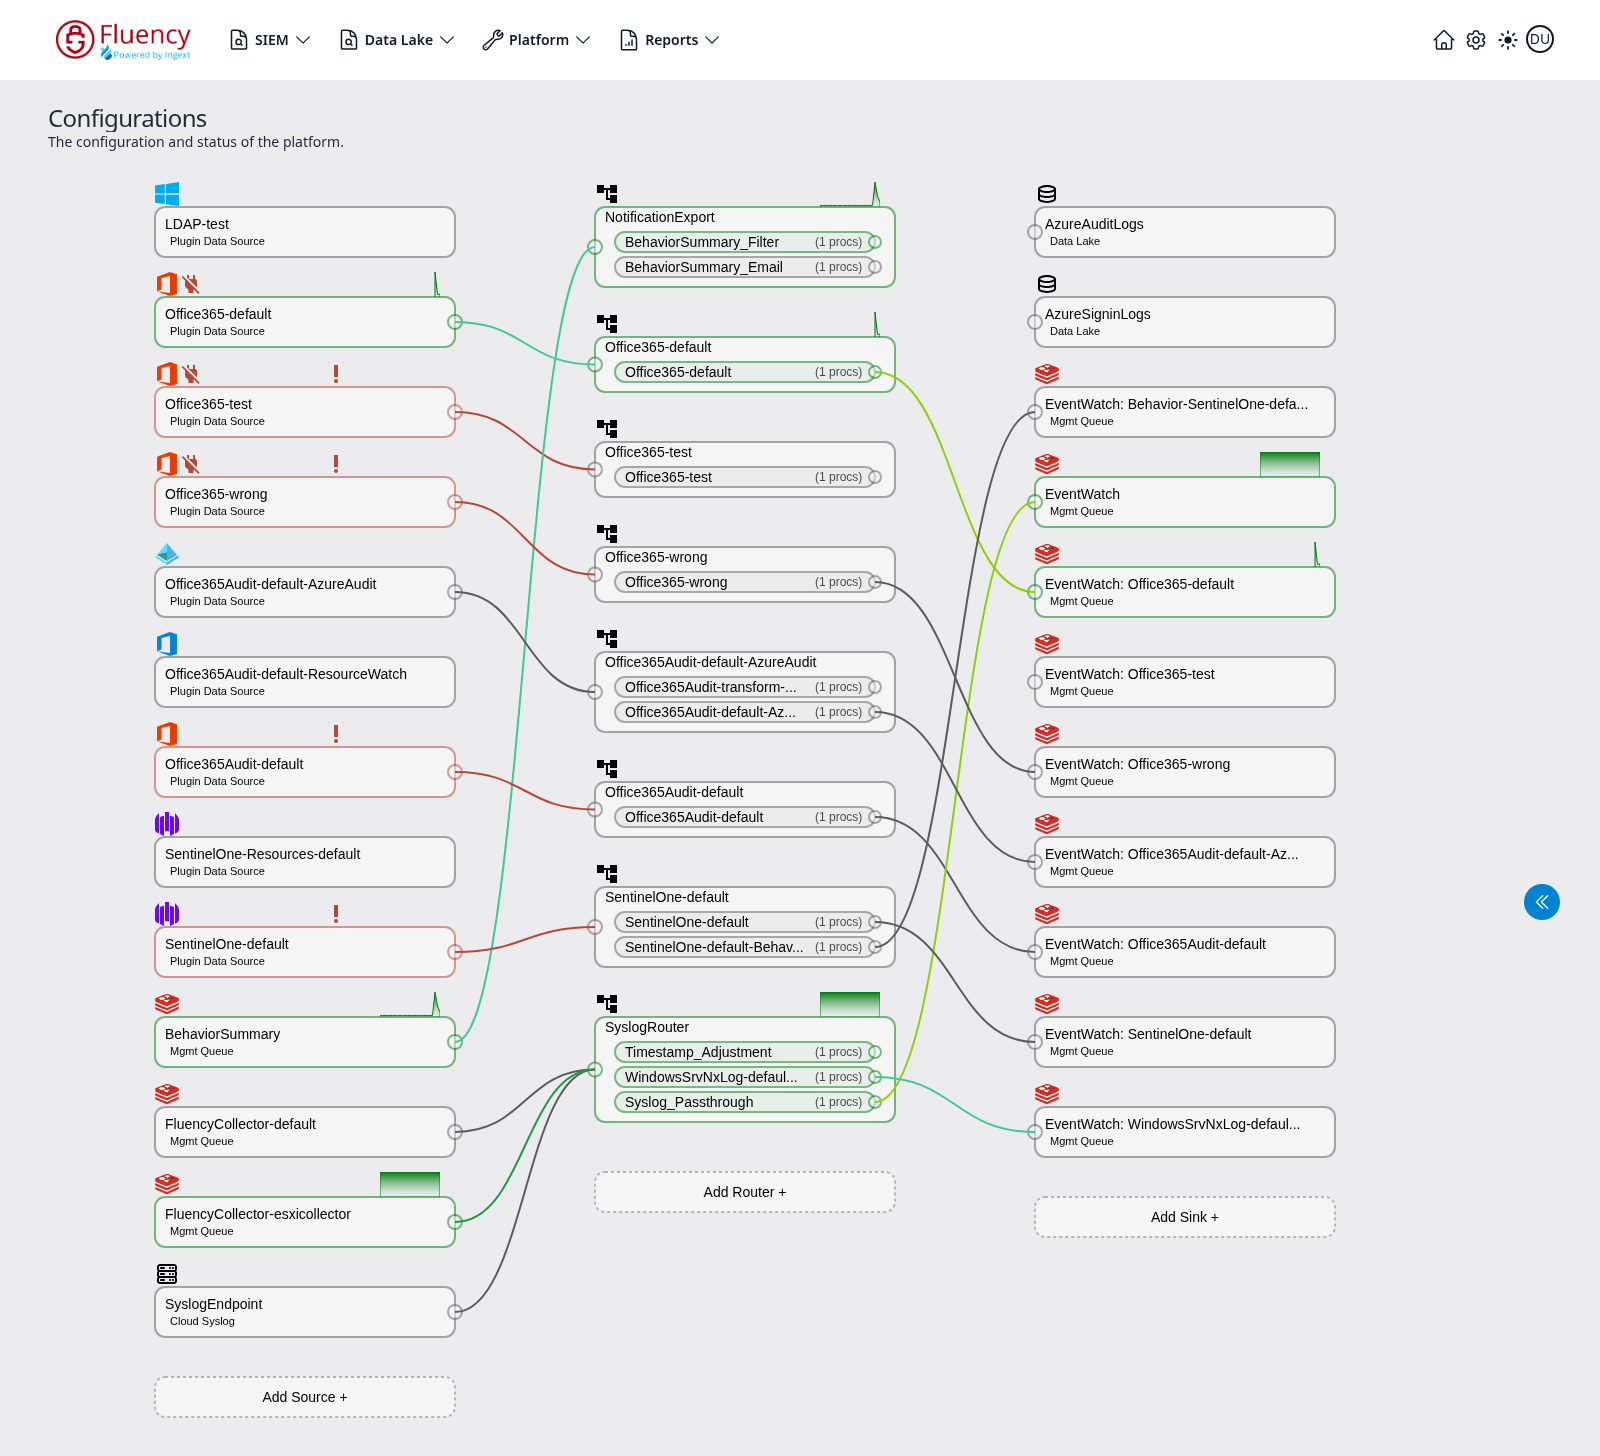
Each source card shows a type icon, the source name, and a label for the transport that feeds it — for example Plugin Data Source (data pulled by an installed application), Mgmt Queue (an internal management queue), AWS S3 w/ SQS (an S3 bucket read via SQS notifications), or Cloud Syslog. A source that is actively moving data is outlined in green and displays a small green throughput graph above the card's upper-right corner; an idle source has a gray outline and no graph; a source in error is outlined in red and marked with an exclamation mark above the card. A colored line runs from the source's output port to the router it feeds.

Clicking that begins the process.
Configuration
The properties-panel flow and screenshots below are from an earlier version of the Configuration page and are not visible in the current capture above; re-verify them against the current product.
Properties and status of a pipe appear in a properties panel. Once you click Add Source +, an empty properties window will appear.
The first step is to choose the way you want to import that data source.
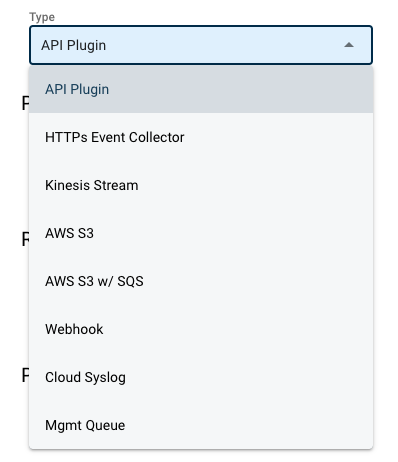
Once a type is chosen, the properties needed for that connector will appear.
Naming the Pipe
Regardless of the type of data source you are configuring, every pipe has a name. This is similar to a file name in an operating system. This is the name that will appear in the Configuration panel. It will also be used when reviewing the platform's usage and metrics charts (Platform → Usage).
When naming the pipe, give it a name that lets users know what type of data is coming from this source, like "Fortinet Firewalls."
Reconfiguring a Data Source
There is an edit icon (pencil) next to fields that can be changed. To edit fields:
- Stop the process.
- Then make the changes to the fields.
- Save the changes (disk icon).
- Restart the process.
Not all fields can be edited. In some cases, it is easier to:
- Create a new data source connector.
- Stop the old data source.
- Delete the previous connection.
- Connect the new data source to the processor.
- Start the new source.
- Validate the new source is operating correctly.
- Delete the old data source connector.
Demo
An interactive demo of adding a data source is available here: Adding a Data Source (Storylane)