Processors
Once a data record is available, you want the record to stand alone in a JSON format. Processors address transforming and decorating the record.
Once the data source is connected, a second pipe is connected to it that will parse the data. The parsing of data allows for it to be searched and processed. During this parsing process, data can be checked for errors, types changed, look-ups made, and values normalized. Two common parsing adjustments are:
- Adjusting the time to correct for timezone or abnormal clock times.
- Adding a User-Entity key for later correlation and scoring.
During the parsing phase, some data processing can occur. Most common is the creation of metric data.
To create a route:
- Create a Process. (Needs to be done first on the Platform → Processors page)
- Add a route.
- Assign the process to the route.
In order to create the route, you need to have a process already defined. If you want to create the pipe structure first, you can define a passthrough process that will just forward a raw event. In this scenario you still want to create the passthrough process with the name of the eventual parser that you are going to implement.
The editor entry points and workspace layout described from Processes onward are from an earlier version of the processor editor. Re-verify those panel names and entry points against the current product. The current page and editor are described immediately below, and the FPL return statuses described at the end of this page still apply.
The Processors page
Platform → Processors (URL path /platform/processors/Processors) lists the FPL processors defined in the account and is where you create, clone, and delete them.
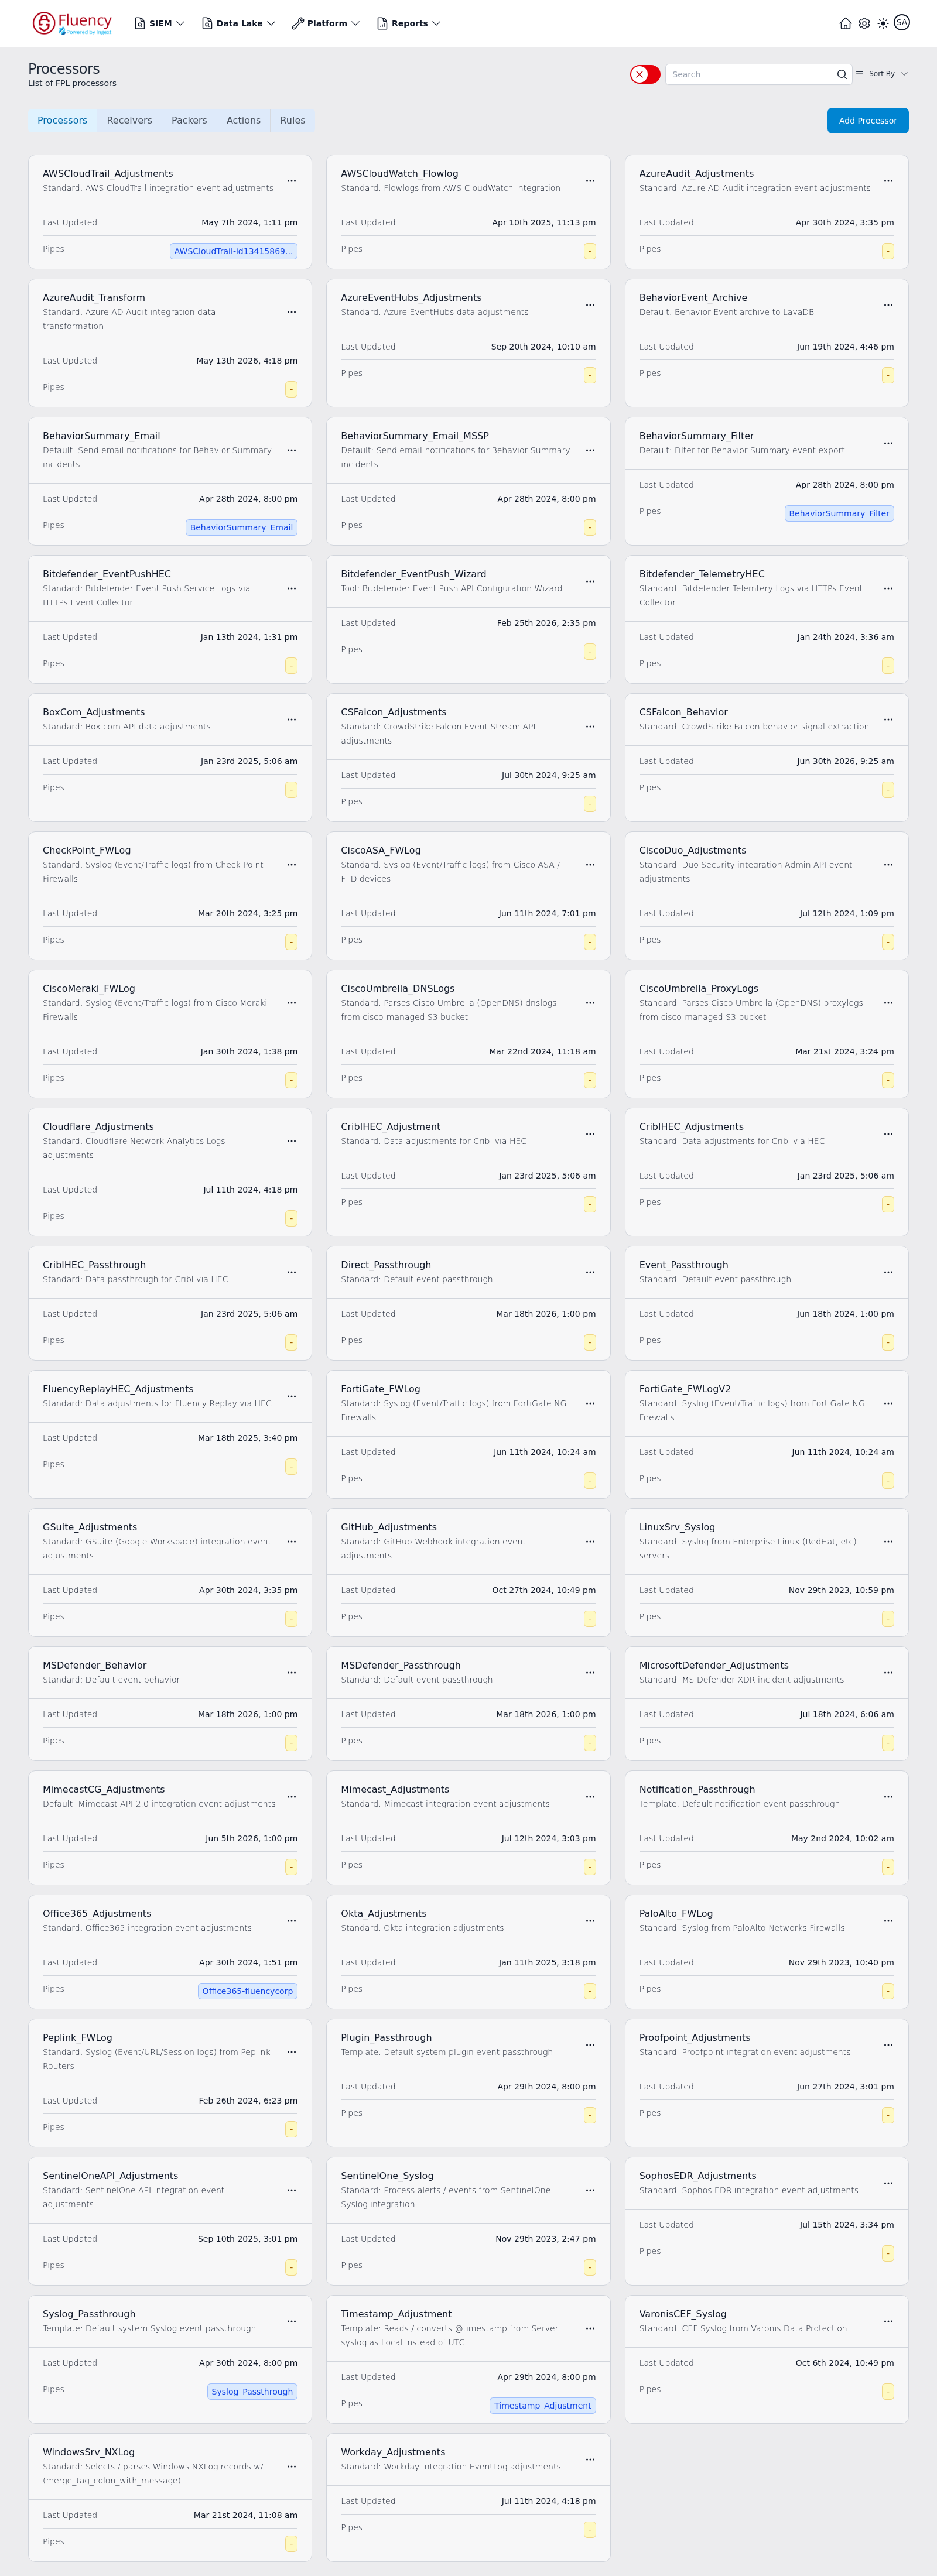
Under the Processors title and the subtitle List of FPL processors:
- The upper-right corner holds a deployed-only toggle, a Search box, and a Sort By control. The toggle filters the grid down to processors attached to a pipe; Sort By offers Name: A-Z, Name: Z-A, and Last Updated.
- A row of tabs — Processors, Receivers, Packers, Actions, Rules — selects which FPL object type is listed, with the blue Add Processor button at the right end of the row.
- The main area is a three-column grid of processor cards. Each card shows the processor name with a classification prefix on the line beneath — Standard, Default, Template, or Tool — followed by a short description, an Open options button (three dots) in the upper-right corner, the Last Updated date and time, and Pipes: blue chips naming the pipes the processor is deployed in, or a small yellow dash badge when the processor is not attached to any pipe.
A card's Open options button opens a two-item menu: Clone, which opens a pre-filled copy of the processor in the editor, and Delete, which removes the processor.
The current processor editor
Add Processor opens the editor at /platform/processors/new?type=Processors. The page is titled with the new processor's name and contains a Code pane pre-filled with a starter FPL main function that returns "pass" — with a Validate button and a full-screen icon in its toolbar — above Output and Console panes for reviewing test results.
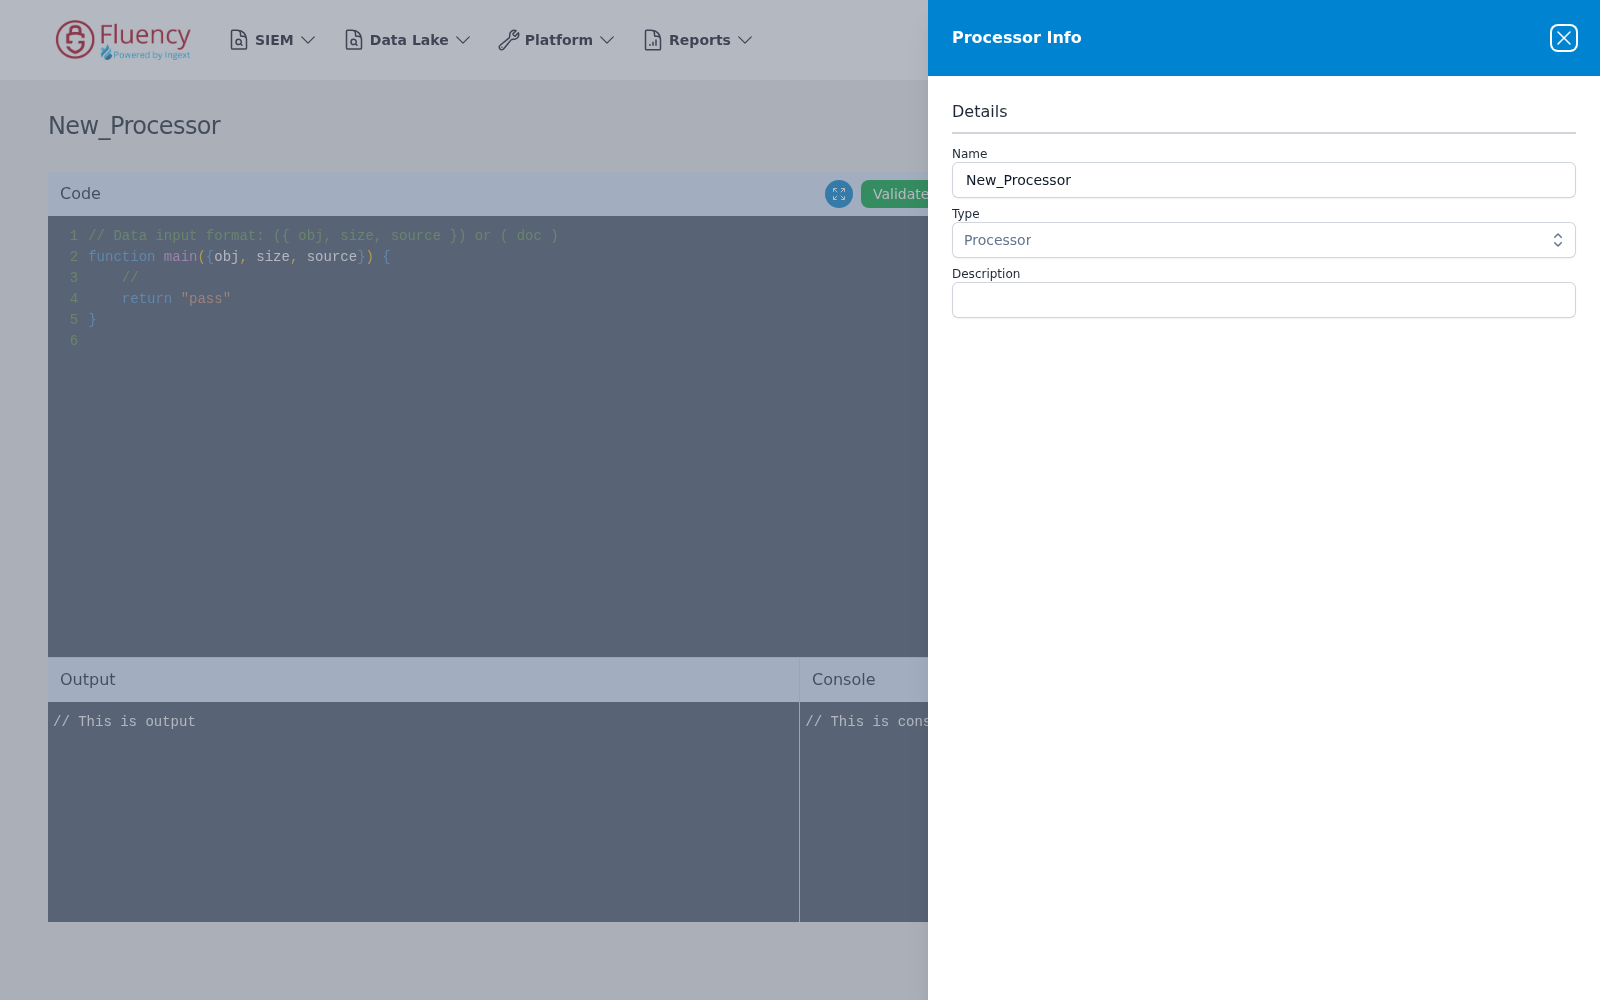
A Processor Info panel opens over the right side of the editor with a Details section:
- Name — the processor name, pre-filled with a default such as
New_Processor. - Type — a selector set to Processor.
- Description — a free-text description.
Close the panel with the X in its title bar to work in the editor.
Choosing Clone from a card's options menu opens the same editor at /platform/processors/clone. The page is titled with the source name followed by (Clone), the Code pane holds a copy of the source processor's FPL code, and the Processor Info panel is pre-filled from the source — Name with a (Clone) suffix, such as AWSCloudTrail_Adjustments (Clone), and Description copied from the source.
Processes
Processes are unique. When you edit a process in the Configuration page, you are editing the base processor. If you use that process in more than one place, you are editing both locations.

Defining the name
The first step is to define the name and provide a description. The processor you are creating is just like a program that can be run from different command lines (pipes). It is for this reason that when you create a temporary stub (passthrough) you give it the name of the eventual process that you want to create.
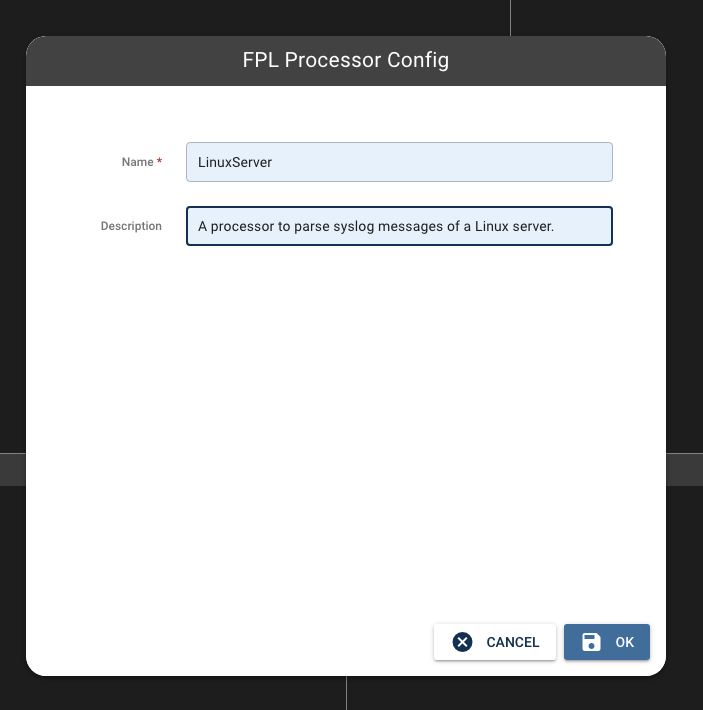
Click "OK" and the Processing workspace appears.
Processor Workspace
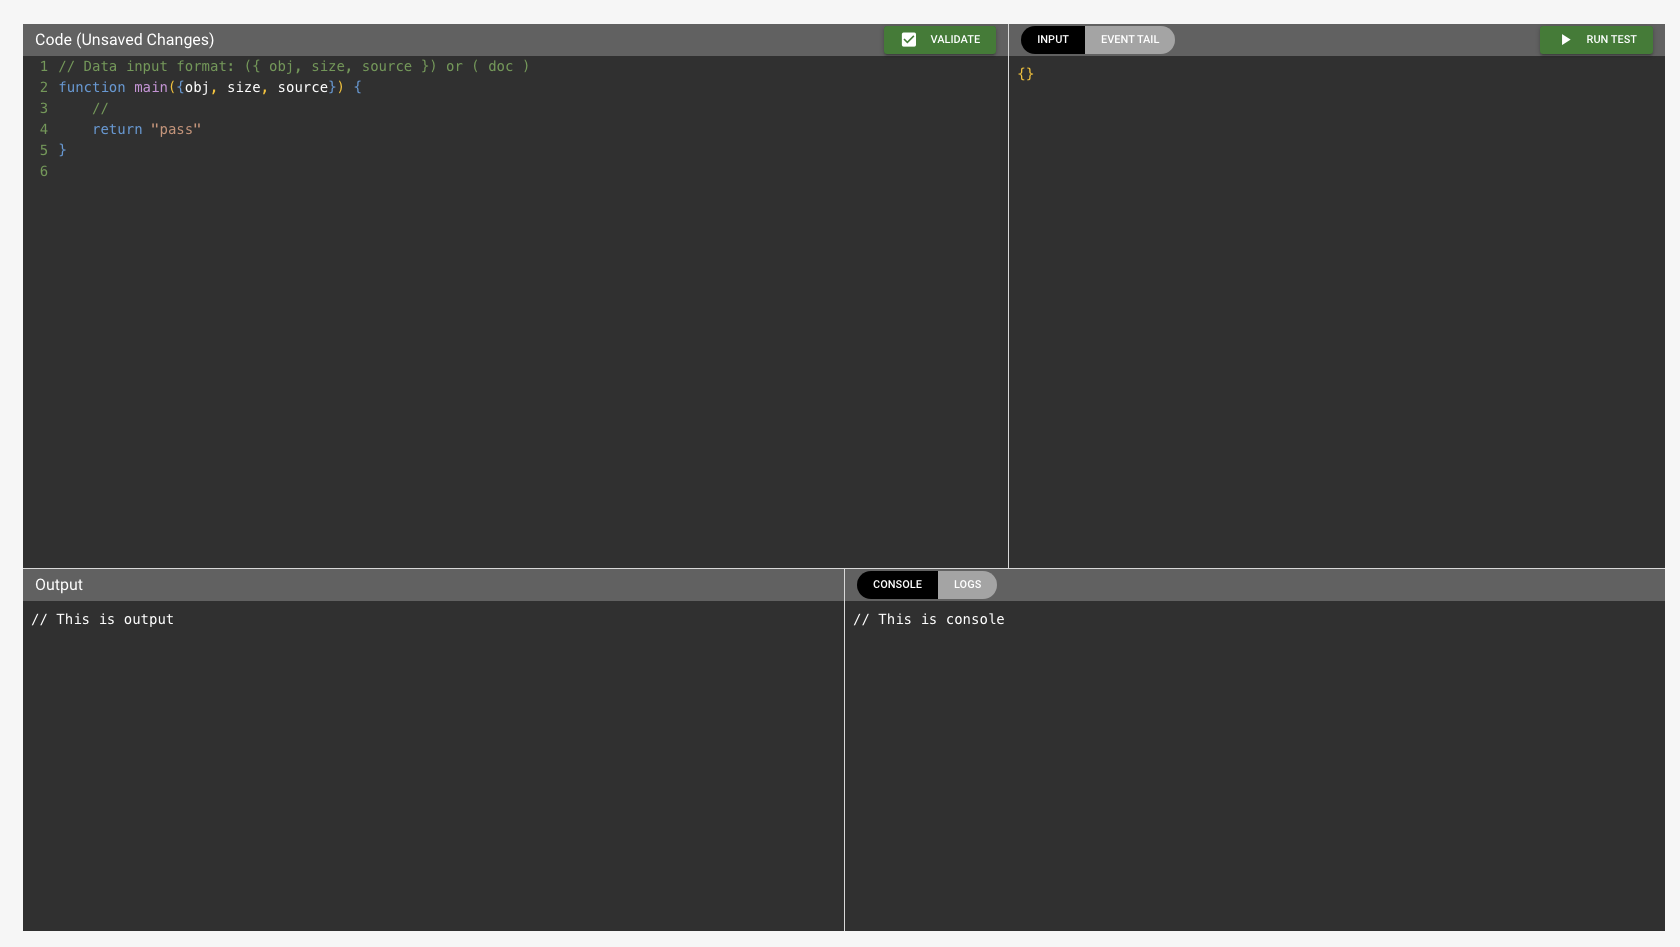
The workspace has four sections. Going clockwise from the top left, these are:
- Code Editor (also called the Code Panel). This is the code that will run when a record is received. A processor starts with a code entry point of
main(). - Record Buffer (also called the Entry Panel). Records sent from the data source are buffered to provide sampling to debug and build. It is a tab panel: its default state is the "Input" state, which allows a custom JSON object to be placed here, and the "Event Trail" option shows the last ten (10) JSON objects of actual data related to the results of the processor.
- Run Output (also called the Output Panel). This shows the outgoing object that is exiting the processor.
- Standard Output. This panel shows the console standard output that a process may write to. This is done by using a
printfcommand. The "logs" tab will show the standard error out.
If you are used to coding, you will have some insight into the use of each section.
Reopening the editor
From the Configuration page, you can reopen the editor for an existing processor by clicking on the processor that you want to edit in the left panel.
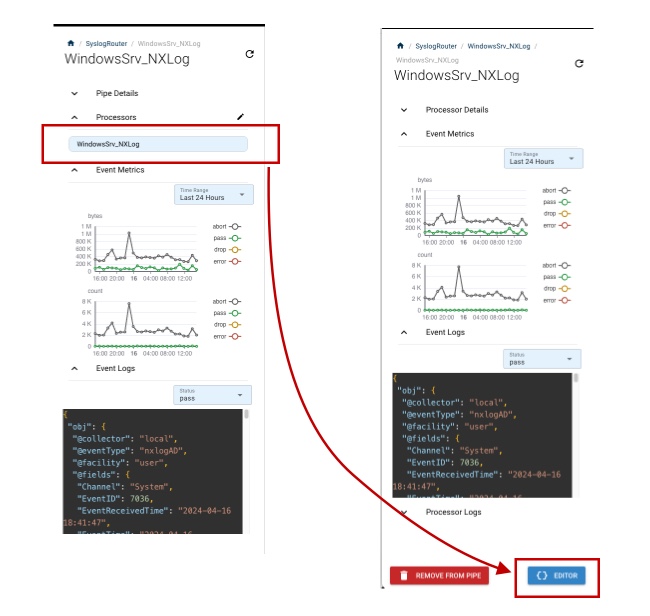
The histograms will change to show the histogram for that processor. More importantly, an "Editor" button will appear on the bottom of the panel allowing you to edit the process. Clicking the Editor button will display the process code workspace page.
Processor Entry Point
The default passthrough might not be what you want.
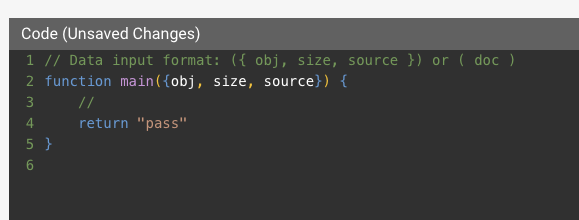
If you are not sure of the shape of the data — how the record is formatted — try viewing the record with a printf statement once you get the data source set up. To do this, change the above code by replacing it with:
function main(envelope) {
    //
    printf("Raw Record: %s", envelope)
    return "pass"
}
Notice that the text editor can highlight with the JavaScript syntax. This will be useful when you code.
The code above is just capturing the incoming object. The name 'envelope' is irrelevant. You are taking the incoming object and sending it to standard output using the printf command.
Using the Record Buffer
The record buffer is extremely useful. Sometimes you do not know the shape of an incoming record. For example, this is a Linux object sent from a Syslog server:
{
  "obj": {
    "@collector": "local",
    "@event_type": "sshd",
    "@facility": "authpriv",
    "@level": "info",
    "@message": "Disconnected from invalid user gang 23.99.201.14 port 57468 [preauth]",
    "@parser": "fpl-LinuxServerSyslog",
    "@parserVersion": "20231128-3",
    "@sender": "71.178.173.2",
    "@source": "remote",
    "@sshd": {
      "parserError": "skipped"
    },
    "@tags": [
      "sshd"
    ],
    "@timestamp": 1711202399000,
    "@type": "event"
  },
  "props": {},
  "size": 136,
  "source": ""
}
Note: The JSON format is a String format and not raw.
You can copy this and drop it into the Record buffer. Make sure that the tab on the record buffer section states "Input".
Then click the run button above the record buffer — labeled "Run" in some versions of the editor and "Run Test" in others.
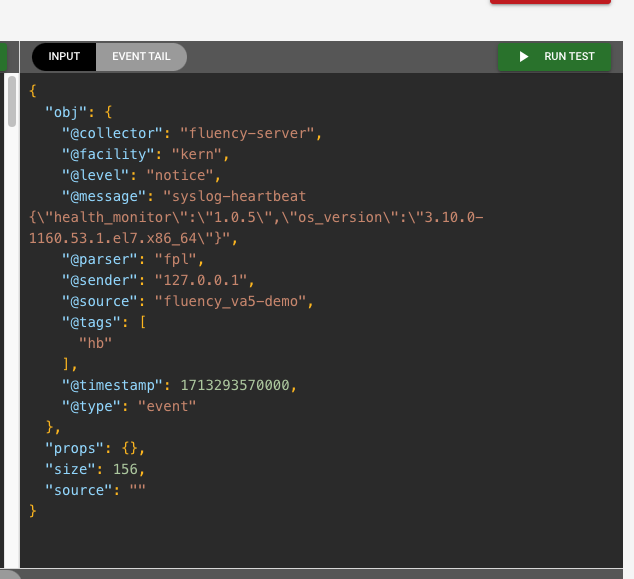
Running the test will take the JSON object in the record buffer and present it as the input to main() in the code editor.
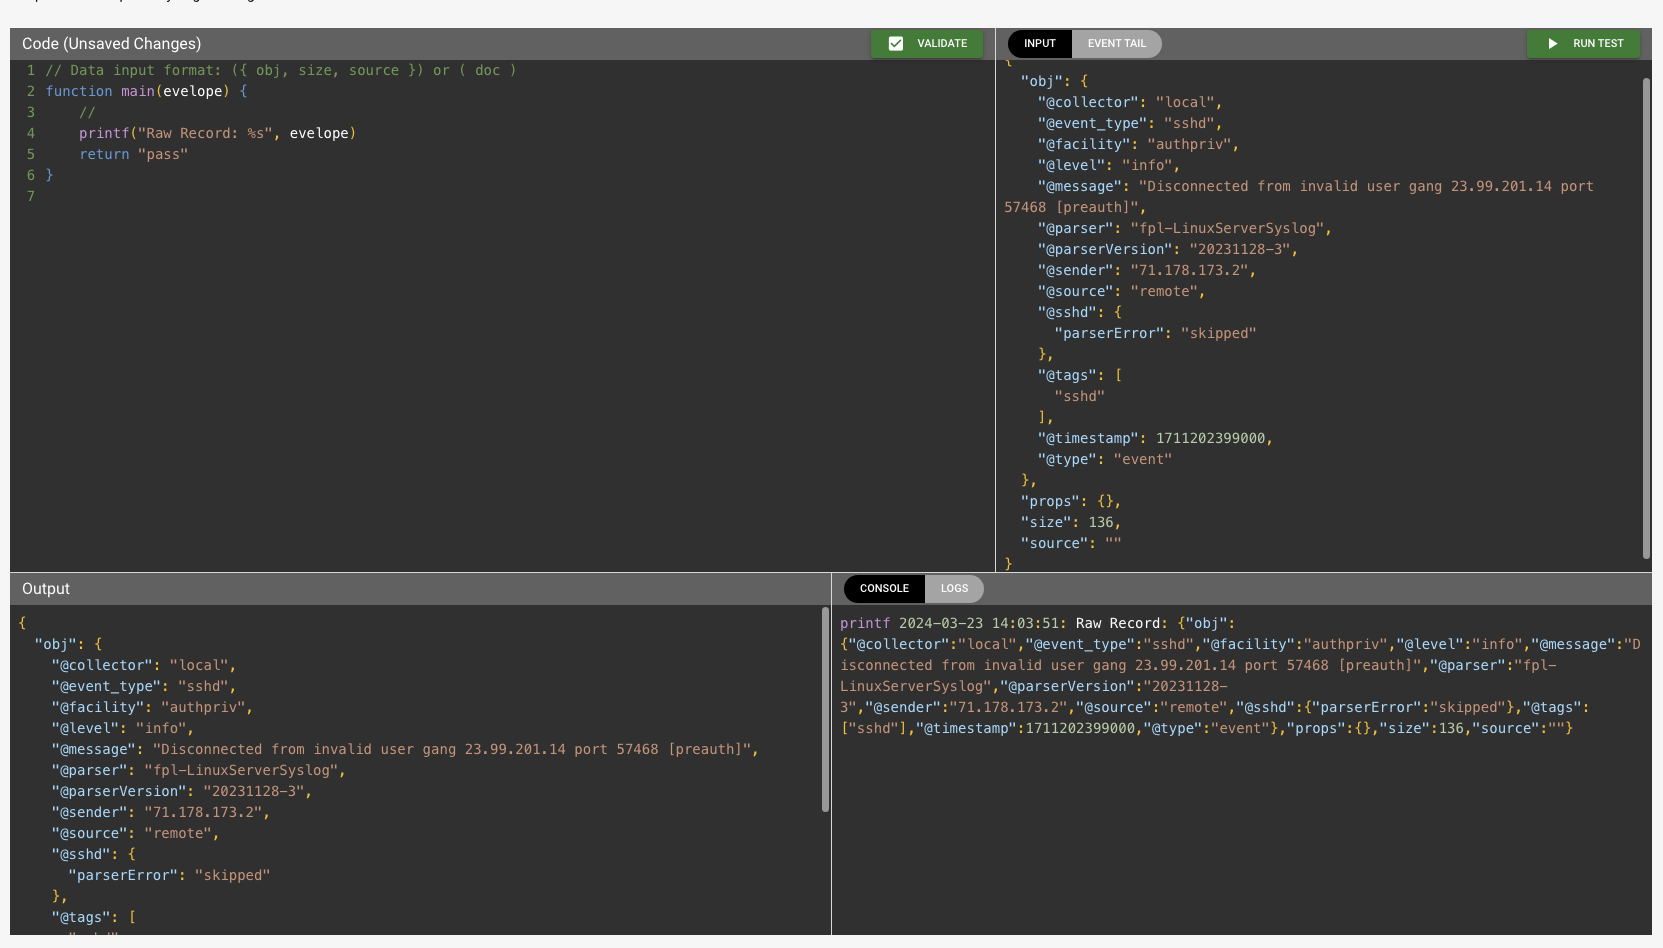
After running the test the object in the output should match the input. This is the effect of a passthrough.
Also, the console (standard output) now contains the print statement to include the "Raw Record" label:
printf 2024-03-23 14:03:51: Raw Record: {"obj":{"@collector":"local","@event_type":"sshd","@facility":"authpriv","@level":"info","@message":"Disconnected from invalid user gang 23.99.201.14 port 57468 [preauth]","@parser":"fpl-LinuxServerSyslog","@parserVersion":"20231128-3","@sender":"71.178.173.2","@source":"remote","@sshd":{"parserError":"skipped"},"@tags":["sshd"],"@timestamp":1711202399000,"@type":"event"},"props":{},"size":136,"source":""}
Matching the incoming record in main()
For the example above, the JSON has four root properties: obj, props, size, and source. Consider this code snippet in the code editor:
function main({obj, size, source}) {
    // Replacement for Java (Groovy) parser
The main routine is using an enumerated parameter to match the incoming root properties. Another variation would be:
function main(rawObj) {
  printf("Incoming object is %s", rawObj)
    return { status: "abort" }
}
In this version, the code will send the object to standard out (console panel) and pass the object (in this case rawObj) on to the next processor, which is what returning abort does.
Every incoming JSON record is unique. Looking at the event trail will show the data, but a programmer normally uses printf statements to see the shape and status of the object in the code.
Returning Status
There are three common statuses that the main function returns:
- pass. Sends the record to the defined sink(s).
- abort. The JSON record drops to the next processor.
- drop. Stop processing the JSON record and discard it.
The returning status directs where the JSON record will go.
Bare string or status object
The status can be returned either as a bare string (return "abort") or wrapped in an object (return {"status": "abort"}). Both forms appear throughout the shipped examples — Writing RegEx Pattern Parsers uses both in the same file, and the parser cookbooks favour the object form. Follow whichever form the recipe you start from uses.
Leaving the Editor
Use the Cancel button to return to the Platform Configuration page. The reason is that the editor is a modal of the configuration page. Using the browser navigation will send you to the page you were previously on before working on the Platform.
Seeing the Created Processor
Once you save the processor you are brought back to the page that lists them.
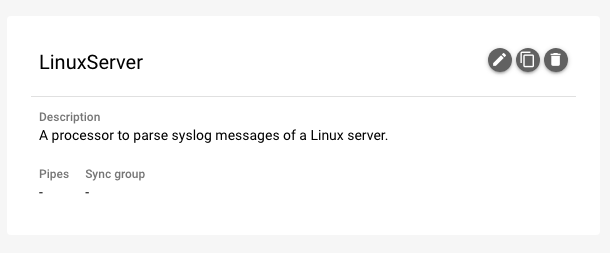
Notice that because you have not assigned the processor, there are no values listed for the assigned Pipes or group. After a pipe is created with this processor (see Data Routers), that will change.
Advanced
At this point you are ready to finish creating a Pipe. But the power of Platform is in the ability to write complex processors.
There are examples of processes written in the Cookbooks section of this manual.